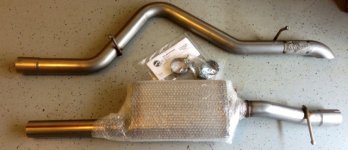
Let's get ready to ruuuuuuumble! (AFE Hi-Tuck Exhaust; 49-46218)
Ever since I banged my giant submarine can of a muffler on that first rock, I’ve been looking for a way to either armor it or get rid of it all together. The more I shopped around, the more I found that simply swapping out the exhaust kit would not only net some performance gains, but it would save a bit of weight, increase my clearance in the rear, and might even give the Jeep that nice little growl it deserves. I spent more time than I’ll admit to on the couch listening to exhaust kits on youtube, but in the end all it really took was me hearing Aeraun’s rig pulling Nubs’ Jeep at Rausch Creek to find the nice subtle, yet throaty exhaust note I’ve been looking for.
In years past, I would have just dropped off my Jeep at the exhaust shop, gone next door for a bite and waited for a call that said it was ready. But lately, I’ve been feeling a little bit of a Billy Bada$$ when it comes to my DIY projects, so I decided to tackle this one on my own. I mean, it’s a bolt on exhaust kit, how hard can it be, right? This set up looks fairly straight forward, install two pipes on a couple hangers with two clamps.
When I got to step 1, remove the existing exhaust kit, my troubles began. I loosened all the clamps, applied a healthy dose of WD-40 at the connections, added a little force courtesy of a heavy rubber mallet, and I even tried a healthy dose of f-bombs to help the rubber mallet but that stock exhaust simply wasn’t budging! Unfortunately for that exhaust kit, I was feeling particularly annoyed AND motivated so I headed off to the store for a special tool that might help relieve my frustrations.
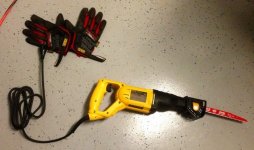
Did you know that a Saw Zall is actually a brand name for a reciprocating saw made by Milwaukee Tools? But, if you’ve got no problem calling any copy machine a Xerox or ordering a Coke regardless of what they bring you, then yeah, you can call my new toy a Saw Zall. I installed the demolition blade called
The Diablo (cue sinister laugh here!) and set off to make quick work of that pesky exhaust kit. As you can see, the dog totally approves of my handy work. As an added bonus, the exhaust is scrap parts now so I can just toss it rather than having it take up space in my garage for years while I find someone who wants to buy it!
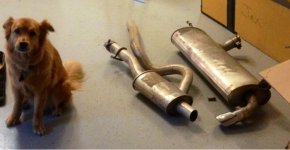
The hard part in this whole thing really was removing the stock pipes. Once the old kit was outta the way, installing the new kit wasn’t that bad at all. Two clamps, a couple of hangers and we are good to go.
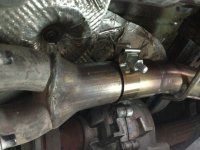
…or so I thought. Perhaps not everyone has had the same trouble I ran into, but my front exhaust clamp simply wouldn’t tighten down the connection. I adjusted the clamp, made sure the pipe was fitted properly, tightened again but still a leak. After fiddling with this for a few days and consequently snapping the clamp bolt, I decided it was time for something a little more... hearty.
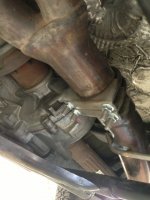
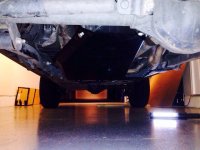
These two HD clamps did the trick and fixed up that exhaust leak. The collar clamp works fine for the rear connection, but in the front it just didn't cut it. The only other adjustment I had to make was rerouting my trailer wiring away from the pipe to keep it from melting any wires and the job is complete. I don’t have a rear shot b/c you really can’t see the exhaust at all unless you look up under the bumper. But I do have a video I put together where you can hear the stock exhaust with the Volant intake, then a quick shot of it with no exhaust b/c... well, why not! And it’s finished off with a shot of the installed kit.
It’s no longer actually as loud as the last part of the clip since I fixed the exhaust leak after I took the video. Now, once it warms up it sounds more like the one below, but I’m being a bit of a slacker and haven’t made an additional video yet.

