Kenny-g
Caught the Bug
I asked a similar question. For that, he suggested LimbRiserz or PillarGuardz.
http://trailskinz.com/otherproducts.html
I'm looking at limb risers myself. Not just this brand, I'm attempting to shop around. We'll have to see.
I asked a similar question. For that, he suggested LimbRiserz or PillarGuardz.
http://trailskinz.com/otherproducts.html
I haven't modded anything in weeks and I think I'm starting to get a little Jeep stir crazy!:gaah:
Mr. K has me thinking lift kits and is tempting the hell outta me with a great deal on a new set of Rigids for the front and another tire thread has got me wondering just what tire I plan to run if/when I do lift it. Curse this whole budget thing!
I'm in the same boat KP...I'm saving for a winch but fenders are next to be ordered. Sometime soon I need to get my JKUR suspension installed but that'll mean paying for a alignment too so it'll probably have to wait a lil while haha I'm so broke it's not even funny. BUT I'm pretty confident that after I get all that done I'll be content for a while ... long enough to save up some more money to buy other crap that I randomly decide I want lol. Por ejemplo; I'm randomly wanting a new exhaust set up. Just a muffler...I want a good little growl but nothing too loud when driving on the highway. Who knows, we'll see what happens haha
A few months ago, I went out on a wheelin’ trip into some muddy & wooded parts of the east coast on an all breeds trip. Some folks brought out their FJ Cruisers, I saw a handful of Land Rovers, a couple full size trucks, but by far it was mostly Wranglers. One of the wranglers that stood out to me had these silly looking panels all over it called TrailSkinz. I of course immediately started laughing... Who would need such a thing? That looks just silly! That's not a real Jeep product! I kept on walking and checking out rigs, but that almost stock Jeep kept popping up in my mind. We armor everything below from rocks, so why not armor the paint too? As the day wore on and the brush got thicker and meaner, I started thinking more and more about that lady in her JKU with her silly panels. Each nasty sounding scrape down the side got me thinking that perhaps maybe aren't so silly after all.
I staked out the website for a month or so waiting for a good deal and ordered a set just before my next wheelin’ trip to RC. They arrived in a tube and I didn't take them out until it was time to put them on the morning before setting out on trail. Doing a little walk around, found that I actually kind of like that flat black look on the billet silver. It doesn't hurt that it makes you a little more fearless on the thicker trails too!
View attachment 39110
There wasn't a ton of brush on the trails I went on, but what there was the TrailSkinz handled with no problem. When you are done with trail, just pull them off, take some mild soap and a soft sponge to them. Lay out to dry for a few minutes, then roll them back up in the tube they came in until the next trip. I went out looking for a fancy art tube with a screw top to store them in, then thought about just making something out of PVC... but in the end, the wife helped me duct tape the hell out of the shipping tube and it seems to be working great!
View attachment 39114
Were you up there on June 29th? I saw a Jeep at the gas station down the road around 8:30 am Saturday morning that had skins all over it. I didn't wheel with the wayalife group so we never would have met.
Didn't you just joing in on the Ocean City Jeep Week thread?
Funny you mention an exhaust set up. Swapping out just the muffler looks super easy and shouldn't break the bank. I'm looking at a full high tuck exhaust kit for myself. I figure, I'll need it eventually when I lift the Jeep, and in the mean time, I'm shaving off weight, getting better sound & air flow, and increasing my departure angle. Yes, I've been beating up my submarine can muffler and exhaust tip already.
The sPod Power source and AeroForce Tech gauge are probably the priciest small components I've ever put into a Jeep. Period! I first heard of sPod from a random guy in a '12 Rubicon that I parked next to near a U-Haul parking lot to talk Jeeps. At the time, mine was bone stock with new car smell wafting out the windows, but his had a few goodies on it. One piece that really caught my eye in particular was his collection of switches above the rear view mirror. So neat and tidy and oem looking! My Jeep obviously needs this. He told me about the sPod set up, what it was, and why he thought it was good. Coming from a man who is a professional electrician, I took his view on the subject with more than a grain of salt. I did a little research online and after dragging my feet for a few weeks at the cost, I pony'd up for an sPod w/ pod gauge cut out and an AeroForce Tech gauge.
View attachment 32683
Everything un-boxed and laid out for install. The concept isn't too hard to wire. The AeroForce Tech gauge is one cable that plugs directly into your OBD II port, while the sPod is one wiring harness that you'll run through the firewall. One thing to keep in mind if you get the AeroForce Tech gauge, (wish I knew this) make sure you ask for the LONGER cable. I ended up having to extend my wiring.
View attachment 32684
Please do yourself a favor and cover your a/c vents with a little painters tape. If you don't, be prepared to watch a washer or a screw take up permanent residence in your hvac system.
View attachment 32685
This is what the bare metal and that top panel looks like from behind. Take note of where the little metal clips live so you can slide them back when you are wrapping up the job.
View attachment 32688
View attachment 32686
To make the system fit nice and flush, you'll have to notch out that top panel just a smidge. A hand saw should do it, or if you have one, a Dremel will probably do the trick too. Once the piece is notched out, refit it LOOSELY back into position around the sPod mounting bracket.
View attachment 32687
The AeroForce Tech gauge is simply a pod gauge and is held in place with the bezel ring. Tighten everything in and prepare to pop it into the Jeep.
View attachment 32689
Lining everything up, tucking the wires in, and getting it all buttoned up can be a bit of a pain. May I suggest zip-ties?
View attachment 32690
2 screws later, the whole thing is in position. Now you just need to run your wiring through the firewall.
View attachment 32691
Under the hood, the sPod source is attached on the driver's side directly behind the CPU using OEM bolts and an included bracket. You'll want to run the wiring around the edge of the engine compartment, on the firewall and connect it to the battery. But that's pretty much it for wiring.
View attachment 32693
Don't worry about your hard top or soft top, there's plenty of space to close everything. Here's a shot with the top on, the jeep idling & all 6 switches flipped on. (No, nothing is connected to them... yet!) The AeroForce Tech gauge is displaying battery volts (14.2) up top and engine load (33%) on the bottom. If your ECU tracks it, then the AeroForce Tech gauge can probably display it. I usually run mine on instant MPG on the bottom and battery volts on top on the road and adjust to a different set up when I'm wheelin'.
View attachment 32692
The finished product looks like it came with the Jeep from the factory and is, overall, a great product. True, it's a little on the pricey side, but if you plan to run a bit of lighting, electric lockers and/or a compressor, it's very easy to fill up six switches. It's great to get all that wiring done at once AND basically have a standalone electrical system which makes connecting new goodies to the sPod actually very, very easy.
View attachment 32694
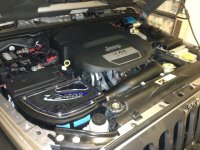
Thanks! Under the hood, that cover looks fantastic. And the small clear plastic window is a nice touch imho.Wow, that looks very clean installed. Nice upgrade!:thumb:
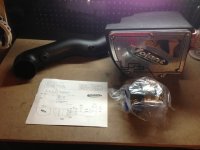
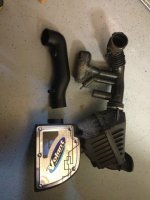
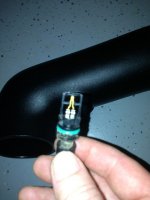
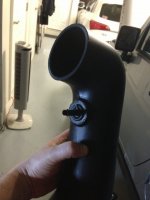
The Volant system is not very expensive as far as full box intake kits go. The Corsa is the same thing (I think) but much, much more expensive. Q-tech lists it for around $360, but I saw it on Amazon today $241.50 w/ free shipping. Search for it by company and part number "Volant 17636." I added 2 more video clips to hear the engine sound from inside the cab.Mmm I got a good smirk when I heard the revving...sounds good! That really makes me want an intake with a nice muffler. I take it the Volant system is expensive?
can you give me an update on how you like this set-up? pros and cons of it. what makes it worth the price tag? please and thanks!
