WxNerd2015's Never Ending Build

Some New Mods!

Over the Thanksgiving weekend, I picked up some new stuff for my Jeep and a few new tools! I picked up a Mag Lite 3 D Cell LED Flashlight, with the mount to attach to the side of the driver's seat! I also ordered some CAN-BUS LED replacement bulbs for my reverse lights, license plate light, and dome light inside the Jeep from SuperBrightLEDS.com! I also, on Black Friday, scored a 10 piece air tool set with air gun, air ratchet, air hammer, etc. from Sears/Craftsman for only $50 which I can't wait to use! I will post pics and install guides, as well as anything else that goes with them as I the parts and get them installed! Stay tuned!
 
Well, my LED bulbs are in now too! Hoping to get them installed tonight or tomorrow possibly! I will post comparison pics, as well as a few tips on the install, as I don't think I need to write much up about it, because it is pretty straight forward! Stay tuned for more to come!

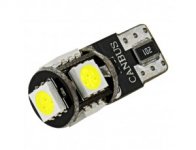
These are the bulbs that I purchased from SBL:

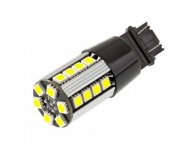
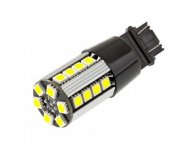
The reverse light bulbs:

timthumb.jpg

https://www.superbrightleds.com/moreinfo/tail-brake-turn/3157-can-bus-led-bulb-dual-function-26-smd-led-tower-wedge-retrofit-car/1263/2984/

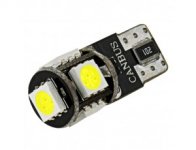
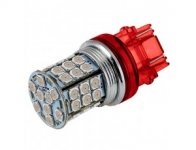
And the interior dome light bulbs and license plate light bulbs:

timthumb (1).jpg

https://www.superbrightleds.com/moreinfo/miniature-wedge-base/194-can-bus-led-bulb-5-smd-led-tower-miniature-wedge-retrofit-car/1127/2672/
 
Excited to see your write up for the reverse lights as I have looking at possibly doing the same thing. Look forward to seeing the difference it makes too because I can't see anything backing up at night. Good luck on the build!
 
Excited to see your write up for the reverse lights as I have looking at possibly doing the same thing. Look forward to seeing the difference it makes too because I can't see anything backing up at night. Good luck on the build!

Yeah, finally pulled the trigger on em, as I am just backing up blind when it is dark! I have tinted windows all the way around except the windshield, and they are a bit darker than from stock, so it is just terrible! I am hoping these can provide some much needed light! They are rated at 500 lumen output, so We shall see what is usable out of that 500 when installed! Plus, my smoked lenses on the taillights don't help much either! I just like the cleaner/whiter look of the LEDs too, and the instant on off, and lower power draw and the longer life! Eventually I hope to swap all the lights to LEDs on the Rig! But for now, I am testing to see how these CAN-BUS bulbs work!
 
Yeah, finally pulled the trigger on em, as I am just backing up blind when it is dark! I have tinted windows all the way around except the windshield, and they are a bit darker than from stock, so it is just terrible! I am hoping these can provide some much needed light! They are rated at 500 lumen output, so We shall see what is usable out of that 500 when installed! Plus, my smoked lenses on the taillights don't help much either! I just like the cleaner/whiter look of the LEDs too, and the instant on off, and lower power draw and the longer life! Eventually I hope to swap all the lights to LEDs on the Rig! But for now, I am testing to see how these CAN-BUS bulbs work!

Awesome, good luck on the intstall
 
License Plate LED Swap

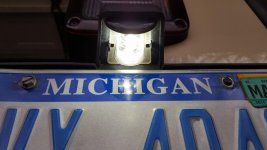
Well, I was able to get one of my LED bulbs in yesterday! I swapped the license plate light bulb out with the new LED bulb! The process was very simple and took ~1 min for me to do, and the bulb only cost 4.95, and the a 10% discount on that! And I am absolutely loving the clean, cool white light, instead of the dirty looking yellowish light! This would be the light which I installed which the link for it is in an earlier post:

timthumb (1).jpg

The install was extremely simple:

1. Push the tabs on either side of the license plate light lens towards the middle of the lens.

2. Pull the lens down

3. Twist the bulb out of the socket

4. Pull the wiring harness gently, but enough to give you some slack to work with so you don't drop the harness into the tub

5. Pull the old bulb straight out

6. Grab the LED bulb and push it back in the same socket

***Test the bulb before you put everything back together, as the LED bulbs do need to be positioned properly to function. So if you test the light and it does not come on, take it back out, rotate it 180* and put it back in and that should fix the issue!***

7. Insert the bulb and socket back into the lens

8. Twist the bulb/socket to lock it into place

9. Push the lens back up into the housing

There ya have it! That is all it takes! Simple as that!

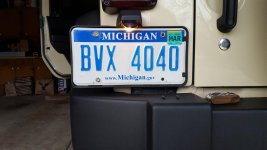
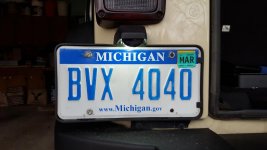
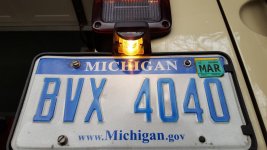
Here are some before and after pics of the installation:

License plate light before:

20151207_160556.jpg

License plate light after:

20151207_161737.jpg

License plate light before:

20151207_160559.jpg

License plate light after:

20151207_161742.jpg

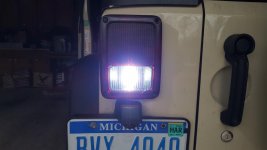
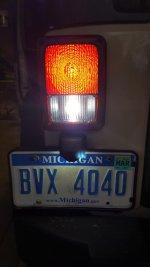
And I will take some more pictures when it is darker to see the light output more, but I will do that when I have all the bulbs installed!
 
Changing order

Well, for the stock Wrangler housing, the 500 lm CAN Bus LED Bulbs do not fit...I tested them in the reverse light housing, and they make contact with the front of the housing and the twist lock wedge mount is about 4 or 5 mm off, and I just don't feel comfortable with how they press against the front of the lamp housing to make them fit, I just feel like that is a failure in some way waiting to happen! So do not get these bulbs, as they will not fit in the stock tail lamp housing properly:

timthumb.jpg

https://www.superbrightleds.com/moreinfo/tail-brake-turn/3157-can-bus-led-bulb-dual-function-26-smd-led-tower-wedge-retrofit-car/1263/2984/

I will however verify that they will not fit in the tail lamp/brake light assembly as well later, just to check and make sure that there isn't a difference in length or something like that! I will also test the fit in the front turn signals as well to see the length on those, as I eventually plan and swapping those as well!

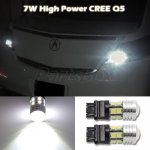
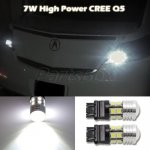
But in the mean time, I have purchased the same setup as KevinMac's build for bulb choices! I purchased these projector LED bulbs for the reverse lights from eBay which are shorter, but the output of the projector lens should help greatly with what I was looking for in light increase, and are rated at 380 lm:

s-l500.jpg

http://www.ebay.com/itm/231144413483_trksid=p2060353.m2749.l2649&ssPageName=STRK%3AMEBIDX%3AIT

And I have also purchased bulbs for the brake lights in the back from SuperBrightLEDs.com:

timthumb (2).jpg

https://www.superbrightleds.com/moreinfo/tail-brake-turn/3157-led-bulb-dual-function-45-smd-led-tower-wedge-retrofit-car/633/1908/

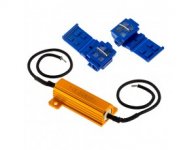
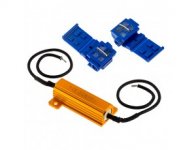
And the corresponding load resistors that are needed to prevent the hyper-flashing of the signals:

timthumb (3).jpg

https://www.superbrightleds.com/moreinfo/car-install-supplies/led-light-load-resistor-kit-led-turn-signal-hyper-flash-warning-fix/190/831/

And I should see my refund for the other bulbs in like 5 days are so. So net, I increased the cost of what I was doing by about $20 from before which is pretty good! And from what I have read on KevinMac's build, he has loved those bulb options and has had no issues with them, so I will go with a proven option!

I will update later when I install the dome LED light bulbs and when I get my other LEDs!
 
WeatherTech Floor Liners

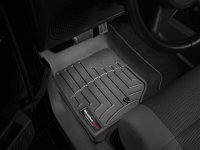
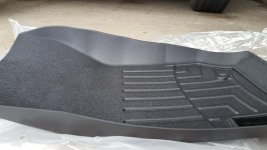
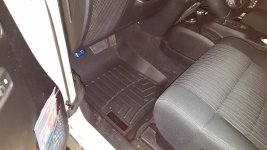
Had an early Christmas with one side of my family this year this past weekend and my Grandparents got me some nice new floor mats for the Jeep! Just in time for the winter that is (eventually) coming this year! They got me the WeatherTech DigitalFit - Laser Measured FloorLiner mats, and they are extremely good quality, and fit and protect really nice! Here is the link to the mats that I received:

441051_Wrangler_07_Unlimited.jpg

http://www.weathertech.com/jeep/2011/wrangler/floorliner-digitalfit/

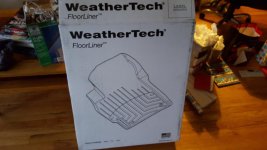
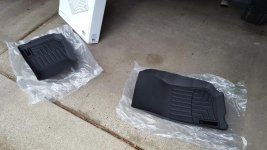
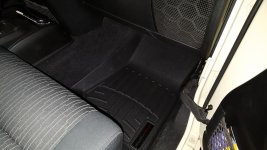
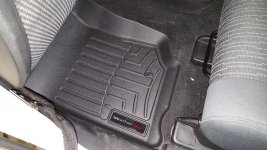
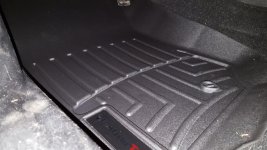
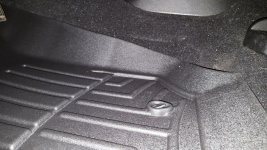
I got these installed over the weekend too, as...they are floor mats, one of the easiest "installs" you can do, but none the less, I will still give a quick couple of pictures and a description! So to start with unboxing, they were packaged well, and nice and ridged and clean and tough coming out of the package!

20151213_143224.jpg
20151213_143325.jpg
20151213_143333.jpg
20151213_143339.jpg

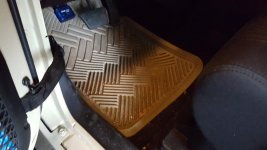
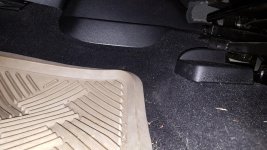
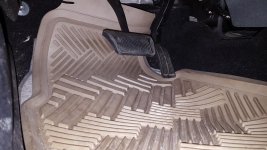
So the first step was to remove all the floor mats that are in the floor, including the factory carpet mats, as these are meant to fit snug, and they use the same attach point that the factory carpet mats do, but you cannot have them both installed properly at the same time! So here is my before shot of the floor well:

20151213_143354.jpg
20151213_143404.jpg
20151213_143409.jpg

And here is a shot with everything removed and the attach point that the WeatherTech mat will lock into place with:

20151213_143507.jpg

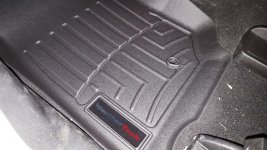
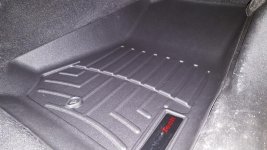
Next, it is important to figure out which mat flits on each side, so for my application, the weather tech logo was to the side of the mat, closest to the outside of the vehicle for both sides. If you just hold the mats up, lay them in there, or just "eye ball 'em", you can pretty easily figure out which one should go on which side! So once you are sure you have the proper side, go ahead and push the mat over the attach point on the floor! (This was a little difficult as these are snug fitting mats that are a bit more rigid than the original mats that I had in there, so you have to use a little force to get the hole in the mat to the proper point to attach, but once you get it there, it will lock in easy! And there ya go, new, high quality mats installed! Here are some pics of them installed in my Jeep:

20151213_143950.jpg
20151213_143705.jpg
20151213_143659.jpg
20151213_143652.jpg
20151213_143647.jpg
20151213_143540.jpg
20151213_143956.jpg

And my tail light bulbs came in on Friday, and I tested one real quick and they are definitely brighter than the stock bulbs! Can't wait to get em installed with the inline resistor to prevent the hyper-flash! And I may soon look into the same bulbs for the front turn signals maybe too? I am also expecting the reverse bulbs to arrive today, so hopefully I can get those installed as well! And I still have the dome LED lights to install inside, however, I am having major issued trying to get the stock bulbs out, so I will update as these installs happen!
 
LED Light Bulb Install (Taillights and Reverse Lights)

Well, finally got the time and the correct bulbs, so now the whole back end of my Jeep is LEDs! And it looks really nice! I followed the install guidance of KevinMac's build, as well as jsmorris's LED taillight and reverse light install. However, I cannot make exact references to these posts, as they were on a different forum, and I believe that would violate Wayalife code, so correct me if I am wrong, and I will post those, but to respect the forum to the best of my ability, I will not post the exact location of those, and I will do my best to describe the entire process and steps that I gathered between the two posts in this single post). These two gave me all the information that I needed and they worked great!

So, to start off, the bulbs that I purchased can be seen above in a bit more detail with there links, but the number replacement bulb you will need is one that fits in a 3157 for both the taillights and the reverse lights. I purchased my Brake/Taillight dual function LED towers from SuperBrightLEDS, as well as the needed load resistors to prevent the hyperflash low voltage warning. As the LED's draw so little power, the CAN Bus system thinks the light is out, so the resistor fakes an OK signal back to the CAN Bus that all is fine back there. Now, the bulbs will work/function without the resistor just fine, there is no issue getting them lite and using all the functions, so if you can stand the hyper flash, or it doesn't bother you at all, then you don't need the resistors, i just light everything to be functioning properly, so I went ahead and did it, and they are not too hard to install either. The bulbs were $19.99 a piece, and the resisters were $4.95 a piece.
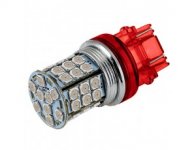
timthumb (2).jpg
timthumb (3).jpg

And then I also purchased reverse LED towers with high powered projector LEDs on the ends from eBay. I got the ones with the projector end as I am hoping to throw a bit more usable light out when I hit reverse, as well as get the nice, clean LED light out there as well! I got a set of 2 "bulbs" for about $17.50 on eBay, and since there is not hyperflash or anything like that, these so these do not need resistors.
s-l500.jpg

My impression of these bulbs is very good! They are solid, substantial, and they are bigger than I thought they would be from the picture! And as a plus, they are also waterproof, and virtually, I should never need to replace one for the rest of the life of the bulb! So I am very excited for these! Plus, i am hoping for a bit more light and faster response time from the light output, for safety, as well as to compensate for the smoked taillight housings which dim the light output anyways!

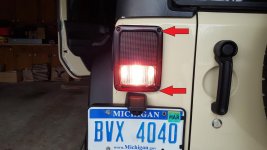
So, for the installation, you first need to remove the taillight housing. This is done by removing the two screws from the front of the housing towards the inside of the Jeep, not the two outside ones. The driver side taillight is shown, but for the passenger side, it is just flipped.
20151207_160458_2.jpg

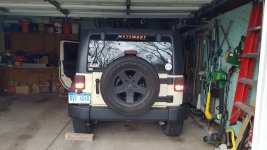
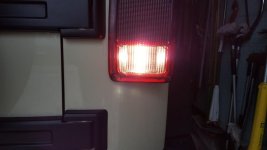
Once those two screws are removed, you then shift the housing slightly to the inside of the Jeep, and then they pull straight out. Once you have the housing out, you then have all the access to the bulbs that you need! First, I went for the reverse light install, as these did not require any special modifications. You just twist the bulb socket counter clockwise and then then you pull the bulb straight out. You then grab the bulb, and it is secured in the socket much better than I though it would be, so you will have to give it a good tug/pull, but it will come out. You then grab you new LED Projector bulb, and insert the bulb in the same way the other came out! (Before the next step, make sure you put the parking brake on all the way, as well as put something behind one of the tires to prevent the Jeep from rolling, or have someone go stand on the brake. As you can see, I did the parking brake and a big chunk of wood behind my rear tire and my Jeep did not move) However, before you insert the bulb back into the housing, go put the Jeep in gear to check and make sure that the light is actually working, as with these LED bulbs, they need to be sitting properly to work, so if the bulb does not light all the LEDs (as mine the first time only lite the projector, not the surrounding LEDs) pull the bulb back out, rotate it 180*, and reinsert the bulb, and it should then be functioning just fine. And once you have checked the new bulb and all is working, go ahead and insert the bulb through the hole in the housing, and line up the tabs on the socket with the housing, and push in and rotate clockwise until the socket is tight to the housing. Here are some before and after pics of the reverse lights:

Before:
20151207_160452.jpg

Comparison (Left LED, right stock):
20151215_161102.jpg

Before:
20151215_161107.jpg

After:
20151215_161113.jpg

Comparison between stock output (farther side) and LED output (Closer side), the difference is even in bigger in person! I am lovin' them!
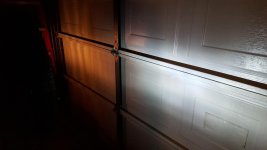
20151215_165211.jpg

So once those were done, I moved onto the brake/taillights. These required a bit more work, but not too much! First of all, I had to find a good location to secure the resistor and provide a heat sink for it as well, on the driver side, I used one of the panels inside the taillight hole which had a bigger hole through it to allow me to zip-tie the resistor to it, however, on the passenger side, I have not found anything good enough still to attach to with just zip-ties,so currently it is zip-tied to the wiring harness, but not right against it so it does not bounce around and shake something loose, but I do not want any wires melted either, so it is sort of sitting in space and the moment and I am still looking for a good solution that doe snot involve drilling the metal. But here are the pics of the resistor on the drivers side:
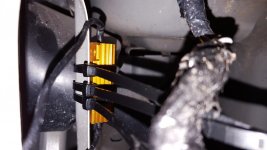
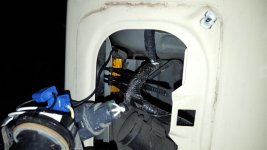
20151215_162651.jpg
20151215_162656.jpg

So with the resistor secured, I then needed to tap in with the wire splices into the proper wires to allow for the proper signal to be sent back to through the CAN Bus to throw no errors. For the two wires coming out of the resistor at either end, it does not matter which end you connect to which wire, as long as one is attached to one wire, and one to the other. So for me, for both the driver's side and passenger's side, I had to connect one end of the resistor to the black wire which was going to the taillight bulb (Note which bulb socket the wires are going to as once I did both splices and then realized I had the housing upside down and I spliced the reverse light on accident and I had to go back and redo the splices) and the other end of the resistor went to the white or off-white wire with the yellow stripe on it. This was for both taillights. And from my understanding, this is the wire which allows the brighter function of the taillight (i.e. The brake and indicator) because the running light functions fine and will not through a warning code, only the brighter functions. If that was unclear, let me know and I can explain that better! The White with purple stripe to my understanding is for the running lights when you turn the lights on. He is a picture of the splices, which after I took the pic, I then wrapped in electrical tape for an extra secure hold:
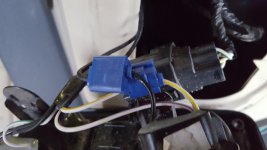
20151215_162634.jpg

As an extra note with these splices though, I had an issue with the drivers side one, that before I actually finished the splices, I inserted the taillight/Brake light bulbs and checked the hyper flash issue to see if it happened. It seems that when the Jeep is turned on and then the turn signal is turned on, it takes 6 flashed before the CAN Bus realizes the voltage is too low on the bulb, so make sure you let it flash more than 8 times! I counted somewhere between 10-15 flashes to be sure! I had an issue with the driver side splice which was that the metal part of the splice that actually cuts through the wire cover and taps into the actual wires underneath did not cut far enough through the coating on the black wire. So I had to open up the splice again, and I took a pair of needle nose pliers and clamped the splice all the way in, and tested again, and then that worked. So, if using these splices in the future, I would recommend using something directly on the splice to clamp through the coating, and then actually close the cover of the splice.

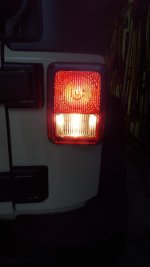
So with everything functioning properly, I inserted the bulb back into the housing, tightened the socket back to the housing, and re-secured the housing! The entire install took about an hour to an hour and a half, and probably would have been quicker if I wouldn't have had my few hiccups, but even those were no big problem! Here are some comparison pics of the taillights (but I apologize as it is really difficult to get pictures of light as the camera wants to adjust to the light):

Stock bulbs:
20151215_164452.jpg

LEDs:
20151215_164448.jpg

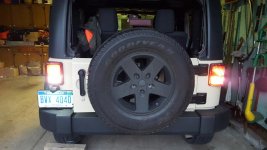
Comparison between LEDs on left, stocks on right, with just the running lights:
20151215_164444.jpg

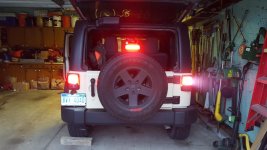
Comparison between LEDs on left, stocks on right, with the brakes applied:
20151215_164352.jpg

Now in these pics, like I said, it is hard to tell the differences in the taillights, however, from being here in person, these are a good bit brighter in output than the stock bulbs! They have instant response time and they absolutely make up for the smoked housing in brightness! These are even brighter by far in the daylight as well! There is very little light wasted, and even the side markers on the sides of the taillights are much brighter! I will put together a small video of the lights, where you can really see the difference soon, and then I will post it up here, but I am 110% impressed with these lights, and they are far better than I expected them to be! I am very happy and would recommend doing this for others!

Let me know if you have any questions about this, or I am sure KevinMac and jsmorris could also help on this! And on a side note, if anyone needs any stock bulbs, I have a license plate bulb, and two brake light bulbs and two reverse light bulbs with not too much use on em as my Jeep still only has 31k miles on it! I would sell em off for really cheap if anybody wants them!
 
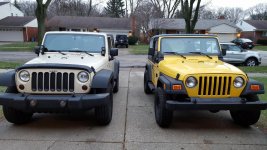
Jeep Family Photos

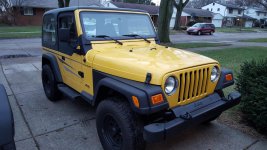
Hey all! And Happy New Year! Just finally got a chance to take a few pics of my fiancé's Jeep and mine together for a Jeep family photo and thought I would share it here! So obviously, you are familiar with my 2011 JK, but her's is a 2000 TJ. It is the base model with the 2.5L I4 engine. It's got the half doors with sliding windows, not the zip windows, and it come with the hard top. It's got about 118k for mileage on it, but it is still running great, it's a pretty nice Jeep itself! Here's a pic of her Jeep:

20160109_170534.jpg

And here is our Jeep family:

20160109_170518.jpg
 

Attachments

  • 20160109_170528.jpg
    20160109_170528.jpg
    141.4 KB · Views: 138
LED Bulb Swap/Upgrade Video

As promised a while ago, I finally had time to put together my video of how the LED bulbs function, and a comparison between the stock taillight bulbs and the new LEDs. Here is the video, enjoy:

 
A little bit of a struggle!

Well, I am hoping within the next week or so that I can have a write up and comparison on the LED bulb swap on the interior dome lights! My issue however is, those dang light bulbs are so hard to actually get a grip on to pull out! Getting the cover for the dome light open is not a problem, and reinstalling the LED bulb into the socket will be no problem, but I still have no figured out a good way o get the stock bulbs out! And I was avoiding going and grabbing a wrench or something because I do not want to break the bulb and have to clean up broken glass then too! I should be able to figure something out this weekend hopefully as I have some time to work on it! Amazing how something so small is putting up such a fit!

Anyways, in other news, I am also still find my exact location that I would like to install my mag-lite 3-D Cell flashlight and mounting brackets as well, so that is an upcoming project too! But for now, that's the update! I'll post when I have some more stuff finished!
 
Jeeps at NAIAS in Detroit!

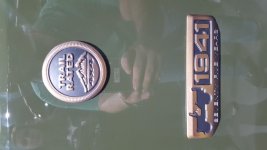
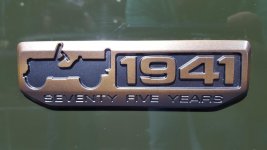
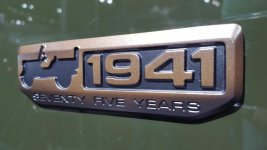
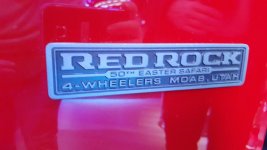
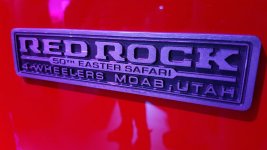
Well, had some fun today with my fiancé and my dad at the Detroit at the North American International Auto Show today! As I am sure we all know here, 2016 is the 75th Anniversary of the Jeep brand, so there are some special edition Jeeps for the 75th Anniversary! Also, there were some cool Mopar customized Jeep as well! So I figured I would share a few pics of some of the new Jeeps I saw today! Enjoy!

20160123_131017.jpg
20160123_130938.jpg
20160123_130854.jpg
20160123_130859.jpg
20160123_130906.jpg
20160123_130911.jpg
20160123_131437.jpg
20160123_131411.jpg
20160123_131236.jpg
20160123_131500.jpg
 
New Headlights on the Way!

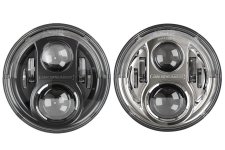
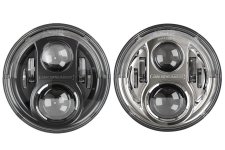
Well, Ben at Rubitrux hooked me up big time! I have ordered a set of brand new JW Speaker 8700 J series Black Bessel headlights! Only $620 delivered to my door! I spent a lot of time researching headlights (like the last year) and I finally made my decision with all the info that I was able to gather and reviews I could see and all that! The biggest thing that sold me on these lights over all the others what the true plug and play nature of them! And the lack of a need for an extra harness, as all the PWM in integrated into the new headlight, as well as the connect actually matches the stock Jeep connector. To me, more Harnesses and plugs equals more chance for problem and failure, and I read a bunch of stories about issues with the harnesses and having to take them off and reseal them and all that and I just did not want to deal with that! Plus, I really like the look of the half halo, and from what I have been able to research, if you activate the DRL function on your Jeep, that half halo is all that should light up then!
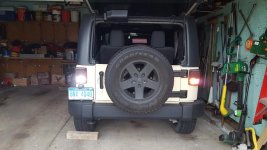
I know there are a few places that I could have tired to snag these for cheaper, however, JW sets a bottom price on these lights, and if they are sold below that, then the warranty no longer applies to the lights. Plus, going through a shop like Rubitrux really provides that extra backing of warranty and help if ever needed with the lights. So, for lights that are normally listed at $720 which includes the warranty, I was able to score it for $100 and still get the warranty!

http://www.rubitrux.com/jw-speaker-evolution-j-8700-led-headlights-pair.html
jw-speaker-evolution-j-model-8700-led-wrangler-jk-headlight-0551131-55078148-55078149-new.jpg

I will post of pics of them installed, as well as detailed instructions on the install (as I always try to do) once they are in. These are supposed to be a birthday present though and that is not until March, sooooo...it might be just a little long on the wait to install. I also have some travel for business coming up, so once that travel is done, I hope to be able to be able to get these in and review them! For now though, that is all!
 
Super Bowl Commercials

Well, Just figured that I would add these into my main forum page, here are the two videos spotlighting Jeep and the 75 year heritage and all that Jeep has seen! #4x4ever :rock: Enjoy!


JW Speakers Arrived!

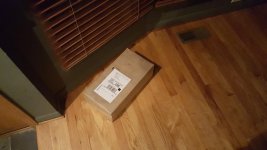
Well, that was some fast and free shipping too from Rubitrux! My lights arrived yesterday evening! Though I don't know how much time I will have until the beginning of March to install them :naw:, though I guess that is ok since these are supposed to be a birthday present and my birthday isn't until March! ;) Well, once I get the chance to install, I will post up my pics of the before and after as well as the install process, and maybe a video on these too! Stay tuned!

20160209_063540.jpg
20160209_063602.jpg
jw-speaker-evolution-j-model-8700-led-wrangler-jk-headlight-0551131-55078148-55078149-new.jpg
 
Reserved parking: Jeeps only

Boy! Gotta love winter! Places really cater to us Jeeps! These reserved front parking spots are so nice! And really convenient when I gotta run out and grab a quick lunch for work! Everyone else is scrabbling around waiting for spots and I just pull right in like it was meant to be! That'd be the WAYALIFE right there!

And might I add, a little mini flex going there on Friday! #FlexyFriday anyone? Haha

20160212_122455.jpg

Edited: Just a couple of additional flexing pics below...

20160213_190915.jpg
20160213_190847.jpg
20160213_190854.jpg
20160213_190906.jpg
 
Last edited:
Fog to go with JWs?

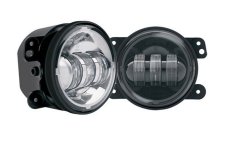
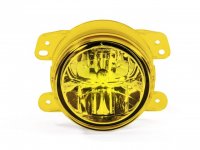
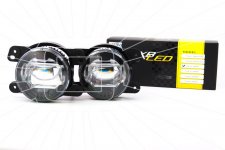
Well, I have the JWs to install now for headlights, and their performance is absolutely unquestioned, but I have been looking at many, many different fog light options to go with the JWs as I want something that is gonna look nice, and be extremely useful! I was looking into the JW fogs, as that is a no brainer if you have the JW headlights, however a couple of other options came across my radar that I was looking at. So from my research, I was down to the JW 6145s (Which are 100% proven, but are on the pricier side), the amber Quadratec LEDs (for something totally different, but not 100% sold on the amber), and the Morimoto XB LEDs for Jeep (which I have not seen too much about, but the little bits that I have seen, they are impressive).

So I sent some emails and did some research, and obviously, the JWs are reviewed everywhere with a lot of information and pics and all that about them, so I am confident in what I know about them, The Quadratecs, I still see nothing about the amber fogs and they themselves could not provide any pictures of them on, or too much info on the performance of them, and lastly, one of the other members on another forum reviewed them, and they definitely impressed me with the output from them, and the price is only $170! So $190 less than the JWs and I believe the output is more! Here are the links that I have to the fogs I have discussed above:

jw-speaker-model-6145-j-series-fog-light-jeep-wrangler-jk.jpg
http://www.rubitrux.com/jw-speaker-6145-jeep-fog-lights.html

226551-add2-lg.jpg
http://www.quadratec.com/products/97109_001X_A_PG.htm

morimoto_mopar_jeep_jk_wwrangler_fog_light_9411_3.jpg
http://www.morimotohid.com/complete-headlight-fog-light-housings/morimoto-xb-led-fog-lights-jeep.html

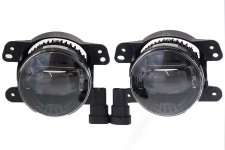
ANd to be honest, my favorite out of the 3 LED fog lights was definitely the Morimotos, however, that big, chrome reflector in the middle was off-putting to me, and the shape of it just didn't seem to go with the shape of the fog light holes. So I thought I wasgoing to end up going with the JWs to match the headlights, and go with my black and tan look on my Jeep, or the Quadratecs to be completely different. So I ended up getting in touch again with Ben at Rubitrux and he gave me some really good information, and a brand new product they just got in! So he informed me that the JWs, as I already knew, were definitely good, and if I got those, I would not be sorry, but he got in a brand new design of the Morimoto XB's, exclusively requested by Rubitrux in all black! Check these out!

morimoto-xb-led-fog-light-type-m-mopar-jeep-jk-front-and-back-xbfog-mopar-black.jpg
http://www.rubitrux.com/morimoto-xb-led-fog-light-pair.html

I will say, this is exactly what I was looking for, and they are still only $170! And I have been informed by Ben that they perform better than the JWs, and in his opinion, these are the lights to go with! I am thinking I am sold, but I am thinking it over for a week, but these things in my opinion are sick, and I am excited to see how they look on the JKs and how they perform! Once I do order, I will post up and then when I get the install done, as I have three or four projects that I want to do right now and just absolutely no time! Let me know what you think! Just wanted to share this new option, that in my opinion, is pretty sick!
 
Top Bottom