You are using an out of date browser. It may not display this or other websites correctly.
You should upgrade or use an alternative browser.
You should upgrade or use an alternative browser.
switch locations
- Thread starter noroad
- Start date
Tim
Member
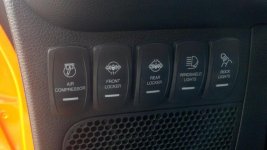
Here is what I did. Did want to spend allot of money. Still wiring up lights and adding relays. All my accessories are being wired to terminal strip and in line fuses.
QUOTE]
I alsoo love this man that looks cool, do you have a write up on it im loving these options!
not much of a write up, but gives the general idea of what I did.
http://wayalife.com/showthread.php?9547-2012-and-later-Button-option
Holeshot
Banned
Here's the link to my write-up for the ORE switch panel Eddie posted.
http://wayalife.com/showthread.php?...)-switch-panel-install&highlight=switch+panel
The thing I really like about having these switches under the radio, is that they are easy to reach when you use driving lights, I keep my elbow on the center console and just move my hand from the shifter to the panel, no need to reach the top of the windshield. :rock: The install is very straight forward, and the guy (sorry forgot his name) gives a very good service.
gtony12
Caught the Bug
not much of a write up, but gives the general idea of what I did.
http://wayalife.com/showthread.php?9547-2012-and-later-Button-option
I like the setup. Nice job.
Sent from my SCH-I545 using WAYALIFE mobile app
cozdude
Guy with a Red 2-Door
Ok i really like this look but it doesnt look like this person used any housing just put them in there, how would that be done?
looks like they just cut a hole big enough so that the rocker can fit in like it would on a daystar switch panel.
noroad
New member
looks like they just cut a hole big enough so that the rocker can fit in like it would on a daystar switch panel.
ya but wouldnt it just fall out?
Ok i really like this look but it doesnt look like this person used any housing just put them in there, how would that be done?
If you pull off the side panel of your dash, you will see that there's a lot of room right there. All you need to do is cut what you need and pop in the switches.
cozdude
Guy with a Red 2-Door
ya but wouldnt it just fall out?
nope just cut it small enough so its nice and snug. also a lot of the main switch housing have clamps almost on the ends that will hold them.
also like eddie just said there is a lot of room back there for them to fit.
pvanweelden
New member
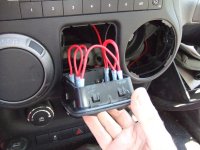
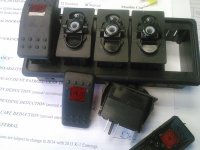
Trace an outline of the switch you want to use. Place painters tape where you want the switches to go. Trace on the painters tape your outline. Using a untility knife make several passes on the lines while applying light to moderate pressure until you have the cut out. Another option is to use a Dremmel with a cutting bit. An example would be one used in a ROTOZIP.
Here are some pics that might help.
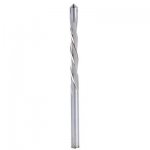
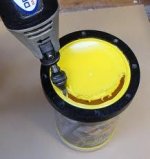
Here are some pics that might help.


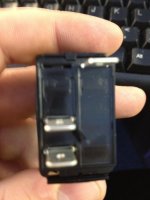
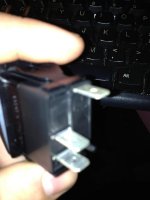
cool cool thanks guys not just to be positive here on the switch there are three prongs the top is a ground #7? #2 middle is the power aka battery?? and the bottom on #3 is the lights??
You should have a brass prong which is the ground, I ran mine to the fatory ground. There should be two silver prongs. The middle goes out to your accessory. The outer prong is for 12v constant. When I wired all my switches I ran the ground and 12v constant in series. By doing this it reduces the number of wires you have to run.
R/
Will
pvanweelden
New member
Are you not using a relay? Yes switch pins are top- ground (pin 7), middle- power in, bottom- switch out (relay input or connect to positive on accessory)
His switches are different than yours Will.
Sent from my SM-N900V using WAYALIFE mobile app
His switches are different than yours Will.
Sent from my SM-N900V using WAYALIFE mobile app
Last edited:
pvanweelden
New member
^ yes, that is correct
Sent from my SM-N900V using WAYALIFE mobile app
Sent from my SM-N900V using WAYALIFE mobile app

