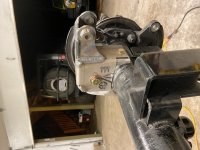
Build of my JKU

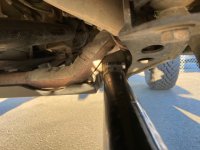
Well fist issue.View attachment 360731

Sent from my SM-G996U using WAYALIFE mobile app

Yeah a couple of posts up I commented on this. When I first put them in I had to find a way to put the bolt in from the inside while keeping the coilover compressed Like this:
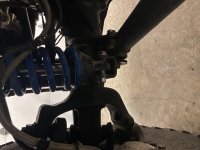
non flipped.jpg

This weekend I swapped the arm around and it went in normally with clearance all the way from droop to stuff. Like this...
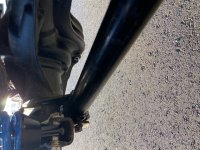
flipped arm.jpg

Here's a pic of the frame side.

frame side.jpg
 
Last edited:
Yeah a couple of posts up I commented on this. When I first put them in I had to find a way to put the bolt in from the inside while keeping the coilover compressed Like this:
View attachment 360732

This weekend I swapped the arm around and it went in normally with clearance all the way from droop to stuff. Like this...

View attachment 360733

Here's a pic of the frame side.

View attachment 360734

Yeah that’s not how they are supposed to be mounted.


Sent from my iPhone using WAYALIFE mobile app
 
Easy enough to switch back. I was looking at it last night and it seemed easy enough to do. How come it's a bad idea?

I can’t remember exactly what evo said but I thought there was a reason. One reason would be you can’t adjust them so the adjusters are pointless but I thought there was another reason.


Sent from my iPhone using WAYALIFE mobile app
 
Well fist issue.View attachment 360731

Sent from my SM-G996U using WAYALIFE mobile app

Flex the axle up and the bolt should clear, bring it in from the other direction.

Probably need a shorter bolt too [emoji6]


2015 JKUR AEV JK350
1985 CJ8 Scrambler

Now that I see the pic, turn the pinch bolt around, and then unbolt the control arm so you can drop it down and put the coilovers bolt in the other way from how it is.
The two end up head to head, and should be close, but not rubbing. If they run, grind the head of the pinch bolt some, so it clears.
 
I like what Kevin did but it would worry me the part of the arms dragging the most is not replaceable like the Johnny Joint end.

Sent from my SM-G996U using WAYALIFE mobile app

That would be the other reason that overlander is searching for right now I'm sure. I am going to switch it around tonight. I was pretty beat last night and thought I had struck gold. I even looked back at the instructions for the long arm and saw where the back should have the adjuster axle end, but the front didn't mention it. Sorry to lead you a bad way.

Now that I see the pic, turn the pinch bolt around, and then unbolt the control arm so you can drop it down and put the coilovers bolt in the other way from how it is.
The two end up head to head, and should be close, but not rubbing. If they run, grind the head of the pinch bolt some, so it clears.

If you run the bolt through from the inside, the bolt head clears the pinch bolt head. No grinding necessary. It's just a pain to get it all of the way in.
 
Last edited:
That would be the other reason that overlander is searching for right now I'm sure. I am going to switch it around tonight. I was pretty beat last night and thought I had struck gold. I even looked back at the instructions for the long arm and saw where the back should have the adjuster axle end, but the front didn't mention it. Sorry to lead you a bad way.


If you run the bolt through from the inside, the bolt head clears the pinch bolt head. No grinding necessary. It's just a pain to get it all of the way in.
Yeah running the bolt the opposite way is going to be hard with the load of the Coilovers on it. I'll mess with it Friday. I just wanted to get them out of crate and ready to work on tonight so that task has been accomplished.

Having the short arms makes the angle a little more drastic and more jacking of the axel is needed to create a gap between the bolts.

Kevin can you post pictures of the rear Rockstars as well. I want to verify what I need to cut off.

Sent from my SM-G996U using WAYALIFE mobile app
 
Kevin can you post pictures of the rear Rockstars as well. I want to verify what I need to cut off.

Sent from my SM-G996U using WAYALIFE mobile app


yup!
IMG_1640.jpg

62751985111__B059FA2A-F8C8-4D79-A914-EA3F88ABAACC.jpg

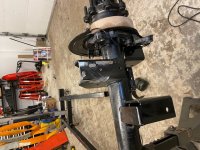
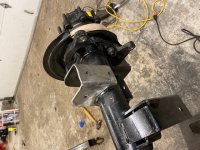
At this point I was able to tap it in to place, but it wasn't going on far enough to get the bolts in, so I did some grading on the eve bracket until it matched up with the weld on the axle tube.
62751989315__6F8051E0-6F2C-47FA-863B-8E192C99A785.jpg

IMG_1652.jpg

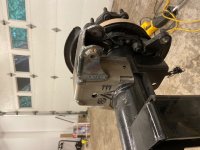
From there weld it everywhere you can. I'll spare the horror of mine. The high clearance brackets are in a box waiting to go on.:rock:
 
yup!
View attachment 360745

View attachment 360746

At this point I was able to tap it in to place, but it wasn't going on far enough to get the bolts in, so I did some grading on the eve bracket until it matched up with the weld on the axle tube.
View attachment 360747

View attachment 360748

From there weld it everywhere you can. I'll spare the horror of mine. The high clearance brackets are in a box waiting to go on.:rock:
Sweet, Internet High five. Thank you!!!!

Sent from my SM-G996U using WAYALIFE mobile app
 
Looks good.

If you haven't got some already, go by the welding supply and get some good anti splatter spray, and coat everything around where you are welding.

It makes clean up a lot easier.
 
Looks good.

If you haven't got some already, go by the welding supply and get some good anti splatter spray, and coat everything around where you are welding.

It makes clean up a lot easier.

I use that spray.. for flux core wire... do you need it if running gas?
 
Top Bottom