You are using an out of date browser. It may not display this or other websites correctly.
You should upgrade or use an alternative browser.
You should upgrade or use an alternative browser.
Gladys
- Thread starter Bizcuit
- Start date
Bizcuit
Active Member
Thank you. My last Jeep was a Wrangler, which I was very proud of. Had a lot of money and time in it. The mistake I made was not going to 60s the first time. Cry oncenice work! looks strong enough to air dropped.
Bizcuit
Active Member
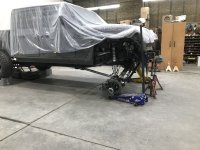
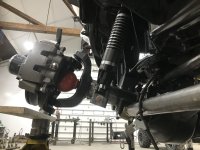
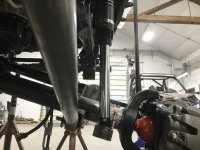
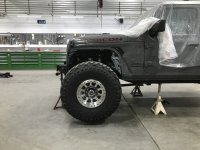
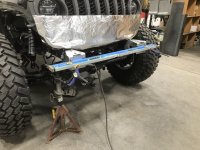
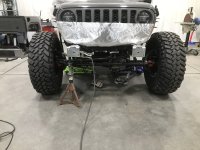
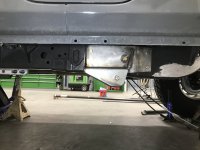
We made a little more progress today. Committed on the lower strut brackets and welded them on with 1/4 of clearance when stuffed both sides. Loaded the suspension and it moved a great deal less than I thought, about a 1/16. So I cut them off and set the clearance to zero. This would be a scenario when both tires are bottomed out at the same time. Never. When only one tire is up or flexed out, there’s a mile of room on everything. When the right tire is hung, the axle is moved as far to the left as it will ever be. There’s about 3/8 of clearance between the RH strut and the frame. The left strut is 90 to the axle. I think it looks good, but I’m interested in your thoughts.
Attachments
Bizcuit
Active Member
Thanks. I’m enjoying it, and feeling crunched at the same time. We have a Sand Hollow trip in May.What does the geometry look like with it flexed in the other direction (passenger stuffed)? Really enjoying watching your build!
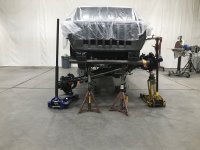
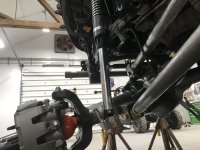
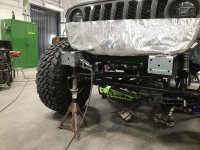
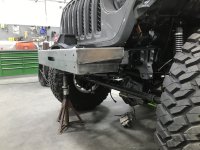
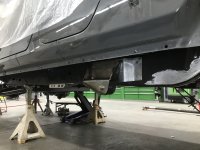
In the second picture it shows 2 in of clearance while flexed. The track bar mount was built for this amount of lift. I set the struts at track bar strike and axle level, feeling confident this will never happen. The third link is about 1/8 of an inch from the motor mount at this point so everything nested awesome. There’s slightly more clearance on the LH strut/frame when flexed this direction. About 1.6 degree out at the bottom, whereas the RH strut is straight while flexed the other direction.
Attachments

Bizcuit
Active Member
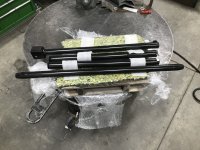
Got everything back today. The LCAs from powder, and the axle from paint. Looking forward to tomorrow. I used Metalcloak ends this time instead of Synergy because they have a LH, and RH threaded joints.
Attachments

Bizcuit
Active Member
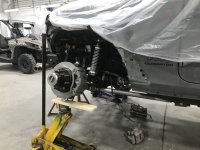
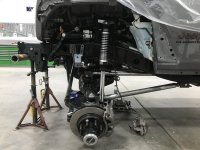
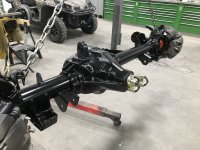
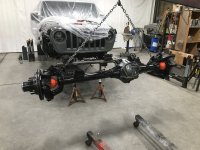
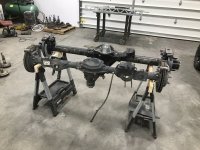
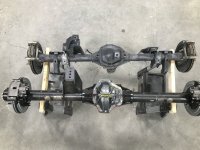
Today was a good day. Got the front 75% done, and removed the rear axle. I didn’t want to take both axles out at the same time just because. The pictures are set at ride height using 5 1/2 of uptravel. After setting these two axles next to each other, it’s amazing how big the 80 is.
Attachments


Bizcuit
Active Member
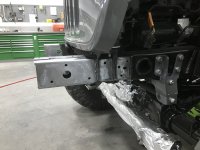
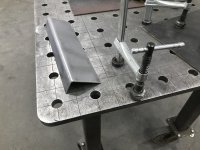
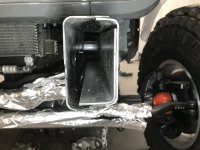
Sun started shining here in Oregon, so outside jobs are keeping the project time limited. I was able to make a little progress on the frame and bumper today though. The frame on this Jeep is amazingly thin. I thought the 10K Warn on the JK was quite ambitious for a frame that’s only .120 thick, so a 12K on a frame that’s .083 has me a bit worried. The winch wouldn’t fit between the pads on the end of the frame without affecting the bolt pattern so I removed them. Bent a couple of L-serts out of .120 because I didn’t want to manhandle the frame, just add strength to it. I drilled the frame in a crisscross pattern for plug welds on the side, and then every 4in on the bottom. You can also see in the pics how I trimmed the frame to expose the L-sert 3/16, so that when I weld it to the frame endplate, everything gets tied in. Here’s how that turned out.
Attachments
Last edited:
Bizcuit
Active Member
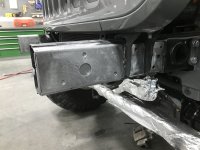
Here’s the frame end plates made out of 1/4 in. My original plan was to run a 1/2 bolt inside the frame, to the tubular cross member under the engine to help share the pull of the winch, that’s why the hole in the center. After I cut the factory plates off it looked like the L-sert was a better option.
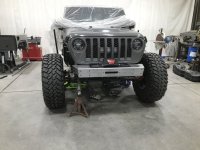
My last bumper was your typical Rubicon style, so it was big enough to clear all the sway bar and brackets. This one is just big enough to house the winch. This is as close as I could comfortably get the winch to the grill. I’ll later build a small skid to protect the sway bar that bolts to the bottom of the bumper.
My last bumper was your typical Rubicon style, so it was big enough to clear all the sway bar and brackets. This one is just big enough to house the winch. This is as close as I could comfortably get the winch to the grill. I’ll later build a small skid to protect the sway bar that bolts to the bottom of the bumper.
Attachments

Last edited:
Bizcuit
Active Member
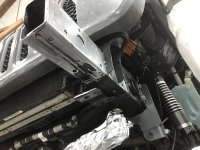
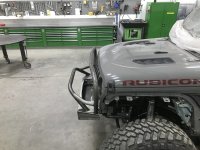
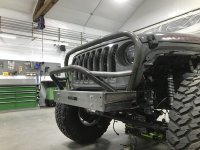
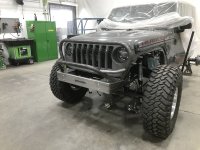
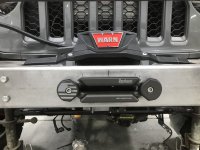
Here’s what today produced. Not a fan of the grill guards, but I’m going to run a Level-It with the ORI’s. It needs to be 2in. higher than the shocks so with no room under the hood, it has to be showing. I could have put it on the hood where some people mount their jacks, or up on the light bar but, neither of which were very serviceable. Curious as to your thoughts.
Attachments
Disciple Off Road
Hooked
Not my style but nicely done! Definitely some clean fab work 
jeeeep
Hooked
The grill guard took a sudden turn, does the level-it require that much space? is it in addition to ORI struts?Here’s what today produced. Not a fan of the grill guards, but I’m going to run a Level-It with the ORI’s. It needs to be 2in. higher than the shocks so with no room under the hood, it has to be showing. I could have put it on the hood where some people mount their jacks, or up on the light bar but, neither of which were very serviceable. Curious as to your thoughts.
Can't route and mount them in the bed on a tube made to fit the front of the bed?
Bizcuit
Active Member
Not my style either, thank you. It’s something I enjoy.Not my style but nicely done! Definitely some clean fab work
Last edited:
Bizcuit
Active Member
Ok, I laughed when I read that. That probably was the nicest way you could have worded it.The grill guard took a sudden turn, does the level-it require that much space? is it in addition to ORI struts?
Can't route and mount them in the bed on a tube made to fit the front of the bed?
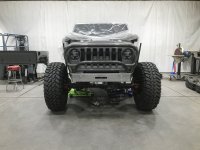
The Level-it is not big, maybe 4in. in diameter and a foot long. But it need be higher than the Schrader on the top of the strut by a couple inches to rid the oil. To have built the push bar tall enough, then mount it on top of that, the height was nearly the same as this, but even uglier. In the bed was something we discussed and it’s a good option and it still might happen. I’m not at all set on this look, but i’m going to let this soak for a week and see if it grows on me. If by next weekend it doesn’t, I’ll move it.
jeeeep
Hooked
umm.. if it grows on you, better have an emergency contact to reach out toOk, I laughed when I read that. That probably was the nicest way you could have worded it.
The Level-it is not big, maybe 4in. in diameter and a foot long. But it need be higher than the Schrader on the top of the strut by a couple inches to rid the oil. To have built the push bar tall enough, then mount it on top of that, the height was nearly the same as this, but even uglier. In the bed was something we discussed and it’s a good option and it still might happen. I’m not at all set on this look, but i’m going to let this soak for a week and see if it grows on me. If by next weekend it doesn’t, I’ll move it.

Bizcuit
Active Member
Thanks, I do appreciate. Working on it as time allows and it’s not much.This has really turned into one bad ass build. Can't wait to see the finished product.
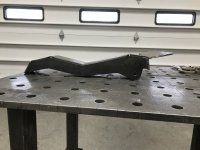
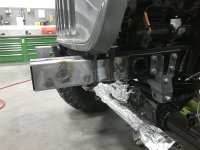
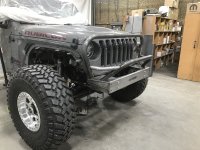
A little bit of progress on the trailing arms, and I was told this fairlead would take some of the ugly out of the grill guard. Hoping? Maybe?
Attachments
Bizcuit
Active Member
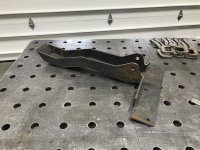
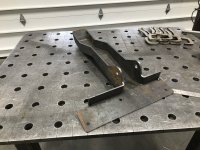
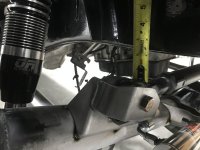
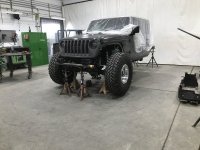
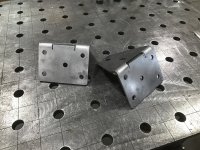
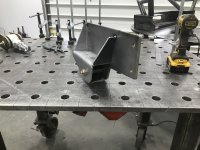
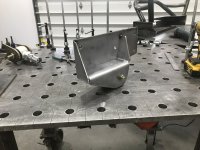
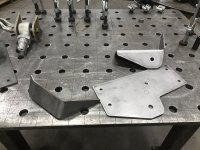
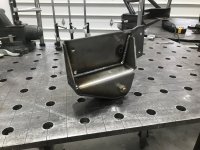
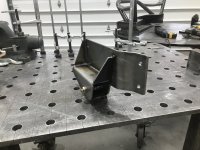
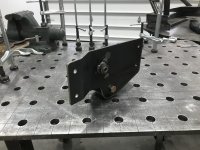
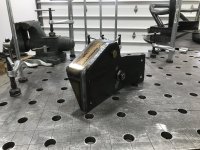
Working on the trailing arm brackets today. All of the LCA brackets have been cleaned off the frame. The middle bolt is step bushed to the indentation in the frame. The bottom of the bracket lines up with the bottom of the tank skid.
Attachments
-
 IMG_3232.jpeg194.9 KB · Views: 16
 -
 IMG_3230.jpeg211.8 KB · Views: 15
 -
 IMG_3229.jpeg241.8 KB · Views: 15
 -
 IMG_3233.jpeg227.9 KB · Views: 15
 -
 IMG_3234.jpeg213.5 KB · Views: 15
 -
 IMG_3235.jpeg216.7 KB · Views: 15
 -
 IMG_3237.jpeg243.2 KB · Views: 17
 -
 IMG_3239.jpeg155.6 KB · Views: 17
 -
 IMG_3240.jpeg160.8 KB · Views: 16
 -
 IMG_3241.jpeg179.2 KB · Views: 16
Bizcuit
Active Member
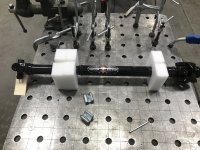
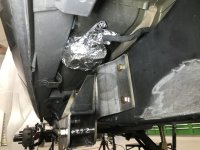
The wind has quit blowing here so super busy. A little progress on the tank skid and third link mount. This is the rough draft but I think it’ll look similar to the finished product. The cross members in this JT are extremely thin. The JK platform is an anvil by comparison. The paddle up front will sit on top of the front x-member, then will come up from the bottom of the second x-member. Also Adam’s sent me a package.