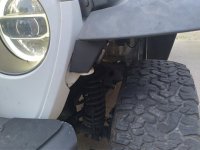
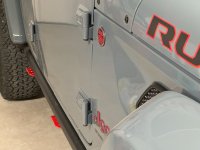
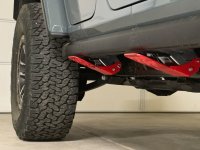
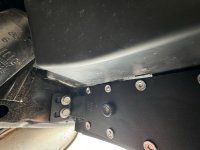
Because I hate myself and like self-torture, I installed four M.O.R.E Hide-a-Steps on my JL this weekend.
I have a spouse and visiting family that need steps to get in. Steps that hang down permanently were not an option, or why bother with a high clearance vehicle to start with? Sliders with a step level with the pinch seam were not an option since that means stepping up too far. These are the best compromise I could find since I can pull the pins and remove the step if I need the clearance when off roading without said passengers. With the step removed, the rest of the assembly is spring loaded and contracts up above the rock rails and out of the way.
I’ve had one of these on my Mojave before for just the passenger side, so it saved me some time knowing to ignore some of the directions. These are near impossible to install by simply loosening the rock rails and wiggling them into place. F-that. I did the following:
(Not intended to replace the instructions but to supplement, hence no install photos. My variation on the install may not make sense without having read the directions.)
Pre-assemble the steps by inserting the lower pin first, then fold over the top and slide in the second pin. Use some body leverage and be very careful. These springs are tight, and I imagine the contraption could easily break finger(s). Do this on a padded surface so you don’t scrape up the step. I did it inside on carpet.
Place two buckets or two floor jacks near either end of the rails about a foot away from the vehicle. Have something you can use as shims to get the height just right if needed. Remove the rail and set it on the buckets. Having it on the bucket makes putting on the steps easier and will make it easier to reinstall the rail. I used some Lego-style vehicle levelers as shims to get the height just right.
Optional: wrap the exposed powder coated parts with painters tape so you don’t scratch the powder coating if you drop it at any point during the install.
Slide the step assembly over the main rail arm. It will contact the pin. Release the pin that’s in the way but only pull it far enough so that the assembly can slip past the rail bracket — keep the pin in one side. Do not fully remove the pin or the finger-breaking trap will snap open. Slide the pin back in and across once the pedal assembly is past the bracket. Zip tie the assembly to the top of the bracket through the holes up top. Leave the zip tie pretty loose. Leave about an inch space between the bottom assembly bracket holes and the mounting studs on the rail. You need about an inch gap because the pinch seam needs to go between the rail and the step’s bottom bracket holes. Repeat for the second step if you’re installing two per side.
Slide the buckets and rail close to the pinch seam. Lift the rail up and put the rail studs back though the holes in the pinch seam. Make sure the step goes fully behind the pinch seam. With two steps, it can be a bit of a juggling act, and a second set of hands is helpful. With two steps, it also gets a bit heavy.
With the rail pushed fully into place, get under the vehicle and cut and remove the zip ties. Push the step toward the rail so that the step’s bottom bracket holes go onto the rail studs. Install the bottom rail bolt nuts loosly. Install the body bracket bolts loosely onto the locations other than the step location. You’ll not use the original body bolts for the step but rather the ones provided. To install the provided bolts that go into the body bracket, first find something to use as a block/shim to insert between the back of the step and the frame. A block of wood, rubber mallet head, something that’s about that size. To regain access to that body bolt location, you’ll have to fully pull out the bottom step pin and let the step hang down. (Without a brace between the step and the frame, the back of the step will snap back hard against the frame when the pin is pulled.) Pull the bottom pin and let the step hang loose. You can now access the top body bolt with a multi-tip screwdriver using the appropriate sized hex key that fits the provided body bolt replacement. It may take some finger trickery to get the washer and bolt up in there. Tighten but don’t overtighten. These are not very tight from the factory. Swing the petal back up and reinstall the bottom pin. Tighten the bolts on the rail studs. Remove the brace between the step and the frame. Repeat with second step if installing two per side. Tighten up all remaining rail bolts.
View attachment 408049
View attachment 408048

