Nope, not all of them. Bummer
You are using an out of date browser. It may not display this or other websites correctly.
You should upgrade or use an alternative browser.
You should upgrade or use an alternative browser.
The Metamorphosis of MumboJumbo
- Thread starter ridg3runner
- Start date
Finally home for some much needed time off. First order of business was to dive into the mountain of parts and try to make some sense out of it. I have to toss a huge thanks out to Strizzy for the new King Airbumps and the badass keychain. (I certainly hope it doesn't break and I need to call customer service)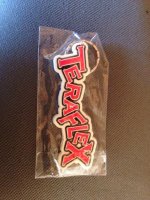
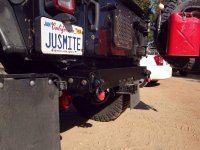
After putting together a game plan,I started off with the rear EVO Fascia and D-Ring mounts. I had a bit of help for a limited time even.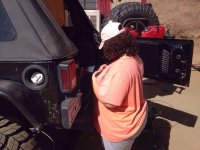
We picked up a plastic file folder from Walmart and used it as a backing for the EVO cutouts in the Fascia,rock skins and bumper end caps, we simply attached them with a bit of silicon.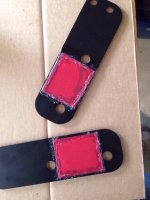
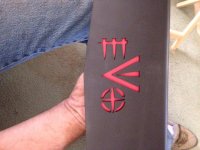
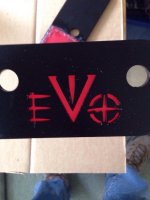 ..Doesn't look too bad once I installed it
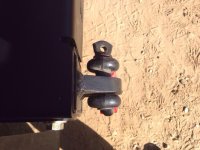
 the trick to making the D-Ring mounts look good is to trim the ends of the frame rails as flush as possible.
  .
.
Started the task of removing the ElCheapo skins I had added way before I knew something better was available. Tomorrow I'll lift the body a bit so I can get the Diamond Plate garbage removed completely and begin installing the new EVO ones.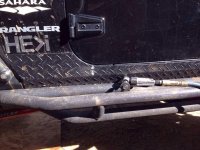

After putting together a game plan,I started off with the rear EVO Fascia and D-Ring mounts. I had a bit of help for a limited time even.

We picked up a plastic file folder from Walmart and used it as a backing for the EVO cutouts in the Fascia,rock skins and bumper end caps, we simply attached them with a bit of silicon.


 ..Doesn't look too bad once I installed it
 the trick to making the D-Ring mounts look good is to trim the ends of the frame rails as flush as possible.
  .
.Started the task of removing the ElCheapo skins I had added way before I knew something better was available. Tomorrow I'll lift the body a bit so I can get the Diamond Plate garbage removed completely and begin installing the new EVO ones.

Last edited:
branman
-
badass keychain. (I certainly hope it doesn't break and I need to call customer service)
Make sure you only put 3 keys on it and make sure you don't split the ring to far.. I have heard there are install issue with that.
bkac
Caught the Bug
Finally home for some much needed time off. First order of business was to dive into the mountain of parts and try to make some sense out of it. I have to toss a huge thanks out to Strizzy for the new King Airbumps and the badass keychain. (I certainly hope it doesn't break and I need to call customer service)View attachment 102351
After putting together a game plan,I started off with the rear EVO Fascia and D-Ring mounts. I had a bit of help for a limited time even. View attachment 102352
We picked up a plastic file folder from Walmart and used it as a backing for the EVO cutouts in the Fascia,rock skins and bumper end caps, we simply attached them with a bit of silicon. View attachment 102353View attachment 102354View attachment 102355..Doesn't look too bad once I installed itView attachment 102356 the trick to making the D-Ring mounts look good is to trim the ends of the frame rails as flush as possible. View attachment 102357.
Started the task of removing the ElCheapo skins I had added way before I knew something better was available. Tomorrow I'll lift the body a bit so I can get the Diamond Plate garbage removed completely and begin installing the new EVO ones. View attachment 102358
Looks great, Good idea!
Sent from my VS980 4G using WAYALIFE mobile app
Panda
New member
Finally home for some much needed time off. First order of business was to dive into the mountain of parts and try to make some sense out of it. I have to toss a huge thanks out to Strizzy for the new King Airbumps and the badass keychain. (I certainly hope it doesn't break and I need to call customer service)View attachment 102351
After putting together a game plan,I started off with the rear EVO Fascia and D-Ring mounts. I had a bit of help for a limited time even. View attachment 102352
We picked up a plastic file folder from Walmart and used it as a backing for the EVO cutouts in the Fascia,rock skins and bumper end caps, we simply attached them with a bit of silicon. View attachment 102353View attachment 102354View attachment 102355..Doesn't look too bad once I installed itView attachment 102356 the trick to making the D-Ring mounts look good is to trim the ends of the frame rails as flush as possible. View attachment 102357.
Started the task of removing the ElCheapo skins I had added way before I knew something better was available. Tomorrow I'll lift the body a bit so I can get the Diamond Plate garbage removed completely and begin installing the new EVO ones. View attachment 102358
Lookin good Lee! Trick is adjust the key chain correctly so it doesn't jiggle
olram30
Not That Kind of Engineer
Lookin good lee! Trick is adjust the key chain correctly so it doesn't jiggle
Lo, Ok this one is funny.
bkac
Caught the Bug
Lookin good Lee! Trick is adjust the key chain correctly so it doesn't jiggle
Oh, and if it cracks or breaks, you didn't do it right...
Sent from my VS980 4G using WAYALIFE mobile app
Panda
New member
Oh, and if it cracks or breaks, you didn't do it right...
Sent from my VS980 4G using WAYALIFE mobile app
Yup that would be user error :yup:
StrizzyChris
New member
In all fairness, this is an old model and the new version has more rubber webbing for strength. If there's any issues with it Lee, let me know and I'll arrange a replacement.
Panda
New member
In all fairness, this is an old model and the new version has more rubber webbing for strength. If there's any issues with it Lee, let me know and I'll arrange a replacement.
You mean TF isn't going to send him a reinforcement kit? :shock:
That had to be made in $h!n@..... I wouldn't let it dangle too low!
Do you have a NutZert tool for the Skins? Saved me a ton of time. The plastic back drop's look great!!! Hope you and the Mrs are home long enough to get it all done.
Do you have a NutZert tool for the Skins? Saved me a ton of time. The plastic back drop's look great!!! Hope you and the Mrs are home long enough to get it all done.
10frank9
Web Wheeler
Tomorrow I'll lift the body a bit so I can get the Diamond Plate garbage removed completely and begin installing the new EVO ones. View attachment 102358
Wait a second... Why don't you just take off your bolt on sliders??? :idontknow: :cheesy:
Wait a second... Why don't you just take off your bolt on sliders??? :idontknow: :cheesy:
You just had to ask, didn't you? So, I'm going to do like many before me have done..Pass the buck, lol.
In all seriousness I unfortunately cannot simply remove them anymore. There seems to be a set of control arm brackets welded over them, and no I didn't do the welding this time. Needless to say, it was quite interesting removing the body lift for sure.
10frank9
Web Wheeler
You just had to ask, didn't you? So, I'm going to do like many before me have done..Pass the buck, lol.
In all seriousness I unfortunately cannot simply remove them anymore. There seems to be a set of control arm brackets welded over them, and no I didn't do the welding this time. Needless to say, it was quite interesting removing the body lift for sure.
:cheesy: come on that was too easy. I was hoping for some hmmmning and hawing for a while first!
:cheesy: come on that was too easy. I was hoping for some hmmmning and hawing for a while first!
You weren't expecting me to lie..Or were you?
10frank9
Web Wheeler
You weren't expecting me to lie..Or were you?
No way. Just a little dance...
No way. Just a little dance...
Really, the plan is to remove them in the not so distant future, which will render them undonatable, and install a set of EVO sliders once the Mrs and I agree on the configuration that will give her a flattish step similar to what is already there. But, hey, this is another one of those Pre- Wayalife mistakes that I'm slowly making right.
10frank9
Web Wheeler
Really, the plan is to remove them in the not so distant future, which will render them undonatable, and install a set of EVO sliders once the Mrs and I agree on the configuration that will give her a flattish step similar to what is already there. But, hey, this is another one of those Pre- Wayalife mistakes that I'm slowly making right.
I was trying to help convince her with my angled sliders.... Hope it worked!
