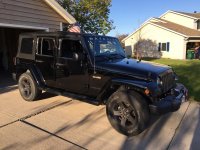
You are using an out of date browser. It may not display this or other websites correctly.
You should upgrade or use an alternative browser.
You should upgrade or use an alternative browser.
Oscar's No Build Thread
- Thread starter sipafz
- Start date
NecessaryEvil
Caught the Bug
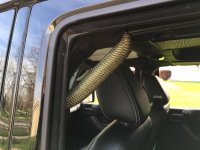
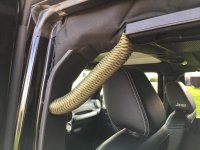
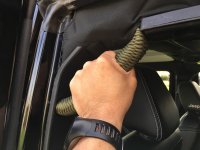
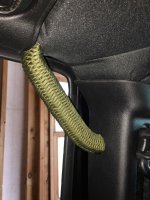
Those grab handles turned out good and I really like the wrap.
Sent from my iPhone using WAYALIFE mobile app
Sent from my iPhone using WAYALIFE mobile app
sipafz
Caught the Bug
Those came out really nice!!!
US Army Combat Vet. Afghanistan 2010-2011
Those grab handles turned out good and I really like the wrap.
Sent from my iPhone using WAYALIFE mobile app
Thanks guys! I really enjoyed this project and I'm thinking that maybe a set for the back seats might be next?
sipafz
Caught the Bug
Finished the rear grab handles last week:
Using 3/4" EMT and my 1/2" bender (because I don't know any better [emoji38]). First bend starting flush at the end and pulled to 60 degrees:
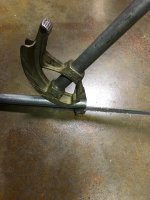
Measure out 4" and make the second bend to 60 degrees:
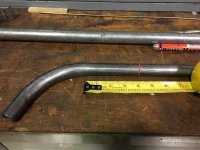
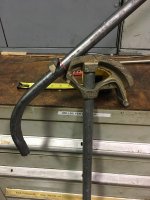
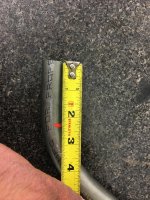
Measure out another 3" past the second bend and trim. At the starting end, measure out 2 1/4" and use a press or vise to flatten as shown:
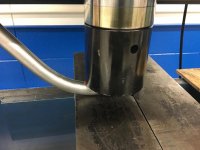
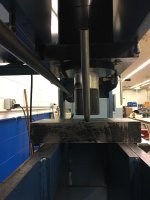
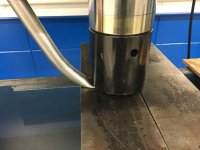
Making sure everything is square:
Use a vise and mallet to bend the tang as needed:
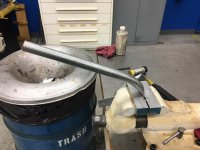
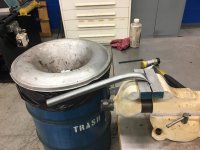
Measure out about 9" from the tang edge as shown:
(Note that the next few pictures do not show the second bend that you should have.)
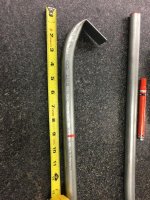
And press the rest of the end flat:
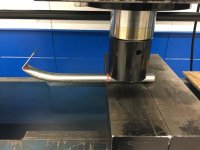
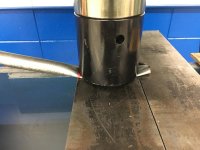
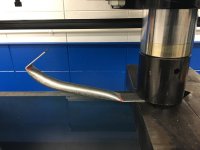
Use a vise and mallet to make the Speaker Bar bends:
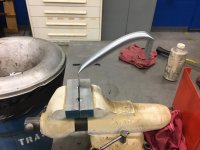
The top one tuned out better:
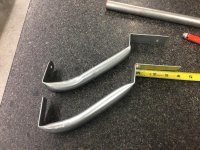
This should be more like 1 1/4" instead of 1 1/2" as shown:
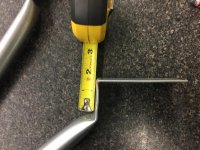


Using 3/4" EMT and my 1/2" bender (because I don't know any better [emoji38]). First bend starting flush at the end and pulled to 60 degrees:

Measure out 4" and make the second bend to 60 degrees:


Measure out another 3" past the second bend and trim. At the starting end, measure out 2 1/4" and use a press or vise to flatten as shown:


Making sure everything is square:


Use a vise and mallet to bend the tang as needed:


Measure out about 9" from the tang edge as shown:
(Note that the next few pictures do not show the second bend that you should have.)

And press the rest of the end flat:


Use a vise and mallet to make the Speaker Bar bends:

The top one tuned out better:

This should be more like 1 1/4" instead of 1 1/2" as shown:

sipafz
Caught the Bug
On the "B" pillar, remove the plastic and drill the existing hole with an "F" drill (if you have it) or 1/4" drill thru the next rib (about an inch and a half deep or so) and tap the hole to 5/16-18 through both ribs. The passenger side might have a harness anchor at this hole. Remove and reroute as needed:
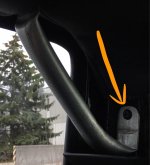
Next drop the sound bar and make a small incision in the roll bar padding for the top tang. Line up handle, mark hole locations and drill both holes to 11/32" diameter. Test fit mounting using existing sound bar bolt and 5/16-18x1 1/4" long button heads:
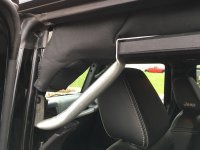
Carefully line up the plastic trim, mark handle pass through location and drill hole using 1 1/4" hole saw:
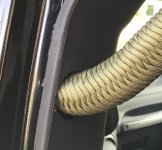
Add a custom paracord wrap and you're all set! [emoji481]

Next drop the sound bar and make a small incision in the roll bar padding for the top tang. Line up handle, mark hole locations and drill both holes to 11/32" diameter. Test fit mounting using existing sound bar bolt and 5/16-18x1 1/4" long button heads:

Carefully line up the plastic trim, mark handle pass through location and drill hole using 1 1/4" hole saw:

Add a custom paracord wrap and you're all set! [emoji481]
AZ Explorer
Caught the Bug
Very nicely done Sir!
Nice Oscar Mike. I have a slightly older 2014 JKU Oscar Mike. It's the first Jeep I've ever owned. Your story is great and I look forward to watching your build. Cheers!
Sent from my iPhone using WAYALIFE mobile app
Sent from my iPhone using WAYALIFE mobile app
sipafz
Caught the Bug
Great work on those. :thumb:
Very nicely done Sir!
Nice Oscar Mike. I have a slightly older 2014 JKU Oscar Mike. It's the first Jeep I've ever owned. Your story is great and I look forward to watching your build. Cheers!
Sent from my iPhone using WAYALIFE mobile app
Thanks gents! This is a very rewarding project because I get to see the results every time I get in the Jeep. Time and patience paid off as these grab handles turned out better than I ever imagined. I'm truly thrilled with the results!
NecessaryEvil
Caught the Bug
sipafz
Caught the Bug
As nicer weather draws closer and seeing other members sort out their doorless mirror dilemmas got me searching for my solution to this age old question.
In my quest to find the something compact, sleek, machined and black, I found these motorcycle mirrors on Amazon for cheap:
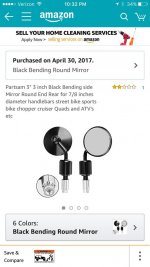
I wasn't sure how I was going to mount them, but that didn't stop me from clicking the "Ship It" button.
A few days later, they came in the mail:
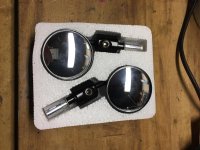
My initial reaction was, wow, fully machined metal mirror with a really nice finish! Now I just have to figure out how to mount them.
I started with stripping off the unnecessary hardware:
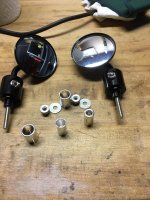
And found that the OE door nuts are the same thread as the mounting bolts [emoji848]:
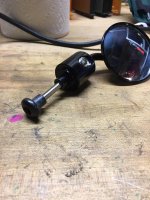
First I tried them on top of the upper door hinge:
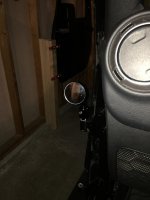
It was good for the drivers side, but not visible at the passenger side.
I flipped them to the bottom of the top hinge which was better on the passenger side:
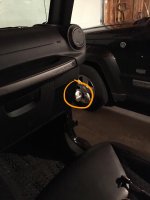
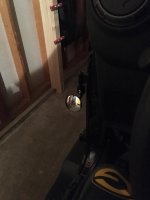
But, once my wife gets in with all her shit I think the line of vision will be broken.
I then removed a bolt from the "A" pillar and tried that position:
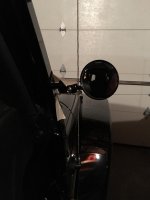
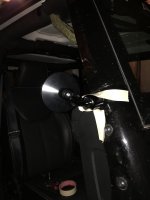
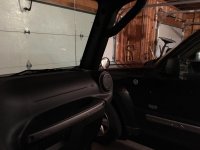
Yes, I like that a lot. Now I need to modify the mounting. I cut the mounting pilot off the post, filed it smooth, tapped the existing hole, cut the head off a spare bolt and installed the stud with some Loctite:
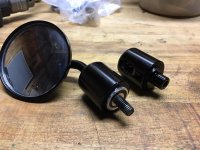
Now it just screws right into the "A" pillar:
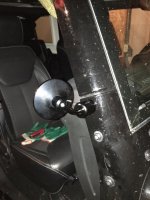
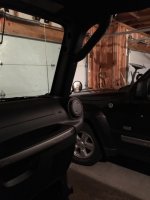
I have to finish up the drivers side and will post up some better pictures later today.
In my quest to find the something compact, sleek, machined and black, I found these motorcycle mirrors on Amazon for cheap:

I wasn't sure how I was going to mount them, but that didn't stop me from clicking the "Ship It" button.
A few days later, they came in the mail:

My initial reaction was, wow, fully machined metal mirror with a really nice finish! Now I just have to figure out how to mount them.
I started with stripping off the unnecessary hardware:

And found that the OE door nuts are the same thread as the mounting bolts [emoji848]:

First I tried them on top of the upper door hinge:

It was good for the drivers side, but not visible at the passenger side.
I flipped them to the bottom of the top hinge which was better on the passenger side:


But, once my wife gets in with all her shit I think the line of vision will be broken.
I then removed a bolt from the "A" pillar and tried that position:


Yes, I like that a lot. Now I need to modify the mounting. I cut the mounting pilot off the post, filed it smooth, tapped the existing hole, cut the head off a spare bolt and installed the stud with some Loctite:

Now it just screws right into the "A" pillar:


I have to finish up the drivers side and will post up some better pictures later today.
JeepJeep75
New member
That is a great spot you found for mounting your mirrors! How do you get the mirror tight in its new mounting position? I would've never been that lucky to have the fastener tighten up with the mirror in that position. Nice mirrors to! [emoji106]
Sent from my iPhone using WAYALIFE mobile app
Sent from my iPhone using WAYALIFE mobile app
sipafz
Caught the Bug
Thank you! Its my favorite part!
sipafz
Caught the Bug
That is a great spot you found for mounting your mirrors! How do you get the mirror tight in its new mounting position? I would've never been that lucky to have the fastener tighten up with the mirror in that position. Nice mirrors to! [emoji106]
Sent from my iPhone using WAYALIFE mobile app
When I modified the post and added the threaded stud (which is nothing more than a bolt that I cut the head off of) and used Loctite to glue into place:
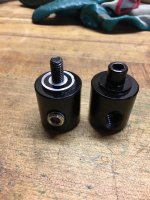
Now I can just turn the post in until it bottoms on the "A" pillar:
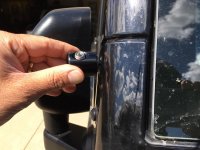
And tighten by hand:
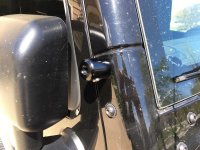
The boss on the post fits inside the counterbore on the "A" pillar for a clean look:
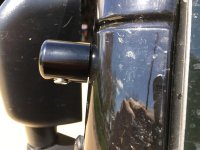
Then attach the mirror:
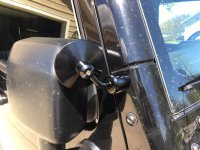
Admittedly, I got real lucky with how this turned out since I had absolutely no real plan when I bought them.
DannyD
New member
JeepJeep75
New member
Admittedly, I got real lucky with how this turned out since I had absolutely no real plan when I bought them.
Well they turned out pretty trick looking! Nice job! That's exactly how my mirrors went to. I had no plans on using conduit for the rods, or even using a twin-tube post. The project kinda led itself along. [emoji106]
Sent from my iPhone using WAYALIFE mobile app
sipafz
Caught the Bug
The mirrors look great
Thanks! I still have some work to finish on the drivers side and of course some 80 degree days would be nice so I can try them out!
Well they turned out pretty trick looking! Nice job! That's exactly how my mirrors went to. I had no plans on using conduit for the rods, or even using a twin-tube post. The project kinda led itself along. [emoji106]
Thank you! Good idea to start a separate mirror thread - great timing! I hope I find that they are big enough to be useful. I was going to try the mini mirrors on the vents, but read that the passenger side was pretty useless. If these don't work out, I just may make something similar to what you made. Gotta love this hobby we have! [emoji482]
sipafz
Caught the Bug
Finished the mirror modification and tried them out:
View attachment 257512
View attachment 257513
View attachment 257514
View attachment 257515
The garbage cans represent cars in the blind spot:
View attachment 257516
View attachment 257517
Drivers perspective - drivers side:
View attachment 257518
Passenger side:
View attachment 257519
I'm pretty happy with how they turned out.

