You are using an out of date browser. It may not display this or other websites correctly.
You should upgrade or use an alternative browser.
You should upgrade or use an alternative browser.
Oscar's No Build Thread
- Thread starter sipafz
- Start date
ka-bar
Member
Awesome thread sipafz! It’s great you have the skills and equipment to fab your own stuff. I’m a carpenter, and while I’ve seen some wood bumpers, and even a pic of a wood control arm [emoji50], it’s not really a transferable skill set. [emoji23]
Sent from my iPhone using WAYALIFE mobile app
Sent from my iPhone using WAYALIFE mobile app
sipafz
Caught the Bug
Awesome thread sipafz! It’s great you have the skills and equipment to fab your own stuff. I’m a carpenter, and while I’ve seen some wood bumpers, and even a pic of a wood control arm [emoji50], it’s not really a transferable skill set. [emoji23]
Sent from my iPhone using WAYALIFE mobile app
Thanks for the kind words! My Dad and Grandfather are/were both self employed carpenters that built houses from start to finish, furniture and nick nacks. I didn’t inherit those skills, but I hope to expand my abilities someday.
DeJkUnlimited
Caught the Bug
Initially (before I looked closer at the pictures) I was wondering how you kept the extension from pivoting on the lower bolt, but I realized how tight your clearances were that it won’t allow for any movement.So this is what showed on the main screen of my app preview:
View attachment 298053
What was the rest of your question that you didn’t ask? If you think that I don’t like going on and on about about this stuff, you’re wrong!
sipafz
Caught the Bug
Initially (before I looked closer at the pictures) I was wondering how you kept the extension from pivoting on the lower bolt, but I realized how tight your clearances were that it won’t allow for any movement.
While that is true and probably sufficient, there is a bolt that that will go through an existing hole in the bottom of the bracket into the extension where the arrow shows:
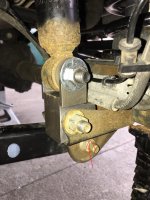
I transfer punched the location during the dry fit and it will be drilled and tapped for a 6 or 8mm bolt prior to paint. That should help insure that everything stays tight.
DeJkUnlimited
Caught the Bug
Gotcha! Thanks for the clarification.
sipafz
Caught the Bug
I installed the front shock extensions and officially finished my DIY Budget Boost!
They were sprayed with some enamel and “baked” so they look pretty:
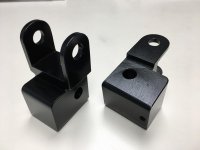
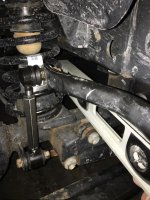
Then installed including an extra bolt through the bottom of the bracket to hold everything nice and tight:
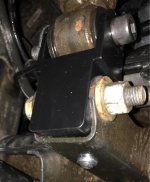
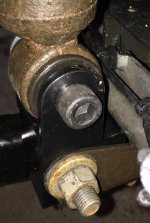
The complete front assembly including spacers, bump extensions and now the shock extensions:
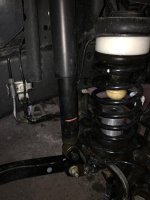
I did some measuring of the rear shock travel as compared to the hard bump stop and found that rear shock extensions are not possible due to the small amount of lift in the rear. That makes this project complete.
I ended up spending about $20 for fasteners. All other materials were leftover surplus and free to use. In all, the measuring, designing, manufacturing and installation of parts took about 30 hours to complete. It sounds like a lot, but for me it’s a hobby and gives me something to do when my kid is at club swim practice or when I need to be at work on Saturday mornings for shop support.
They were sprayed with some enamel and “baked” so they look pretty:

Then installed including an extra bolt through the bottom of the bracket to hold everything nice and tight:


The complete front assembly including spacers, bump extensions and now the shock extensions:

I did some measuring of the rear shock travel as compared to the hard bump stop and found that rear shock extensions are not possible due to the small amount of lift in the rear. That makes this project complete.
I ended up spending about $20 for fasteners. All other materials were leftover surplus and free to use. In all, the measuring, designing, manufacturing and installation of parts took about 30 hours to complete. It sounds like a lot, but for me it’s a hobby and gives me something to do when my kid is at club swim practice or when I need to be at work on Saturday mornings for shop support.
Jsouder53
Hooked
I ended up spending about $20 for fasteners. All other materials were leftover surplus and free to use. In all, the measuring, designing, manufacturing and installation of parts took about 30 hours to complete. It sounds like a lot, but for me it’s a hobby and gives me something to do when my kid is at club swim practice or when I need to be at work on Saturday mornings for shop support.
I’m very glad to hear that it worked out perfect for you [emoji106]
Sent from my iPhone using WAYALIFE mobile app
TrainWreck618
Caught the Bug
sipafz
Caught the Bug
Turned out awesome Chris! Nice work man!:thumb:
Really impressive stuff! Haven't found anything that beefy looking for sale.
Thanks gents! I ordered some zinc coated, hex head, flange bolts and flange nuts to replace the Socket Head Cap Screws that are pictured. The black oxide bolts will rust quickly not to mention that the cap screws fill with crap.
Jsouder53
Hooked
This happened this morning:
Very cool process! Glad it’s all level!
Sent from my iPhone using WAYALIFE mobile app
Jsouder53
Hooked
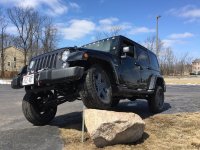
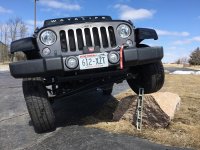
The level standing against the rock is 2 feet. Oscar is up 20” and wants more, but the rock is starting wobble when I go higher. The shock extensions have worked out very well:
Awesome flex for a homemade(professional quality) kit!!! [emoji106]
Sent from my iPhone using WAYALIFE mobile app
JKbrick
Active Member
This happened this morning:
View attachment 298552
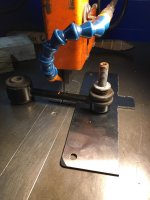
Used the belt sander to clean up the ends and put a nice lead on the rod:
View attachment 298553
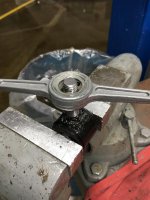
Kind of like wrestling a bear:
View attachment 298554
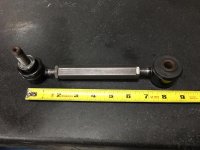
5 1/2” has grown to 8” [emoji15]:
View attachment 298555
Sway bar is now completely level:
View attachment 298556
Very nice those look great
Sent from my iPad using WAYALIFE mobile app

