I settled on the Method 105 beadlocks and the Nitto Trail Grapplers. So far I am pleased with them. No issues what so ever, other than they are made in China. The wheels come with a valve stem and grade 8 bolts.
You will need a torque wrench capable up to 25 ft/lbs, 1/2 socket (extensions are helpful), a tire spoon, Simple Green (or any soapy spray), and an air compressor.
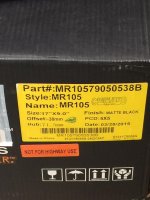
They were packaged well.
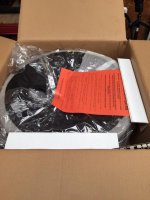
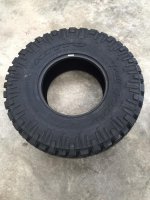
Nitto's ordered from Discount Tire Direct and arrived in 2 days.
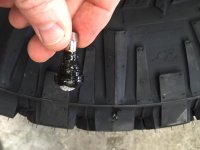
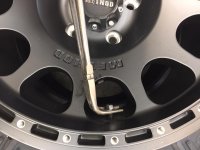
I opted not to install TPMS sensors, so I put in the valve stem that came with the wheel. Spray a little Simple Green on the hole and the stem then gentlty pull it through while pressing on the back side with your thumb. I used a set of bent needle nose with long arms. Make sure you screw the valve stem cap on so you have something to pull against and you don't damage the threads.

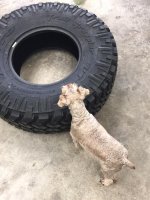
Make sure your little buddy approves of your work and lay your tire on the ground. Make sure you have the side you want facing out to be facing down.
Spray the lip of the tire facing up and drop the rim,beadlock side first, through the tire. You may have to wiggle it a bit, but it should drop in with ease. Then I placed it on top of a 5 gallon bucket and centred the tire onto the rim. I used an old motorcycle tire wrench to just ease the lip of the tire to its final resting spot.
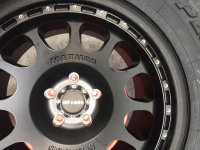
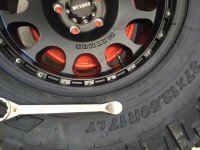
Now comes the fun part. Once you have the tire centered, lay the ring on the outside of the tire. Make sure you put a dab of anti-seize paste on the bolt threads. Using your valve stem as a guide insert the first bolt and screw down about 2 turns. From there put a bolt in the 12, 3, and 9 o'clock possitions and screw them down about 2 turns. Now there will be 5 spaces between each bolt you have installed. Place a bolt in between the ones you have already installed (you should have a bolt in every third hole now). Now you can start turning the bolts a few more turns. After you have got the ring bolts started you should now put in the rest of the bolts. Using the valve stem as a guide start screwing them down a few turns at a time using a criss cross pattern. I did this by hand as I didn't want to use any more force than was necessary to put them on. Once you have them snugged up by hand now go back with your torque wrench. I went 11.5 ft/lb on the first round followed by 23 ft/lb on the second round. Method recommends 10-15 ft/lb on the first round and 20-25 ft/lb on the second round.
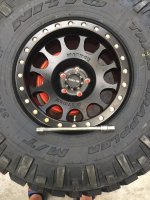
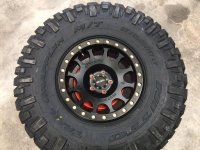
After everything was torqued down I aired them up to 30 psi. After putting them on the jeep I settled in at 26 psi.
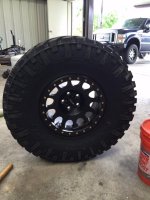
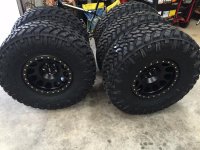
The first wheel took about 35-40 minutes to complete. The rest were closer to 30 minutes each. I took my time screwing everything down.
Re torqued after 50 miles. I checked again after 200 miles and nothing has moved.
Used my Flashpaq to set TPMS at zero and have had no issues.
I have about 500 miles on them right now, and have yet to have them ballanced. They were smooth from the first mile. I'm sure at some point I will have to get them ballanced, but there hasn't been a need yet. My local DT charges $20 per wheel for lifetime ballance.
Hope someone gets some helpful info out of this.
Thanks for reading
JJ
You will need a torque wrench capable up to 25 ft/lbs, 1/2 socket (extensions are helpful), a tire spoon, Simple Green (or any soapy spray), and an air compressor.

They were packaged well.

Nitto's ordered from Discount Tire Direct and arrived in 2 days.

I opted not to install TPMS sensors, so I put in the valve stem that came with the wheel. Spray a little Simple Green on the hole and the stem then gentlty pull it through while pressing on the back side with your thumb. I used a set of bent needle nose with long arms. Make sure you screw the valve stem cap on so you have something to pull against and you don't damage the threads.


Make sure your little buddy approves of your work and lay your tire on the ground. Make sure you have the side you want facing out to be facing down.

Spray the lip of the tire facing up and drop the rim,beadlock side first, through the tire. You may have to wiggle it a bit, but it should drop in with ease. Then I placed it on top of a 5 gallon bucket and centred the tire onto the rim. I used an old motorcycle tire wrench to just ease the lip of the tire to its final resting spot.


Now comes the fun part. Once you have the tire centered, lay the ring on the outside of the tire. Make sure you put a dab of anti-seize paste on the bolt threads. Using your valve stem as a guide insert the first bolt and screw down about 2 turns. From there put a bolt in the 12, 3, and 9 o'clock possitions and screw them down about 2 turns. Now there will be 5 spaces between each bolt you have installed. Place a bolt in between the ones you have already installed (you should have a bolt in every third hole now). Now you can start turning the bolts a few more turns. After you have got the ring bolts started you should now put in the rest of the bolts. Using the valve stem as a guide start screwing them down a few turns at a time using a criss cross pattern. I did this by hand as I didn't want to use any more force than was necessary to put them on. Once you have them snugged up by hand now go back with your torque wrench. I went 11.5 ft/lb on the first round followed by 23 ft/lb on the second round. Method recommends 10-15 ft/lb on the first round and 20-25 ft/lb on the second round.


After everything was torqued down I aired them up to 30 psi. After putting them on the jeep I settled in at 26 psi.


The first wheel took about 35-40 minutes to complete. The rest were closer to 30 minutes each. I took my time screwing everything down.
Re torqued after 50 miles. I checked again after 200 miles and nothing has moved.
Used my Flashpaq to set TPMS at zero and have had no issues.
I have about 500 miles on them right now, and have yet to have them ballanced. They were smooth from the first mile. I'm sure at some point I will have to get them ballanced, but there hasn't been a need yet. My local DT charges $20 per wheel for lifetime ballance.
Hope someone gets some helpful info out of this.
Thanks for reading
JJ


