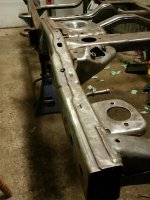
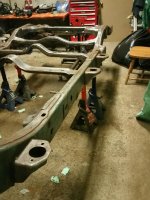
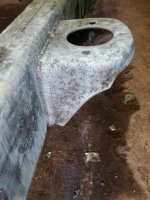
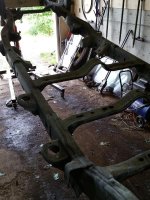
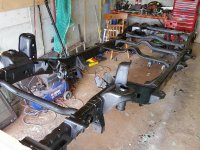
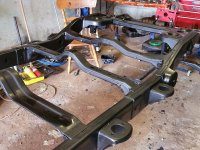
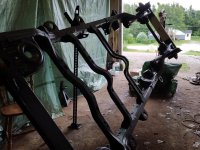
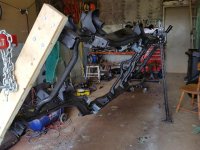
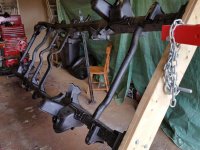
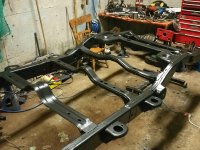
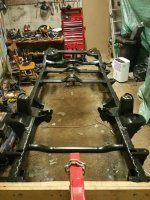
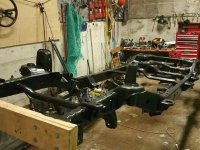
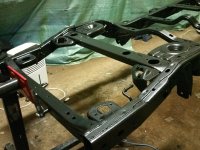
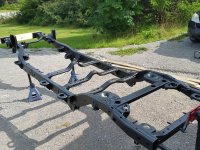
BIG BAD WOLF Build ~~~~

Part 4 - Removal of engine/tranny and components.


At this point it's time to strip what is left.

First was the exhaust system. The bolts holding the pipes to the manifolds were seized BAD, I had to cut them off. During the cutting I glazed a manifold and put a slight hole in it :grayno: I will have to fill the hole or purchase a set of aftermarket manifolds. I do plan on doing an engine swap but I may put some wear on my V6 first. Where I live would be hard to sell it so I might as well use it. It's a set of 60's or an engine swap.. In my mind 60's come first.

Second was the engine. I decided to leave the transmission attached but my hoist would not go high enough to clear so I had to muscle the tranny over. My hoist is a pain because the front wheels do not rotate so maneuvering was insane. If I had a larger work area it would be no big deal but when you back over a concrete lip with that much weight pushing it back over is not fun.

The rest I didn't take photos of, I just got carried away with work vs taking pictures. I will try to add further photos.

My fuel tank was half full so it was heavy. I decided to use two ratchet straps for safety and used a motorcycle lift to take the weight and role it out. I will note I HAD to get someone to help carry the tank out of the garage.
The steering box was removed and getting the drag link off the pitman arm was a PITA. I would not suggest heat here as it could travel to the box. In my case using a pickle fork did the job.

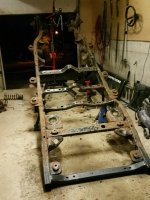
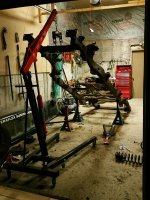
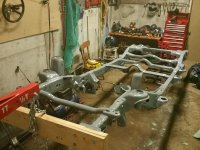
I used jack stands the whole time but had planned to create a swivel so I could rotate the frame to work on it. At one end I used an engine stand and the other I used wood to mount on with a hole with a sleeved bolt that could rotate.

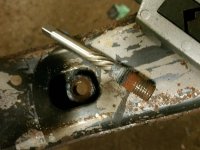
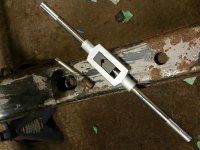
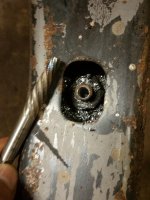
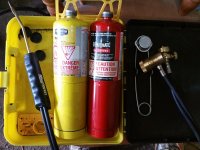
Having ran out of oxygen for my torch I broke a couple rear sway bar bolts and one cross member bolt. I drilled them and used an easy out. Of course during the process I had drill bits breaking inside the bolt and even a broken easy out. I knew this could happen so I made sure to drill all the way through the bolt so I could access the hole from the top in case of an issue.
For reference there are nuts welded inside the frame for the bolts. From here I drilled a small hole in the top of the chassis above the lower bolt I had drilled through. I used a thin punch to slip down and knock the obstructions out of the bolt. It worked! PITA! SERIOUS LESSON here, don't get impatient and make sure to use a torch. This was my fault.
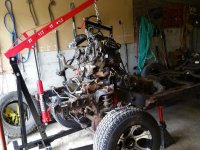
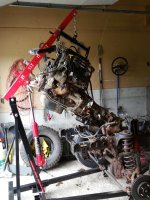
20160718_145928.jpg20160718_152159.jpg20160719_223334.jpg20160719_223349.jpg20160728_232838.jpg20160728_232842.jpg20160728_231349.jpg20160804_161516.jpg


More photos to come here.
 
Last edited:
Part 5 - Cleaning, paint removal and internal coating of chassis.


It was time to remove paint, for this I used Aircraft paint stripper made by POR-15. This stuff is NASTY so be sure to use a respirator and have NO skin exposed. I let it sit for around 20 minutes, although it worked I should have left it much longer. It was no big deal I just had to do more sanding than I had planned. View attachment 218079

I now kill two birds with one stone, wash off the paint stripper and clean out debris inside chassis. For this I used a gas powered pressure washer but please note wear safety glasses/face shield and your suit as the paint stripper may splash you.

The amount of debris that came out was nasty, mud, sand, rocks, rust, but I was quickly satisfied knowing it was all out. This process also allowed me to see exactly where water drains and where it could sit. I do not have images of this part but I will note most of the water drains from the large hole under where the rear lower control arms are. Just use gravity as your friend.. I used my chassis holder/hoist on a track to give me plenty of slope. View attachment 218080

It can be said introducing water into the chassis is counter productive but the key is to make certain you dry it accordingly. The trick here was to tape over all the small holes (about 50 of them) and use a heat gun inserted in the end of the frame opening. I took around 45 minutes on each side making sure it was fairly dry. At this point I just allowed the chassis to sit for a couple days prior to coating.

After the time passed I inspected it with a flashlight and concluded it was bone dry. It was now time to coat the inside of the chassis with Eastwood Internal Frame Coating.

The reason I am doing this step prior to rust removal on the exterior is so particles that fall inside the chassis will be easier to blow out with the smooth surface. Also, any leakage from the holes will be sanded away with the rust.

I have no photos but I used 6 cans of black coating. They come with a 2ft hose with a 360 degree nozzle. A trick with the curled up hoses is to heat them so they become straight. Follow the instructions and take your time. It is easy to miss areas so inspect often.

Once dry the messy fun begins.
 
Last edited:
Part 6 - Rust Removal & neutralizing + metal prep.


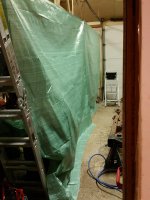
It's time to make a serious mess. Before I start I put up a divider to stop dust from settling on my chassis etc. 20160720_005423.jpg

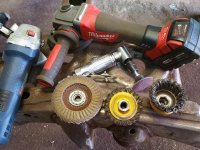
I was not certain which rust removal tool would work best so I tried different ones. I found the full circle wire wheels to last the longest. The cup wire wheel proved to be useless. Flap disks worked well but did not last long. I need to note I own three grinders and the vibration was INSANE with my Bosch and cheapo. In the end my Milwaukee was much better but it was cordless which resulted in much needed patience. I used vibration gloves which helped. Use a filter mask and eye protection, this stuff is messy.
20160804_161423.jpg

To finish the job I tried a die grinder with cookie style sanding disks. This would have been great but my small air compressor was not up up the job. I put the adapter on a Dewalt drill and presto it worked pretty good! This helped with tight spots, add a wire brush and you will be set.

It took some elbow grease but I feel I did a good job at getting all the rust I could. A media blaster would have been a better way but I saved a lot of $ here.
20160728_233753.jpg20160728_233822.jpg

It was not time to use POR-15 Marine Clean to clean the surface. This has to be rinsed off after 15 minutes. Take note I already have the inside of the chassis coated so I don't need to worry about it introducing rust.

After all this is said and done, you can sand all you want there is no way you will get the rust in any pits. For this I used the POR-15 metal prep which neutralizes rust and etches the metals surface. I sprayed it on and followed instructions. After it was done it looked like this: 20160805_182219.jpg20160805_182251.jpg

Make sure you coat your frame ASAP, rust will start coming back before you know it.
 
Last edited:
Part 7 - Painting


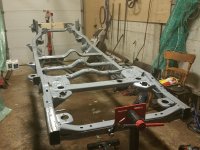
It is time to coat the frame with POR-15. This product will prevent rust and encapsulate the surface, not allowing oxygen to get at it.

I decided to do my first coat with the color/shade grey. This makes for an easier second coat. This stuff dries rock hard. Take note, you must add the second coat while it is dry but tacky to the touch. If you fail to do this you have to sand the whole chassis for adhesion purposes. 20160808_214729.jpg20160808_214754.jpg20160808_214825.jpg

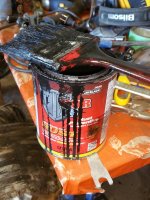
I was impressed with the first coat.. On to the second which is black. Note: I used two different sizes of brushes and rotated the frame on the stand which was a life saver. I did the first coat on the ground laying down, what a disaster. Try removing POR-15 from your face and head, it's not fun. Cover your skin!! 20160816_172310.jpg20160818_135540.jpg20160818_135551.jpg20160818_153224.jpg20160818_153238.jpg20160818_153246.jpg20160818_201320.jpg

Next is the POR-15 Bedliner coatings., First, I sanded the entire chassis using 80 grit sandpaper. I did this by hand as using an electric sander proved to be a bad idea.

I proceeded with two coats, 4 hours apart. I used two dehumidifiers as with this stuff it needs to be very dry, and it was raining outside (I painted inside). The good news is this stuff washes off with soap and water. Again, with all these products use a respirator. I also used a headlamp the entire time.
20160818_201355.jpg20160818_201428.jpg20160818_201517.jpg

This stuff is thick like molasses, it gives you confidence and was honestly half fun to apply.

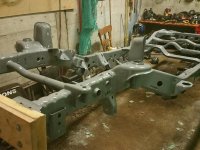
Make sure to pay special attention to the underside, there are hidden places that need coating. One would have to do it them selves to see what I mean.

Here is the finished final coat. It's such a nice sight to see.. all brand new again! 20160821_155515.jpg20160821_155515.jpg
 
Last edited:
This "rebuild" is looking great, amazing how much work you doing and im sure you'll be might proud when its all done. Keep up the good work!
 
This is inspiring. I'm going to put a winch on my JKU next weekend. Now I feel inadequate and should be doing more.
 
Thanks everyone! I greatly appreciate everyones positive comments.

This build won't happen overnight as I have to save for 60's etc, but I will continue to post updates with details.


A note, I am going with long arms so once the set arrives I am cutting off the control arm mounts. I went with the Synergy long arm kit with brackets, reason being the Evo kit is not available here and I'm content with the Synergy arms. I will also be doing coilovers, possibly an evo lever set up in the back but I'm not certain.

Over the winter I will be creating a custom dash and console. There is so much work to do, honestly more than I had imagined.

I plan to do a Chevy swap but that will have to wait as I'm using extra funds to do the suspension right the first time. I don't think I am adding bypass shocks but I may later on. I'm doing mostly slow crawling and not high speed stuff. Once the Chevy is installed I'll look at the bypass options as having some power will be fun.

If anyone has any questions feel free to post.
 
Are you going to coat the inside of the frame?

Yep! I actualy did earlier in the thread but there are no photos. I used Eastwood internal frame coating with the 2ft hose. I used 6 cans. Otherwise, I will spray Rust cure - Formula 3000 into the frame yearly.
 
Yep! I actualy did earlier in the thread but there are no photos. I used Eastwood internal frame coating with the 2ft hose. I used 6 cans. Otherwise, I will spray Rust cure - Formula 3000 into the frame yearly.

Nice, I'm wanting to coat the inside of my frame too. Was it a real mess or should I just park on a tarp or something? Your project looks great, I subscribed
 
Awesome thread! "Lone Wolf" might be a better title? I'm impressed with your willingness to take on this huge undertaking and love the ingenuity behind your problem solving! This reminds me of when I was a teenager and swapped engines in my parents garage. The year was 1989 and my first car was a worked over '75 Camaro. Of course I blew the 350 (small block) after a short time so got a barn stored 396 (big block) from a '67 Chevelle, stripped it down and completely re-built it for my automotive senior project. The swap was done later that summer and we needed to beef up the trusses in the garage since we used a come along to pick and place the engines. Nothing like the elaborate structure you designed, just reminded me of it.
Someday I hope to follow in your footsteps and find an old CJ5 or Willy's to bring back to glory. In the meantime I will continue to follow your progress. Kudos and Welcome to Wayalife!
 
Nice, I'm wanting to coat the inside of my frame too. Was it a real mess or should I just park on a tarp or something? Your project looks great, I subscribed

Thanks!

In my case I didn't find there to be any heavy rust flakes that came out, more muddy water with a few rocks. I have seen some older frames having major rust inside, luckily that was not me.

Were you thinking of pressure washing inside ? A vaccum and air compressor sounded nice until I tried it. Perhaps my air compressor was just underpowered. I found mud and grit has settled in chunks and needed diluting to break down.

Were you doing it outside ? I did mine outside but I have a gravel driveway. If you have a nice driveway a cheap tarp would be a good idea. If you lift the front up of the Jeep the water will mostly come out of the large rectangle holes near the rear control arms. At least, that's how mine went.

Just make sure it's bone dry prior to coating and inspect with a flashlight after your coats are done. It's hard to get 100% coverage but it's better than nothing.
 
Awesome thread! "Lone Wolf" might be a better title? I'm impressed with your willingness to take on this huge undertaking and love the ingenuity behind your problem solving! This reminds me of when I was a teenager and swapped engines in my parents garage. The year was 1989 and my first car was a worked over '75 Camaro. Of course I blew the 350 (small block) after a short time so got a barn stored 396 (big block) from a '67 Chevelle, stripped it down and completely re-built it for my automotive senior project. The swap was done later that summer and we needed to beef up the trusses in the garage since we used a come along to pick and place the engines. Nothing like the elaborate structure you designed, just reminded me of it.
Someday I hope to follow in your footsteps and find an old CJ5 or Willy's to bring back to glory. In the meantime I will continue to follow your progress. Kudos and Welcome to Wayalife!


Thank you! I'm glad it reminded you of old times, those are priceless memories.

Honestly, start your dream build when you can.. It's a lot of work as I'm discovering but I'm sure it will be worth it. Life is just way too short to not go all in.. This is coming from experience as I'm recovering from a 3 year long health battle.. I thought I was toast. But here I am.. I'm going all out because I see things differently today.

Lone wolf sounds good.. I chose Big Bad Wolf as it reminds me of the 3 little pigs fairytales as a child... Plus it was not taken haha. The Jeep is going to be big and baddass. I'd be surprised if Lone Wolf is not taken.. Good suggestion though.


Cheers!
 
Top Bottom