You are using an out of date browser. It may not display this or other websites correctly.
You should upgrade or use an alternative browser.
You should upgrade or use an alternative browser.
Amp'd Up JKU Sport Build
- Thread starter seansheds
- Start date
JeepJeep75
New member
I can't wait to see this thing all grown up! My garage is always open too. Haha! Just ask Mike, he is in there right now.
Sent from my SAMSUNG-SM-G935A using WAYALIFE mobile app
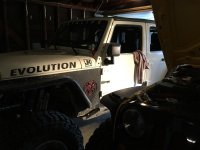 haha, busted!!
Sent from my iPhone using WAYALIFE mobile app
dillard09
New member
Hey I know that jeep. Just haven't seen it in a few weeks!
Sent from my SAMSUNG-SM-G935A using WAYALIFE mobile app
JeepJeep75
New member
dillard09
New member
That's good but hard to drive if your control arm can just fall out of the frame side mount! Man I need to get that fixed for good!
Sent from my SAMSUNG-SM-G935A using WAYALIFE mobile app
Crystaliner
Doesn't know shit about wheeling
seansheds
New member
I'll be installing the lift today. Big updates to come!
fiend
Caught the Bug
dillard09
New member
Crystaliner
Doesn't know shit about wheeling
Crystaliner
Doesn't know shit about wheeling
Oh lord...hope everything is going well and no hiccups.
Sent from my iPhone using WAYALIFE mobile app
Sent from my iPhone using WAYALIFE mobile app
seansheds
New member
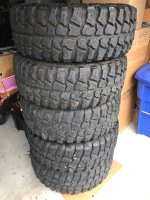
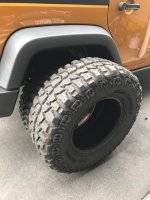
Well, it was a huge weekend for both myself and the Jeep. A new bumper, 4" Enforcer, and 35's baby!
Let me start by saying this is the first big project I've ever done on a vehicle. I'm pretty green when it comes to wrenching, but I'm happy to say that after this weekend I think I moved up to yellow! It was intimidating taking on a lift project by myself, but I knew I had some great guys standing by if I needed some help so that put my mind at ease. I didn't go crazy with photos because this install has been done plenty of times. Plus I knew I was going to need all the time I had over the weekend to get it all done.
It was suggested to me by JeepJeep75 that I start with the rear brake lines so that's what I did. I re-routed the hard lines to the top of the frame. I had planned to have them come out in the rear shock mount area but I realized I needed some self-tapping bolts or at least some SS hardware to make it work. Since my wife was at work and I didn't have a car I opted to just use the stock mount. I think it will be fine since at least the hard line is out of the way.
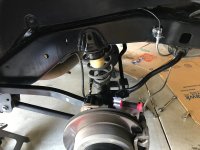
After the brake lines were done I removed the sway bar links, shocks, and springs. Then it was time to do some cutting for the rear track bar bracket.
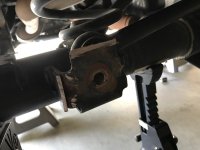
The rest of the rear went smoothly so there were minimal F-BOMBS, and here's the rear all done. :thumb:
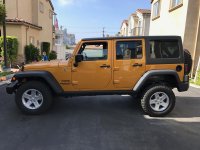
Let me start by saying this is the first big project I've ever done on a vehicle. I'm pretty green when it comes to wrenching, but I'm happy to say that after this weekend I think I moved up to yellow! It was intimidating taking on a lift project by myself, but I knew I had some great guys standing by if I needed some help so that put my mind at ease. I didn't go crazy with photos because this install has been done plenty of times. Plus I knew I was going to need all the time I had over the weekend to get it all done.
It was suggested to me by JeepJeep75 that I start with the rear brake lines so that's what I did. I re-routed the hard lines to the top of the frame. I had planned to have them come out in the rear shock mount area but I realized I needed some self-tapping bolts or at least some SS hardware to make it work. Since my wife was at work and I didn't have a car I opted to just use the stock mount. I think it will be fine since at least the hard line is out of the way.

After the brake lines were done I removed the sway bar links, shocks, and springs. Then it was time to do some cutting for the rear track bar bracket.

The rest of the rear went smoothly so there were minimal F-BOMBS, and here's the rear all done. :thumb:

seansheds
New member
It was late afternoon when I finished the rear so rather than getting into the front I decided to get the driveshaft in. I removed the old one no problem. It popped right now. The Adams 1310 I was installing was on a rig or two before and I was 99% sure I had all the hardware, but when I went to put the flange on the transfer case the stock nut was way too big. WTF? A quick text to the boys and I found out I need to grind the stock one down so it fits. I decided to do that tomorrow and call it a day.
It's amazing how sore you are when you don't do this stuff. All the up and down and crawling around had me aching everywhere!
It's amazing how sore you are when you don't do this stuff. All the up and down and crawling around had me aching everywhere!
seansheds
New member
It's now Sunday morning and I got started bright an early. I knew the tire shop closed at 4 so my goal was to have everything finished by 3:30 so I could make it over there.
Let's get to it...
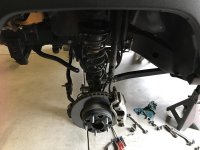
After much research I chose to use the MetalCloak front shock relocation brackets over the EVO ones. I studied the geometry and the way MetalCloak rotates the bottom of the shock just makes more sense to me. Rather than binding on the bushing it can rotate freely as the suspension flexes. I guess time will tell if it was the correct choice.
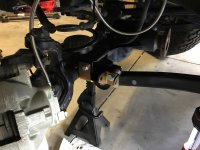
As I was working through the front I ran into a little snag. To mount the front bump stop you need to drill a hold in the factory base, and then thread in a bolt using a self-tapping 15mm bolt. Well, there was no way I was getting that bolt to thread even with my massive biceps :rolleyes2: I needed a 15mm socket driver but the largest I had was 10mm. My neighbor is always working on cars and loaned me some tools already so I went over to see if he had one. Of course not. I think it's the only tool he didn't have. After trying to MacGyver something we struck out. Time to use a lifeline so I called JeepJeep75 and he came right over to bail me out. He had a cordless impact driver and an adapter that worked perfectly so what would have taken me an hour to 2 minutes for both sides. Thanks Bro!
After that was out of the way I was able to put the springs and shocks in and at that point the only thing left was the draglink.
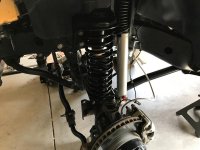
I got the draglink all in and the front finished up!
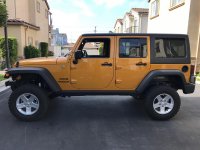
Damn, it's high and the tires aren't even on! :rock:
I was super stoked I was able to do the install myself. I learned a lot and most importantly I know how it all goes together in case I need to make field repairs.
Let's get to it...

After much research I chose to use the MetalCloak front shock relocation brackets over the EVO ones. I studied the geometry and the way MetalCloak rotates the bottom of the shock just makes more sense to me. Rather than binding on the bushing it can rotate freely as the suspension flexes. I guess time will tell if it was the correct choice.

As I was working through the front I ran into a little snag. To mount the front bump stop you need to drill a hold in the factory base, and then thread in a bolt using a self-tapping 15mm bolt. Well, there was no way I was getting that bolt to thread even with my massive biceps :rolleyes2: I needed a 15mm socket driver but the largest I had was 10mm. My neighbor is always working on cars and loaned me some tools already so I went over to see if he had one. Of course not. I think it's the only tool he didn't have. After trying to MacGyver something we struck out. Time to use a lifeline so I called JeepJeep75 and he came right over to bail me out. He had a cordless impact driver and an adapter that worked perfectly so what would have taken me an hour to 2 minutes for both sides. Thanks Bro!
After that was out of the way I was able to put the springs and shocks in and at that point the only thing left was the draglink.

I got the draglink all in and the front finished up!

Damn, it's high and the tires aren't even on! :rock:
I was super stoked I was able to do the install myself. I learned a lot and most importantly I know how it all goes together in case I need to make field repairs.
seansheds
New member
Unfortunately, I finished up the lift at 4:15 and the tire shop was closed. No biggy, I'll just get my new Fishbone bumper installed!
Out with the old!
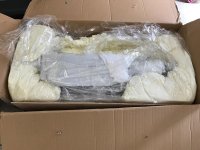
Packing was great. It was well wrapped and the airspace filled with foam. It actually took a bit of work to get it all unwrapped, but that's a good thing.
No parts missing and shiny, new powder-coating!
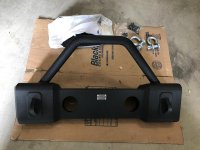
The install was very easy and straight forward, although there were no instructions included. A quick visit to youtube and they had an install video. Some clips slid onto the fog light mounting brackets and then the lights screwed in quickly. I mounted the winch plate using four supplied bolts, but I didn't drill the two holes for the winch since I don't have a winch yet. Then I just lifted the bumper into place the the bolts slid right onto the factory mounting plates. Everything lined up perfectly and 8 washers and nuts hold it on just like the factory bumper. If I had a winch I probably would have needed another person to help lift it on.
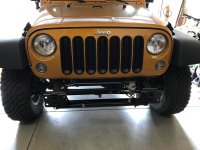
And here it is!
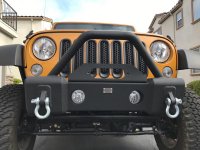
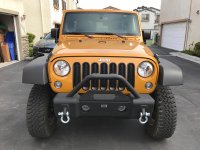
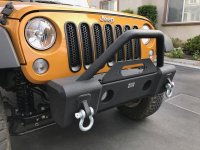
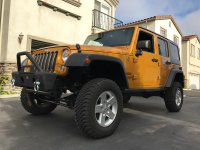
It looks great and I'm so stoked (and shocked) I won it!
Thanks again to Wayalife and Fishbone for putting on this awesome giveaway!
Out with the old!

Packing was great. It was well wrapped and the airspace filled with foam. It actually took a bit of work to get it all unwrapped, but that's a good thing.

No parts missing and shiny, new powder-coating!

The install was very easy and straight forward, although there were no instructions included. A quick visit to youtube and they had an install video. Some clips slid onto the fog light mounting brackets and then the lights screwed in quickly. I mounted the winch plate using four supplied bolts, but I didn't drill the two holes for the winch since I don't have a winch yet. Then I just lifted the bumper into place the the bolts slid right onto the factory mounting plates. Everything lined up perfectly and 8 washers and nuts hold it on just like the factory bumper. If I had a winch I probably would have needed another person to help lift it on.
And here it is!


It looks great and I'm so stoked (and shocked) I won it!
Thanks again to Wayalife and Fishbone for putting on this awesome giveaway!
seansheds
New member
I slept like a baby last night, but as soon as I woke up I couldn't wait to get over to the tire shop to get the new shoes installed! They opened at 7:30 but I had to load the new tires in the back on put the spare back on so I got there at 8:15 :yup:
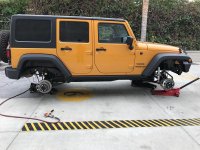
Drumroll please!!
Voila! Allow me to introduce you to Amp'd 2.0!
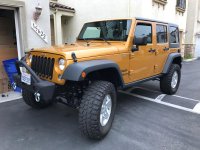
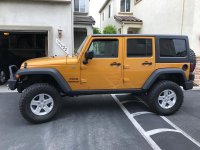
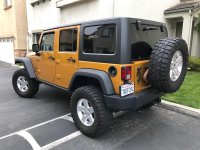
She drives great with no vibration even at 75 mph. My steering wheel is a little off center so the traction control light came on, but that's an easy fix. My ProCal is waiting for me at my office so I'll get that tomorrow up update the speedo. I took some initial measurements and it looks like I netted around 4.7" of lift, but I'm going to recheck that.
I have a new third brake light to install, and I'll also go back and re-torque everything in a day or two. The big test is this weekend at Calico! I can't wait to see what she can do. Keep an eye out for my first "Flex Friday" post.
You definitely get a huge sense of accomplishment doing things like this yourself and I'm so glad I did. Even if it's an overwhelming task just break it down into smaller chunks and try not to think about what's left. Just focus on the current chunk and work through it. Before you know it you'll be finished and feel great!

Drumroll please!!
Voila! Allow me to introduce you to Amp'd 2.0!


She drives great with no vibration even at 75 mph. My steering wheel is a little off center so the traction control light came on, but that's an easy fix. My ProCal is waiting for me at my office so I'll get that tomorrow up update the speedo. I took some initial measurements and it looks like I netted around 4.7" of lift, but I'm going to recheck that.
I have a new third brake light to install, and I'll also go back and re-torque everything in a day or two. The big test is this weekend at Calico! I can't wait to see what she can do. Keep an eye out for my first "Flex Friday" post.
You definitely get a huge sense of accomplishment doing things like this yourself and I'm so glad I did. Even if it's an overwhelming task just break it down into smaller chunks and try not to think about what's left. Just focus on the current chunk and work through it. Before you know it you'll be finished and feel great!
Labricon
Caught the Bug
Looking good. Love the shoeless photo![emoji23][emoji23]
Sent from my iPhone using WAYALIFE mobile app
Sent from my iPhone using WAYALIFE mobile app

