You are using an out of date browser. It may not display this or other websites correctly.
You should upgrade or use an alternative browser.
You should upgrade or use an alternative browser.
68' M715 AKA "Smokey", 8.1 engine on links, coils and 40's
- Thread starter Rock40
- Start date
FFPulley77
Hooked
The attention to detail is just wild. And awesome.All filled in.
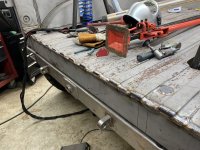
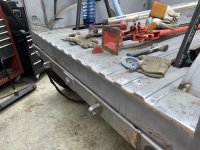
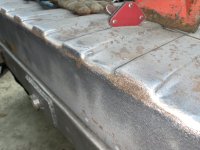
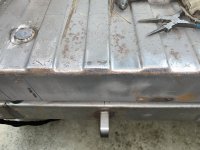
Did 3 rounds of rough sanding with a flap wheel then going back over and filling any low spots with silicone bronze
View attachment 371348
Once everything was level, hit it with the DA
View attachment 371349
View attachment 371350
View attachment 371351
Cousin Clyde
Hooked
Wow that’s dedication. Lotta time under the hood right there! Came out awesome. Forgive me if you already mentioned this, but are you using silicone bronze filler metal on all of this tig work?All filled in.
Did 3 rounds of rough sanding with a flap wheel then going back over and filling any low spots with silicone bronze
View attachment 371348
Once everything was level, hit it with the DA
View attachment 371349
View attachment 371350
View attachment 371351
Rock40
Active Member
Thanks friend!The attention to detail is just wild. And awesome.
Rock40
Active Member
Thanks!!Wow that’s dedication. Lotta time under the hood right there! Came out awesome. Forgive me if you already mentioned this, but are you using silicone bronze filler metal on all of this tig work?
Yes I’m using silicone bronze in the stuff I consider “non structural”, mostly sheet metal and the like. Nearly all of it is 1/16” rod but I have some .045 for the really thin stuff
Strength wise, it is very good. About 50,000 psi compared to the 70,000 of the ER70S2 I use for the high strength steel welds. Bottom line is it shouldn’t come apart AND it’s much easier sanding it
Cousin Clyde
Hooked
Thanks!!
Yes I’m using silicone bronze in the stuff I consider “non structural”, mostly sheet metal and the like. Nearly all of it is 1/16” rod but I have some .045 for the really thin stuff
Strength wise, it is very good. About 50,000 psi compared to the 70,000 of the ER70S2 I use for the high strength steel welds. Bottom line is it shouldn’t come apart AND it’s much easier sanding it
Oh ok, it’s maybe a bit softer and therefore easy to sand / smooth out. Yea I’ve never used that wire, that’s why I was curious. I like how it looks. Very cool
Rock40
Active Member
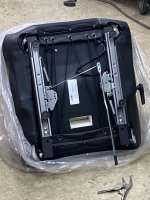
Fun with seats…
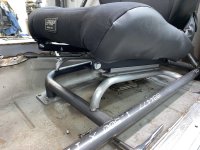
These are PRP with installed seat heaters
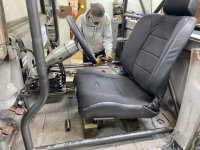
Mounted the rails…
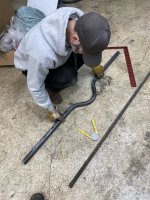
My buddy Ethan was over to do the tube bending work
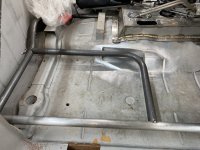
On blocks for setup. Front floor bar has been added here
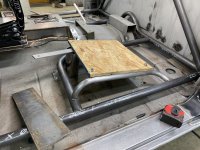
Rear cross bar. Bent to clear the rear of the transmission hump
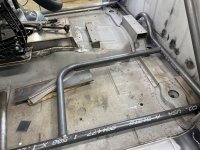
Main seat hoop tacked in…
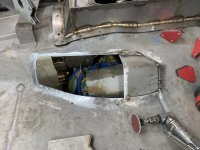
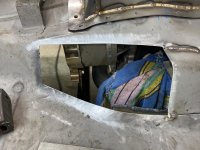
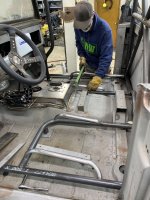
And the passenger side had major clearance issues which we saw coming.
Out came the plasma…
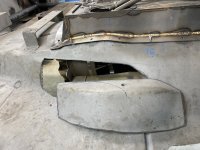
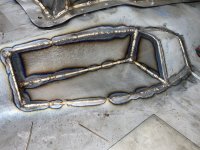
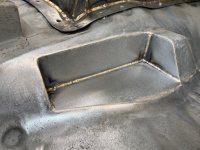
To make room for the main hoop. I’ll box the floor back in this week
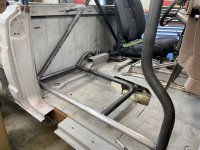
These are PRP with installed seat heaters
Mounted the rails…
My buddy Ethan was over to do the tube bending work

On blocks for setup. Front floor bar has been added here

Rear cross bar. Bent to clear the rear of the transmission hump

Main seat hoop tacked in…

And the passenger side had major clearance issues which we saw coming.
Out came the plasma…

To make room for the main hoop. I’ll box the floor back in this week

Rock40
Active Member
A few little things. Got the doors out that mount on the lower portion of the bad. Blasted them, super nasty and 3 coats of thick paint

I can only imagine what the truck looked like when it was this glow orange color
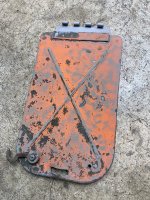
Blasted the tailgate hinges. Of the 4, only 1 is remotely straight
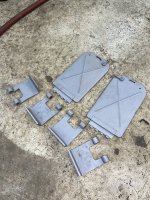
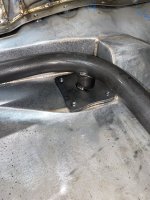
Added some support legs and feet to the seat hoops. This is the driver side
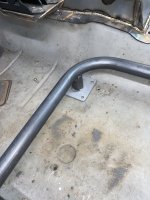
Passenger side support
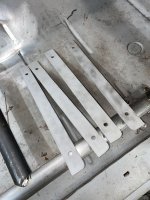
And cut out seat mount brackets. Hopefully the seats will get installed tomorrow

I can only imagine what the truck looked like when it was this glow orange color

Blasted the tailgate hinges. Of the 4, only 1 is remotely straight

Added some support legs and feet to the seat hoops. This is the driver side

Passenger side support

And cut out seat mount brackets. Hopefully the seats will get installed tomorrow

Last edited:
Rock40
Active Member
Seats are in and fully mounted now. Cut out a chunk of 3/16” plate this morning, spaced out the mounts appropriately and burned them in. LOTS of clamps and a big chunk of angle to keep things flat while welding
Both inboard seat mounts will require a small gusset on the forward edge
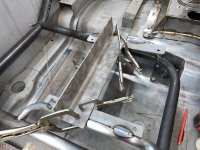
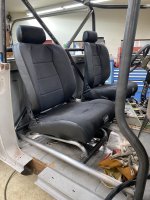
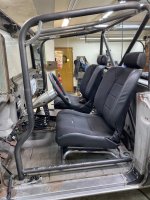
Bent up some chunks of 1.5” DOM and made some hip guards. They also triangulate and reinforce the rear of the cage
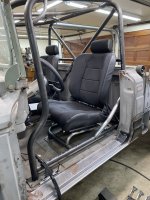
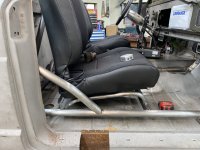
Added two small 1” grab handles and called it a day
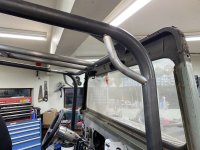
Both inboard seat mounts will require a small gusset on the forward edge


Bent up some chunks of 1.5” DOM and made some hip guards. They also triangulate and reinforce the rear of the cage


Added two small 1” grab handles and called it a day

JT@623
Hooked
I see it’s a typical Jeep windshieldSeats are in and fully mounted now. Cut out a chunk of 3/16” plate this morning, spaced out the mounts appropriately and burned them in. LOTS of clamps and a big chunk of angle to keep things flat while welding
Both inboard seat mounts will require a small gusset on the forward edge
View attachment 371650
View attachment 371651
View attachment 371652
Bent up some chunks of 1.5” DOM and made some hip guards. They also triangulate and reinforce the rear of the cage
View attachment 371653
View attachment 371654
Added two small 1” grab handles and called it a day
View attachment 371655
Rock40
Active Member
Hahaha! Thanks! Yes, horribly brokenI see it’s a typical Jeep windshieldthis thing is going to be killer when finished.
The windshield is ridiculous. It actually cants forward past 90 degrees, super odd
Rock40
Active Member
Now that the seats and brackets are in, I was able to figure out the radio mounts
We wanted to get both under the passenger seat and it was a SQUEEZE. Layed out the mounting brackets…
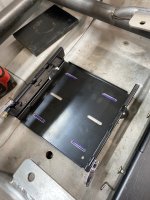
Drilled 8 holes for welded nutserts
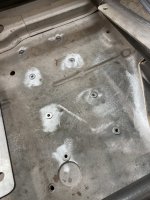
Burned them in
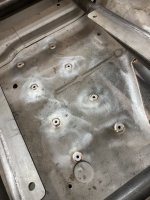
And now they’re mounted. I need some strips of 1/2” UHMW to push them off the floor but you get the idea.
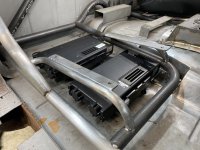
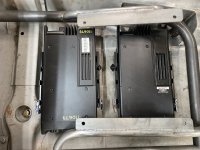
They fit VERY well and are a good use of space in the fairly cramped cab
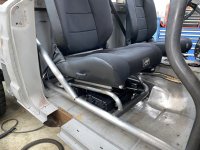
We wanted to get both under the passenger seat and it was a SQUEEZE. Layed out the mounting brackets…

Drilled 8 holes for welded nutserts

Burned them in

And now they’re mounted. I need some strips of 1/2” UHMW to push them off the floor but you get the idea.


They fit VERY well and are a good use of space in the fairly cramped cab

CalSgt
Hooked
Shit I don't think I'd bother with umhw for shims, just get some nylon washers at the hardware store. Pretty bad ass whoever you decide to do...Now that the seats and brackets are in, I was able to figure out the radio mounts
We wanted to get both under the passenger seat and it was a SQUEEZE. Layed out the mounting brackets…
View attachment 371690
Drilled 8 holes for welded nutserts
View attachment 371695
Burned them in
View attachment 371691
And now they’re mounted. I need some strips of 1/2” UHMW to push them off the floor but you get the idea.
View attachment 371692
View attachment 371693
They fit VERY well and are a good use of space in the fairly cramped cab
View attachment 371694
Rock40
Active Member
Yeah, I just want to make sure I have them spaced off the floor quite a bit. Not only for air flow and cooling but also if water and mud gets in I don't want the radios sitting in it. UHMW is great stuff, only about $25 for four feet of 1.5"x.5" thick material. It drills and machines very nicely and wont ever corrode in addition to being somewhat of an insulatorShit I don't think I'd bother with umhw for shims, just get some nylon washers at the hardware store. Pretty bad ass whoever you decide to do...
2007 JKU CANADA
Hooked
Great attention to detail on this build. It's coming along nice 
Rock40
Active Member
Thanks!!Great attention to detail on this build. It's coming along nice

