NecessaryEvil
Caught the Bug
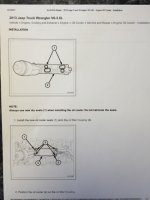
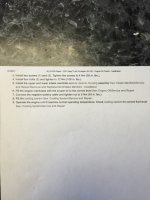
This is a basic Write-Up on how to repair the common oil cooler housing/adaptor leak. I will post as many photos as I can that will aid you, if you choose to tackle the project yourself. I will also supply a couple of picture that include ALL-DATA INFORMATION on torque specs and bolt torquing patterns for the oil cooler adaptor and upper/lower intake.
How will you know if your oil cooler is leaking? Easy, You will see MOTOR oil on your upper and lower transmission bell housing. If your leak is as bad as mine was when discovered, you will see motor oil on the bottom of the transmission pan, crossmember, and transfer case. From underneath, you will not be able to see the exact point of origin the oil is emitting from. You will be able to see the general area (top transmission bell housing and behind the engine). From the TOP of the engine compartment you should be able to see some pooling down in the engine valley where the oil cooler adaptor is located. I was able to see a little bit of pooled oil looking in between the oil filter housing and the intake. If you want to confirm the leak before you buy parts or disassemble anything, you should be able to get a camera snake into the engine valley through the front or back of the engine. You will see obvious pooling of motor oil in the valley.
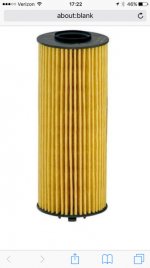
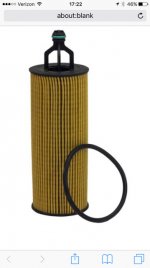
PARTS you will need are the oil filter/cooler adaptor as pictured below and intake gaskets. Oil adaptor housing part #5184294-AE (2011-2013) and part #68105583-AE (2014-2016{refer to other posts in this thread in regard to the difference}) You can find the part online much cheaper than the dealership (buy at your own risk). The dealership is around $240.00. I did not buy OEM intake gaskets. I bought FEL-PRO gaskets from NAPA Part #MS 97204 and that includes the 6 upper and 6 lower intake gaskets.
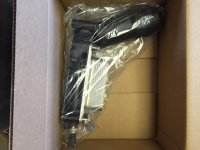
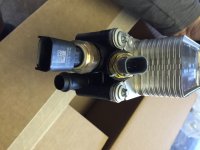
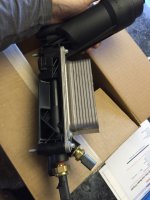
Very basic tools needed for this job other then a torque wrench and #8 external torx socket. I used a deep well 8mm and 10mm socket for the whole job with a few different extensions and a wobble socket attachment. You will also need a pair of pliers and a screw driver for the removal of some clamps and hoses. A clean bucket for coolant and rags or towels. I also would recommend some masking tape for when the intake is off so you can cover the intake ports to the heads (VERY vulnerable to foreign objects when exposed). You will have the intake off long enough to have the open ports be a hazard.
I will post the All-Data pages I have to also give you an idea of the only intake bolts that should be removed.
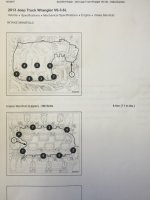
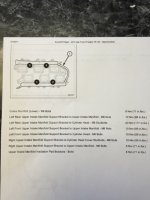
First things first, disconnect the battery!! You will be having parts off and the fuel line off. The last thing you want is for something silly to happen like someone turning the key on. It has happened, that is why it's brought up. Next, you will want to take the air intake tube off from the throttle body to the air box. Both sides are held on by a pipe clamp and can either be taken off with a flat head screw driver or an 8mm socket. Don't forget the two 10mm bolts that hold the intake pipe onto the top of the radiator fan shroud. BEFORE pulling the air intake pipe all the way off, disconnect the single sensor located closer the throttle body and behind the pipe (facing the ground/firewall).
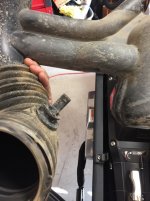
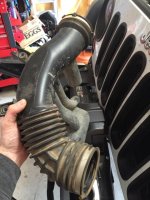
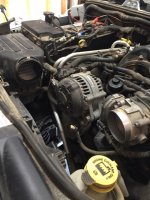
After you have removed the air intake pipe, I would recommend taking the coolant out now, only to get the task out of your way. Remove the radiator cap and open the radiator petcock with a clean bucket underneath. The radiator's petcock is located in the front (facing bumper) of the radiator and bottom left (passenger side). You will only get around a gallon out, maybe less. Close the petcock and move your bucket underneath in the middle touching your axle. This will place the bucket where you need it next. I choose to remove the smaller water pump hose instead of the larger one, for more control of the contents. The hose is help on by a single clamp that can be removed with pliers. Pull hose and drain. Once the contents are out go ahead and reattached the hose and clamp. Move your bucket of coolant out from underneath to avoid an debris getting in while working in the engine compartment.
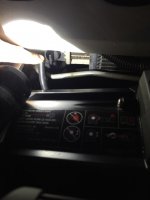
INTAKE REMOVALE:
First start by removing the two EGR/intake tubes located on the left side (passenger side) of the intake neck.
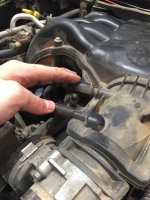
Remove sensor plug and throttle body plug. You will also have to pry/remove the loom holders from the intake and brackets.
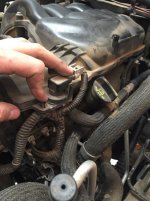
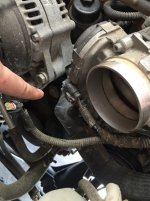
Remove 10mm nuts on the bracket located on the right side of the intake neck, behind the throttle body. You will then have to remove the front two 10mm bolts below the throttle body in the front. Remove bracket once both 10mm nuts and bolts have been removed.
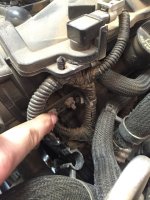

Remove 10mm nuts on the driver side intake bracket located closer to the fire wall.
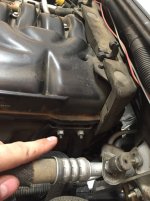
Next on the passenger side, remove the two 10mm bolts that holds the bracket onto that side of the intake. Located closer to the firewall, there is a wire loom held on by keepers that need to be pried/removed.
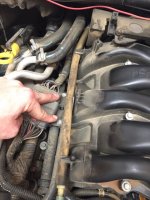
I also choose to remove the two 10mm nuts located on the same bracket that secure the coolant line onto the bracket.
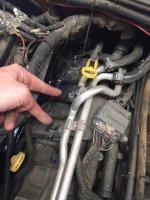
Before removing the upper intake bolts off, you have to remove the heat shielding pad from behind the engine. Pry the two push pins up to detach the pad from the brackets. I removed the 10mm bolt on each side in order to remove the two brackets. Once the brackets are removed you can remove the pad and reach the back upper intake bolt easier.
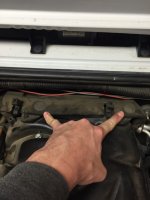
Remove all 7 upper intake bolts as listed in the provided All-DATA pages. Once you remove all the bolts, lift up on the upper intake until you feel it free. Next you will have to take a screw driver and pry the intake away from the driver side bracket you removed the bolts on earlier. It does NOT take much force before the bolt studs clear the bracket and your able to life up on the intake. Once the bolt studs are past the bracket and you can lift up, you should be able to pull the upper intake up and out towards the driver side. NOTE: After removing the upper intake, I strongly recommend covering the lower intake holes and using an air gun to blow any debris out from the sides of the lower intake. This will help keep unwanted debris out of the intake port after pulling the lower intake off.
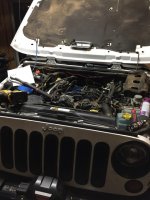
After removing the upper intake, its time to unplug all the fuel injectors and remove the fuel line. The driver side is very easy, unplug the three injectors on that side, along with the three coil pack wires. Carefully pull the blue safety clip from the fuel line and you should be able to squeeze the white clip. Pull the Fuel line and tuck away to the right along with the wires from the injectors and coils. The driver side should be open and free.
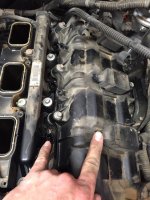
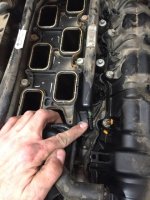
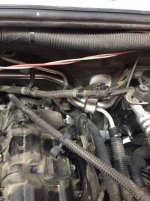
The passenger is a little tighter with the bracket holding the main harness connector and coolant lines. I unplugged the harness connector and bent the bracket up and out of the way. I was able to carefully remove all the fuel injector plugs with a screw driver.
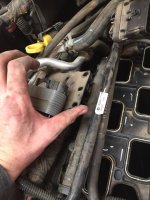
Before you unbolt or remove the lower intake, it is important to pry/remove the back wire looms that are secured to the back of the intake. You should now be able to remove all eight 8mm lower intake bolts and carefully remove remove the intake.
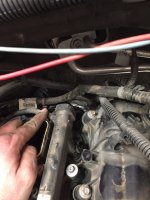
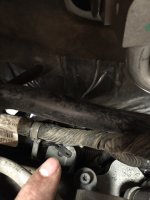
The lower intake pulls out fairly easy.
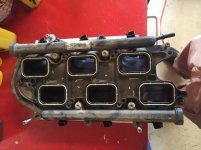
And there it is!!!! The really inconveniently placed oil cooler!!! :idontknow: As you can also see visible oil near the filter housing.
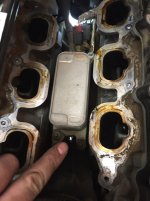
Now carefully wipe dirt and oils AWAY from the ports and get them taped up.
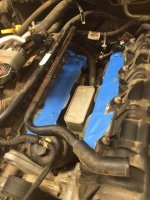
OIL FILTER/COOLER ADAPTOR removal/replacement:
First remove both plugs from the rear of the adaptor housing.
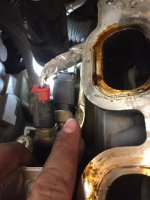
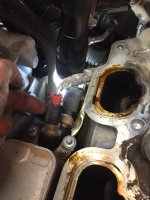
You will not be able to get the rear coolant hose or clamp off the adaptor housing while it is still mounted in the valley. You will be able to remove the hose and clamp once you have taken the housing out.
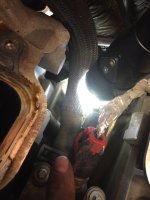
Now remove all five external torx #8 bolts from the housing. The bolts will NOT come all the way out from the actual housing. You should be able to wiggle and lift the housing up and out. There is a neck with an o-ring in the front of the housing. It goes at least an inch into the top of engine valley so it may be a little tough. Once pulled, you can then remove the clam and coolant hose off.
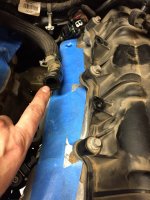
As you can see the bulk of that oil is from the leak itself. The valley is fairly deep as well, so there is quite a bit of oil. I used a brake pump with reservoir to remove the oil from the valley and then used needle noise pliers to dab small pieces of rag and soak up the rest of the oil.
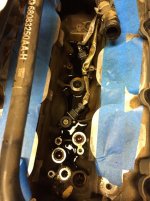
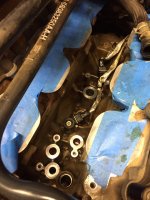
Prior to installing the new housing, make sure all debris is removed from the mountable surfaces. You can use a piece of scotch bright or very very fine wet sanding paper.
I did not get any pictures of the housing in the valley brand new. Let me be the first to say, it looks the same. For installation of the new housing follow the provided ALL-DATA pages for proper torque values and patterns.
INTAKE REASSEMBLY:
I would strongly recommend cleaning the lower intake and replacing all twelve gaskets (parts listed above). Be careful with the injectors.
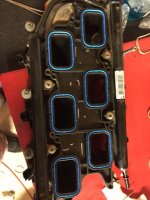
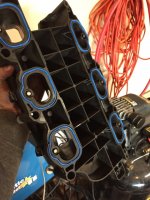
For the upper and lower intake reassembly, follow instructions in reverse. Refer and follow the provided ALL-DATA pages for torque values and patterns during intake reassembly.
Follow all other instructions in reverse order to reassemble your JK.
Don't forget to replace and check all fluids prior to starting vehicle.
I suggest cleaning all old oil underneath to better monitor new leaks. After driving your JK for a good period of time, I would check for any new leaks. A slow leak may not be obvious right after install but hopefully it will leak never again!!!:icon_crazy:
How will you know if your oil cooler is leaking? Easy, You will see MOTOR oil on your upper and lower transmission bell housing. If your leak is as bad as mine was when discovered, you will see motor oil on the bottom of the transmission pan, crossmember, and transfer case. From underneath, you will not be able to see the exact point of origin the oil is emitting from. You will be able to see the general area (top transmission bell housing and behind the engine). From the TOP of the engine compartment you should be able to see some pooling down in the engine valley where the oil cooler adaptor is located. I was able to see a little bit of pooled oil looking in between the oil filter housing and the intake. If you want to confirm the leak before you buy parts or disassemble anything, you should be able to get a camera snake into the engine valley through the front or back of the engine. You will see obvious pooling of motor oil in the valley.
PARTS you will need are the oil filter/cooler adaptor as pictured below and intake gaskets. Oil adaptor housing part #5184294-AE (2011-2013) and part #68105583-AE (2014-2016{refer to other posts in this thread in regard to the difference}) You can find the part online much cheaper than the dealership (buy at your own risk). The dealership is around $240.00. I did not buy OEM intake gaskets. I bought FEL-PRO gaskets from NAPA Part #MS 97204 and that includes the 6 upper and 6 lower intake gaskets.


Very basic tools needed for this job other then a torque wrench and #8 external torx socket. I used a deep well 8mm and 10mm socket for the whole job with a few different extensions and a wobble socket attachment. You will also need a pair of pliers and a screw driver for the removal of some clamps and hoses. A clean bucket for coolant and rags or towels. I also would recommend some masking tape for when the intake is off so you can cover the intake ports to the heads (VERY vulnerable to foreign objects when exposed). You will have the intake off long enough to have the open ports be a hazard.
I will post the All-Data pages I have to also give you an idea of the only intake bolts that should be removed.


First things first, disconnect the battery!! You will be having parts off and the fuel line off. The last thing you want is for something silly to happen like someone turning the key on. It has happened, that is why it's brought up. Next, you will want to take the air intake tube off from the throttle body to the air box. Both sides are held on by a pipe clamp and can either be taken off with a flat head screw driver or an 8mm socket. Don't forget the two 10mm bolts that hold the intake pipe onto the top of the radiator fan shroud. BEFORE pulling the air intake pipe all the way off, disconnect the single sensor located closer the throttle body and behind the pipe (facing the ground/firewall).


After you have removed the air intake pipe, I would recommend taking the coolant out now, only to get the task out of your way. Remove the radiator cap and open the radiator petcock with a clean bucket underneath. The radiator's petcock is located in the front (facing bumper) of the radiator and bottom left (passenger side). You will only get around a gallon out, maybe less. Close the petcock and move your bucket underneath in the middle touching your axle. This will place the bucket where you need it next. I choose to remove the smaller water pump hose instead of the larger one, for more control of the contents. The hose is help on by a single clamp that can be removed with pliers. Pull hose and drain. Once the contents are out go ahead and reattached the hose and clamp. Move your bucket of coolant out from underneath to avoid an debris getting in while working in the engine compartment.

INTAKE REMOVALE:
First start by removing the two EGR/intake tubes located on the left side (passenger side) of the intake neck.

Remove sensor plug and throttle body plug. You will also have to pry/remove the loom holders from the intake and brackets.


Remove 10mm nuts on the bracket located on the right side of the intake neck, behind the throttle body. You will then have to remove the front two 10mm bolts below the throttle body in the front. Remove bracket once both 10mm nuts and bolts have been removed.


Remove 10mm nuts on the driver side intake bracket located closer to the fire wall.

Next on the passenger side, remove the two 10mm bolts that holds the bracket onto that side of the intake. Located closer to the firewall, there is a wire loom held on by keepers that need to be pried/removed.

I also choose to remove the two 10mm nuts located on the same bracket that secure the coolant line onto the bracket.

Before removing the upper intake bolts off, you have to remove the heat shielding pad from behind the engine. Pry the two push pins up to detach the pad from the brackets. I removed the 10mm bolt on each side in order to remove the two brackets. Once the brackets are removed you can remove the pad and reach the back upper intake bolt easier.

Remove all 7 upper intake bolts as listed in the provided All-DATA pages. Once you remove all the bolts, lift up on the upper intake until you feel it free. Next you will have to take a screw driver and pry the intake away from the driver side bracket you removed the bolts on earlier. It does NOT take much force before the bolt studs clear the bracket and your able to life up on the intake. Once the bolt studs are past the bracket and you can lift up, you should be able to pull the upper intake up and out towards the driver side. NOTE: After removing the upper intake, I strongly recommend covering the lower intake holes and using an air gun to blow any debris out from the sides of the lower intake. This will help keep unwanted debris out of the intake port after pulling the lower intake off.

After removing the upper intake, its time to unplug all the fuel injectors and remove the fuel line. The driver side is very easy, unplug the three injectors on that side, along with the three coil pack wires. Carefully pull the blue safety clip from the fuel line and you should be able to squeeze the white clip. Pull the Fuel line and tuck away to the right along with the wires from the injectors and coils. The driver side should be open and free.


The passenger is a little tighter with the bracket holding the main harness connector and coolant lines. I unplugged the harness connector and bent the bracket up and out of the way. I was able to carefully remove all the fuel injector plugs with a screw driver.

Before you unbolt or remove the lower intake, it is important to pry/remove the back wire looms that are secured to the back of the intake. You should now be able to remove all eight 8mm lower intake bolts and carefully remove remove the intake.


The lower intake pulls out fairly easy.

And there it is!!!! The really inconveniently placed oil cooler!!! :idontknow: As you can also see visible oil near the filter housing.

Now carefully wipe dirt and oils AWAY from the ports and get them taped up.

OIL FILTER/COOLER ADAPTOR removal/replacement:
First remove both plugs from the rear of the adaptor housing.


You will not be able to get the rear coolant hose or clamp off the adaptor housing while it is still mounted in the valley. You will be able to remove the hose and clamp once you have taken the housing out.

Now remove all five external torx #8 bolts from the housing. The bolts will NOT come all the way out from the actual housing. You should be able to wiggle and lift the housing up and out. There is a neck with an o-ring in the front of the housing. It goes at least an inch into the top of engine valley so it may be a little tough. Once pulled, you can then remove the clam and coolant hose off.

As you can see the bulk of that oil is from the leak itself. The valley is fairly deep as well, so there is quite a bit of oil. I used a brake pump with reservoir to remove the oil from the valley and then used needle noise pliers to dab small pieces of rag and soak up the rest of the oil.


Prior to installing the new housing, make sure all debris is removed from the mountable surfaces. You can use a piece of scotch bright or very very fine wet sanding paper.
I did not get any pictures of the housing in the valley brand new. Let me be the first to say, it looks the same. For installation of the new housing follow the provided ALL-DATA pages for proper torque values and patterns.


INTAKE REASSEMBLY:
I would strongly recommend cleaning the lower intake and replacing all twelve gaskets (parts listed above). Be careful with the injectors.


For the upper and lower intake reassembly, follow instructions in reverse. Refer and follow the provided ALL-DATA pages for torque values and patterns during intake reassembly.
Follow all other instructions in reverse order to reassemble your JK.
Don't forget to replace and check all fluids prior to starting vehicle.
I suggest cleaning all old oil underneath to better monitor new leaks. After driving your JK for a good period of time, I would check for any new leaks. A slow leak may not be obvious right after install but hopefully it will leak never again!!!:icon_crazy:
Last edited:

