The one where we build an Outlaw.

She looks like a fine young lady who definitely goes to church on Sunday. Im guessing.. no idea who that is. :D
 
Some good progress today. the dirty 30 has been laid to rest.

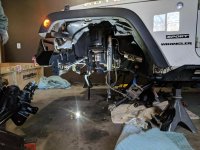
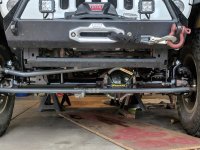
Started out getting the 30 removed completely. When I called it quits last time, the only thing holding it in was the driveshaft. So I took that apart and prepared for removal. I put the floor jack under the axle and lifted it just enough to get the jack stands out from under it. My plan was to just wheel it out from under there.

I am a little bit glad I was alone at the moment because all hell broke loose and the axle came crashing out of there. To make matters worse, my coils had retainer clips that I didnt know about so they were smacking into everything. I assumed they would just fall away when I lowered the axle down. Boy was I wrong. There was a minute or two of slightly controlled chaos.

Nevertheless, out it came.

IMG_20180211_120802.jpg

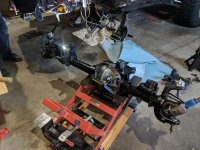
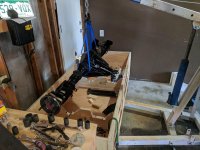
Next was getting the new pro rock out of the crate. Slimebones and I muscled it out of there, but honestly, that was a poor choice. My back is paying for it.

On plus the side, slimebones brought over a motorcycle lift which worked out amazingly well.

IMG_20180211_120754.jpg

We rolled it into place and started connecting the control arms. It took some maneuvering with the jack but we eventually got them all together. Next were the shocks which turned out to be our first hurdle. The shock mounts are a lot bigger than the D30 and the bolt turned out to be too short. Not only that, the shock itself was swimming in the bracket so we added some washers to snug that up. Made a run to the hardware store for a couple bolts and we were set.

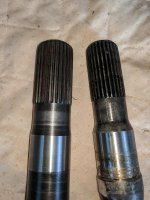
Then we pulled the axle shaft out in order to put together the knuckle and hub bearing.

IMG_20180211_144421.jpg

Pro Rock 44 left, D30 right.

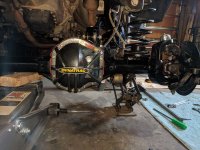
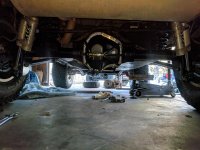
Got the driver side complete with the knuckle and the whole brake assembly. The passenger side will have to wait because I ruined one of the hub bearing bolts getting it out. I have a new one on order.

IMG_20180211_153822.jpg

Decided to call it a day there.
 
Last edited:
Looks good! If you are seriously considering cutting up the old axle, I'd be happy to take the tubes themselves. I always have little steel projects that I can work on.
 
That motorcycle lift turned out to be the perfect tool for this job. Toughest part was getting the axle out of the crate onto it. That rear 60 is going to be crazy heavy. It's massive.
 
Started early this morning working on the Jeep. The unit bearing bolt that I ordered came yesterday. Unfortunately, what was delivered wasnt a unit bearing bolt. It wasnt even a bolt. Such a pain in the ass. Back to the internet to track down another one. Turns out the 4WP down the road actually has them. Not sure why I didnt check them out first. Oh well.

New bolt in hand and back to work. Slimebones and I got the knuckle and brakes together. Then started on the tie rod and drag link. Castle nuts and cotter pins are such a pain. Trying to balance the right torque, with lining up the hole for the pin is very frustrating.

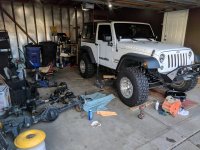
Then we put the wheels/tires back on and set it down for the first time. We tried to set caster using the adjustable evo lowers, but the passenger side collar was just frozen solid. I couldnt get any adjustment out of it at all. My johnny joints need rebuilding badly, so I ordered a kit for the two fronts.

After that frustration, we decided that I could adjust caster with the uppers instead, so that's what I did. Then I set about checking and setting torques all the way around, double checking everything we touched. And finally, put some gear oil in it and took a very tentative trip around the block.

IMG_20180214_165233.jpg

:rock:
 
Started early this morning working on the Jeep. The unit bearing bolt that I ordered came yesterday. Unfortunately, what was delivered wasnt a unit bearing bolt. It wasnt even a bolt. Such a pain in the ass. Back to the internet to track down another one. Turns out the 4WP down the road actually has them. Not sure why I didnt check them out first. Oh well.

New bolt in hand and back to work. Slimebones and I got the knuckle and brakes together. Then started on the tie rod and drag link. Castle nuts and cotter pins are such a pain. Trying to balance the right torque, with lining up the hole for the pin is very frustrating.

Then we put the wheels/tires back on and set it down for the first time. We tried to set caster using the adjustable evo lowers, but the passenger side collar was just frozen solid. I couldnt get any adjustment out of it at all. My johnny joints need rebuilding badly, so I ordered a kit for the two fronts.

After that frustration, we decided that I could adjust caster with the uppers instead, so that's what I did. Then I set about checking and setting torques all the way around, double checking everything we touched. And finally, put some gear oil in it and took a very tentative trip around the block.

View attachment 293178

:rock:
Looks good!

Sent from my SM-N920P using WAYALIFE mobile app
 
Lots more work done this weekend and the Jeep is back on the ground. Well, was on the ground. For a little while anyway.

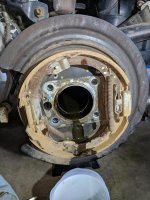
Started early Saturday morning, getting the last few items disconnected from the D44 and dragged that thing out from under the Jeep. The final item to come off was the parking brake. Not being really sure how it was supposed to come off, I decided it would be smart to take a few pics before I made a mess of things. (Pro tip: drain the diff before removing rear axle shafts.:doh:)

IMG_20180217_100704.jpg

Turns out that whole enchilada comes off in one piece with a good whack from the rear with a hammer. Thank god. I was not looking forward to messing with those springs.


Then with perfect timing, my brother in law showed up as promised with the cherry picker. We actually had to lift the crate with the pallet jack and put some 4x4 chunks of wood under it so the hoist would fit under it. Then a couple ratchet straps around the axle and it came out perfectly.

IMG_20180217_112132.jpg

At this point, just working backwards, reconnecting everything that came off.

IMG_20180217_162431.jpg

We put everything back together and briefly basked in the glory.

IMG_20180217_162323.jpg

Sunday was a beautiful day here in Denver, almost 70 degrees and I didnt want to waste it. The 37s are set to be delivered tomorrow so I got to work breaking down the 35s and beadlocks.

IMG_20180218_081926.jpg

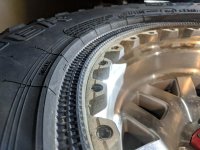
25 ft/lbs might not seem like much, but it sure clamped down on this tire. I had to take them to a shop to get separated unfortunately. I hated spending that money, but there was no way I could get them apart. I was able to mount those 35s on my own, hopefully the 37s are no different.

So as of now, the Jeep is back on jack stands. I am thinking that by this time next week, it will be driving again. Still need to order driveshafts.
 
Last edited:
I am too. There is so much work left to do it seems. Mount the tires, install driveshafts, swap transfer case, and replace the brake lines in there somewhere along the way.
 
You also might want to consider PSC's new steering gear box now that you are installing those 37's. It seems like others on here recommended it due to stock sector shaft failures.
 
Doesnt look too different yet. I will have to be a little more vigilant with bump stops. And a fender trim is most definitely in the future.

IMG_20180220_163033.jpg
 
Doesnt look too different yet. I will have to be a little more vigilant with bump stops. And a fender trim is most definitely in the future.

Wow, those tires look sweet. Used hockey pucks on eBay are really cheap for bump stop extensions.
 
Top Bottom