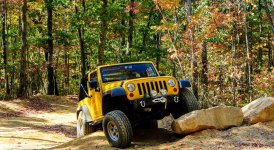
The Butters JK Build

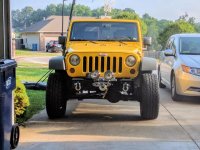
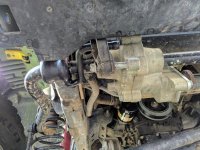
Last time I was out I came down off a ledge a little hard and hit my tie bar and stabilizer. It knocked the end of the tube off my new bilstein, but thankfully it all snapped back together and is working fine. I decided to relocate it above the tie bar now:

Everything is working fine, but after getting a closer look I'm pretty sure my tie bar has a bend in it now :grayno:

Yep. It's bent. Being that it is a bar between point A and point B, you could probably just run with it after re-setting your toe angle. You do want to reset your toe angle as soon as you can so there is no abnormal tire wear. You can also get a new Crown one for about 100 bucks.
 
Yep. It's bent. Being that it is a bar between point A and point B, you could probably just run with it after re-setting your toe angle. You do want to reset your toe angle as soon as you can so there is no abnormal tire wear. You can also get a new Crown one for about 100 bucks.

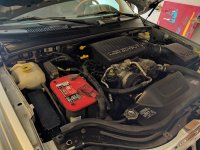
Good point. I just rotated the tires when I put the new rear coils in because I was noticing a little odd wear on the front tires. This is probably why. I'll have to measure my toe-in later, but I know for a fact the adjustment turnbuckle on the tie bar is seized up. I've tried to adjust it before and got nowhere. I even soaked it in PB Blaster for a week and re-tried with some big vice grips and nada. Any tips to break it loose? It bugs me that it's not straight so I'll probably end up replacing it eventually, but I'd rather it not ruin my tires in the meantime.
 
Last edited:
Good point. I just rotated the tires when I put the new rear coils in because I was noticing a little odd wear on the front tires. This is probably why. I'll have to measure my toe-in later, but I know for a fact the adjustment turnbuckle on the tie bar is seized up. I've tried to adjust it before and got nowhere. I even soaked it in PB Blaster for a week and re-tried with some big vice grips and nada. Any tips to break it loose? It bugs me that it's not straight so I'll probably end up replacing it eventually, but I'd rather it not ruin my tires in the meantime.

Get a good size pipe wrench. You could apply heat to the bar itself near the adjuster as well. If that don't work, just replace it. A good big pipe wrench will cost some money regardless.
 
Get a good size pipe wrench. You could apply heat to the bar itself near the adjuster as well. If that don't work, just replace it. A good big pipe wrench will cost some money regardless.

Maybe I'll see if I can find someone to borrow from that has a bigger wrench than what I have (12" vice grip) and give it a shot with a little heat.
In the meantime I'll shop for a replacement. Thanks.
 
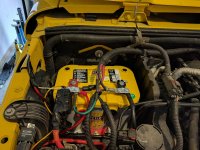
The battery was pretty much shot in our new-to-us WJ, so I did a little battery swap. I picked up a new deep cycle yellow top Optima for Butters and put the red top in the WJ.
redTop.jpg
yellowTop.jpg
 
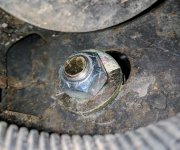
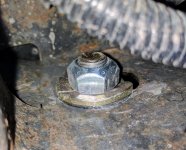
I noticed my passenger's side rear shackle mount was coming a little loose yesterday. I got the tourque wrench out and tightened the big shackle bolts down to 60 lbs and the smaller OEM bumper bolts to 40 lbs. Much better, but I figured if this side got loose the other may have too. So I went to the driver's side and was surprised to find this (before I got the wrench on it):
washer.jpg
washer1.jpg
I'm pretty sure when I installed it I did 60 lbs then too. Was that too much or did I just get a bad washer?
 
Air

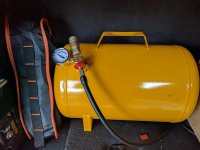
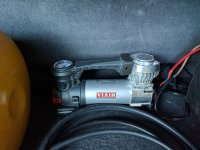
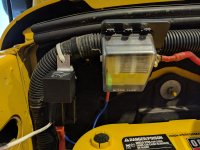
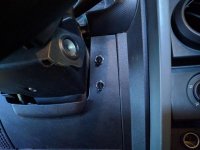
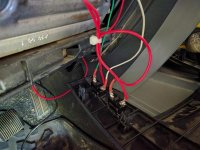
I'm experimenting with a DIY on board air. I hardwired my portable compressor through a switch and relay and added a tank. It's certainly better than before (clipping onto the battery and screwing onto the schrader valve every time), but this little compressor gets pretty hot when airing back up all four tires and the duty cycle isn't great, but I already had it so it works. I'm only in for $150 at this point including the compressor and tank and everything. I built the circuit to handle up to 30 or 40 amps so down the line I can install a proper compressor and tank on the same wiring, but this'll do for now. Plus now I can use a REAL chuck and blow gun with the quick discos and everything.

airTank.jpgairComp.jpgairRelayFuse.jpgairSwitch.jpg
 
Badges and Stickers

Not much, just added some more flair today (and extra HP)
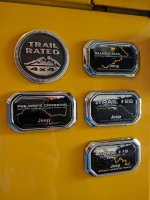
Badges of Honor from last October still rolling in:
badges.jpg
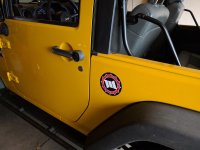
Finally got some WOL decals and applied:
decal.jpg
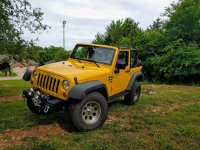
For full effect, here's some backyard action:
stickers.jpg
 
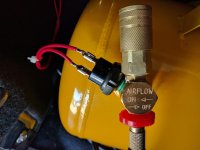
Messed around with the DIY OBA a bit this weekend and added a 90-120psi pressure switch:
pressureSwitch.jpg
switches.jpg
I wired it inbetween the physical switch and the ACC power. Works well so far.
 
I had to switch out the (off-brand) pressure switch to a 85-110psi Viair switch because it kept going up to 125psi (which is over my compressor's rating). The Viair switch actually stops at 110psi. I can now air up all four tires without having to wait for it to cool down! It saves me a good 15 minutes :thumb: plus now I don't have to worry about leaving the switch on while driving (to air the tank back up) because it will shut off automatically.
 
I had a CEL - P0465 in the beginning of July. I've also had the gas cap message a couple of times last month. I replaced the gas cap with a cheap $6 one I found online hoping that would be it and reset the code. I also drilled a small hole in the top so I can use my existing tether. Three weeks and a tank of gas run through and still no CEL :thumb:
 
I picked up a new Millermatic a couple of days ago and needed some extra practice. I decided I would try and re-do the rubicon swaybar stabilizer bracket that didn't work out before. I cut the old stabilizer arm off and welded it back on at a new angle to rotate the swaybar up higher. It now sits about flush with the bottom of the 1/4 pounder.
I didn't take a 'before' photo, but you can kind of see in this one how it stuck out a couple inches below the bumper.
FallColorJeepSmall.jpg
Now looking straight on you can't see it.
swayBarRotation.jpg
Here's the new hanger
swayBarRotation1.jpg
 
Top Bottom