The Building of Meanst

So I wired the compressor to the keyed outlet, the other three switches to the accessory 12 volt, and all four switches' dimmer to the heater switch dimmer. Works like a charm. For those of you who don't intend to run a cage, this is honestly one of the cleanest and best looking switch setups I have seen. It looks factory...well, better than factory. View attachment 36586View attachment 36587


Hi Sharkey.

Nice build. I was looking back in your posts and I didn't see what make the A pillar switch panel was also what switches are those? they look great. please let me know where you got these, I gotta have em...........

Cheers
Grant
 
Thanks. This is my buddy's (meanst) rig, I'm just doing the install (with mtg's assistance).

The pillar is made by Rugged Ridge, the switches are by otrattw.com.
 
I think they are working on a new website. Anyway, give them a call. They are very customer friendly.
 
Stage 1 complete with MTG's help. Stage 1.5 will be done by others: hard brake line re-route in the rear, extended brake lines at all corners, LCA skids and C-gussets, weld on the EVO front and rear trackbar brackets.

Stage 2 is all me (unless I can sucker MTG into helping again). Bumpers, 20" LED lightbar in the front, LED backup lights, winch and (hopefully) Trek Armor seat covers perhaps with some seat heaters.

Stage 1 and 1.5 complete; starting Stage 2 with some changes:

I just installed the procal to take care of the TPMS and speedo. When I get some time over the next week or two I will be installing the Gen III LoD rear bumper with tire carrier and flush mount diffused Rigid Dually LED's for back up lights; the LoD midwidth front bumper with hoop and diffused Rigid Dually LED's for fog lights (these require a conversion kit make fit in the round fog light opening), and a 20" LED Lightbar on or under the hoop once it arrives.

I'll take some pics of install (particularly the flushmount back up lights) but most of it is pretty standard stuff everyone has seen before. I do have one "special" modification to the tire carrier that I haven't seen anyone do in several years. Once it's done I'll post up some pics to see what you all think.

After that, Meanst needs to get a winch and some good rocker protection and he will be pretty well set with his build.
 
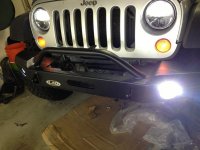
Finally getting back to this. Just installed the LoD Midwidth front with skid plate. I also installed Rigid Dually diffused lights with the round hole conversion into the fog position.

The lights did flicker when powered OFF so I ran the factory fog power to a relay as a trigger then used the relay to turn on the lights. That way Meanst can still use the factory fog switch and his Canbus is fully protected.

ImageUploadedByWAYALIFE1376715954.555940.jpg

Won't get to the rear this weekend. Hopefully I can start next week.
 
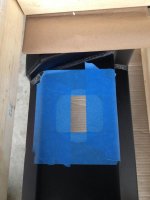
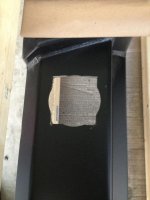
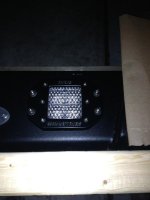
Front is done. Time to work on the rear. Had to cut the round holes into squares to fit the flush mount Rigid lights. Protected the bumper with tape, measured and marked, then used a Dremel with a cutoff wheel so I had good control.
ImageUploadedByWAYALIFE1376883547.360330.jpg
ImageUploadedByWAYALIFE1376883573.729327.jpg
ImageUploadedByWAYALIFE1376883602.360138.jpg
I love the look and can't wait to see them on. Hopefully I'll have time to finish up this week.
 
The flush mounts look really good, probably the cleanest set up I have seen yet on the rear! I keep saying I'm going to drop some coin on these for my rear spots, but not sure why I haven't pulled the trigger :thinking:
 
Finally getting back to this. Just installed the LoD Midwidth front with skid plate. I also installed Rigid Dually diffused lights with the round hole conversion into the fog position.

The lights did flicker when powered OFF so I ran the factory fog power to a relay as a trigger then used the relay to turn on the lights. That way Meanst can still use the factory fog switch and his Canbus is fully protected.

View attachment 44669

Won't get to the rear this weekend. Hopefully I can start next week.

Amongst many things as green jeep owner, electrical can be daunting. Sounds/looks like you've got a great set up for use of existing factory fogs.
 
Amongst many things as green jeep owner, electrical can be daunting. Sounds/looks like you've got a great set up for use of existing factory fogs.

It's actually quite a bit easier than it sounds: (1) I took the OEM positive wires for the fogs, joined them to a single wire, and ran that single wire to a relay as the "trigger" or switch; (2)Then I took the OEM negative wires, joined them to the negative leads from the Rigid lights, and joined all four of them to a single ground wire which I ran to a ground bolt; (3) I ran one wire from the relay to the positive wires on the lights; and, finally, (4) I ran power to the relay with an inline fuse and grounded the relay. Of course I used heat shrink connectors for all connections and also put all of the new wiring in plastic split loom for protection.

Think of it like running any other light with a proper relay set up but, instead of using a separate switch, you utilize the factory switch.
 
Last edited:
It's actually quite a bit easier than it sounds: (1) I took the OEM positive wires for the fogs, joined them to a single wire, and ran that single wire to a relay as the "trigger" or switch; (2)Then I took the OEM negative wires, joined them to the negative leads from the Rigid lights, and joined all four of them to a single ground wire which I ran to a ground bolt; (3) I ran one wire from the relay to the positive wires on the lights; and, finally, (4) I ran power to the relay with an inline fuse and grounded the relay. Of course I used heat shrink connectors for all connections and also put all of the new wiring in plastic split loom for protection.

Think of it like running any other light with a proper relay set up but, instead of using a separate switch, you utilize the factory switch.

That sounds awesome but confusing as heck, guess cause I'm a visual person. Sounds like you've got above average skills in low voltage electrical components, which basically makes you an expert. 
 
Last edited by a moderator:
That sounds awesome but confusing as heck, guess cause I'm a visual person. Sounds like you've got above average skills in low voltage electrical components, which basically makes you an expert. 

LOL! I'm visual too. If you get to the point where you want to do something similar let me know and I'll draw it up. Truly, it's much easier than I am making it sound. Expert? Hardly. If it turns on and doesn't blow a fuse or catch fire I consider it a success. I'm sure some of the real electrical guys and gals out there would laugh at what I come up with.
 
LOL! I'm visual too. If you get to the point where you want to do something similar let me know and I'll draw it up. Truly, it's much easier than I am making it sound. Expert? Hardly. If it turns on and doesn't blow a fuse or catch fire I consider it a success. I'm sure some of the real electrical guys and gals out there would laugh at what I come up with.

Thanks I appreciate that. Well I was using the Californian legal definition of an expert which is someone with more knowledge than the average person. But there is also what I call "Mexican ingenuity" which is throwing something together and hoping something doesn't blow up or catch fire. Haha. And YES you can have Mexican Ingenuity without being Mexican.
 
That sounds awesome but confusing as heck, guess cause I'm a visual person. Sounds like you've got above average skills in low voltage electrical components, which basically makes you an expert. 

If you break the word "expert" to it's basic components you get:

Ex - a washed up, has been

And

Spurt - a drip under pressure
:eek:

Sent from my Galaxy S3 on Wayalife mobile
 
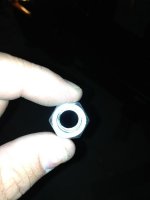
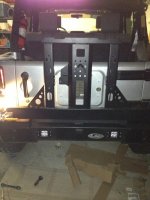
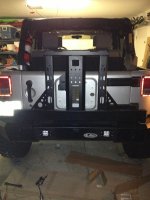
Almost finished the rear tonight. We were shorted three nuts ImageUploadedByWAYALIFE1377326772.010650.jpgand then my neighbor showed up with a bottle of honey. Decided to call it a night since I don't have the nuts. The good news is we drank the entire bottle of honey and cracked open a second one that I had chilling. Wives aren't happy. ;). The bumper rocks though.
ImageUploadedByWAYALIFE1377326802.877437.jpg
 

Attachments

  • ImageUploadedByWAYALIFE1377326742.176578.jpg
    ImageUploadedByWAYALIFE1377326742.176578.jpg
    82.9 KB · Views: 413
Top Bottom