Roger's Evolutions - 2012 2-Door JK

Oh! And take a grinder to the mounting tabs on the new lights before you try to install them. I ground just past the paint on all 3 tabs on both lights and they fit snugly after the first light would not fit at all. I read reviews on the Amazon page that alluded to needing to do this but thought my luck would be better. It was not.
 
The only downside of installing my new radio is that I needed to remove the bracket that supported my Bulletpoint mount that I had been using for holding my devices during my daily commute or while on the trail. As we all know, setbacks just necessitate upgrades! LOL
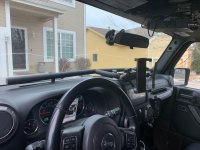
This weekend I added a Vector Full Width Bar to replace the Bulletpoint mount. This thing is AWESOME and installed super easy!
 

Attachments

  • Vector.jpg
    Vector.jpg
    196.2 KB · Views: 8
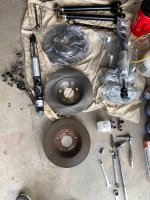
Got the Crown Big Brake Kit installed over the weekend! Props to Northridge 4X4 as they hooked me up with a steep discount on the kit.
No surprises on the install. I learned more fully that our perceptions of brakes are twofold: 1) stopping power (i.e., how well do the brakes stop your Jeep); and 2) pedal feel (i.e., how much confidence do the brakes inspire based on the firmness of the pedal). The Crown kit definitely improved #1, but did nothing for #2. Looking at adding the J8 master cylinder and booster to improve both #1 and #2!

BBK.jpg
 
Sometimes the mushy feeling is from the factory brake lines expanding under pressure.

Good point! I have swapped out the front soft lines for hard lines. Thinking I will do the rear lines too before going further... The braking power is definately better now that the new pads have bedded in!
 
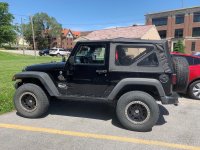
Not a major update, but I added a hoist to my garage ceiling to remove the hardtop, installed the soft top I purchased for $100, and "restored" the soft top by giving it a thorough cleaning inside and out and then redyeing the exterior using Forever Black Black-Top Gel (link below). My original plan was to just by the soft top for the frame and hardware (e.g., door surrounds) and then buy a premium replacement cover. Recently I thought better of this plan and figured I would: 1) first see if I even liked the soft top - I was worried about the noise and if I would ever even take it down at all; and 2) see how much time I could get out of the original fabric before upgrading it. Turns out the fabric was REALLY dirty and a little discolored by the sun. While the picture does not due the Forever Black dye justice - the top really does look new now except for some remaining light scratches on the windows that I will hit again this weekend with the Novus Scratch Remover. After just under a week of trying the soft top I can say I LOVE it and so do my kids! Every day I have had it on I have at least opened the Sunrider portion when driving.

Link for top dye:

Soft Top.jpg
 
Good job! It is good that you seem to like the same thing.
I never for a minute forget that it is an incredible blessing that I have a wife that loves off-roading, camping, fishing, and is tolerant of me getting my "therapy" building stuff in the driveway and garage. Thanks for your kind comment! Have a fantastic Friday and a great weekend!
 
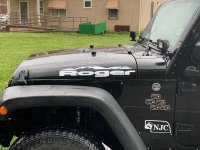
Not much of an update, but I finally got some hood stickers that I could live with. I then learned a ton about applying decals in trying to get these on! LOL
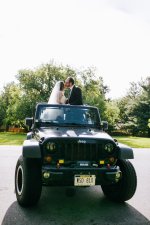
The install is far from perfect and the decals are not exactly what I wanted, but I was glad to get his name on him! I tried numerous placements of the stickers before settling on the farthest back option (e.g., 1/2 inch from the end of the hood).


Roger Stickered Up.jpg
 
Top Bottom