I installed my own ball joints over the weekend and I would like to share the experience with my install. I didn't document it very well with pictures (sorry), I will try to explain with words.
I have all the necessary tools need for this install, except the ball joint press which I figured I didn't have to buy since I would only use it one time. I leased a set from Advance Auto Parts, they will charge about $260 for lease and when you are done and bring it back they will refund the total amount paid. So it actually comes out to be FREE, no one can beat free.
DYNATRAC ADAPTERS ARE NECESSARY WITH A BALL JOINT PRESS LIKE THIS ONE
Here is a set I used
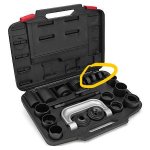
In my research on ball joint install I found out that there is special 'slightly slanted adapter' that is required when working with Dana axle. The special adapter is one of the circled ones, it is not very big, but big enough to allow sufficient space to install ProSteers
After all necessary components has been removed it was time to press the old ball joints out. I found it easier to press the lower one out first (oppose to dynatrac instructions), maybe due to press design and available adapters that came in the set.
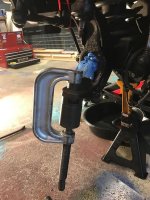
For the top I flipped the press over and went threw the hole of the lower joint. First I used an adapter right up against the stud of the ball joint and pressed that fucker out right through the top cap. It was funny to see how weak the factory ball joint really is (unfortunately I didn't take a picture of this step). With the stud of the way I switched the adapters to press the rest of the upper ball joint out.
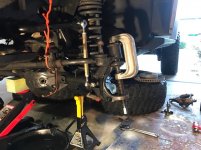
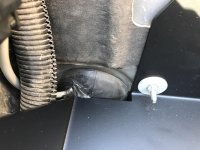
Next step was to press the ProSteers in. After cleaning the forging and juggling juggling with adapters and ball joints for a bit I decided to press the top one in first. The press was hitting up against the spring bucket a little, but I decided to just go with it and touched up the spring bucket with black paint after I was done (had to do this on both sides). The lower ball joint is much easier to work with, especially with the press I had. The 'slanted adapter' is absolutely necessary to press the lower ball joint in straight.
I am sorry but I didn't take any pictures while pressing the ProSteers in, I was to paranoid with making sure I won’t fuck this up. I must say it is tight with this press (and any other that can be leased out from autostore) but absolutely doable.
Here are pictures of both upper and lower pressed in
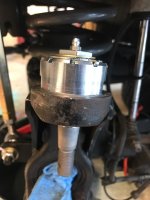
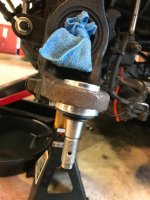
If you look at the upper ball joint it looks like it might not be pressed in all the way in. I looks like might be 1/16" up form the forging. Ball joint has a slight taper around the edge there. It is pressed all the way in.
Next I have a picture with knuckle installed
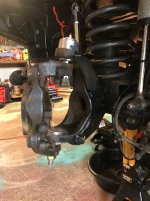
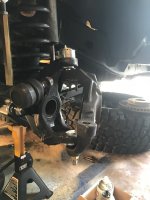
If you look closely you can see that there is a gap between the top of the knuckle and forging of the upper c. I checked the side that still had the factory setup, measured the gap it was same size as with new ball joints. The only difference is the rubber boot on factory side that made it look different. I guess the rubber boot isn’t really necessary with ProSteers.
The press I had accepted a 22mm socket at the end, and with a 2-foot breaker bar it went somewhat smooth. It does take some force to press in and out. It wasn’t that hard or I just might be really strong lol.
Here is a picture of different tools I used for this install, it was a few.
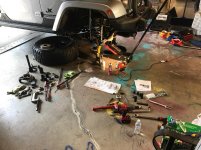
And here both sides finished and all the components put back together.
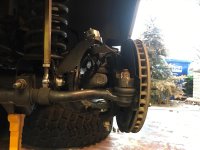
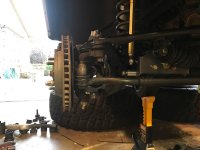
I had one hiccup during the Install. I snapped the speed/abs sensor while trying to gently pry it out of the hub. It pretty much just snapped off with very little pressure (this costed me couple extra hours on this install).
For the other side, instead of prying the sensor out of the hub I went ahead and unplugged it at the frame side. I removed the axleshaft and hub as an assembly with the whole wire that connects to the main harness. Worked great!!!!!
Sensor stuck in the hub
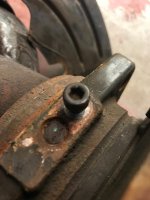
After few suggestions form Wayalife members I was able to get the rest of the sensor out of the hub and my little hiccup costed me $25 for the new senor and about 3 extra hours including the trip to a dealer for the new sensor.
Here is a picture of the sensor out.
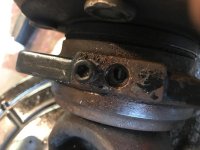
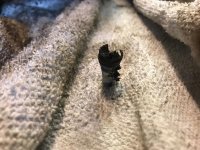
I used a dremel and picks. I ended up breaking couple picks out of the cheesy two little sets I had. It is time for a more serious pick set I guess lol.
All in all, it is not rocket science and between having the right tools, taking my time, thinking ahead, following instructions and OCD-ing about not fucking this up, it was fairly easy install. I would of took me 7-8 hours total with setup and cleanup, but with my little hiccup I came in just under 11 hrs.
.....…...............................................................
MY BUILT/REBUILD:
http://wayalife.com/showthread.php?44123-Rebuilt-of-a-Billet-Silver-mall-crawler&p=859931#post859931


