Random (non-Jeep) Shit You’re Working On....

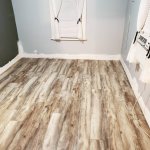
And another update... so damn close to finished.

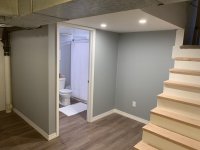
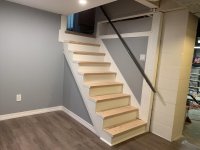
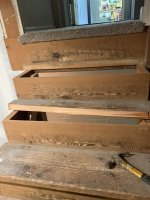
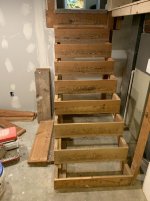
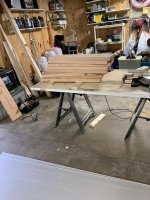
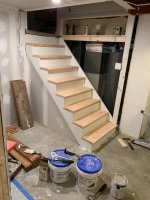
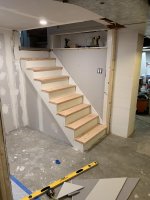
Needed to pop the stair treads up to flush cut them so I can install the wall on the right side. Well the 50 year old wood had other ideas, so added another project. Whoops.
IMG_8764.jpg
62145555870__871F0190-1C80-4498-AD6F-D989BDE66F26.jpg
IMG_8766.jpg
IMG_8770.jpg
IMG_8772.jpg

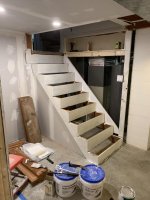
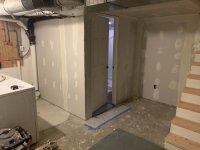
Then could finally finish some wall, last of the drywall hanging.
IMG_8776.jpg
IMG_8804.jpg

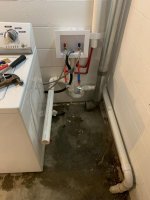
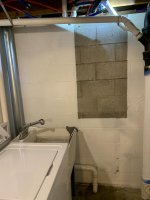
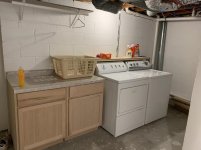
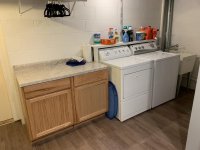
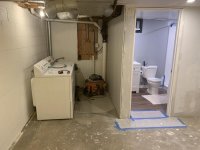
Onto the laundry area, to fit the sink washer and dryer have to move them against the left wall, which means moving the plumbing and drain pipe. I hate plumbing, but it doesn’t leak!
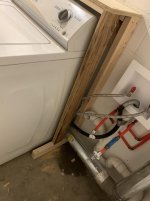
Ran the pex lines inside of a 2” pvc pipe to hide them, and installed a Norma washer hookup box instead of the big wood panel with pex all over it like before.
IMG_8800.jpg
IMG_8813.jpg
IMG_8818.jpg

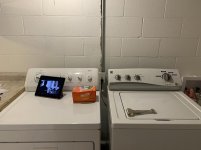
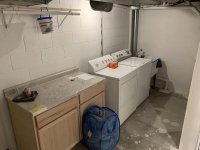
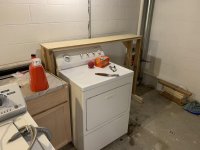
Moved the wiring and kept them below the top to conceal the wiring, ran a new dryer vent. Hung a clothes bar / shelf and bought a basic cabinet and countertop.
62182039641__E16B49C1-5321-4472-BF22-BA5DEED7F17A.jpg
IMG_8871.jpg

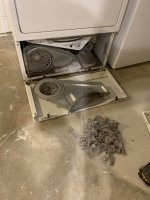
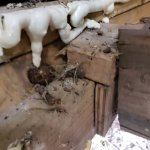
Friendly reminder to clean the lint from the inside of your dryer once in awhile.
IMG_8794.jpg

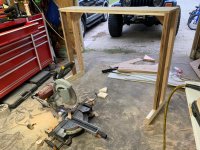
In between coats of drywall mud and painting built a free standing shelf for over the units with the leftover wood pieces.
IMG_8909.jpg
IMG_8911.jpg
All the lines and vents are nice and hidden, and it will get a coat of white paint when I pull everything out to put the floor in.
62199097116__449A6713-4D17-4CDD-AA7F-3002EED119D4.jpg
62199648031__7825B3CB-9357-4DEA-B0E4-741CAFDF56E6.jpg

Starting to come together finally. Couple more coats of mud then paint then floor, and it will finally be done. [emoji16]


Sent from my iPhone using WAYALIFE
 
And another update... so damn close to finished.

Needed to pop the stair treads up to flush cut them so I can install the wall on the right side. Well the 50 year old wood had other ideas, so added another project. Whoops.
View attachment 353284
View attachment 353285
View attachment 353286
View attachment 353287
View attachment 353288

Then could finally finish some wall, last of the drywall hanging.
View attachment 353289
View attachment 353290

Onto the laundry area, to fit the sink washer and dryer have to move them against the left wall, which means moving the plumbing and drain pipe. I hate plumbing, but it doesn’t leak!
Ran the pex lines inside of a 2” pvc pipe to hide them, and installed a Norma washer hookup box instead of the big wood panel with pex all over it like before.
View attachment 353291
View attachment 353292
View attachment 353293

Moved the wiring and kept them below the top to conceal the wiring, ran a new dryer vent. Hung a clothes bar / shelf and bought a basic cabinet and countertop.
View attachment 353294
View attachment 353295

Friendly reminder to clean the lint from the inside of your dryer once in awhile.
View attachment 353296

In between coats of drywall mud and painting built a free standing shelf for over the units with the leftover wood pieces.
View attachment 353297
View attachment 353298
All the lines and vents are nice and hidden, and it will get a coat of white paint when I pull everything out to put the floor in.
View attachment 353299
View attachment 353300

Starting to come together finally. Couple more coats of mud then paint then floor, and it will finally be done. [emoji16]


Sent from my iPhone using WAYALIFE
Looks like a ton of work! Nice job! [emoji481]


Sent from my iPhone using WAYALIFE
 
And another update... so damn close to finished.

Needed to pop the stair treads up to flush cut them so I can install the wall on the right side. Well the 50 year old wood had other ideas, so added another project. Whoops.
View attachment 353284
View attachment 353285
View attachment 353286
View attachment 353287
View attachment 353288

Then could finally finish some wall, last of the drywall hanging.
View attachment 353289
View attachment 353290

Onto the laundry area, to fit the sink washer and dryer have to move them against the left wall, which means moving the plumbing and drain pipe. I hate plumbing, but it doesn’t leak!
Ran the pex lines inside of a 2” pvc pipe to hide them, and installed a Norma washer hookup box instead of the big wood panel with pex all over it like before.
View attachment 353291
View attachment 353292
View attachment 353293

Moved the wiring and kept them below the top to conceal the wiring, ran a new dryer vent. Hung a clothes bar / shelf and bought a basic cabinet and countertop.
View attachment 353294
View attachment 353295

Friendly reminder to clean the lint from the inside of your dryer once in awhile.
View attachment 353296

In between coats of drywall mud and painting built a free standing shelf for over the units with the leftover wood pieces.
View attachment 353297
View attachment 353298
All the lines and vents are nice and hidden, and it will get a coat of white paint when I pull everything out to put the floor in.
View attachment 353299
View attachment 353300

Starting to come together finally. Couple more coats of mud then paint then floor, and it will finally be done. [emoji16]


Sent from my iPhone using WAYALIFE
Damn... I’m tired just reading about all that work that went into your basement... it has definitely come out looking great! [emoji1360][emoji1360]


Sent from my iPhone using WAYALIFE mobile app
 
And another update... so damn close to finished.

Needed to pop the stair treads up to flush cut them so I can install the wall on the right side. Well the 50 year old wood had other ideas, so added another project. Whoops.
View attachment 353284
View attachment 353285
View attachment 353286
View attachment 353287
View attachment 353288

Then could finally finish some wall, last of the drywall hanging.
View attachment 353289
View attachment 353290

Onto the laundry area, to fit the sink washer and dryer have to move them against the left wall, which means moving the plumbing and drain pipe. I hate plumbing, but it doesn’t leak!
Ran the pex lines inside of a 2” pvc pipe to hide them, and installed a Norma washer hookup box instead of the big wood panel with pex all over it like before.
View attachment 353291
View attachment 353292
View attachment 353293

Moved the wiring and kept them below the top to conceal the wiring, ran a new dryer vent. Hung a clothes bar / shelf and bought a basic cabinet and countertop.
View attachment 353294
View attachment 353295

Friendly reminder to clean the lint from the inside of your dryer once in awhile.
View attachment 353296

In between coats of drywall mud and painting built a free standing shelf for over the units with the leftover wood pieces.
View attachment 353297
View attachment 353298
All the lines and vents are nice and hidden, and it will get a coat of white paint when I pull everything out to put the floor in.
View attachment 353299
View attachment 353300

Starting to come together finally. Couple more coats of mud then paint then floor, and it will finally be done. [emoji16]


Sent from my iPhone using WAYALIFE

#skills. Looks good!
 
My goal is to get rid of all dressers in the house... starting in the kids rooms.

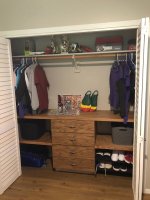
Here’s the first attempt in my oldest kids closet. I tasked him with staining it last week.

IMG_0807.jpg

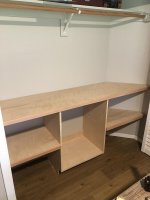
Here’s the closet in my youngest Rugrats room. Everywhere was sold out of drawer slides but some I ordered came in today. Here’s where that one stands.

IMG_0808.jpg

I’m not a carpenter or builder by any means so this is a huge learning process for me, including down to what type of wood to use and how certain stains look on it. I used 3/4” red oak ply on the first one and 3/4” birch ply on the second.


Sent from my iPhone using WAYALIFE
 
My goal is to get rid of all dressers in the house... starting in the kids rooms.

Here’s the first attempt in my oldest kids closet. I tasked him with staining it last week.

View attachment 353518

Here’s the closet in my youngest Rugrats room. Everywhere was sold out of drawer slides but some I ordered came in today. Here’s where that one stands.

View attachment 353519

I’m not a carpenter or builder by any means so this is a huge learning process for me, including down to what type of wood to use and how certain stains look on it. I used 3/4” red oak ply on the first one and 3/4” birch ply on the second.


Sent from my iPhone using WAYALIFE
Why does he have sneakers. Thought Hawaiians only wore flip flops.


Sent from my iPhone using WAYALIFE mobile app
 
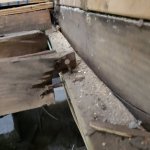
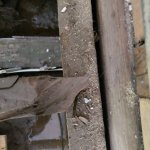
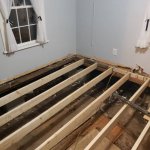
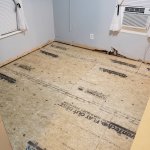
First attempt at replacing a floor from the ground up. Didn't expect to do much work on the cottage, but it gave us some lessons on what to expect in the main house.

View attachment 353553
View attachment 353554
View attachment 353555
View attachment 353556
View attachment 353557
View attachment 353558


--
Build Thread - Adventures of Fiona - https://wayalife.com/showthread.php?t=47407

Looks great. A lot more moisture and humidity down there compared to Gavinland.
 
First attempt at replacing a floor from the ground up. Didn't expect to do much work on the cottage, but it gave us some lessons on what to expect in the main house.

View attachment 353553
View attachment 353554
View attachment 353555
View attachment 353556
View attachment 353557
View attachment 353558


--
Build Thread - Adventures of Fiona - https://wayalife.com/showthread.php?t=47407

Good lord that looks like a nightmare to fix.


Sent from my iPhone using WAYALIFE
 
Good lord that looks like a nightmare to fix.


Sent from my iPhone using WAYALIFE
Just ripped it all out and installed new everything from the joists up. Worst part is that there's not a square corner in the place so adjustments had to be made going down the line.

The main house is gonna be worse, but I wasn't expecting to do anything other than cosmetics in the cottage until after we are done with the main house. Then my wife tells me she wants to change the flooring in the cottage too... Needless to say, I kept peeling off layers of 75 years worth of shit fixes until I got to the dirt. [emoji23]


--
Build Thread - Adventures of Fiona - https://wayalife.com/showthread.php?t=47407

It looks great with that new flooring [emoji106] square corners are for squares anyways lol
 
Top Bottom