Bullwinckle
Hooked
Lmao [emoji23] part 2 was pretty funny as well.
That is a very beautiful car you have!!We did new upholstery and top for my 34 Ford Roadster.
View attachment 350446View attachment 350447View attachment 350448
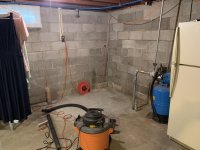
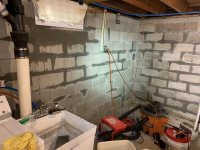
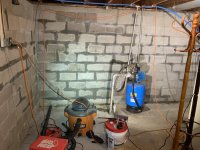
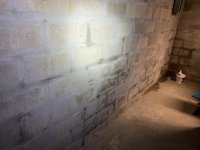
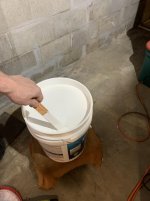
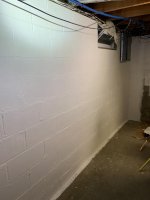
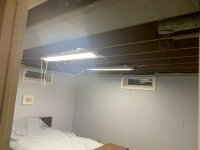
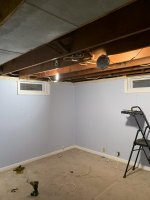
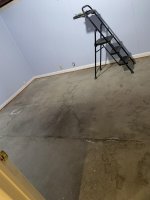
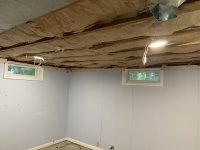
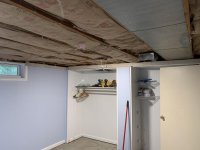
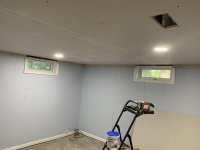
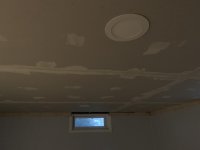
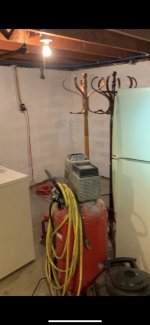
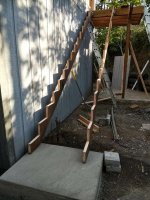
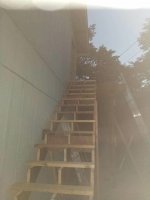
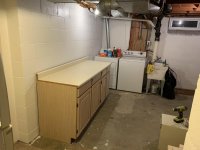
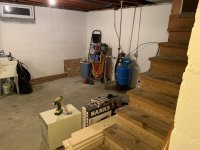
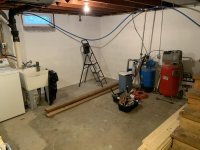
Started the process to rebuild the basement.
Had a slight water issue in the past so fixed the landscaping and now repairing the damage of 50 years and water ingress.
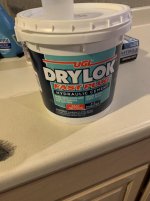
First up, filling the “cracks” I went through 3 10lb buckets of Drylok hydraulic cement. Had I known there was this many issues to the point I damn near filled every single block edge I likely would’ve looked into other options but here we are
View attachment 350596
View attachment 350597
View attachment 350598
View attachment 350600
View attachment 350599
Drylok extreme water sealing wall paint. This shit has to be brushed on to form a good seal with no pinholes. And a min of 2 coats. This was a bitch. And I still have one small wall to finish, other project timeline took priority.
View attachment 350601
View attachment 350602
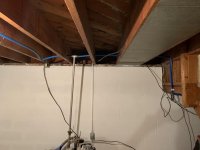
Bedroom remodel, this house had a small crappy basement bedroom with a nasty drop ceiling gross carpet and like no insulation. Ripped the ceiling down. Redid most of the wiring, insulated and did the ceiling as well for some noise reduction. Ripped out the carpet and tack strips. Then dry walled the ceiling today and first coat of mud (I’m not good at drywall so it’s not gonna be perfect. ) I screwed it directly to 50 year old floor joists that are not level with each other but did what I could. Debated adding drop down 2x4 pieces to level it but I wanted maximum height because it’s a short basement. You can see top of the walls where the ugly paint used to be I gained about 4” of height from where the drop ceiling was.
View attachment 350603
View attachment 350604
View attachment 350605
Tore all this ugly out.
View attachment 350609
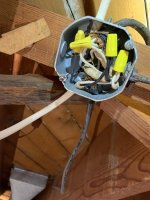
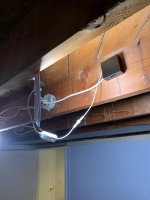
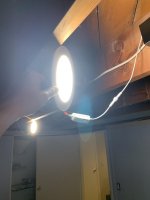
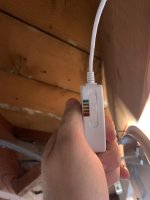
Ditched the old fluorescent garage lights for these new “canless” recessed lights. They’re like 30 a piece and I love them. They’re super thin, insulation rated so are safe to use directly against the fiberglass. Have selectable color temperature so you can pick your favorite, and are held in place with 2 spring clips just cut a 6” circle and push them in. 1000 lumens each this room is about 15x15 and I’m gonna have to put a dimmer switch in.
View attachment 350606
View attachment 350607
View attachment 350608
View attachment 350610
View attachment 350611
View attachment 350612
View attachment 350613
Next up multiple coats of mud til I give up on being flatter and some sanding. Then some crown moulding of some sort is going up around the ceiling to help the transition to the panel walls and I’ll coat everything with primer and then walls get a light gray. Have vinyl plank floating floor to drop down as well. Will eventually get a egress window down the line, but I’m contracting that out down the line. Hard pass on doing that myself.
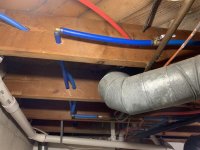
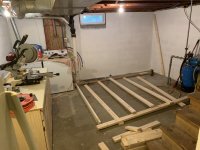
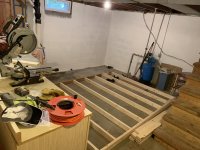
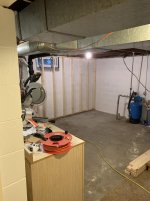
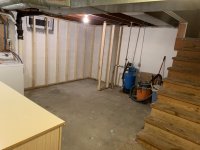
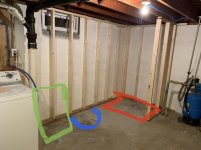
Few more days to finish bedroom then I get to start project #3, putting a bathroom in this corner, plumber comes in a week and a half to knock out the concrete floor for sink toilet and shower drains and run all the pex and pvc and I need to have half of the framing done by then for him to work with.
View attachment 350614
Jeep still needs a steering gear and the ranch’s 5000xs put on, I need more beer. So much more beer.
Sent from my iPhone using WAYALIFE
Just a tip for hanging drywall to uneven framing. RC-Channel, decouples the sheet rock from the framing great for acoustic separation and from my experience the flex in the metal allows for smooth seams. You only lose 1/2" in height.Started the process to rebuild the basement.
Had a slight water issue in the past so fixed the landscaping and now repairing the damage of 50 years and water ingress.
First up, filling the “cracks” I went through 3 10lb buckets of Drylok hydraulic cement. Had I known there was this many issues to the point I damn near filled every single block edge I likely would’ve looked into other options but here we are
View attachment 350596
View attachment 350597
View attachment 350598
View attachment 350600
View attachment 350599
Drylok extreme water sealing wall paint. This shit has to be brushed on to form a good seal with no pinholes. And a min of 2 coats. This was a bitch. And I still have one small wall to finish, other project timeline took priority.
View attachment 350601
View attachment 350602
Bedroom remodel, this house had a small crappy basement bedroom with a nasty drop ceiling gross carpet and like no insulation. Ripped the ceiling down. Redid most of the wiring, insulated and did the ceiling as well for some noise reduction. Ripped out the carpet and tack strips. Then dry walled the ceiling today and first coat of mud (I’m not good at drywall so it’s not gonna be perfect. ) I screwed it directly to 50 year old floor joists that are not level with each other but did what I could. Debated adding drop down 2x4 pieces to level it but I wanted maximum height because it’s a short basement. You can see top of the walls where the ugly paint used to be I gained about 4” of height from where the drop ceiling was.
View attachment 350603
View attachment 350604
View attachment 350605
Tore all this ugly out.
View attachment 350609
Ditched the old fluorescent garage lights for these new “canless” recessed lights. They’re like 30 a piece and I love them. They’re super thin, insulation rated so are safe to use directly against the fiberglass. Have selectable color temperature so you can pick your favorite, and are held in place with 2 spring clips just cut a 6” circle and push them in. 1000 lumens each this room is about 15x15 and I’m gonna have to put a dimmer switch in. [emoji1787]
View attachment 350606
View attachment 350607
View attachment 350608
View attachment 350610
View attachment 350611
View attachment 350612
View attachment 350613
Next up multiple coats of mud til I give up on being flatter and some sanding. Then some crown moulding of some sort is going up around the ceiling to help the transition to the panel walls and I’ll coat everything with primer and then walls get a light gray. Have vinyl plank floating floor to drop down as well. Will eventually get a egress window down the line, but I’m contracting that out down the line. Hard pass on doing that myself.
Few more days to finish bedroom then I get to start project #3, putting a bathroom in this corner, plumber comes in a week and a half to knock out the concrete floor for sink toilet and shower drains and run all the pex and pvc and I need to have half of the framing done by then for him to work with.
View attachment 350614
Jeep still needs a steering gear and the ranch’s 5000xs put on, I need more beer. So much more beer.
Sent from my iPhone using WAYALIFE
View attachment 350630
Just finished a ship lap wall in my kids bedroom.
Sent from my iPhone using WAYALIFE
Started the process to rebuild the basement.
Had a slight water issue in the past so fixed the landscaping and now repairing the damage of 50 years and water ingress.
First up, filling the “cracks” I went through 3 10lb buckets of Drylok hydraulic cement. Had I known there was this many issues to the point I damn near filled every single block edge I likely would’ve looked into other options but here we are
View attachment 350596
View attachment 350597
View attachment 350598
View attachment 350600
View attachment 350599
Drylok extreme water sealing wall paint. This shit has to be brushed on to form a good seal with no pinholes. And a min of 2 coats. This was a bitch. And I still have one small wall to finish, other project timeline took priority.
View attachment 350601
View attachment 350602
Bedroom remodel, this house had a small crappy basement bedroom with a nasty drop ceiling gross carpet and like no insulation. Ripped the ceiling down. Redid most of the wiring, insulated and did the ceiling as well for some noise reduction. Ripped out the carpet and tack strips. Then dry walled the ceiling today and first coat of mud (I’m not good at drywall so it’s not gonna be perfect. ) I screwed it directly to 50 year old floor joists that are not level with each other but did what I could. Debated adding drop down 2x4 pieces to level it but I wanted maximum height because it’s a short basement. You can see top of the walls where the ugly paint used to be I gained about 4” of height from where the drop ceiling was.
View attachment 350603
View attachment 350604
View attachment 350605
Tore all this ugly out.
View attachment 350609
Ditched the old fluorescent garage lights for these new “canless” recessed lights. They’re like 30 a piece and I love them. They’re super thin, insulation rated so are safe to use directly against the fiberglass. Have selectable color temperature so you can pick your favorite, and are held in place with 2 spring clips just cut a 6” circle and push them in. 1000 lumens each this room is about 15x15 and I’m gonna have to put a dimmer switch in.
View attachment 350606
View attachment 350607
View attachment 350608
View attachment 350610
View attachment 350611
View attachment 350612
View attachment 350613
Next up multiple coats of mud til I give up on being flatter and some sanding. Then some crown moulding of some sort is going up around the ceiling to help the transition to the panel walls and I’ll coat everything with primer and then walls get a light gray. Have vinyl plank floating floor to drop down as well. Will eventually get a egress window down the line, but I’m contracting that out down the line. Hard pass on doing that myself.
Few more days to finish bedroom then I get to start project #3, putting a bathroom in this corner, plumber comes in a week and a half to knock out the concrete floor for sink toilet and shower drains and run all the pex and pvc and I need to have half of the framing done by then for him to work with.
View attachment 350614
Jeep still needs a steering gear and the ranch’s 5000xs put on, I need more beer. So much more beer.
Sent from my iPhone using WAYALIFE
I wonder why cement block basements are so popular in Michigan? I’ve noticed this looking at vacation places. Is it the sandy soil? Seems backwards for all the freezing and thawing. Your project looks great
Sent from my iPhone using WAYALIFE mobile app
I wonder why cement block basements are so popular in Michigan? I’ve noticed this looking at vacation places. Is it the sandy soil? Seems backwards for all the freezing and thawing. Your project looks great
Sent from my iPhone using WAYALIFE mobile app
Just a tip for hanging drywall to uneven framing. RC-Channel, decouples the sheet rock from the framing great for acoustic separation and from my experience the flex in the metal allows for smooth seams. You only lose 1/2" in height.
Sent from my SAMSUNG-SM-T337A using WAYALIFE mobile app
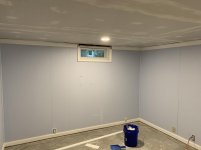
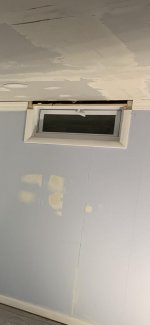
You think that’s bad? Look up “Michigan basement”
That is great info to have going forward, wish I had it a week ago lol. Ended up having to fill so much mud inbetween pieces to attempt to level them that I’m now debating a textured finish
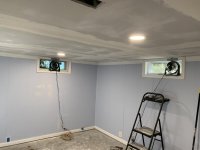
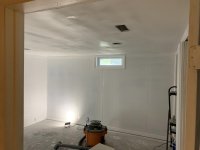
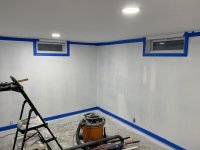
Put up some moulding, retrimmed Windows, lots of mud and sanding, lots of waiting for mud to dry. Lots of fucking it up with sanding and putting more on to try again. Not my forte. But now there’s the first coat of primer drying so I can see where all my flaws are and if I care enough to fix. Could be worse.
Bells brewing- Bright white. Delicious.
View attachment 350788
View attachment 350789
View attachment 350790
View attachment 350791
Finished ceiling and trim, downward facing lights help hide most the issues.
View attachment 350830
Looks good man! I'm in the middle of drywalling/mudding a 32'x32' garage. Trying to work on my mudding technique cause I too am sick of sanding the shit back off. I'll try to post up pics of the garage in the next few days. Good luck.
Thanks bud, turned out pretty okay overall. The only advice I Feel qualified enough to give is thin the shit out of the mud, and if you’re using one of the sanders on a pole with the swivel joint- duct tape the shit out of it so it can only go back and forth not a full circle. If it catches for whatever reason it’ll jackknife itself and gouge the shit out of the wall and you get to start over. (It also gouges the thing it hits when you throw it out of anger too �� ) this is the tutorials I followed for taping / mudding the guy explains it very well without dumbing it down too much. https://www.youtube.com/watch?v=QbHeDkMN9bQ
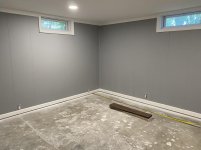
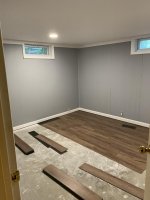
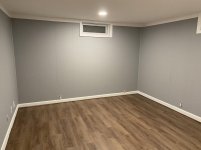
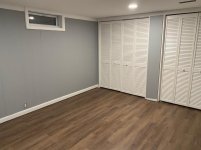
Few touch ups to do and I need to pickup some 1/4 round for the baseboard with the new floor in. Then I start framing for the bathroom in a few days.
View attachment 350865
View attachment 350866
View attachment 350867
View attachment 350868
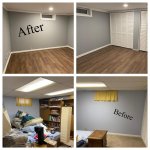
Night and day difference, not too shabby for a weeks worth of work. 7 days start to finish.
View attachment 350869
Sent from my iPhone using WAYALIFE
Thanks bud, turned out pretty okay overall. The only advice I Feel qualified enough to give is thin the shit out of the mud, and if you’re using one of the sanders on a pole with the swivel joint- duct tape the shit out of it so it can only go back and forth not a full circle. If it catches for whatever reason it’ll jackknife itself and gouge the shit out of the wall and you get to start over. (It also gouges the thing it hits when you throw it out of anger too �� ) this is the tutorials I followed for taping / mudding the guy explains it very well without dumbing it down too much. https://www.youtube.com/watch?v=QbHeDkMN9bQ
Hell of an improvement.Thanks bud, turned out pretty okay overall. The only advice I Feel qualified enough to give is thin the shit out of the mud, and if you’re using one of the sanders on a pole with the swivel joint- duct tape the shit out of it so it can only go back and forth not a full circle. If it catches for whatever reason it’ll jackknife itself and gouge the shit out of the wall and you get to start over. (It also gouges the thing it hits when you throw it out of anger too ) this is the tutorials I followed for taping / mudding the guy explains it very well without dumbing it down too much. https://www.youtube.com/watch?v=QbHeDkMN9bQ
Few touch ups to do and I need to pickup some 1/4 round for the baseboard with the new floor in. Then I start framing for the bathroom in a few days.
View attachment 350865
View attachment 350866
View attachment 350867
View attachment 350868
Night and day difference, not too shabby for a weeks worth of work. 7 days start to finish.
View attachment 350869
Sent from my iPhone using WAYALIFE
