RAGNAROK - Mojave Sand Build

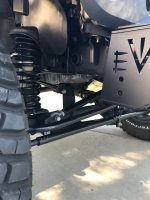
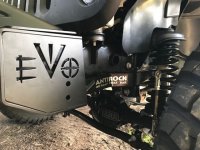
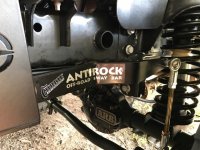
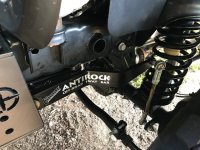
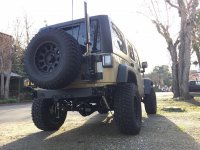
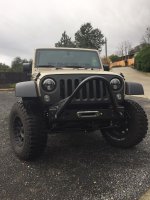
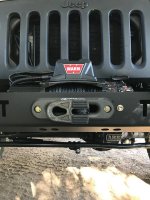
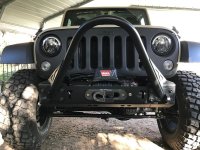
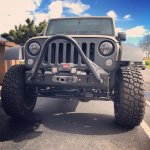
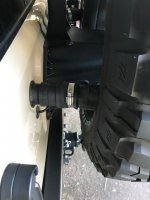
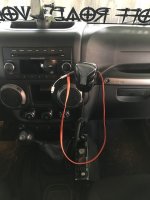
Installed the EVO vacuum relocation bracket and EVO Quarter Pounder with Stinger yesterday. I still need to drill out the top holes on the bumper for the stinger. My current drill is crap so I'll need to get a better one for that :D

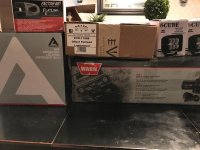
Winch to come later. Leaning towards the Warn M-8000S. I Picked up a Factor 55 Hawse Fairlead to fill the hole for the winch line and for a bit of a cleaner look while I'm without winch. I'd like to mount some DOT fog lights on the bumper using the factory fog wiring and switch. Does anyone know of any good options for that? Are there any plug-and-play options?

View attachment 233777

View attachment 233778

View attachment 233779

Man, your rig is looking great! Mojave Sand looks badass all EVO'ed out! :thumb:
 
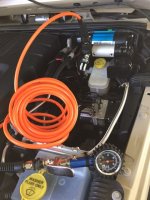
Finished the installation of my ARB compressor and EVO mounting bracket today.

ARB comp 1.jpg

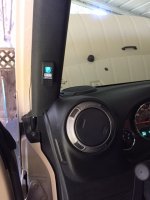
I cut out a slot for the switch on the OEM plastic.

ARB Switch.jpg

All in all it was a pretty straight forward install thanks to Eddie's write up. I got a little hung up on the red/yellow cord and ended up running it back to the battery so that I can run the switch with the Jeep on or off.
 
A couple of small items done this weekend.

Ran my CB coax and put my Firestik w/quick disconnect on. Waiting for the mounting bracket to arrive before I put my Bearcat 880 in. On my 2014 JK I had it mounted on the dash above the stereo. Didn't really like it there so I've decided with this Jeep to mount it next to the shifter on the passenger side. One of the reasons I didn't like the CB on the dash was that I like putting stuff in the tray and wanted to have my cell there. Just put in a Rugged Ridge Dash Mount this morning and am liking having my phone in that spot for using maps etc.

Here's a pic with the Firestik mounted:

rear with firestik.jpg


Also put an Off Road Evolution decal on my windshield:

ORE windshield.jpg

And lastly, installed a Bestop Lock Box under my seat
 
Lots of good stuff arrived the other day.

winch locker lights.jpg

I put the winch in last night and am having the locker installed tomorrow. Leave that kind of thing for the pro's!

winch install 2.jpg

winch install 1.jpg
 
Had the ARB Air Locker installed in the rear 44. I'm keeping the front open since I still have the 30 up front. I had the shop that did my gearing do the locker install and run the air line to my compressor under the hood. I'm going to do the switch installation myself. I cut a slot in my A pillar for my compressor and may do another for the locker. If that doesn't work I'll get a Daystar or Rugged Ridge A pillar replacement with the pre-cut switch slots.

rear locker.jpg
 
I went with Inspired Engineering 6 Cube Flood Lights mounted above my fairlead. These are plug and play with the OEM fogs and are turned on/off with OEM fog switch.

fog lights.jpg
 
Until I get a proper rear tire carrier I wanted to get something on the tailgate to help with the 35" tire as a temporary fix. Picked up some rubber coupling from Home Depot to extend the stock bumpstops on the tailgate.

iso rear.jpg

I also got my Bearcat 880 mounted as few weeks back. Still need to tune it but I'm liking this mounting spot much better than when I had it above the dash in my 2014.

CB 1.jpg
 
Decided on installing a Currie Antirock Sway Bar in preparation for Moab EJS this year. My original plan was to find a used Rubicon swaybar and go with an EVO No Limits set-up. Seems like those things are harder to find than I thought and when I did find one for a reasonable price it had already been swooped up. After talking to a few people out at King of the Hammers and getting annoyed with disconnecting and re-connecting my sway bar I felt like it would be a good idea to get the Antirock prior to EJS. My Rock Krawler quick disconnects worked fine and as intended but I'd heard good things about the Antirock's and figured it'd be nice not having to re-connect everyday out at Moab and anytime for that matter.

I haven't noticed much if any increased body roll from what I already had. The ride is great and so far I'm really liking them. Installation should have been pretty straight forward and taken an hour or so. I seemed to run into every issue I could with each step.

I had it in my head for some reason that I wouldn't have to take off my EVO quarter pounder to do the install. After fumbling around for 45 minutes trying to make it work with the bumper in place I finally came to my senses and unbolted and slid it back enough to get the sway bar through the bushing. That leads to my next delay, getting the damn sway bar through the bushings. Holy hell that was a tight fit! Instructions say you might have to "tap" it through. I beat the living hell out of it to get it through those bushings!! Next, I had problem getting the bolt to thread into the sway bar. Ended up having to run to the hardware store to get a tap and die set (my first time doing that, which was cool) so that I could get the bolt started. Sway bar links were easy enough to get on, no problems there. Ok, so now I'm on the home stretch getting my EVO QP bolted back on. Well, wouldn't you know the last bolt decided to be a pain in the ass to get started and bolted down. Now i'm into this 1 hour install 3 and a half hours. Lucky for me I expect every install to have some sort of hiccup and take longer than expect since this Jeep is really my first do-it-yourself vehicle. Each install is definitely a learning process and anytime I get an excuse to add to my tool collection I can't complain.


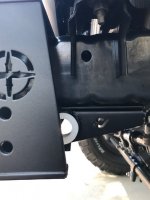
Here you can see why the EVO bumper needed to come off. Not enough space to get the sway bar in:
Antirock 6.jpg

Old sway bar with Rock Krawler links:
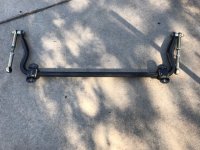
sway bar.jpg

Sway bar removed:
no sway bar.jpg

Few of the finished product:
Antirock 1.jpg

Antirock 3.jpg

Antirock 5.jpg

I'm going to try to get it flexed later this week and see how that goes and if the links need any adjusting.
 
Top Bottom