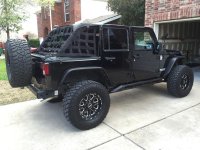
Project "Thanos" Build

iRonin

Member
Project Thanos Build

Whelp, I've been on here for a while now, and I've always meant to get a build thread going, but I think I was waiting for a significant mod before doing so, just so the first bunch of updates weren't all minor.

Most of the work you'll see here I've done with my own two hands and my own tools. Now, I don't know how to weld, so for that and for critically precise implementations like re-gearing, I've relied on a good friend of mine here in Austin with years of experience (and his own shop) to help me out.

Finally, this project is my first real Jeep project - growing up we always had beaters (jeep and non jeep) we'd wheel in the mountains but nothing I would claim. In my late teens and early 20s I was more into drag racing, so its only been within the last couple years that I've come full circle back into the off-road space.

All that said, welcome, please enjoy, and thanks for taking the time to follow this build and my journey :)

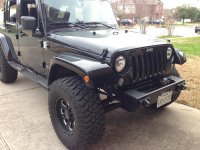
12-08-2013.jpgthanos profile.jpg


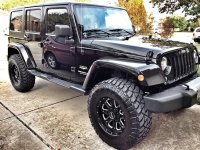
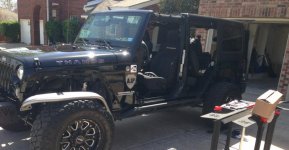
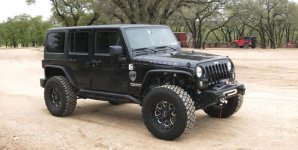
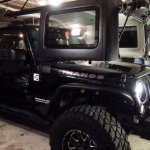
Initial Setup: 2014 Sahara Unlimited
December 2013
3.6L Pentasar Engine w/ “NextGen” Dana 30/44 @ 3.73 Gearing

Modifications at the time of purchase
  • 35″ Kelly Safari TSR Off-road Tires
  • 17″ ProComp "Phantom" Series 5182 series Wheels.
  • Teraflex JK Wrangler 2.5″ Suspension
  • Aries Spare Tire Relocation Carrier
  • Rugged Ridge Third Brake Light Extension
  • Hypertech 752501 Speedometer Recalibrator

The Plan
The plan, quite simply, is for this to be a JK Experience capable rig that will also be street legal (non-trailered). The target is 37" tires, with the option to scale to 40" later in a way that my wife's 2 door can inherit the axles/suspension components if/when that bridge is crossed.

The theme for the jeep is based on a fictional character named Thanos from the Marvel Comics universe. I’m not planning on slapping a giant mural of the guy on the hood, but instead will be taking aspects of the character and personifying them in the Jeep. But even in the subtleties, I still plan on adding a few easter eggs here and there in the build that will be a direct nod to the character.

Finally, since I don’t have a piles of disposable cash laying about, or sponsorship, I’ll be building the Jeep up in phases, so things can/will change based on new information.

Phase 1 – Armor and Recovery

I purchased the Jeep as a dealer-built setup that had some useful modifications done to it that I knew I could later migrate onto a second 2-door Jeep that my wife would eventually buy. So, with a decent 35″ platform already in place, the first place to start was to get some protection around the vehicle, as well as some of the recovery gear and communication equipment.

So the laundry list for phase 1 looked like this:

Radio/Communication
  • Cobra 29 LTD BT – Done, but ended up swapping out to a Cobra 75 WX ST for a much cleaner setup without having to mount a big radio. Also learned that the bluetooth feature was pretty useless already having UConnect.
  • Firestik NGP LG4-M2-B CB Antenna– Done
  • AntennaX 13" FM Antenna - Done

Recovery/Misc

Armor
  • Poison Spyder Front Crusher Flares (Narrow) - Done
  • Poison Spyder Read Crusher Flares - Done
  • EVO MFG 1/4 Pounder – Done (Customized to fit Zeon winch)
  • EVO MFG Rock Sliders – Done (Welded)
  • EVO MFG LCA Skids - Done (Welded) - Retired w/old Axle
  • EVO MFG Rock Skins – Owned but not Installed Yet

Phase 2 – Steering Components, Minimal Locker Investment, Cosmetic Upgrades - Completed!

Phase 2 was spent putting in time on the 35s, looking for gaps in on-board equipment, upgrading the front open diff with a cheap and reusable locker, and beefing up the steering components to prepare for Phase 3. Trying some of the more challenging trails at parks on 35s with the Unlimited wheelbase meant a lot more contact with things like my tie rod and underbelly components. Bashing up a few stock components while putting in the wheel time was part of the plan so I wasn't crunching "the good stuff" aftermarket components later on dumb mistakes.

Steering & Driveline
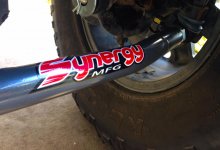
  • Synergy Tie Rod – Done
  • Synergy Drag Link – Done (Welded)
  • TeraFlex HD Track Bar - Done
  • Yukon Spartan Locker (Front/D30/3.73) - Done

Misc/Cosmetic
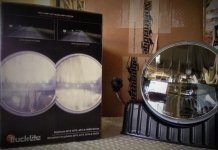
  • Truck-Lite 7" Headlights - Done
  • ARB Onboard Hi-Output Air Compressor - Done
  • Bestop Safari Top - Done
  • Bestop Tonneau Cover - Done
  • Wayalife Windshield Banner/Side Icon Stickers -Done
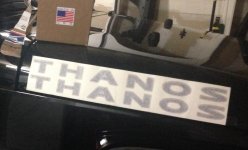
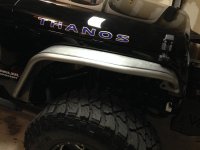
  • THANOS Hood Cowl Decals w/"Wrangler Omnipotent" replacement stickers - Done
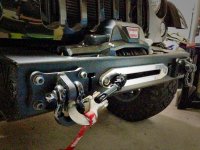
  • Factor 55 ProLink Shackle Mount - Done

Phase 3 – Scale to 37", Finish JKX Requirements- Completed! Applied! Update: SELECTED!!
This is the current phase I'm in now. I have the PR44 and EVO Long Arm kit fully installed (finally!).

Suspension

Drivetrain
  • (Front) Dynatrac ProRock 44 Unlimited w/Reid Racing Knuckles, Synergy Ball Joints, Weld-on Drag Link Flip Bracket, 4.88 Gearing - Done
  • (Front) RCV Axles - Done
  • (Front) ARB Air Locker - Done
  • (Front) Adam's Rear Driveshaft (1350) - Done
  • (Rear) Yukon/Motive 4.88 R&P/Overhaul of stock D44 - Retired; D44 swapped for PRXD60.
  • (Rear) Ten Factory 30 spline Chomo Axle Shafts - Retired; D44 swapped for PRXD60.
  • (Rear) Dynatrac ProRock XD60 - 5x5 bolt pattern, Dynatrac HD Shafts, 4.88 gearing - Done
  • (Rear) ARB Air Locker - Done
  • (Rear) Adam's Driveshafts (1350) - Done

Tires/Misc
  • Custom Weld-In Exhaust Loop Delete for LA Clearance - Done
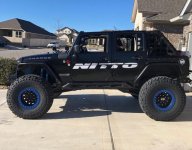
  • Nitto Mud Grapplers (37x13.5x17) - Done
  • American Racing ATX Slabs (17x9) - Done
  • Superchips Flashpaq - Done
  • Extended/Steel Braided Brakelines - Done
  • Hi-Lift 48" Jack - Done
  • EVO MFG Tailgate Hi-Lift Jack Mount - Done, Retired to Nebula Jeep.
  • EVO MFG Rear Corner Rockskins - Done
  • EVO MFG Chromoly Sport Cage - Done
  • Drake Offroad Fire Extinguisher Mount - Done

Bonus


Phase 4 – Finishing Touches
The following phase will clean up some odds-and-ends that I would like to have done, but weren't really critical to build out Thanos to support applying for the JKX.

Lighting

Cosmetic

Phase 5 - One-Ton Swap

Drivetrain & Suspension

Wheels & Performance

Phase 6 - Double-tri rear & the push for 42s
  • (Rear) GenRight 25gal Fuel Cell (stock gas tank delete)
  • (Rear) Rock Kralwer Upper 4-Link Crossmember
  • (Rear) GenRight Coilover Shock Mounts
  • (Rear) X" King Coilovers (depending on available geometry)
  • (Rear) King Air Bump Stops
  • Transfer Case Upgrade (Rubi, Atlas4)
  • 42" Nitto Trail Grapplers
  • (Front) 3 Link?
 
Last edited:
Phase 1 Part 1

Cobra CB & Firetick Antenna
February, 20014
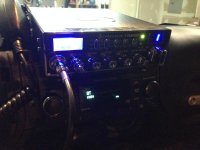
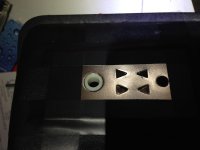
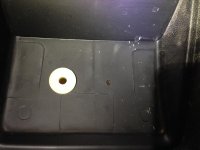
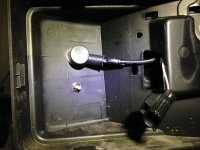
My first real priority was getting some communications installed in the Jeep. I had a club/newbie run coming up and with it being stupid cold outside I wanted to do my part in limiting how often the trail guides had to stand outside. I went with the Cobra 29 Bluetooth and paired it with a Firestik NGP (no ground plane) antenna. I struggled with where to mount the radio itself as I was seeing most folks with them had a sport cage installed with it mounted overhead. I decided to mount it on my dash but being a JK, I had that tray to deal with. So I ended up drilling a pair of holes up through the tray recess and, using carriage bolts, essentially created a pair of "stilts" for the radio to screw down onto so that it rested level with the dash.

20140205_045049267_iOS.jpg

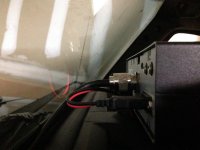
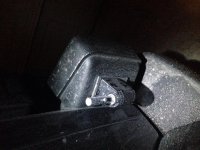
I also had to be cognizant about how deep the unit sat as the hookups were all in the back, near the glass:
20140205_073720456_iOS.jpg

I don't have a picture of it, but I later also added a cone-shaped rubber bumper to the rear of the unit to act as a bump stop and to smooth out vibration on the trail.

The rest of my pics on the head unit are all around routing the wires through the firewall, etc. I didn't end up keeping this set up. It did fine on the trail, but having it on the dash did limit a smidge of visibility and I was disappointed in what the Bluetooth functionality ended up being (I thought it was so that I could talk, via app on my phone, or BT headset, on the channel from outside the vehicle) - so I ended up going with the hand-held Cobra 75 WX ST.

As for the antenna, I went with the NGP solution so that I didn't have to ground it to the body and then later deal with potential interference. It also keeps the coax all one clean line from the antenna to the radio. The trick to it, though, is that it's a fixed length cable so I had to be creative on how I could reasonably route it and mount it to the rear. The cable was not long enough to route through to the tailgate, so I opted to mount it using the hollow stock licence plate housing. Pulling the housing apart, I ran the cable through the existing body hole for the LP light, and then drilled the holes for the elbowed quick release mounting plate.

This is the mounting plate on the outside of the LP housing before and after attaching the quick-release mount:
20140210_215645993_iOS.jpg
20140212_045954361_iOS.jpg

And here is the before and after from the inside:
20140210_215657606_iOS.jpg
20140211_003151585_iOS.jpg

Overall I was super impressed with the NGP solution - when I got in and started going through the CB SWF calibration, I remember setting the radio to Channel 1 and then hitting the button and watching as the needle hardly even flinched. Then I set it to channel 40, hit it again and it barely flinched....this was with no adjustment! I thought surely I had done something wrong so I actually drove down to one of the truck-stop gas stations and lurked around in channel 19 until a voice bellowed through, clear as day, asking whether anyone knew if the Subway on Grand Ave was open late.

I get asked about the LP mount for the antenna a lot,and while I really like it in general, in practice trees dragging the antenna back puts a bit of leverage strain on the housing. I didn't really want to do a big spring thing, so my solution was just to brace the antenna a short ways up with a very small bungee and it seemed to do the trick.

As I mentioned earlier, I also decided to ditch the big Cobra 29 head unit and go with a smaller Cobra 75. So far on trails I haven't had a problem with range or anything, and I still have access to NOAA weather alerts.

Here are some daylight pics of the final setup as it stands now a year later:
<TBD Pic of the Cobra 75>
<TBD Pic of the Antenna attached>

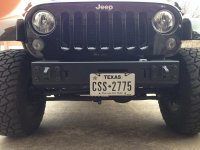
EVO 1/4 Pounder Front Bumper
February, 2014
Ah,the first real "permanent modification". As you know, this bumper requires you hack your frame horns back a bit, so it was my first time taking things like a sawzall and angle grinder to my otherwise brand-new jeep. I was pretty nervous so I didn't think to take pics of it. So these are the early pics of just the bumper installed.
IMG_4151.jpgIMG_4152.jpg

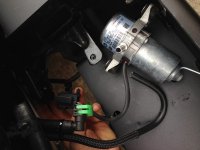
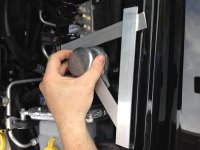
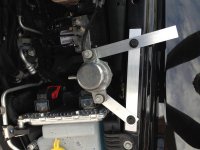
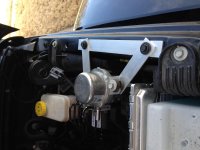
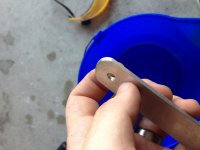
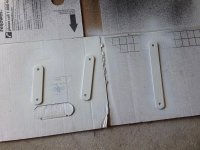
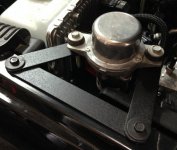
I still needed to relocate the vacuum pump. That I Felt a lot more comfortable doing, so I took plenty of pictures of the process. I decided to some custom bracket work of my own and built one from about $6 of aluminum:
20140220_201517276_iOS.jpg20140220_203353960_iOS.jpg20140220_211648109_iOS.jpg20140220_212943668_iOS.jpg20140224_210023239_iOS.jpg20140224_210816979_iOS.jpg

Wroks great, doesn't interfere with where my air compressor was later mounted:
reloc.jpg

TeraFlex Quick Disconnects
February, 2014
I guess I only have one crappy pic of the disconnects installed, but I actually had an issue where a crossbar in the frame was blocking my swaybar from being able to swing up all the way. I didn't really realize that was a thing until I attended the the newbie run and the guy running it took a look at it (I thought I just installed it wrong lol). So later that evening when I got home I ground it down and made a cheesy video of the process since I didn't see anything out there on the topic:
 
Last edited:
Phase 1 Part 2

EVO Rock Sliders
February, 2014
This is the project that got me in touch with what would be my go-to brother for Jeep wisdom. I wanted to go the weld-on route with them, so I did all the prep and paint work myself, and then asked around until I was put in contact with a shop in town that he was headlining.

The sliders arrived bare, and from Colorado (Northridge) so understandably there was a little rust to sand off around the welds. I ended up using those sand-grit sponges when I now swear by because you can get them into all the nooks and crannies:
20140219_203412579_iOS.jpg

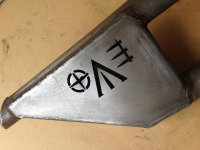
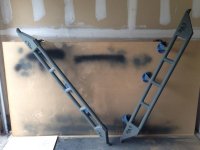
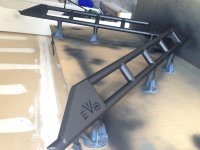
I personally only had my garage to work with and not a fancy paint booth, so my rigging was the best I could do. I didn't go the powder coating route to save a little dough knowing that these things were meant to be scrached and beat to hell anyways, so the route I decided on was to just prime them up and hit them with textured bedliner. I taped off the attachment ends to leave them bare for the welding later:
20140220_150005643_iOS.jpg

Here's how they looked after their final coat:
20140220_155413492_iOS.jpg

I pulled off the old Sahara side-steps:
20140221_195554248_iOS.jpg

Then I packed up the new sliders and headed out for John's shop:
20140221_193726218_iOS.jpg

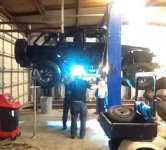
This is my first picture of Thanos up on a lift, you can see where we also had the sliders on jack stands to get things into position:
20140222_000108894_iOS.jpg

After clamping things in place the best we could, we found the mounting ends needed a little help to contour to the frame, so a little heat was used to make things easier:
20140222_003940381_iOS.jpg

With everything aligned and clamped, it was time to tack and weld the first slider on!
20140222_004354034_iOS.jpg

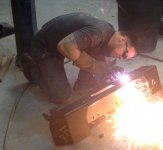
For the second slider, I asked if I could watch him weld to get a feel for the process. He was totally cool with it, told me to just squint a little if it gets too bright :cheesy: :
sliders.jpg

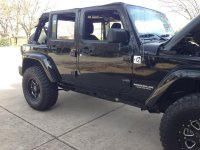
After his great work, we finished cleaning and painting things up, and a few days later I was back on the trails putting them to work!
20140222_182650501_iOS.jpg20140222_182722475_iOS.jpg

Warn Zeon 10s Winch
February, 2014

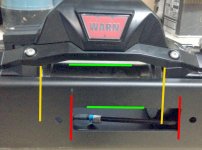
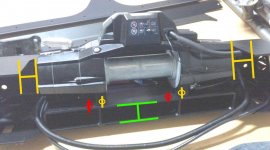
Now that my rails were safe, the next key component for me was getting a winch to help me in sticky situations. There weren't very many folks in my group running them, so I wanted to be sure I didn't need to depend on others. I opted for the Warn Zeon 10s and got a decent deal on it while they were doing the rebate special. The part where I screwed up was... I didn't see the fine print when i bought the EVO Bumper that it wasn't compatible with the new Zeons. So when the winch arrived and I tried a test fit, I discovered why:
front.jpgback.jpg

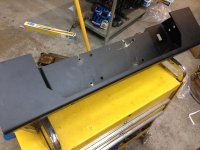
The footprint of the Zeons was very "centered' and symmetric, whereas typical winch sits justified towards one side. So as you can see in the pictures above, all of the mounting holes were off by about 1-2", and then the winch itself sat so centered that the mouth opening was off by a good 4".

The Zeons were still pretty new at this point, so when I explained the situation to Northridge, they were pretty cool about offering to take back the winch so I could go with a non-zeon style, but there was a part of me that not only felt responsible cause I should have known better, but was also intrigued by the challenge of overcoming the situation and getting it to work. So I contacted my new best friend at the shop who installed the sliders and ran the situation by him. So I brought it down and we figured out a solution.

For the mounting points, we simply measured offset needed and tapped new holes:
20140228_023040730_iOS.jpg

As for the mouth, we realized that there was plenty of room and if we simply cut the slot wider, not only would it clear the drum for the winch, but it would look perfectly symmetric. In the pic below, you can see where we drilled and taped a new fairlead hole on the left. You can see the portion of the bumper he would need to cut in the slot:
20140228_031920281_iOS.jpg

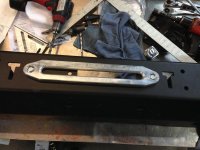
The real crazy luck of it was that he just so happened to have a longer 10" custom hawse fairlead that he made for a different project altogether laying around in the shop collecting dust. It was perfect!

Using the fairlead as a guide, he marked off exactly how much material needed to be removed, then we pulled everything off and used a plasma to elongate the hole:
plasma.jpg

Success!
20140228_050148969_iOS.jpg

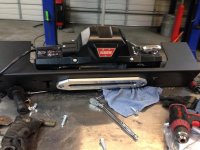
After that, I spooled on the synthetic line and slapped it all back together onto the Jeep:
20140311_223841537_iOS.jpg

This combination and what it took to get it done is by far my favorite modification so far. Since then, EVO has released a new revision to the 1/4 pounder that is compatible with the Zeons, but I love the work that went into getting this thing to fit and actually look and perform great in a custom way!

Thanos Decals
March 2104
Working with pixeldecals.com, I had some custom stickers made in the same Rubicon/Wrangler font to finally brand the Jeep with the Thanos name. I also took the opportunity to include a little Thanos lore easter egg by replacing the "Wrangler Unlimited" side decal with a "Wrangler Omnipotent", in reference to when Thanos finally completed the Infinity Gauntlet and was imbued with absolute power:
thanos.jpgomnipotent.jpg

My wife was kind enough to shoot a quick clip of the official christening ceremony:
 
Last edited:
Phase 1 Part 3

Poison Spyder Flares (Narrow)
March 2014
The final bit of body armor on the agenda was to swap out the stock painted flares for steel ones. There's different schools of thought between cutting stock and having them purposely be flexible, but by this point I had been out wheeling enough that I kinda wished I had something more substantial keeping the upper body from leaning too far into walls and creek beds, so I opted to go the rigid route. Since EVO didn't make flares that I could get shipped, I was down to either the Metal Cloak Overline or the Poison Spider Narrows. Ended up linking the PS flares more aesthetically, and MC was on a pretty huge back-order anyways at the time. Never looked back - these things are great!

There really wasn't a whole lot to this modification process that I bothered to document or photograph. This was the first mod that I involved powder-coating since the flares arrive bare. I found a great company locally that was willing to shoot all 4 and the inner braces/brackets for $200 out the door, so they handled all the prep work as well. So all I really have is a couple of pics of the test fit:
psc_flares.jpgIMG_4398.jpg

The fronts were a LOT easier to install than the rears. The fitment on them was just about perfect and the only PITA was getting the rubber gasket to stay in place while mounting them. The rears sucked because although there wasn't a rubber gasket, it was mostly nutserts that didn't want to cooperate very well as things got tightened down.

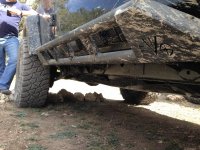
In the picture above, you can also see the EVO rock skins that I aspired to mount at the same time, until I realized I made a grave mistake by not doing them before the sliders, which angle upwards and make it so that I wouldn't be able to get the holes drilled straight or the nutsert tool in there, so back in the garage they went. As a cool update though, I was able to meet Mel in Austin a short while ago, and he gave me the brilliant idea of undoing the body mounts and simply raising the chassis up on either side a couple inches to clear the sliders and put the skins on!

Back to the flares, the powder coat company did a great job, and I was able to check out some of their other colors and identify a few that i will eventually use as accents:
Colors.JPG

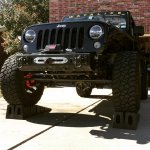
This pretty much concluded the Phase 1 mods. Dug around a bit and found a good pic from the era:
IMG_0650.jpg
 
Last edited:
Awesome! thanos has a build thread!!!

Can't wait to meet this beast at the October Hidden Falls Campout
 
Phase 2 Part 1

Phase 2 really kicked in towards the end of the Summer 2014. After wheeling the Jeep every chance I could get at several local parks, I quickly realized that depending on (and waiting for) park-provided systems to air back up was for the birds.

As the year pressed on into the Winter, I was starting to see where 35" tires on a 4-door was more limited than unlimited as I grew more and more confident in my wheeling and tied to tackle harder and harder obstacles. Additionally, with an Automatic there's only so far pumping your breaks and throttle control can do to compensate for an open front diff. This meant having to bump it more, which also meant putting more....I'll call it "wear and tear"... on some of those low hanging components like the tie rod & steering stabilizer, to the point where I bashed in several stabilizers, had a slight bend in my tie rod, and was beginning to experience Death Wobble.

It was time for Thanos to beef up.


Yukon "Spartan" Front Locker
May 2014
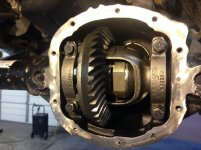
Not wanting to invest serious money into the front D30, I opted to go with a Spartan. It's cheap enough (300 bucks), reliable (Yukon), and didn't require any additional modifications other than the slightly larger TJ-style carrier. Not wanting to grenade my diff by installing it improperly, I once again communed with the local Jeep deity to get it installed:
Spartan.jpg

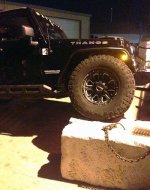
I can't quite remember, but this may have also been when I had him weld on the LCA skids from EVO. What I do know is, after we got the locker installed, we promptly tested it out by doing a little hardcore mall-crawling behind the shop up onto a cinder block:
block_flex_driver.jpgblock_flex_passenger.jpg

My feedback on the Spartan is that I really enjoyed wheeling with it the remainder of the year until I got the PR44, and I highly recommend it as an economical solution to stepping up from open diffs. My personal experience with it is that I didn't get very loud binding/popping like some folks report - I mean I could hear it 'clicking' during tight turns, and turning radius was affected for sure, but I never really felt like it was a burden at all on pavement. The only place it did kind of suck offroad was under load, either on an obstacle, or coming down off a ledge, where I then needed to make some kind of tight turn or adjustment - if it's locked it will fight to keep those wheels straight, and so now I have a definite appreciation for select-ability.

As a straight up locker though, this thing rocked. I was able to pull myself up onto many more obstacles and use more angling while doing so knowing that I didn't have to worry about one of the front tires not having as good of traction.

ARB Onboard Hi-Output Air Compressor
July 2014

*** Pics Inc ***

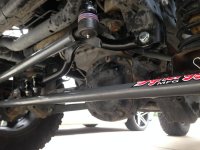
TeraFlex HD Trackbar, Synergy Tie Rod & Drag Link
December 2104
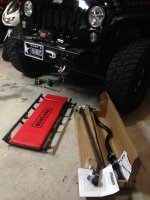
I ordered all three components at the same time with the preparation and intent of reusing them once I went to the new axle and bigger suspension and knocked out the installation in the garage:
2014-12-29 20.04.34.jpg

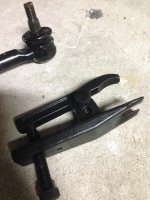
The only piece that gave me fits was the drag link - it had an absolute death grip on my pittman arm and although everyone was saying to just give it a few good whacks with a BFG, I was seriously worried I was going to end up doing some damage to it, so I took a trip to Harbor Freight and bought one of these beauties:
2014-12-30 09.02.33.jpg

I'll tell you, as i was hitting the spreader bolt with the impact I remember thinking for a half second how much tension there has to be in the damn thing when suddenly KAPOW it went and that drag link end shot down so hard it left a nice divot in the concrete.:eek:

Beyond that, it was a pretty easy job:
2014-12-30 12.37.25.jpg2014-11-29 12.07.29-2.jpg

The next day I took it in to dial the toe-in to spec. Oddly enough it seemed like the tie rod came built a little long, so trying to get to .8 was not possible without hacking a small bit of rod off the end so it could be adjusted in further. No big deal. As for the drag link, I love the simplified single-bolt adjustment for the steering wheel. These were pretty much my last upgrades for 2014.

Factor 55 ProLink Shackle & Rugged Ridge Cowl Body Armor
January 2015
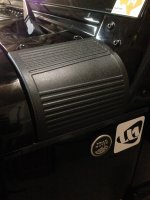
Friends and family, happy that places like Northridge have gift cards, made it a Jeepy Christmas for me, so I combined gifts to purchase a couple of nice touches. First, some Rugged Ridge cowl protectors that have been holding up beautifully since then:
2015-01-05 19.07.38.jpg
(Full disclosure, I wish I had these sooner. The driver's side one is covering a classic JK dimple from the first time I forgot to secure the door strap. Since then I've had the doors swing open a few times and these do a great job of deflecting the blows without cracking)

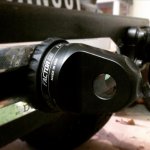
The second thing I got was a ProLink nipple to replace the default Warn hook on the winch:
2015-01-09 11.48.34.jpg

I love the utility of it, having used it a few times now to winch. I also love that the line reels in flush and that nothing hangs or needs to be secured to a shackle when not in use.

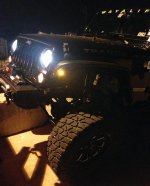
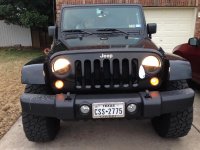
Trucklites!
January 2015

My Christmas present to myself was a pair of Trucklites. After several attempts to win a pair during Wayalife, Northridge, and other site promotions to no avail, I broke down and just bought my own. In fact, the Wayalife Trucklite contest back in April was one of the first active threads I participated on when joining the forum yesteryear, where I posted a mock up "sad" version of Thanos with the stock lights:
20140130_133751000_iOS.jpg
D'awww poor kid.

No tears since Jan tho, the Trucklites were on special at Northridge and they arrived brighten up his day :cheesy:
2015-01-14 11.14.44-2.jpg

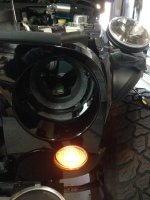
Halfway through the installation, the before and after:
]2015-01-16 17.20.23.jpg
2015-01-16 17.25.46.jpg

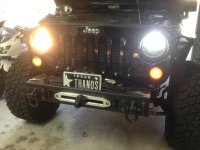
All done for the night!
2015-01-16 23.31.56-3.jpg

I love the lights, buuuut since then the heated versions have come out, and later in Feb when we were getting crazy ice storms, I got to experience first hand the freeze over effect of the regular Trucklites and I have to admit, I kinda want the heated ones. So again, as a finishing touch my wife's Jeep will likely inherit these so I can score the new ones :) :rock:
 
Last edited:
Awesome rig bro!! I'm a huge fan!!! I big into comics especially marvel and i love the thanos theme!! I'm from corpus, hopefully we will wheel together someday! Would love to see this beast in action. I'll be at hidden falls next weekend.

Btw have you got to ride the 37's and 4.88 gearing? How is it for Texas driving?

Thanks man :) I'm always stoked when people recognize the reference; some folks think it's either my last name or the Egyptian deity (Thanatos) lol

I'm sure we'll wheel together, you're signed up for the Oct 2nd trip ya? I may make it out this weekend, depends on how this week goes.

So far I'm diggin' the gearing. For a minute there I was on the 37s but my rear was still geared 3.73 (no front DS) and I was struggling to find OD on the highway. Now that I'm properly geared it's smooth again. Mileage-wise I lost about 2-3mpg with all the extra height/weight but it's all good; thankfully my daily commute isn't far at all :)
 
Man George, totally jealous of those new 37" Mud Grapplers.Your rig is turning out great! Hopefully get to see you out on the trail again sometime soon to get to see the new shoes in action. 👍🏻
 
Thanks man :) I'm always stoked when people recognize the reference; some folks think it's either my last name or the Egyptian deity (Thanatos) lol

I'm sure we'll wheel together, you're signed up for the Oct 2nd trip ya? I may make it out this weekend, depends on how this week goes.

So far I'm diggin' the gearing. For a minute there I was on the 37s but my rear was still geared 3.73 (no front DS) and I was struggling to find OD on the highway. Now that I'm properly geared it's smooth again. Mileage-wise I lost about 2-3mpg with all the extra height/weight but it's all good; thankfully my daily commute isn't far at all :)

Yeah (just a idea but maybe paint stud bolts colors of infinity stones?! :p)

The mud grips kill!! Yeah I'm half commuted to the October trip cause of work. But I'll be up there Saturday (on chipped spider gears that I found out about yesterday in the rear lol)

Good to hear the 4.88's are working for Ya on 37's! Can't wait to see what else you have in store!
 
EVO Rock Sliders
February, 2014
This is the project that got me in touch with what would be my go-to brother for Jeep wisdom. I wanted to go the weld-on route with them, so I did all the prep and paint work myself, and then asked around until I was put in contact with a shop in town that he was headlining.

The sliders arrived bare, and from Colorado (Northridge) so understandably there was a little rust to sand off around the welds. I ended up using those sand-grit sponges when I now swear by because you can get them into all the nooks and crannies:
View attachment 154211

I personally only had my garage to work with and not a fancy paint booth, so my rigging was the best I could do. I didn't go the powder coating route to save a little dough knowing that these things were meant to be scrached and beat to hell anyways, so the route I decided on was to just prime them up and hit them with textured bedliner. I taped off the attachment ends to leave them bare for the welding later:
View attachment 154212

Here's how they looked after their final coat:
View attachment 154213

I pulled off the old Sahara side-steps:
View attachment 154214

Then I packed up the new sliders and headed out for John's shop:
View attachment 154215

This is my first picture of Thanos up on a lift, you can see where we also had the sliders on jack stands to get things into position:
View attachment 154216

After clamping things in place the best we could, we found the mounting ends needed a little help to contour to the frame, so a little heat was used to make things easier:
View attachment 154217

With everything aligned and clamped, it was time to tack and weld the first slider on!
View attachment 154218

For the second slider, I asked if I could watch him weld to get a feel for the process. He was totally cool with it, told me to just squint a little if it gets too bright :cheesy: :
View attachment 154219

After his great work, we finished cleaning and painting things up, and a few days later I was back on the trails putting them to work!
View attachment 154222View attachment 154223

Warn Zeon 10s Winch
February, 2014

Now that my rails were safe, the next key component for me was getting a winch to help me in sticky situations. There weren't very many folks in my group running them, so I wanted to be sure I didn't need to depend on others. I opted for the Warn Zeon 10s and got a decent deal on it while they were doing the rebate special. The part where I screwed up was... I didn't see the fine print when i bought the EVO Bumper that it wasn't compatible with the new Zeons. So when the winch arrived and I tried a test fit, I discovered why:
View attachment 154225View attachment 154226

The footprint of the Zeons was very "centered' and symmetric, whereas typical winch sits justified towards one side. So as you can see in the pictures above, all of the mounting holes were off by about 1-2", and then the winch itself sat so centered that the mouth opening was off by a good 4".

The Zeons were still pretty new at this point, so when I explained the situation to Northridge, they were pretty cool about offering to take back the winch so I could go with a non-zeon style, but there was a part of me that not only felt responsible cause I should have known better, but was also intrigued by the challenge of overcoming the situation and getting it to work. So I contacted my new best friend at the shop who installed the sliders and ran the situation by him. So I brought it down and we figured out a solution.

For the mounting points, we simply measured offset needed and tapped new holes:
View attachment 154230

As for the mouth, we realized that there was plenty of room and if we simply cut the slot wider, not only would it clear the drum for the winch, but it would look perfectly symmetric. In the pic below, you can see where we drilled and taped a new fairlead hole on the left. You can see the portion of the bumper he would need to cut in the slot:
View attachment 154228

The real crazy luck of it was that he just so happened to have a longer 10" custom hawse fairlead that he made for a different project altogether laying around in the shop collecting dust. It was perfect!

Using the fairlead as a guide, he marked off exactly how much material needed to be removed, then we pulled everything off and used a plasma to elongate the hole:
View attachment 154229

Success!
View attachment 154231

After that, I spooled on the synthetic line and slapped it all back together onto the Jeep:
View attachment 154232

This combination and what it took to get it done is by far my favorite modification so far. Since then, EVO has released a new revision to the 1/4 pounder that is compatible with the Zeons, but I love the work that went into getting this thing to fit and actually look and perform great in a custom way!

Thanos Decals
March 2104
Working with pixeldecals.com, I had some custom stickers made in the same Rubicon/Wrangler font to finally brand the Jeep with the Thanos name. I also took the opportunity to include a little Thanos lore easter egg by replacing the "Wrangler Unlimited" side decal with a "Wrangler Omnipotent", in reference to when Thanos finally completed the Infinity Gauntlet and was imbued with absolute power:
View attachment 154240View attachment 154241

My wife was kind enough to shoot a quick clip of the official christening ceremony:

Omnipotent!!!
 
Man George, totally jealous of those new 37" Mud Grapplers.Your rig is turning out great! Hopefully get to see you out on the trail again sometime soon to get to see the new shoes in action. 
Thanks Nick :) it has been a minute eh? There's a trip being organized for the 2nd, not sure if it's full but we'll definitely get to wheel again. I still have pics of you the last time we wheeled, did you ever get em?

Yeah (just a idea but maybe paint stud bolts colors of infinity stones?! :p)

Actually I'm planning on doing some custom LEDs (one of each stone color) that will be suspended in each slot of the grill. Totally focused on the functional requirements tho so it's further down on the list but it WILL happen. I'm also planning on doing a Chrysler-esque hood ornament bust of Lady Death lol.

More pics from the existing mods coming up tonight, finally caught some free time to keep going. Other bonus update for today is a pic of Thanos made it onto the Hidden Falls Instagram wall - made my day!
 
Thanks Nick :) it has been a minute eh? There's a trip being organized for the 2nd, not sure if it's full but we'll definitely get to wheel again. I still have pics of you the last time we wheeled, did you ever get em?


Actually I'm planning on doing some custom LEDs (one of each stone color) that will be suspended in each slot of the grill. Totally focused on the functional requirements tho so it's further down on the list but it WILL happen. I'm also planning on doing a Chrysler-esque hood ornament bust of Lady Death lol.

More pics from the existing mods coming up tonight, finally caught some free time to keep going. Other bonus update for today is a pic of Thanos made it onto the Hidden Falls Instagram wall - made my day!

So much win!!! Love the bust and stones idea! I'm really excited to see your plans unfold! Subbed!!
 
Phase 2 Part 2

Smittybuilt CRES2 Cargo Netting and Cab Cover
February/March 2015
I gotta say.. Smittybuilt may not be my brand of choice, but for the price point, this cargo net effing rocks. I priced out a lot of options, including buying a bunch of rings and polypropylene straps to make my own, and this thing just kept rising to the top as the best choice for the price. Unlike it's CRES predecessor, the CRES2 wasn't just a bunch of squares cut out of some material, it is a proper-good web of stitched, buckled and clipped poly straps that look great and have done a great job of keeping stuff in:
Photo Feb 25, 5 23 36 PM.jpg

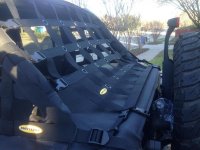
As you can kind of tell in the previous picture, I was able to integrate it with the Bestop Tonneau cover, as well as the Bestop Safari top, to create what I now consider to be the official Thanos look for when I'm not running a hard top:
2015-03-14 16.34.03.jpg

Now, normally I don't run doors with the look, but at the time it was still Feb, and still very cold and rainy so I wasn't fully nekkid. As things warmed up a bit towards March, I was running doorless finally and also picked up the Smittybuilt Cab Cover for sudden rain or camping situations:
2015-03-27 18.29.00-1.jpg

Dynatrac ProRock 44 (Unlimited, 37" Package)
February/March 2015
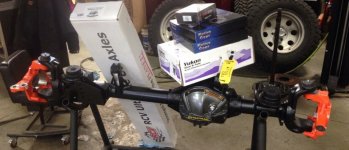
Now it was really getting serious. I worked with Brian & Sean from Northridge to spec out the new front axle that would be swapping in for the D30 and ushering Thanos into the 37th Century. The only deviation in the plan was that I was originally going to regear to 5:13, but apparently with the newer JKs there's a risk of things going into limp-mode with anything north of 5, so I went with 4:88 instead.

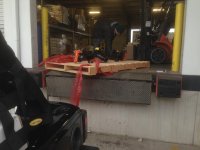
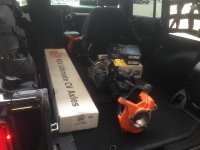
A few short weeks later, I was on my way to a freight station to pick up the goods:
Photo Feb 27, 4 37 20 PM.jpg

Photo Feb 27, 4 47 09 PM.jpg

Photo Feb 27, 4 51 43 PM.jpg

Axle Config Options:
  • ARB Air Locker
  • 5:13 Gears
  • RCV Axles
  • Reid Knuckles
  • Synergy Ball Joints
  • Weld on track bar bracket
  • Pre-reamed knuckle for drag link flip

Also pictured is a few of the supporting pieces I would need to make the integration successful.
  • I moved the Hypertech Speedo Calibrator over to my wife's jeep since it was a basic model that only really supported changing tire size (not gearing) and went with the Flashpaq.
  • Since the axle was coming 5:13 but my rear was still 3:73, and I just couldn't afford to do both axles at once, I decided to throw a bit of money regaring the rear D44 to 5:13, which meant a Motive Gear master overhaul kit and a Yukon R&P.

I felt confident in being able to handle the axle swap considering it came pre-assembled with everything but the RCV shafts and having to run the air-line to the compressor. What I *wasn't* looking foward to was having to do the swap in my garage with all the volatile weather and having to throw the thing up on jack-stands. So I decided to rent a bay at DIY Austin (now called Loyal Austin DIY Shop) with a hydraulic rack one fine Saturday and get the whole thing knocked out.

Here were the goodies laid out on install day:
2015-02-20 18.59.16.jpg

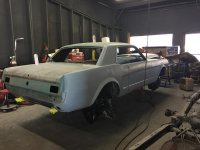
And here is a completely unrelated, but sweet, '68 Mustang that was at the shop with me:
2015-03-06 14.54.31.jpg

Since I didn't have the knowledge or the expertise to do the rear re-gearing on my own that day, the plan was to completely remove the front driveshaft and save it for when I could get it into my buddy's shop. So off it came first, and carefully set aside:
2015-03-06 16.35.49-1.jpg

Next it was time to pull the wheels off and start loosening components to remove the old axle:
2015-03-06 16.36.07.jpg 2015-03-06 16.36.35-1.jpg

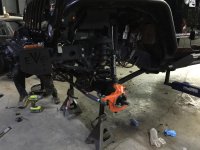
The last pic of the D30 with just the LCA's attached, time to super-size!
2015-03-06 17.40.40.jpg

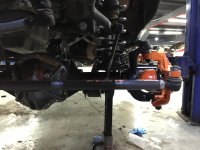
Here is the first pic of the PR44 in place with some of the components starting to be attached:
2015-03-06 18.48.21.jpg

And here is one towards the end after finally getting the RCV shafts to "boot in" properly:
2015-03-06 18.48.36.jpg

Total time to swap out the old axle and swap in the new one: 5 hours, sans alignment. Full disclosure, I had a helping hand who I previously helped swap out his front axle back to a stock one before trading it in, so while I was a complete novice to the ProRock thing, I had already done a JKU axle swap and knew the basics of what to expect.

The next day after the alignment shop finished dialing it in:
2015-03-14 10.43.20-1.jpg

Super fun project getting it installed. As I mentioned earlier, I had to leave the front driveshaft off since the gearing didn't match with the stock rear, so I just oiled it up and started the break-in process driving around town until I could get it into my buddy's shop. It was a brutal wait. The only interesting thing I got to do with the Jeep during that time was winch and elderly man's car out of a ditch:
2015-03-11 21.17.47.jpg2015-03-11 21.32.02.jpg

Coming Up Next...

No turning back as Thanos begins the chop process of installing the EVO Long Arm kit :rock:

The Easter Snafu that took me from Trail to Mud Grapplers. :eek:
 
Last edited:
Project is looking good! Did you talk them into a 10% discount on the Dynatrac ? (assuming you purchased from Northridge4x4).


Luke
 
Top Bottom