You are using an out of date browser. It may not display this or other websites correctly.
You should upgrade or use an alternative browser.
You should upgrade or use an alternative browser.
Project "Thanos" Build
- Thread starter iRonin
- Start date
iRonin
Member
Happy birthday George! Thanos is looking great! I love the rear doors in matte black.
I hope you had a Great Birthday! Your Rig looks Great!
Happy birthday! I don't know if it's the tires or the lack of spare tire, but Thanos looks extra wide in this picture. That's an awesome rig you have there.
Happy birthday George! Hope you had a great day! And glad you got to spend some QT with Thanos. I need to do the same, but my birthday isn't for a few more months
Happy birthday! And your rig is looking great!
[emoji512][emoji324][emoji95]!!!! Thanos looks incredible!
Happy belated Birthday. Thanos is looking sharp.
Happy Birthday bro! Thanks is looking badass!
Happy birthday man. Rig is beastly.
Happy birthday. Rig sure is looking sharp.
Thanks y'all
Napalm
Caught the Bug
Thanks y'allit was a pretty good time; also one of the first times I got my Jeep friends together with my non-Jeep friends and everyone hit it off pretty good - about 30 of us in total took over the Growler Bar and the weather held nicely for a very enjoyable evening!
Too bad it didn't stay good for very long
We are getting flooded this morning up north!
Sithwindu
Member
Thanks y'allit was a pretty good time; also one of the first times I got my Jeep friends together with my non-Jeep friends and everyone hit it off pretty good - about 30 of us in total took over the Growler Bar and the weather held nicely for a very enjoyable evening!
Happy birthday brotha!!
iRonin
Member
Too bad it didn't stay good for very long
We are getting flooded this morning up north!
Yea and more rain all this week eh? I refuse to put my hard top on, I just keep rolling the dice and driving from covered location to covered location
Happy birthday brotha!!
Thanks homie
Sithwindu
Member
Yea and more rain all this week eh? I refuse to put my hard top on, I just keep rolling the dice and driving from covered location to covered location
Thanks homie
Have you signed up for the jeepxperience?
iRonin
Member
Have you signed up for the jeepxperience?
I happened to be up dickin' with facebook when it was announced, I think I was one of the first people to register lol - going for sure!
Sithwindu
Member
I happened to be up dickin' with facebook when it was announced, I think I was one of the first people to register lol - going for sure!
Awesome brotha!! Looking forward to checking out the rig and the event!!!
iRonin
Member
Loaded up and heading to the shop in a bit despite wanting to head out to the trails instead on this gorgeous Friday here in Austin.
On the docket:
* Poison Spyder Inner Fenders for the front (need to mock up then paint)
* sPOD (don't judge, got it below cost since it had the air gauge on the switch panel, but it was for an elocker customer) :cheesy:
* Swap rear driveshaft flange bolts for proper grade 10 CV bolts (shout out to Chuck from Adam's Driveshaft for sending me replacement ones after last event's fiasco)
* Remove TeraFlex bump stops, pull coils, articulate axles and measure for true bump stop needs all around, then stack-and-install Metal Cloak replacement bump stops.
* Locate and lube squeaky suspension bushings (guessing track bar)
There's a Jeep show/contest thing going on tomorrow in town that I signed up for which is my motivation on the cosmetic chores. I would love to roll up into it without sounding like a a creaky WW1 tank, and if they let me flex on the rocks, I don't want to frighten children with the loud PANGs of my springs unbinding from these fat teraflex bump stops I got on here now
I'm also hoping there's a separate category for "actually wheeled" so I don't have to compete with the flawless mall crawlers.. Thanos shines rough like a diamond so you have to stand back a few feet and pump the exposure up a bit lol
Last edited:
iRonin
Member
Bump Stop Swap
Best laid plans...
Didn't get much off my list accomplished. The shop was bangin so the only available space left was on one of the smaller no-lift bays, so while I had access to air tools, I was confined to floor jacks and jack stands which makes flexing out suspensions less fun.
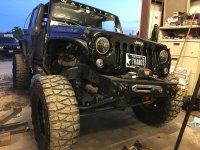
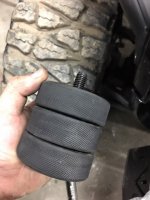
Still, I was able to get my front bumpstop needs measured and met and swapped out the old Teraflex ones for some Metal Cloaks. Here you can see where the tops of the plush rides don't jive with the wider TF extensions:
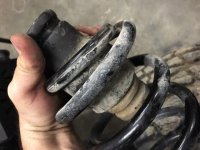
Rather than extending down from the top, MC gives you several pucks and different length bolts that you stack your desired length then mount it to the bottom spring pad..
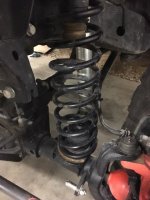
Not the best pic but here you can see the stops installed on the bottom while the top has been returned to the stock "just the foam" config. The spring in this pic just looks a bit weird because I'd just finished clearing the spring so my suspension was at close to max flex :
I did not install the sPOD as I am still on the fence about "needing" it right now when I have the daystar a-pillar switch mount working just fine for my Lux lights/ARB/Lockers. What I should be spending that level of $ on is my sport cage so I can apply to JKX... so we'll see.
And then finally the Poison Spyder inner fender liners were a bit more involved than I was prepared for. I was expecting a completely agnostic setup but it turns out PS sends you liners that have extra material which integrates I with the Flares-
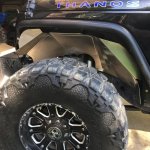
As you can see towards the front, there's a plate that actually tucks in behind that side blinker/marker. Rearward, the liner tucks in along the wheel well where the inner brace of the crusher fenders is- so to do this right, you literally have to remove your fenders, mount the inner fenders. Didn't have that kinda time Friday...
Best laid plans...
Didn't get much off my list accomplished. The shop was bangin so the only available space left was on one of the smaller no-lift bays, so while I had access to air tools, I was confined to floor jacks and jack stands which makes flexing out suspensions less fun.

Still, I was able to get my front bumpstop needs measured and met and swapped out the old Teraflex ones for some Metal Cloaks. Here you can see where the tops of the plush rides don't jive with the wider TF extensions:

Rather than extending down from the top, MC gives you several pucks and different length bolts that you stack your desired length then mount it to the bottom spring pad..

Not the best pic but here you can see the stops installed on the bottom while the top has been returned to the stock "just the foam" config. The spring in this pic just looks a bit weird because I'd just finished clearing the spring so my suspension was at close to max flex :

I did not install the sPOD as I am still on the fence about "needing" it right now when I have the daystar a-pillar switch mount working just fine for my Lux lights/ARB/Lockers. What I should be spending that level of $ on is my sport cage so I can apply to JKX... so we'll see.
And then finally the Poison Spyder inner fender liners were a bit more involved than I was prepared for. I was expecting a completely agnostic setup but it turns out PS sends you liners that have extra material which integrates I with the Flares-

As you can see towards the front, there's a plate that actually tucks in behind that side blinker/marker. Rearward, the liner tucks in along the wheel well where the inner brace of the crusher fenders is- so to do this right, you literally have to remove your fenders, mount the inner fenders. Didn't have that kinda time Friday...
Last edited:
iRonin
Member
Swung by the scrap yard this morning, was curious what my running weight was in trail config (Me in it, w/ spare, basic trail gear and tools, no hard top, no doors) - 5420lbs
Part of the reason for doing this was to see what I should be running my tires at... and the math seems a little wonky to me...
Nitto shows the load range for a 37x13.5-x17 to be 4300lbs @ 65psi
So max load for the vehicle is 4300x4, or 17,200lbs
Figure out my percentage of max... 5420/17200 = 31.5%
Then apply the percentage to the max load psi... 65 * 0.0315 = 20.48psi.
So is that right? I should only be rocking like 21psi in my tires? I thought I was already being conservative at 30 lol.
Last edited:
DWiggles
Caught the Bug
Swung by the scrap yard this morning, was curious what my running weight was in trail config (Me in it, w/ spare, basic trail gear and tools, no hard top, no doors) - 5420lbs
Part of the reason for doing this was to see what I should be running my tires at... and the math seems a little wonky to me...
Nitto shows the load range for a 37x13.5-x17 to be 4300lbs @ 65psi
So max load for the vehicle is 4300x4, or 17,200lbs
Figure out my percentage of max... 5420/17200 = 31.5%
Then apply the percentage to the max load psi... 65 * 0.0315 = 20.48psi.
So is that right? I should only be rocking like 21psi in my tires? I thought I was already being conservative at 30 lol.
Dang man, 30psi seems high, I run 28psi (load range E toyo OC MT 37/13.50R17) and I'm thinking of lowering it a bit... chalk test and be happy. 20psi seems low... I could be wrong though
iRonin
Member
Poison Spyder Crusher Flare Inner Fenders
Poison Spyder Crusher Inner Fenders
May, 2016
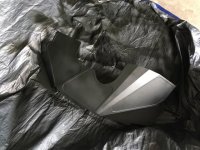
This weekend I finally found the time to install the inner fenders I've had rolling around in the trunk for a month.
Part of the reason for the delay was a lack of time but another was that the prescribed install called for pulling off the actual fenders and doing a bunch of prep work to get them to fully integrate.
I wanted them to be removable on their own but still able to secure nicely, to the area of contention I was wanting to focus on is the rounded ear you can see in this pic on the far left:
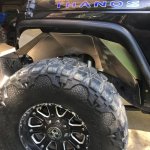
That ear is meant to tuck in behind the front corner of the crusher flare behind the side marker etc. So Friday I mocked up the inner fender and marked out a nice S-curve that would slide in just behind all that without actually having to integrate. Here is a before and after of the cut:
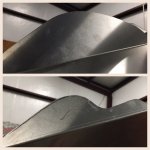
After cleaning it up and making sure it fit as desired, I just married it up to the other inner fender using clamps and used it as a template for the other side:
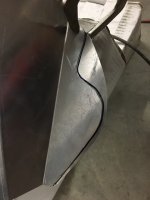
In the rearward sides of the liners, the integration points are the braces that come with the crusher fenders that transfer the impact load from the outer body to the frame. It's a vertical brace on each side with inner and outer bolts holding it in place, and the liner overlaps the inner 2 sets of bolts. The problem is with the liners in place you can't quite see where those bolts line up.
So I cheated and dabbed a little pattern grease to the heads of each of the bolts, installed the flares to the alignment I wanted, and then pressed the rear panel back to get a greaseprint of where those bolts would be. (forgot to photo)
Then I just pulled the liner out again, drilled the holes, and then did the same mirror transfer to the other inner liner.
That was it for Friday night- I installed the liners just to get an idea for how they will ride, but I couldn't fully install them because the extra thickness of the liner itself made it to where I couldn't get a nut on the brace bolts, so I would need to get longer bolts in the morning:
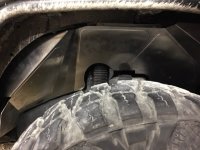
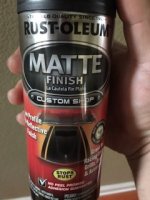
Quick stop by Home Depot I picked up some 1.5" 13mm bolts in between painting coats. I went with a rust-oleum with a matte finish as I want a stealthier effect in the well.
And with that I let everything set up over night and this morning was the final install. Getting the nuts on the backsides of the brace bolts with the liner was tricky. I had my wife keep pressure on the bolt and the. with the nut pre-slung on a long breaker bar, it was actually easier to come at it from under the jeep above the frame rail at an angle (no photo) and just kind of "stab it on" to the bolt until she could get it to turn and bite.
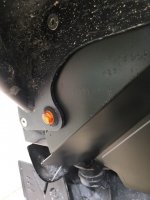
Here you can see the rearward alignment withe the 2 brace bolts installed:
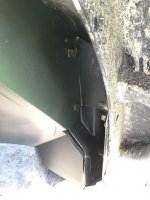
And here you can see the front slide-in modification I cut into the ear to get it to tuck without permanence:
And finally the money shot of the entire liners installed:
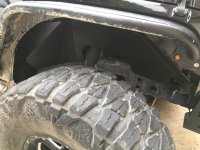
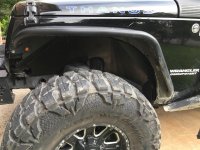
Fun project. The last thing I'll do is hit the inner face with some textured black to give it a similar finish to the fenders. Stoked not to be slinging mud and water into my engine bay anymore, and doubly-stoked to have my flex pictures look a little cleaner :cheesy:
Poison Spyder Crusher Inner Fenders
May, 2016
This weekend I finally found the time to install the inner fenders I've had rolling around in the trunk for a month.
Part of the reason for the delay was a lack of time but another was that the prescribed install called for pulling off the actual fenders and doing a bunch of prep work to get them to fully integrate.
I wanted them to be removable on their own but still able to secure nicely, to the area of contention I was wanting to focus on is the rounded ear you can see in this pic on the far left:

That ear is meant to tuck in behind the front corner of the crusher flare behind the side marker etc. So Friday I mocked up the inner fender and marked out a nice S-curve that would slide in just behind all that without actually having to integrate. Here is a before and after of the cut:

After cleaning it up and making sure it fit as desired, I just married it up to the other inner fender using clamps and used it as a template for the other side:

In the rearward sides of the liners, the integration points are the braces that come with the crusher fenders that transfer the impact load from the outer body to the frame. It's a vertical brace on each side with inner and outer bolts holding it in place, and the liner overlaps the inner 2 sets of bolts. The problem is with the liners in place you can't quite see where those bolts line up.
So I cheated and dabbed a little pattern grease to the heads of each of the bolts, installed the flares to the alignment I wanted, and then pressed the rear panel back to get a greaseprint of where those bolts would be. (forgot to photo)
Then I just pulled the liner out again, drilled the holes, and then did the same mirror transfer to the other inner liner.
That was it for Friday night- I installed the liners just to get an idea for how they will ride, but I couldn't fully install them because the extra thickness of the liner itself made it to where I couldn't get a nut on the brace bolts, so I would need to get longer bolts in the morning:

Quick stop by Home Depot I picked up some 1.5" 13mm bolts in between painting coats. I went with a rust-oleum with a matte finish as I want a stealthier effect in the well.


And with that I let everything set up over night and this morning was the final install. Getting the nuts on the backsides of the brace bolts with the liner was tricky. I had my wife keep pressure on the bolt and the. with the nut pre-slung on a long breaker bar, it was actually easier to come at it from under the jeep above the frame rail at an angle (no photo) and just kind of "stab it on" to the bolt until she could get it to turn and bite.
Here you can see the rearward alignment withe the 2 brace bolts installed:

And here you can see the front slide-in modification I cut into the ear to get it to tuck without permanence:

And finally the money shot of the entire liners installed:


Fun project. The last thing I'll do is hit the inner face with some textured black to give it a similar finish to the fenders. Stoked not to be slinging mud and water into my engine bay anymore, and doubly-stoked to have my flex pictures look a little cleaner :cheesy:
Last edited:
Sithwindu
Member
Poison Spyder Crusher Inner Fenders
May, 2016
This weekend I finally found the time to install the inner fenders I've had rolling around in the trunk for a month.
Part of the reason for the delay was a lack of time but another was that the prescribed install called for pulling off the actual fenders and doing a bunch of prep work to get them to fully integrate.
I wanted them to be removable on their own but still able to secure nicely, to the area of contention I was wanting to focus on is the rounded ear you can see in this pic on the far left:
View attachment 204425
That ear is meant to tuck in behind the front corner of the crusher flare behind the side marker etc. So Friday I mocked up the inner fender and marked out a nice S-curve that would slide in just behind all that without actually having to integrate. Here is a before and after of the cut:
View attachment 204426
After cleaning it up and making sure it fit as desired, I just married it up to the other inner fender using clamps and used it as a template for the other side:
View attachment 204427
In the rearward sides of the liners, the integration points are the braces that come with the crusher fenders that transfer the impact load from the outer body to the frame. It's a vertical brace on each side with inner and outer bolts holding it in place, and the liner overlaps the inner 2 sets of bolts. The problem is with the liners in place you can't quite see where those bolts line up.
So I cheated and dabbed a little pattern grease to the heads of each of the bolts, installed the flares to the alignment I wanted, and then pressed the rear panel back to get a greaseprint of where those bolts would be. (forgot to photo)
Then I just pulled the liner out again, drilled the holes, and then did the same mirror transfer to the other inner liner.
That was it for Friday night- I installed the liners just to get an idea for how they will ride, but I couldn't fully install them because the extra thickness of the liner itself made it to where I couldn't get a nut on the brace bolts, so I would need to get longer bolts in the morning:
View attachment 204429
Quick stop by Home Depot I picked up some 1.5" 13mm bolts in between painting coats. I went with a rust-oleum with a matte finish as I want a stealthier effect in the well.
View attachment 204430
View attachment 204431
And with that I let everything set up over night and this morning was the final install. Getting the nuts on the backsides of the brace bolts with the liner was tricky. I had my wife keep pressure on the bolt and the. with the nut pre-slung on a long breaker bar, it was actually easier to come at it from under the jeep above the frame rail at an angle (no photo) and just kind of "stab it on" to the bolt until she could get it to turn and bite.
Here you can see the rearward alignment withe the 2 brace bolts installed:
View attachment 204433
And here you can see the front slide-in modification I cut into the ear to get it to tuck without permanence:
View attachment 204434
And finally the money shot of the entire liners installed:
View attachment 204435
View attachment 204436
Fun project. The last thing I'll do is hit the inner face with some textured black to give it a similar finish to the fenders. Stoked not to be slinging mud and water into my engine bay anymore, and doubly-stoked to have my flex pictures look a little cleaner :cheesy:
Damn nice job brotha!
DWiggles
Caught the Bug
Thanos is about as ready as he can be - this weekend is the JX in Hidden Falls, so I'll be out there rock crawli.....er..... fording water and mudding all weekend. Looking forward to seeing Mel & folks
View attachment 205302
Awesome! I thought about going but the buy-in is to steep for me being a non member. If you aren't to busy, snap some pics! Ied love to check out the event vicariously :thumb:
iRonin
Member
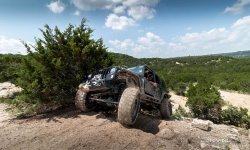
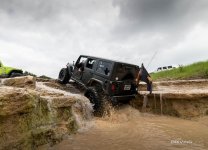
I'm processing the GoPro footage and waiting for some of the "official" pictures to come out on drivingline.com, but here's some teaser footage from Day 1.
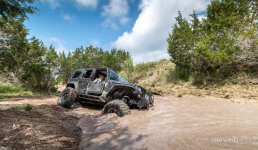
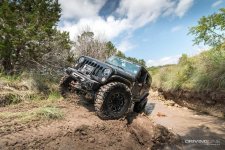
The only thing better than the wheeling was getting to meet more amazing folks I'd only ever seen in pictures and videos until then. In addition to Mr. Healy you see there in the clips, I got to wheel with Mel, Lisa, Mel Jr, & Randy, and got to meet & talk shop with Colin from ORE. It really was such a blast and I was pleased with Thanos' performance given the relative pace of keeping up with coilover jeeps with 40s and Hemis and LS swaps and Superchargers all around me haha. It's actually why I don't have very many pics even though my wife was there - between all the mud and the water and the pace there was little photo op time. The good news is they had Ali there from DrivingLine so hopefully I did enough of the right stuff to make it into a few pictures
The only thing better than the wheeling was getting to meet more amazing folks I'd only ever seen in pictures and videos until then. In addition to Mr. Healy you see there in the clips, I got to wheel with Mel, Lisa, Mel Jr, & Randy, and got to meet & talk shop with Colin from ORE. It really was such a blast and I was pleased with Thanos' performance given the relative pace of keeping up with coilover jeeps with 40s and Hemis and LS swaps and Superchargers all around me haha. It's actually why I don't have very many pics even though my wife was there - between all the mud and the water and the pace there was little photo op time. The good news is they had Ali there from DrivingLine so hopefully I did enough of the right stuff to make it into a few pictures
Last edited:
iRonin
Member
Not super sure if I can directly link to the article, but drivingline.com put out the Jeep Xperience recap article and a mega-gallery for the Memorial Day weekend event. Folks familiar with my build will detect a wee bit of writer embellishment in my photo caption, but it's all good and I'm stoked to have my first public feature 
