You are using an out of date browser. It may not display this or other websites correctly.
You should upgrade or use an alternative browser.
You should upgrade or use an alternative browser.
Project "Thanos" Build
- Thread starter iRonin
- Start date
TheGrendel
Hooked
i'm assuming with Heims on the tie rod and drag link there is a bit more maintenance like regularly spraying white lithium or something. how long do they last before wearing out?
fiend
Caught the Bug
What a project. Great job. Thanks for the write up. One question though, why not go with a double sheer set up for the tie rod?
Sent from my iPhone using WAYALIFE mobile app
Sent from my iPhone using WAYALIFE mobile app
Exodus 4x4
New member
i'm assuming with Heims on the tie rod and drag link there is a bit more maintenance like regularly spraying white lithium or something. how long do they last before wearing out?
Depends on where you live. I feel like they last longer than tie rod ends
Sent from my iPhone using WAYALIFE mobile app
iRonin
Member
Good call out - it just kind of "happened". When we started all we had was the Ruff Stuff steering kit which comes with standard tie rod ends, and a standard superduty high steer arm kit from Artec. During the geometry planning we were concerned about drag link angles so we opted to to swap to heims and went for the straight forward setup of just doing them all the same.What a project. Great job. Thanks for the write up. One question though, why not go with a double sheer set up for the tie rod?
To go double-shear I'll need to change out the arm (you'll notice the drag link mount point is about an inch offset from the lower tie rod point), and add another arm to the driver side, but it's def something we'll look at in the future.
Yep, bit more maintenance, but they seem to last well enough to be used in a lot of extreme applications, so I'm not too worried about it. It's also a $25 part to replace should one of these chomoly ends actually fail.i'm assuming with Heims on the tie rod and drag link there is a bit more maintenance like regularly spraying white lithium or something. how long do they last before wearing out?
Last edited:
Mybadjk
Caught the Bug
Man awesome details on building the front. Kind of jealous! Sometimes wish I went with junkyards.
Sent from my iPhone using WAYALIFE mobile app
Sent from my iPhone using WAYALIFE mobile app
Mybadjk
Caught the Bug
Tried to DM you but your inbox is full, Was your XD60 Low Pinion? Did you find it dragged more than the D44 with the 37's on the trail?
Was that a reply to me? The xds are a high pinion. It dragged just as much. Think I only lost 1/2 of clearance going from 44s to 60s with 37s.
Sent from my iPhone using WAYALIFE mobile app
jorgelrod
Hooked
Was that a reply to me? The xds are a high pinion. It dragged just as much. Think I only lost 1/2 of clearance going from 44s to 60s with 37s.
Sent from my iPhone using WAYALIFE mobile app
It was to Ironin cause he ran an XD60 SF on Thanos before the One Tons, I read up on your thread, 5x5.5 FF sounds nice
iRonin
Member
Tried to DM you but your inbox is full, Was your XD60 Low Pinion? Did you find it dragged more than the D44 with the 37's on the trail?
It was high pinion- didn't really have an issue with it dragging more or less that I would note, but I also try to go out of my way to avoid a lines that put big rocks down the middle as for the longest time I had no extra under armor.
iRonin
Member
1 Ton Swap - Part 3 - Rear 14 Bolt Prep
Happy New Year
Continuing on the 1 ton swap, this next part will cover the rear in chronological order, even though again we worked on both axles off-and-on.
As with the front, the first thing to do was to strip away all the brackets & hardware from the rear.
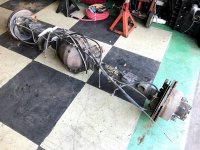
One of the main aspects of ensuring we had the correct 14b variation was obviously axle width, but also this "ribbing" on the pumpkin which isn't always present:
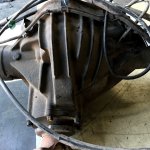
Pulling the shafts, it really set in that I would finally have a full-float rear...
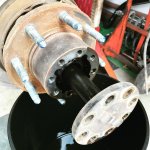
...but that I would also need to do something about the massive pumpkin.
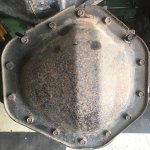
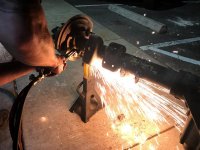
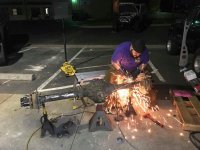
So, once again, long evening of torching and grinding was ahead to get the axle stripped, although not nearly as much material to remove as the SD60.
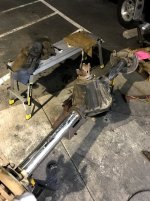
With the axle down to bare metal, it was time to weld the truss on, which all other bracketry is keyed off-of in the Artec 1-ton swap kit.
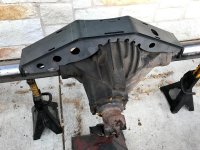
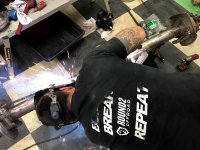
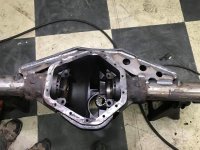
As always, great welds outta R2. Looking in the cavity, you can see the pinion pilot bearing, which is another key features of the 14 bolt in addition to the 10.5" ring gear and full-float shafts.
With most things now in place it was time to work on the clearance. We went with the Ballistic Fabs shave kit. With the shaved diff cover on the axle, this gave us a visual indication as to how much clearance we would be gaining (2")
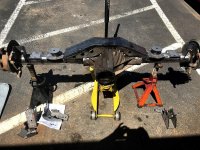
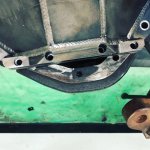
With the cover in place and a steady hand, the next step was to sawzall the material to be removed, effectively "scalping" the bottom of the diff cover.
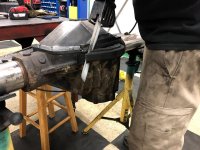
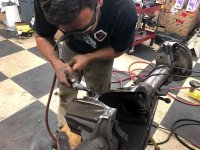
The shave kit comes with a new replacement plate to weld to the diff after the shave. With the bottom plate bolted to the diff cover, we slowly ground down the remaining way to ensure we didn't overdo things and create too much of a gap.
After that, it was time to weld, but first we needed to bring the cast steel up to proper temperature.
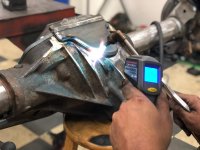
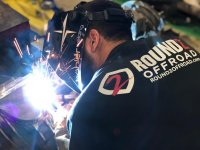
After quickly-but-carefully welding the bottom plate on, the axle was wrapped to ensure a slow, even cool-down.
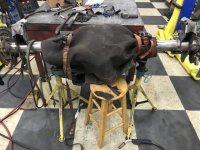
The last thing that needed to be done was to have the Ring Gear machined down slightly to clear the new bottom. Ballistic Fabs had turned down the ring gear, but unfortunately not quite enough as it was still touching:
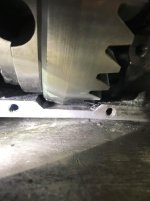
So away it went to get turned a bit more, but we got it back ready to rock and installed it and a new Grizzly Locker (not shown) from Yukon before setting up the gears.
Paired with a set of 4340 rear shafts, the axle would appear to be close to complete after things were painted, but there was quite a bit more doing to get the axle set up to run under a Jeep!
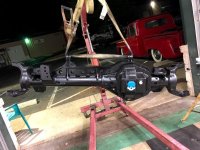
Happy New Year
Continuing on the 1 ton swap, this next part will cover the rear in chronological order, even though again we worked on both axles off-and-on.
As with the front, the first thing to do was to strip away all the brackets & hardware from the rear.

One of the main aspects of ensuring we had the correct 14b variation was obviously axle width, but also this "ribbing" on the pumpkin which isn't always present:

Pulling the shafts, it really set in that I would finally have a full-float rear...

...but that I would also need to do something about the massive pumpkin.

So, once again, long evening of torching and grinding was ahead to get the axle stripped, although not nearly as much material to remove as the SD60.


With the axle down to bare metal, it was time to weld the truss on, which all other bracketry is keyed off-of in the Artec 1-ton swap kit.


As always, great welds outta R2. Looking in the cavity, you can see the pinion pilot bearing, which is another key features of the 14 bolt in addition to the 10.5" ring gear and full-float shafts.

With most things now in place it was time to work on the clearance. We went with the Ballistic Fabs shave kit. With the shaved diff cover on the axle, this gave us a visual indication as to how much clearance we would be gaining (2")


With the cover in place and a steady hand, the next step was to sawzall the material to be removed, effectively "scalping" the bottom of the diff cover.

The shave kit comes with a new replacement plate to weld to the diff after the shave. With the bottom plate bolted to the diff cover, we slowly ground down the remaining way to ensure we didn't overdo things and create too much of a gap.

After that, it was time to weld, but first we needed to bring the cast steel up to proper temperature.


After quickly-but-carefully welding the bottom plate on, the axle was wrapped to ensure a slow, even cool-down.

The last thing that needed to be done was to have the Ring Gear machined down slightly to clear the new bottom. Ballistic Fabs had turned down the ring gear, but unfortunately not quite enough as it was still touching:

So away it went to get turned a bit more, but we got it back ready to rock and installed it and a new Grizzly Locker (not shown) from Yukon before setting up the gears.
Paired with a set of 4340 rear shafts, the axle would appear to be close to complete after things were painted, but there was quite a bit more doing to get the axle set up to run under a Jeep!

iRonin
Member
1 Ton Swap - Part 3 - Rear 14 Bolt Final Assembly and Install
The first conversion that needed to be done was to send the rear hubs off to be machined down a slight bit in order to allow the 60 tooth tone rings from Artec to be pressed on. We found a local machine shop to do the work and they did a great job:
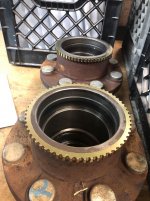
The rings work in conjunction with the stock rear wheel speed sensors which get mounted to pre-set brackets off the Artec control arm brackets. To get things to talk properly for the transmission, the formula Gear Ratio * (52/Tone Ring Teeth) is applied to get the approximate gear ratio you should program the Jeep to. So in my case, 5.38 * (52/60) or 4.66 would be used.
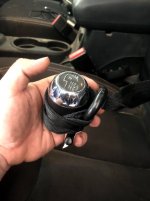
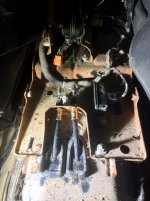
The second conversion needed was for the e-brake system as the JK stock cables are incompatible with the 14b. For this, we turned to Fusion 4x4 who makes custom JK to 14Bolt ebrake cables. The swap requires dismantling the center console to get to the tensioners. I had a particularly hard time trying to get the shifter knob to come off, so the solution was a ratchet strap up over my b-pillar bar with a heavy towel to dampen things once it finally popped free.
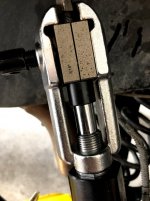
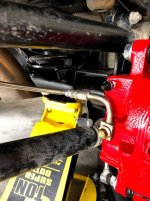
The third conversion needed was around the regular brakes. Once again I went with PowerStop brakes/pads/rotors to match the front, but the rear is a bit more complicated. The calipers ride on the front side rather than the rear, forcing a rather specific angle for mounting the line itself, and also forcing the stock JK hardlines to be cut back more towards the front to line things up. Thankfully, the shop let me borrow one of their swanky brake flare tools which made the processes a ton easier and leak-free.
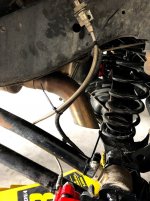
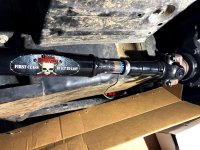
With the brakes, e-brakes, and tone-rings all set, it was finally time to mount the axle up with a new 1410 drive shaft from Adams!
In the final part (coming soon) I will cover the other remaining changes I made for the build.
The first conversion that needed to be done was to send the rear hubs off to be machined down a slight bit in order to allow the 60 tooth tone rings from Artec to be pressed on. We found a local machine shop to do the work and they did a great job:

The rings work in conjunction with the stock rear wheel speed sensors which get mounted to pre-set brackets off the Artec control arm brackets. To get things to talk properly for the transmission, the formula Gear Ratio * (52/Tone Ring Teeth) is applied to get the approximate gear ratio you should program the Jeep to. So in my case, 5.38 * (52/60) or 4.66 would be used.
The second conversion needed was for the e-brake system as the JK stock cables are incompatible with the 14b. For this, we turned to Fusion 4x4 who makes custom JK to 14Bolt ebrake cables. The swap requires dismantling the center console to get to the tensioners. I had a particularly hard time trying to get the shifter knob to come off, so the solution was a ratchet strap up over my b-pillar bar with a heavy towel to dampen things once it finally popped free.


The third conversion needed was around the regular brakes. Once again I went with PowerStop brakes/pads/rotors to match the front, but the rear is a bit more complicated. The calipers ride on the front side rather than the rear, forcing a rather specific angle for mounting the line itself, and also forcing the stock JK hardlines to be cut back more towards the front to line things up. Thankfully, the shop let me borrow one of their swanky brake flare tools which made the processes a ton easier and leak-free.


With the brakes, e-brakes, and tone-rings all set, it was finally time to mount the axle up with a new 1410 drive shaft from Adams!

In the final part (coming soon) I will cover the other remaining changes I made for the build.

Last edited:
iRonin
Member
1 Ton Swap - Part 4 - Wheels & Tires
One of the main reasons for going to the 1 ton swap was to support tires larger than the 37" Mud Grapplers I had been running. With my old setup being 5x5 beadlocks, now moving to 8x6.5, it was time to swap out my entire wheel/tire combo for something different.
I opted to run the XD229 MACHETE CRAWL beadlocks, still in a 17". They run in a nice 3.5 backspace, fit the 8x6.5 bolt pattern, use beefier bolts for the rock ring, but my favorite feature is that the rings themselves are stylized with a bunch of extra holes around the ring which do a really good job of evacuating water and mud.
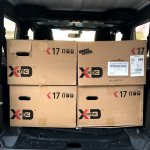
After picking up the wheels I sent the rings off to get powder coated the accent blue for Thanos - they did a great job
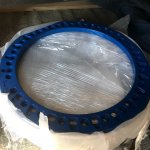
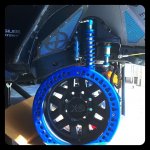
Shortly thereafter my new tires arrived. I went with Trail Grapplers this time in a 40x13.5 as I wanted something that was a little easier to balance and, mostly to appease my wife, a little quieter. :dont_tell:
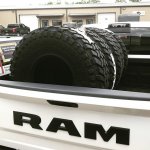
The next step was to get everything mounted. Oddly enough I find mounting beadlocks somewhat cathartic - at least as long as the bead isn't too hard to seat initially. Thankfully these grapplers mounted pretty smoothly to the rims without too much fuss.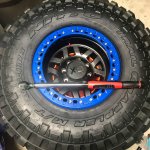
After a quick air-up and leak test, it was time to load them up and bring them to NTB to have them balanced.
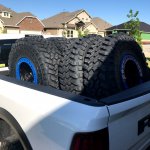
Back home, mounting was.... mostly a breeze. I discovered a slight variation in my front vs rear hubs that forced me to have to purchase separate lug nuts. Apparently the 08 Ford front SD hubs came with a slightly uncommon thread pitch, so I was forced to find some M14-2.0 lugs to pair with the more common M14-1.50 rears. No biggie - between AutoZone and O'Rileys I was able to procure an overall matching set.
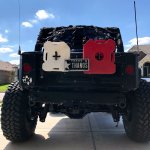
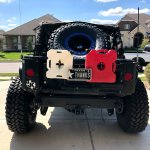
The final consideration I would have to make was for the Spare. I run the Excessive Industries Gate-Keeper mount which occupies the rear trunk space behind the seats. While the standard setup will hold everything up to a 37" tire, jumping to 40s meant having swap out a couple more aspects to clear.
First, I needed to have the wheel mount swap from a 5 lug to an 8 lug pattern. Thankfully, the Gate-Keeper is modular so the mounting hub is on its own separate bracket. I simply DM'd them and ordered a new one for 8x6.5 spacing which actually came as a 4 lug bracket.
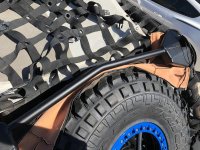
The next adjustment was the upper C-pillar cross-member. At 40", the tire is too tall to fit in the open cavity at a diagonal that will also clear shutting the tailgate. Thankfully again, Excessive Industries makes a replacement bar with a slight bend in it to clear.
The final unfortunate requirement is the upgraded rear JK subwoofer sticks out too far to clear the side of a 40" tire, so I had to do away with it. For this I simply purchased a replacement non-subwoofer panel from Mopar and installed it in its place. My radio sounds a bit dinky now, but I can always revisit this later with some aftermarket stuff.
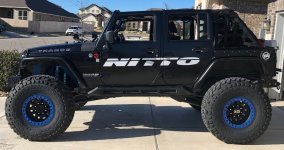
With the spare in place, Thanos was ready to join the 40" tire club!
One of the main reasons for going to the 1 ton swap was to support tires larger than the 37" Mud Grapplers I had been running. With my old setup being 5x5 beadlocks, now moving to 8x6.5, it was time to swap out my entire wheel/tire combo for something different.
I opted to run the XD229 MACHETE CRAWL beadlocks, still in a 17". They run in a nice 3.5 backspace, fit the 8x6.5 bolt pattern, use beefier bolts for the rock ring, but my favorite feature is that the rings themselves are stylized with a bunch of extra holes around the ring which do a really good job of evacuating water and mud.

After picking up the wheels I sent the rings off to get powder coated the accent blue for Thanos - they did a great job


Shortly thereafter my new tires arrived. I went with Trail Grapplers this time in a 40x13.5 as I wanted something that was a little easier to balance and, mostly to appease my wife, a little quieter. :dont_tell:

The next step was to get everything mounted. Oddly enough I find mounting beadlocks somewhat cathartic - at least as long as the bead isn't too hard to seat initially. Thankfully these grapplers mounted pretty smoothly to the rims without too much fuss.

After a quick air-up and leak test, it was time to load them up and bring them to NTB to have them balanced.

Back home, mounting was.... mostly a breeze. I discovered a slight variation in my front vs rear hubs that forced me to have to purchase separate lug nuts. Apparently the 08 Ford front SD hubs came with a slightly uncommon thread pitch, so I was forced to find some M14-2.0 lugs to pair with the more common M14-1.50 rears. No biggie - between AutoZone and O'Rileys I was able to procure an overall matching set.
The final consideration I would have to make was for the Spare. I run the Excessive Industries Gate-Keeper mount which occupies the rear trunk space behind the seats. While the standard setup will hold everything up to a 37" tire, jumping to 40s meant having swap out a couple more aspects to clear.
First, I needed to have the wheel mount swap from a 5 lug to an 8 lug pattern. Thankfully, the Gate-Keeper is modular so the mounting hub is on its own separate bracket. I simply DM'd them and ordered a new one for 8x6.5 spacing which actually came as a 4 lug bracket.
The next adjustment was the upper C-pillar cross-member. At 40", the tire is too tall to fit in the open cavity at a diagonal that will also clear shutting the tailgate. Thankfully again, Excessive Industries makes a replacement bar with a slight bend in it to clear.

The final unfortunate requirement is the upgraded rear JK subwoofer sticks out too far to clear the side of a 40" tire, so I had to do away with it. For this I simply purchased a replacement non-subwoofer panel from Mopar and installed it in its place. My radio sounds a bit dinky now, but I can always revisit this later with some aftermarket stuff.
With the spare in place, Thanos was ready to join the 40" tire club!


iRonin
Member
1 Ton Swap - Part 5 - Exhaust and Rear Update
This final post on the 1-ton journey will cover a couple remaining upgrades I performed "while I was at it" but aren't necessarily directly related to the 1-tons.
First, I was tired of the old stock muffler setup and, as part of the next rear-suspension overhaul phase, I needed to free up the rear cavity anyhow to make room for a fuel tank. I found someone selling their Magnaflow 17143 cat-back exhaust for silly cheap (it was too loud for them), so I scooped it up and got it installed.
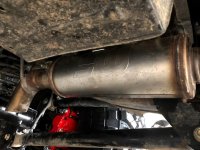
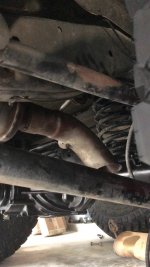
I like that it dumps before the axle, so no having to deal with up-travel clearance. The tip is a *little* close to the rear spring, but clears.
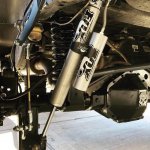
The next thing I wanted to do was upgrade my outdated Enforcer rear suspension. While I had gone to coil-overs in the front, the rear was till sitting on just 4" of lift and bilstein shocks only designed for 10" of travel. I ended up with a combination of some inexpensive Synergy 6" springs paired with some Fox 2.0 resi shocks that boast a decent 14" of travel.
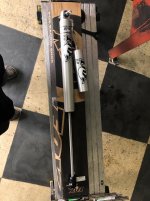
The final thing I added was a rear Anti-Rock sway-bar to match the font, and the rear was officially updated about as much as I care to until we go full tilt and double-triangulate and coilovers. :rock:
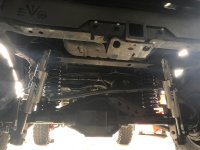
This final post on the 1-ton journey will cover a couple remaining upgrades I performed "while I was at it" but aren't necessarily directly related to the 1-tons.
First, I was tired of the old stock muffler setup and, as part of the next rear-suspension overhaul phase, I needed to free up the rear cavity anyhow to make room for a fuel tank. I found someone selling their Magnaflow 17143 cat-back exhaust for silly cheap (it was too loud for them), so I scooped it up and got it installed.


I like that it dumps before the axle, so no having to deal with up-travel clearance. The tip is a *little* close to the rear spring, but clears.
The next thing I wanted to do was upgrade my outdated Enforcer rear suspension. While I had gone to coil-overs in the front, the rear was till sitting on just 4" of lift and bilstein shocks only designed for 10" of travel. I ended up with a combination of some inexpensive Synergy 6" springs paired with some Fox 2.0 resi shocks that boast a decent 14" of travel.

The final thing I added was a rear Anti-Rock sway-bar to match the font, and the rear was officially updated about as much as I care to until we go full tilt and double-triangulate and coilovers. :rock:


wjtstudios
Hooked
Awesome Jeep! The blue rock rings really set the wheels off on the Jeep. Nice choice
Sent from my iPhone using WAYALIFE mobile app
Sent from my iPhone using WAYALIFE mobile app
