You are using an out of date browser. It may not display this or other websites correctly.
You should upgrade or use an alternative browser.
You should upgrade or use an alternative browser.
Oscar's No Build Thread
- Thread starter sipafz
- Start date
sipafz
Caught the Bug
Almost time for the soft top? :brows:
SMH, we are blanked with 18” of snow still. Maybe sometime in May?
wjtstudios
Hooked
Damn you guys are getting pounded. My sister and brother-in-law just moved over to Mequon. It’s crazy how much more winter you guys get on the other side of the lake.
Sent from my iPhone using WAYALIFE mobile app
Sent from my iPhone using WAYALIFE mobile app
Jsouder53
Hooked
Almost time for the soft top? :brows:
I’m looking forward to topless weather!
sipafz
Caught the Bug
Damn you guys are getting pounded. My sister and brother-in-law just moved over to Mequon. It’s crazy how much more winter you guys get on the other side of the lake.
Sent from my iPhone using WAYALIFE mobile app
Sleeting as we speak. We had lunch and did our grocery shopping in Mequon. Small world!
Snow after February = :icon_crazy:
We will still get snow in April. Some of the piles will be around until late May. 12 more years until retirement, then let the snow-birding begin! [emoji41]
I’m looking forward to topless weather!
Me too! I bought a new bottle of 303 detailing spray the other day with the hopes of using it soon. Might’ve been wishful thinking.
Jsouder53
Hooked
Me too! I bought a new bottle of 303 detailing spray the other day with the hopes of using it soon. Might’ve been wishful thinking.
When do you suspect to be taking the hardtop off?
sipafz
Caught the Bug
When do you suspect to be taking the hardtop off?
Probably not until the end of April.
I suppose you’re trying to figure out when you can put yours back on with your new surroundings and all?
Jsouder53
Hooked
Probably not until the end of April.
I suppose you’re trying to figure out when you can put yours back on with your new surroundings and all?
I’ll definitely be putting on as soon as possible! I didn’t get a new yet or anything but I do want a bikini top.
sipafz
Caught the Bug
Installed the backup camera. It was pretty straight forward with the hardest part being routing the camera wires with RCA plugs through the small holes drilled through the bumper.
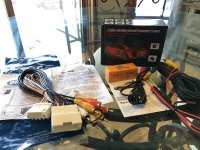
Here’s the camera and harness:
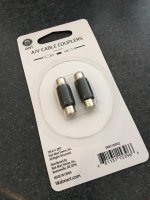
I wasn’t sure if I needed this coupler, but of course I did. Picked up a pair at Walmart:
I started with plugging the harness into the back of the radio.
I followed the instructions in this link to take part of the dash apart and get access to the back of the radio:
https://wayalife.com/showpost.php?p=678054
I also got some good info from this link for doing the wiring and mounting the camera:
https://wayalife.com/showpost.php?p=453431
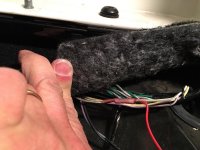
Next I wired in the power connector to the passenger side reverse light. A white wire with gray stripe is the power. Use a 12volt test light to confirm and don’t forget to have the key in the run position, trans in reverse with parking brake set. Test again with the trans in park and you shouldn’t have any power. I snipped, stripped and spliced in the camera power wire:
Attach the ground to the tailgate hinge bracket, connect the video cable and make sure everything works.
Drill the camera mounting hole through the plastic bumper cover using the hole saw supplied with the camera. The plastic cover is hollow in the middle so I used a 1/2” drill to make a hole through the second part and wallowed out the hole to make a slot. It was difficult to get the camera wires with RCA plugs through the bumper holes and a pry-bar was needed to get the wires over the metal part of the bumper.
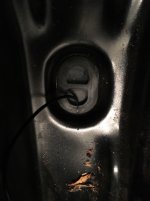
After that struggle, I cut a small slit into the rubber drain plug and routed the power plug to the camera plug, connected and wrapped with electrical tape:
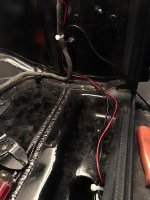
The video cable took the same route and continued up the passenger side floor, into the dash, up over the glove box an coupled to the radio harness. Add some electrical tape to secure the connections, tuck the remaining wire and your good to go.
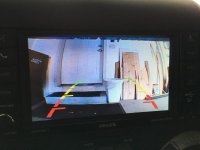
Daytime:
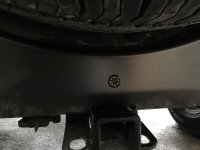
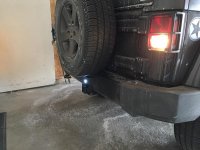
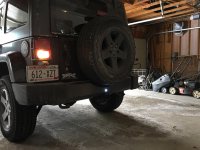
Nighttime:
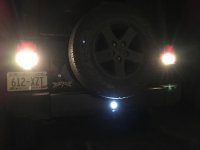
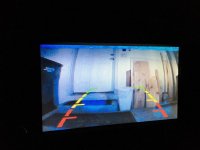
The LED lights really do a nice job brightening the area.
Total cost for this project was $42 and took about 4hrs to complete. The wife’s KK is next.
Here’s the camera and harness:

I wasn’t sure if I needed this coupler, but of course I did. Picked up a pair at Walmart:

I started with plugging the harness into the back of the radio.
I followed the instructions in this link to take part of the dash apart and get access to the back of the radio:
https://wayalife.com/showpost.php?p=678054
I also got some good info from this link for doing the wiring and mounting the camera:
https://wayalife.com/showpost.php?p=453431
Next I wired in the power connector to the passenger side reverse light. A white wire with gray stripe is the power. Use a 12volt test light to confirm and don’t forget to have the key in the run position, trans in reverse with parking brake set. Test again with the trans in park and you shouldn’t have any power. I snipped, stripped and spliced in the camera power wire:

Attach the ground to the tailgate hinge bracket, connect the video cable and make sure everything works.
Drill the camera mounting hole through the plastic bumper cover using the hole saw supplied with the camera. The plastic cover is hollow in the middle so I used a 1/2” drill to make a hole through the second part and wallowed out the hole to make a slot. It was difficult to get the camera wires with RCA plugs through the bumper holes and a pry-bar was needed to get the wires over the metal part of the bumper.
After that struggle, I cut a small slit into the rubber drain plug and routed the power plug to the camera plug, connected and wrapped with electrical tape:


The video cable took the same route and continued up the passenger side floor, into the dash, up over the glove box an coupled to the radio harness. Add some electrical tape to secure the connections, tuck the remaining wire and your good to go.
Daytime:


Nighttime:


The LED lights really do a nice job brightening the area.
Total cost for this project was $42 and took about 4hrs to complete. The wife’s KK is next.
Last edited:
WJCO
Meme King
Installed the backup camera. It was pretty straight forward with the hardest part being routing the camera wires with RCA plugs through the small holes drilled through the bumper.
That came out great. Nice work.
Installed the backup camera. It was pretty straight forward with the hardest part being routing the camera wires with RCA plugs through the small holes drilled through the bumper.
Here’s the camera and harness:
View attachment 322835
I wasn’t sure if I needed this coupler, but of course I did. Picked up a pair at Walmart:
View attachment 322836
I started with plugging the harness into the back of the radio.
I followed the instructions in this link to take part of the dash apart and get access to the back of the radio:
https://wayalife.com/showpost.php?p=678054
I also got some good info from this link for doing the wiring and mounting the camera:
https://wayalife.com/showpost.php?p=453431
Next I wired in the power connector to the passenger side reverse light. A white wire with gray stripe is the power. Use a 12volt test light to confirm and don’t forget to have the key in the run position, trans in reverse with parking brake set. Test again with the trans in park and you shouldn’t have any power. I snipped, stripped and spliced in the camera power wire:
View attachment 322837
Attach the ground to the tailgate hinge bracket, connect the video cable and make sure everything works.
Drill the camera mounting hole through the plastic bumper cover using the hole saw supplied with the camera. The plastic cover is hollow in the middle so I used a 1/2” drill to make a hole through the second part and wallowed out the hole to make a slot. It was difficult to get the camera wires with RCA plugs through the bumper holes and a pry-bar was needed to get the wires over the metal part of the bumper.
After that struggle, I cut a small slit into the rubber drain plug and routed the power plug to the camera plug, connected and wrapped with electrical tape:
View attachment 322838
View attachment 322839
The video cable took the same route and continued up the passenger side floor, into the dash, up over the glove box an coupled to the radio harness. Add some electrical tape to secure the connections, tuck the remaining wire and your good to go.
Daytime:
View attachment 322840
View attachment 322841
View attachment 322842
View attachment 322843
Nighttime:
View attachment 322844
View attachment 322845
The LED lights really do a nice job brightening the area.
Total cost for this project was $42 and took about 4hrs to complete. The wife’s KK is next.
Do you have a parts list or link to the harness you used?
Sent from my iPhone using WAYALIFE mobile app
sipafz
Caught the Bug
Do you have a parts list or link to the harness you used?
Sent from my iPhone using WAYALIFE mobile app
Harness:
PAC CHYRVD Rear Video Retention Cable For Select Chrysler/Dodge/Jeep Vehicles 2008-2012 https://www.amazon.com/dp/B0051XBNDY/ref=cm_sw_r_cp_api_i_3GsNCbCWTPRWC
Camera:
Rearview Camera Vehicle Backup... https://www.amazon.com/dp/B0792M37V5?ref=ppx_pop_mob_ap_share
sipafz
Caught the Bug
First day of 60 degree weather so I decided to play hooky and left work after a half day. Oscar got a good cleaning and shed the winter gear for the afternoon:
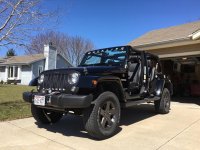
My lift sure makes it easy to ditch the top for a few hours:
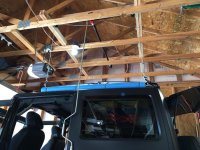
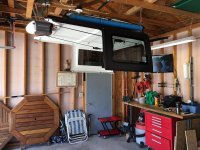
Unfortunately the chance or snow returns on Wednesday, 90% chance of 1” to 3” with a high of 37 degrees.

My lift sure makes it easy to ditch the top for a few hours:


Unfortunately the chance or snow returns on Wednesday, 90% chance of 1” to 3” with a high of 37 degrees.
Jsouder53
Hooked
First day of 60 degree weather so I decided to play hooky and left work after a half day. Oscar got a good cleaning and shed the winter gear for the afternoon:
Unfortunately the chance or snow returns on Wednesday, 90% chance of 1” to 3” with a high of 37 degrees.
Congrats on getting the hard top off! It’s a great feeling [emoji106] we have that same forecast.
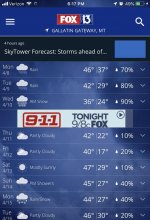 it was nice for a few days after putting the soft top on, then got rainy lol
sipafz
Caught the Bug
Congrats on getting the hard top off! It’s a great feeling [emoji106] we have that same forecast. View attachment 324684 it was nice for a few days after putting the soft top on, then got rainy lol
So this is happening:

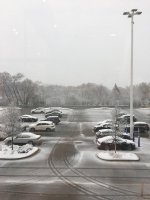
It was almost 70 degrees yesterday [emoji53]
Jsouder53
Hooked
So this is happening:
It was almost 70 degrees yesterday [emoji53]
Dang!! It was snowing today but not sticking
wjtstudios
Hooked
So this is happening:
View attachment 324786
View attachment 324787
It was almost 70 degrees yesterday [emoji53]
Yeah, it looks the same here in Detroit. Winters last breathe before summer gets here. At least you had a day with out the top!
Sent from my iPhone using WAYALIFE mobile app
sipafz
Caught the Bug
View attachment 324828 this was this morning, after I said it wasn’t sticking [emoji23]
Spring break and Arizona can’t come fast enough.

