Novajk88
New member
So after joining the forum, and stopping by and introducing myself, I was urged by some fellow members to start a build thread - so here I am.
For starters, I own a 2012 Black Forest Green JK Sport S, 6spd.
I've already done a few mods that include..
- Peterson LED Headlights
- Warrior Flat Fenders
- Rubi Rock Sliders
- Rubi 18/59 Springs
- Rubi Shocks
- Painted Moab Wheels black
- Spidertrax Wheel Spacers
- Teraflex Spare tire license plate relocation
- 295/70-17 Dick Cepek Extreme Country's
Up until this weekend, I've been running a no name (I assume EBay, because I'm pretty sure I've seen it on there before) front stubby bumper. I got it for cheap, and it did the job, but I really missed my fog lights. So a couple weeks ago I purchased a Crawler Conceptz Ultra front bumper. I waited a week or so, and I received an Ultra rear bumper.. But no big deal, called them up and they sent me a return label for the rear bumper and sent me out the bumper I ordered. FYI - the folks at Crawler Conceptz were great to deal with, and handled the issue promptly; wouldn't hesitate to do business with them again.
Anyways, I got the bumper and debated whether to powdercoat it or paint it, and I decided to go the paint option. I wanted it to have that satin "powder coated look" so I picked up a few things I thought would give it that look.
- Dupli-Color Self Etching Primer
- Dupli-Color Sandable Primer in Flat Black
- Krylon Dual Superbond in Satin Black
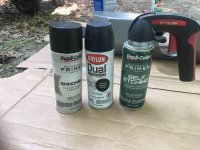
First, I gave the bumper a good sanding with some Scotch Brite, and cleaned with acetone. Then I sprayed a light coat of the Self Etching Primer, then another heavier coat.
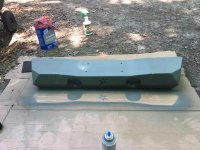
After that, I sprayed the Sandable Primer, starting with a light coat, followed by a few medium coats.
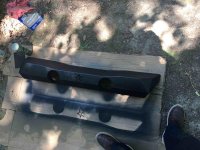
After a few hours of drying, I sanded the primer with 400 grit sandpaper, and cleaned with acetone and cheesecloth. Then I sprayed a light coat of the Dual Satin Black followed by 3 medium coats. Let dry overnight, installed fog light housings, and ended up with this.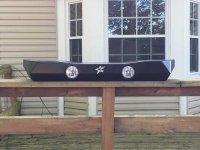
I don't think it turned out too bad. There's a couple spots that I messed up due to my lack of patience, but it's just going to messed up anyways. I'm happy with it.
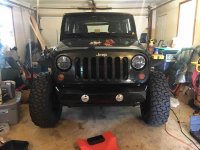
As far as installation, it was a breeze. This bumper can be used without relocating the vacuum pump, so that was a huge plus. I'll be purchasing the lower skid for it in the future. Bur for now, this is what it looks like.
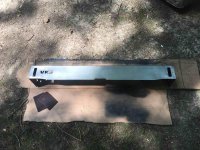
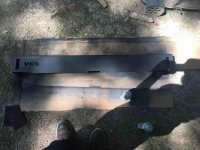
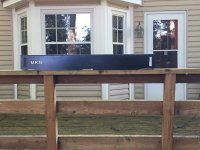
I'll be posting again soon, as I received my VKS Fab rear frame cap a couple days ago, so we'll see how that goes!
Sent from my iPhone using Tapatalk
For starters, I own a 2012 Black Forest Green JK Sport S, 6spd.
I've already done a few mods that include..
- Peterson LED Headlights
- Warrior Flat Fenders
- Rubi Rock Sliders
- Rubi 18/59 Springs
- Rubi Shocks
- Painted Moab Wheels black
- Spidertrax Wheel Spacers
- Teraflex Spare tire license plate relocation
- 295/70-17 Dick Cepek Extreme Country's
Up until this weekend, I've been running a no name (I assume EBay, because I'm pretty sure I've seen it on there before) front stubby bumper. I got it for cheap, and it did the job, but I really missed my fog lights. So a couple weeks ago I purchased a Crawler Conceptz Ultra front bumper. I waited a week or so, and I received an Ultra rear bumper.. But no big deal, called them up and they sent me a return label for the rear bumper and sent me out the bumper I ordered. FYI - the folks at Crawler Conceptz were great to deal with, and handled the issue promptly; wouldn't hesitate to do business with them again.
Anyways, I got the bumper and debated whether to powdercoat it or paint it, and I decided to go the paint option. I wanted it to have that satin "powder coated look" so I picked up a few things I thought would give it that look.
- Dupli-Color Self Etching Primer
- Dupli-Color Sandable Primer in Flat Black
- Krylon Dual Superbond in Satin Black

First, I gave the bumper a good sanding with some Scotch Brite, and cleaned with acetone. Then I sprayed a light coat of the Self Etching Primer, then another heavier coat.

After that, I sprayed the Sandable Primer, starting with a light coat, followed by a few medium coats.

After a few hours of drying, I sanded the primer with 400 grit sandpaper, and cleaned with acetone and cheesecloth. Then I sprayed a light coat of the Dual Satin Black followed by 3 medium coats. Let dry overnight, installed fog light housings, and ended up with this.

I don't think it turned out too bad. There's a couple spots that I messed up due to my lack of patience, but it's just going to messed up anyways. I'm happy with it.
As far as installation, it was a breeze. This bumper can be used without relocating the vacuum pump, so that was a huge plus. I'll be purchasing the lower skid for it in the future. Bur for now, this is what it looks like.

I'll be posting again soon, as I received my VKS Fab rear frame cap a couple days ago, so we'll see how that goes!
Sent from my iPhone using Tapatalk
Last edited:

