I guess it's the "Super Stocker" build

Thanks! I may end up painting the muffler. It will just have to be after moving. I think I'd like to remove the muffler to make sure I get it covered. Did you scuff yours up first or just shoot it?

I left it on and just sprayed the parts you could directly see. Didn't care if the parts you can't see were sprayed. Didn't bother scuffing it, I just used a shop rag and cleaned it real good first to make sure no dust was in the way. After about 20 minutes work it was complete. Very easy and fast.
 
I left it on and just sprayed the parts you could directly see. Didn't care if the parts you can't see were sprayed. Didn't bother scuffing it, I just used a shop rag and cleaned it real good first to make sure no dust was in the way. After about 20 minutes work it was complete. Very easy and fast.

Ok, thanks. Sounds pretty simple.
 
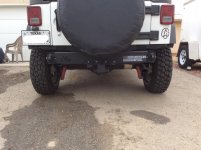
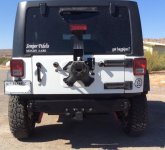
Brown Santa showed up with the EVO Rear Facia yesterday. I intended on making my own, but no time. Heading over to AZ in the morning to find a house.

Pinch seam and below is blacked out, including the stock muffler. I only had enough VHT to do one coat so I expect a touch up in the near future.

ImageUploadedByWAYALIFE1443717931.154078.jpg
 
Forgot to mention, I did trim the frame rails today too. I had not done that when I installed the d-ring setup. The non-trimmed rails interfered with the actual d-rings, now no interference at all. I pulled the d-rings and threw them in my recovery gear bag.
 
Forgot to mention, I did trim the frame rails today too. I had not done that when I installed the d-ring setup. The non-trimmed rails interfered with the actual d-rings, now no interference at all. I pulled the d-rings and threw them in my recovery gear bag.

Way to go! Trimmed frame rails make them aesthetically pleasing IMO.
 
I guess it's the "Super Stocker" build

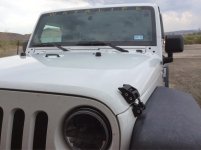
Just got home from my Arizona house hunting trip yesterday. This was the first road trip in the Jeep since removing the front air dam/splash guard and chopping the front bumper. Holy crap the hood flutter was ridiculous! I've been running without the hood spring for about two years now. Anyway, it was bad, so installed the Rugged Ridge latches today.

Edit: The Rugged Ridge instructions made the install sound much easier than it was. It wasn't overly difficult, but it would have been nice to have some suggestions. I removed the horn on the driver's side to allow access to the lower latch nut. On the passenger side I completely removed the factory air box and loosened the power steering reservoir. That made it much easier to get to with a long extension on my ratchet and a universal joint. The top portions were a snap.

ImageUploadedByWAYALIFE1444331177.402930.jpg

...and dressed up the rear fascia a bit...as you may see, one coat of the VHT chassis and frame paint did not cut it on the muffler.

ImageUploadedByWAYALIFE1444331199.490126.jpg

We did secure a rental house on our trip. Now to the packing and loading. We hit the road Nov 6th.
 
Last edited:
Thanks, it fit just like I hoped.

When I move next month I plan on getting BBQ paint. Can't wait to have stores by me again!
 
Thanks, it fit just like I hoped.

When I move next month I plan on getting BBQ paint. Can't wait to have stores by me again!

Look at auto zone for muffler paint. High temp engine block paint works too. Look at temp rating. That's what I used and its perfect. Have dragged it over rocks and through muddy creek edges of drop offs and the paint holds up perfect.
 
Look at auto zone for muffler paint. High temp engine block paint works too. Look at temp rating. That's what I used and its perfect. Have dragged it over rocks and through muddy creek edges of drop offs and the paint holds up perfect.

Thanks, I'll do that.

Did you ever get your pull left sorted out?

It is still there and definitely worse pulling the trailer. My best guess is that I had too much weight in front of the trailer axle until I re-packed it.

I'm starting to wonder if I fried a ball joint or two burning my c-gussets on. I went super slow, but was my first time. Still need to check that. Also need to recheck my front sway bar angles for peace of mind. The rear axle looks centered now that the trailer is off. My best guess is the more I make the back of the Jeep squat, the more the rear axle pushed to the driver's side, but I'm not sure on that.
 
Here's my update from the pulling driver's side thread...

It was pretty windy the first part of the drive. It's slightly pulling left on acceleration still, but not too bad at lower speeds and no trailer. I'm starting to wonder with 22,500 miles and my DIY c-gusset installation if a ball joint or four may be the culprit??? I'll check on that and report back.
 
I found some level ground and checked my front sway bar angle. It shows about 14.5* on both sides. I've been looking for a reason to buy the JKS links, so those are on order. I'm not sure if getting the sway bar at a better angle will help. Hopefully will have time today to check the ball joints for play.
 
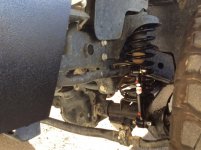
Finally got the JKS quick discos on today. It's so nice to have a level front sway bar again!

ImageUploadedByWAYALIFE1446056510.522664.jpg

I went with the longer ones (2 1/2" lift and up) because of my measurements after the EVO leveling kit.

I also went through and rechecked torque settings on all spacers, front LCA's, front track bar and fine tuned the centering of the steering wheel.

No more updates for awhile, until the move to AZ is all done...
 
Finally got the JKS quick discos on today. It's so nice to have a level front sway bar again!

View attachment 171414

I went with the longer ones (2 1/2" lift and up) because of my measurements after the EVO leveling kit.

I also went through and rechecked torque settings on all spacers, front LCA's, front track bar and fine tuned the centering of the steering wheel.

No more updates for awhile, until the move to AZ is all done...

Discos look good! Good luck with the move. Hope it's done without a hitch and everyone lands safely in AZ!
 
Spider gave me a house warming gift...the need for a new battery. My factory battery lasted 2 years, 3 months. Like the battery on the '11 JKUR I had at work, there was zero indication it was about to go. One minute it was starting and driving just fine, the next...nothing.

Went with a Die Hard Gold because Sears was the most convenient. Anyway, back in TX to pick up load 2 of 2. Back to AZ for good on Friday...
 
Top Bottom