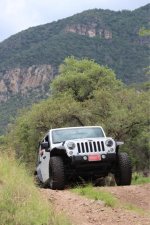
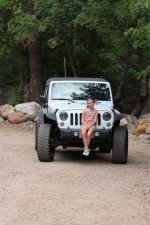
I guess it's the "Super Stocker" build

Is there much difference in road noise between factory soft top and the Premium soft top/ or Aftermarket soft top? Do you know?

That, I have no experience with. I understand the premium "feels" thicker but can't be sure it would be quieter. Maybe hit up Napalm. He's has several soft tops between factory and Trek Top.


Doing this will it fit tucked in behind the 3rd row seat all the way down? Just curious.

It did the one and only time I tried it. It was a PITA though getting it just right. Especially after disconnecting those bow/hinge arms. It also seemed messy. Maybe I didn't do it right, I don't know. One of the factory soft top boot covers might make it manageable, but I'm not sure. The cost of one of those boots isn't worth it to try for me.

This is probably how we would run it the majority of the time. sounds like logical option. :)

It's been great for us. I do also have the spiderwebshade under it. I'm so fair skinned I moonburn! [emoji16] So the AZ sun isn't kind to me.

Sorry for hijacking your thread a bit. But i appreciate your responses for me.

No worries at all. I'm always learning and am so happy to be able to answers questions I can. I am a Jeep addict. When I'm not driving mine I like to read, talk about or plan something for it. Keep the questions coming! If I don't know the answer I will at least try to point you in the right direction.
 
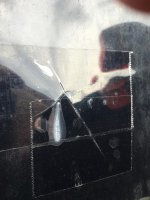
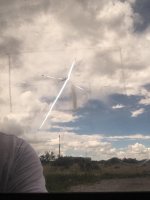
I discovered two cuts, 2-3" long, shaped like an X on my soft top back window yesterday morning. It was while we were loading up to head out for the day when I found it. I know for a fact it wasn't there Saturday night because I rinsed the whole Jeep off at about 8pm. I covered the cuts with clear tape to keep these monsoon rains out, but here's what it looks like.

ImageUploadedByWAYALIFE1470095153.736101.jpg

ImageUploadedByWAYALIFE1470095196.871631.jpg

I have no way of knowing for sure, but the more vertical cut looks pretty straight to me, like a knife did it. Nothing is missing, so your guess is as good as mine.

State Farm is covering it completely under my $0 deductible glass coverage. That was a pleasant surprise since it's clearly vinyl. I figured it could go either way but am satisfied common sense prevailed.

Local dealership quoted $314.00 plus tax just for the rear window! [emoji47] Oh, and $50 to install it!!! [emoji19] State Farm considers me too rural to send an adjuster so I submitted the claim on their app. They will be completing the quote by tomorrow and will go from there.
 
Good to hear they are taking care of you. Always been a fear of mine with a soft top.

Gotta risk it to get the biscuit though! LOL!
 
Wow that's crazy! Good to hear that your insurance is at least trying to take care of it!

I've been with State Farm since 1999. I've had glass claims, hail damage to two vehicles and one accident where I was not at fault. They have always taken care of us with little hassle. It's worth it to me.

Good to hear they are taking care of you. Always been a fear of mine with a soft top.

Gotta risk it to get the biscuit though! LOL!

Ha ha! That's a new one for me.
 
With the AZ temps and having a 3rd row, sometimes the little ones way in the back get a little toasty.

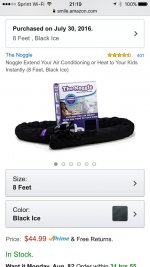
I cannot remember where is saw this, but yesterday my "Noggle" arrived.

ImageUploadedByWAYALIFE1470370916.927596.jpg
https://smile.amazon.com/gp/aw/d/B00LXT23RA/ref=yo_ii_img?ie=UTF8&psc=1

This afternoon we went to Tucson for an appointment. I attached this to one of my vents then used a bungee to hold it in place over the middle row, pointed towards the third row. Although it was cooler today with some summer storms, the kids loved it! My wife and I both felt like the interior temp was more balanced.

So far, I highly recommend it for the price. [emoji122]
 
Local dealership quoted $314.00 plus tax just for the rear window! [emoji47] Oh, and $50 to install it!!! [emoji19] State Farm considers me too rural to send an adjuster so I submitted the claim on their app. They will be completing the quote by tomorrow and will go from there.

$50 to "install" the rear window (e.g. use a zipper)?! No wonder they're called the stealership!
 
$50 to "install" the rear window (e.g. use a zipper)?! No wonder they're called the stealership!

Exactly. It didn't help the parts guy I talked to was extremely unfriendly and almost non-responsive at some of my questions.

As an update to this, State Farm has in fact covered this under my $0 deductible glass coverage. As of today my claim shows they will be sending me a direct deposit to cover replacement.
 
State Farm sent the payment this morning. The Bestop replacement window kit has been ordered. So, all 3 soft top windows for the price of one rear from the stealership!
 
With the AZ temps and having a 3rd row, sometimes the little ones way in the back get a little toasty.

I cannot remember where is saw this, but yesterday my "Noggle" arrived.

View attachment 216145
https://smile.amazon.com/gp/aw/d/B00LXT23RA/ref=yo_ii_img?ie=UTF8&psc=1

This afternoon we went to Tucson for an appointment. I attached this to one of my vents then used a bungee to hold it in place over the middle row, pointed towards the third row. Although it was cooler today with some summer storms, the kids loved it! My wife and I both felt like the interior temp was more balanced.

So far, I highly recommend it for the price. [emoji122]

Good idea
Thanks
 
I guess it's the "Super Stocker" build

Good idea
Thanks

If you get one, I hope it works as well for you as it did for us yesterday. The end that attaches to the vent uses zip ties. It's ok, but could be a little more secure to avoid rattling. The rattling may occur when the hose isn't connected/in use. I may try to explore other options. If I come up with something better, I'll post it here.
 
Lots going on today. Removing, adjusting, reinstalling, drilling, splicing, sanding, primering, and hopefully some color.

I even have some help!

ImageUploadedByWAYALIFE1470517734.682644.jpg

More to follow...
 
Last edited:
I guess it's the "Super Stocker" build

Well, I didn't get started early enough to avoid the typical Arizona afternoon monsoon. So the list above skipped some things. I did get to the drilling, splicing, sanding, primering, and color.

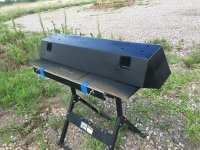
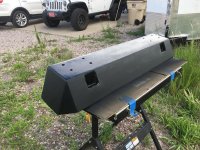
First off was sanding and some primer on the bumper project.

ImageUploadedByWAYALIFE1470539328.860464.jpg

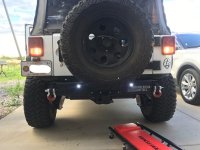
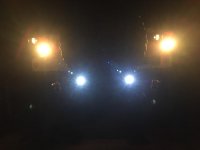
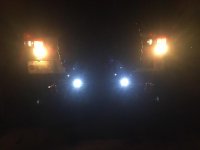
While that was drying I decided to try out two of the twelve 9w eagle eye lights I ordered from Amazon. My plan is to use the remaining ten as rock/waist lights soon. More on that later.

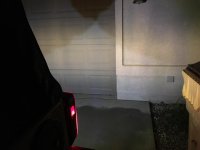
I decided where I wanted them on my EVO rear facia and drilled two 7/16" holes, mounted them and then tapped into the reverse light/ground from the driver's side housing.

Here are some daytime shots...

ImageUploadedByWAYALIFE1470539768.547221.jpg

ImageUploadedByWAYALIFE1470539781.570283.jpg

And nighttime...

Looking back

ImageUploadedByWAYALIFE1470539824.150648.jpg

Reverse lights only

ImageUploadedByWAYALIFE1470542558.564117.jpg

Tail lights on...

ImageUploadedByWAYALIFE1470539907.371693.jpg

I considered putting it on a switch but for now these come on with the factory lights. They are so small but bright I may add two more later on with switched power. We will see.

After the primer had dried for awhile I scuffed the bumper with some fine steel wool and started the first coat of bedliner. All went well on the first coat. On the second with plenty in the rattle can, I started getting a weird splatter. It happened on a few occasions and it caused some runs. I should've switched to a new can after the first time but I was being stubborn and impatient. I never had this issue when I used the same brand of bedliner on my homemade tube doors or any of my wheel wells.

As it's been drying, the runs seem to be flattening some. I'll check in the morning and see how much repair work this will require.

For better or worse, here is how it looked after the second coat.

ImageUploadedByWAYALIFE1470540295.710569.jpg

ImageUploadedByWAYALIFE1470540327.413204.jpg

Time permitting, I hope to make more progress tomorrow. I'm want to have the bumper mounted for its maiden voyage next Saturday back to the nearby Huachuca Mountains.

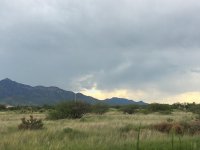
This was what halted my work today...

ImageUploadedByWAYALIFE1470540491.073879.jpg
 
Last edited:
I actually worked a day shift today and found a couple boxes waiting for me when I got home.

Here's one...

ImageUploadedByWAYALIFE1470700499.098912.jpg

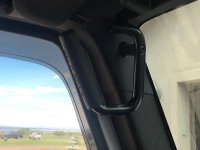
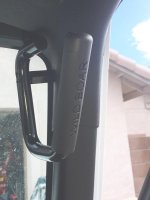
Inside a smaller box were a front set of grab bars. Even though these cost less than half of Grabar brand and are stamped Wild Boar, the instructions directed me to the Grabar website. So no idea if they are made by the same company or knock offs of Grabar, but they seem very stout. With the 35's I found myself pulling on the steering wheel to get in, but not anymore.

ImageUploadedByWAYALIFE1470700721.545752.jpg

ImageUploadedByWAYALIFE1470700737.747953.jpg

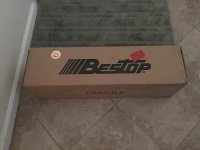
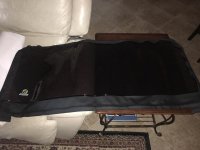
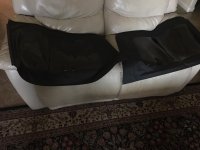
The Bestop box contained...

ImageUploadedByWAYALIFE1470700780.855184.jpg

ImageUploadedByWAYALIFE1470700793.099415.jpg

It's plenty warm enough to install, but it's doing this...

ImageUploadedByWAYALIFE1470700827.586647.jpg

That ^^^ also prevented me from trying to work out the paint issues on the front bumper. Hopefully I'll get time in the mornings before work the rest of the week to wrap up the bumper.
 
The past couple days before work I've been fighting with thunderstorms and paint cans. So today I had some time for a few things.

Rear hockey puck bumpstops attached with liquid nails for now (trial and error)...

ImageUploadedByWAYALIFE1470981292.959532.jpg

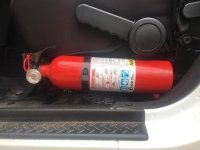
I finally attached my fire extinguisher to the driver seat...

ImageUploadedByWAYALIFE1470981344.842615.jpg

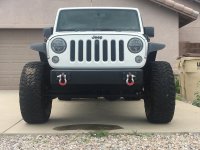
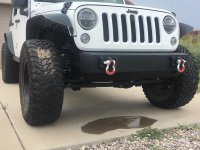
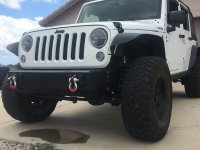
Best part of the day, DIY front bumper 1st phase complete!

ImageUploadedByWAYALIFE1470981419.897819.jpg

ImageUploadedByWAYALIFE1470981436.682252.jpg

ImageUploadedByWAYALIFE1470981471.018832.jpg

I plan on getting the front bumpstops installed tomorrow.
 
The past couple days before work I've been fighting with thunderstorms and paint cans. So today I had some time for a few things.

Rear hockey puck bumpstops attached with liquid nails for now (trial and error)...


I finally attached my fire extinguisher to the driver seat...


Best part of the day, DIY front bumper 1st phase complete!


I plan on getting the front bumpstops installed tomorrow.

Bumper looks awesome! You did a great job. I like those D rings too. What brand?
 
Top Bottom