longarmwj
New member
If you’re like me and have had the unfortunate pleasure of ripping a side mirror off, and have been struggling to find anything online on how exactly to replace a power mirror, then here ya go. I did the trial and error so you don’t have to.
Back in February I ripped my passenger side mirror off on a very tight trail at Choccolocco ORV in Alabama. Since then I’ve been meaning to have the fancy new gloss black set from a Smokey mountain edition that I’ve had sitting in my garage installed, but I finally said screw it and decided to attempt it myself. I learned the hard way on a couple of things, so I decided to write and photograph this so you don’t have to make the same mistakes I did. This is for a 2011+ JK/JKU only, applies to power mirrors only, and the pictures were taken on the driver side (although the procedure is the same) because I used the passenger side as my test subject.
Things you’ll need:
-Flathead screwdriver
-Phillips head screwdriver
-T20
-T40
-Wire cutters
-Ziptie (you’ll see why)
-Mechanic gloves
-Trim panel tool (optional)
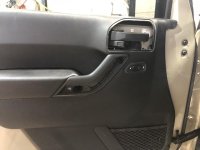
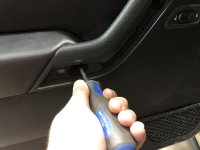
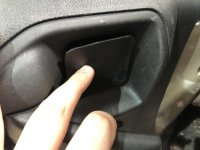
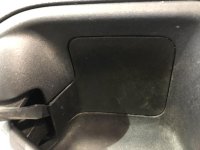
First, open the door and locate the cover behind the door handle. Using your trim tool or flathead, pop out that cover to expose the single T20 bolt behind it.
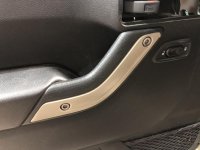
Next, using your trim tool or flathead, pop out the decorative trim piece in the door to expose two Phillips head screws.
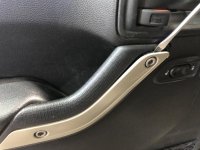
Remove both Phillips head screws and set aside in a safe location.
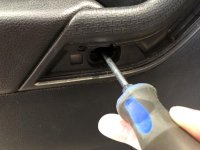
Remove the single T20 torx from behind the door handle and set aside in a safe location.
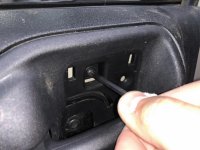
Beneath the cargo net at the bottom of the door you will see two T20 torx. Remove both of those and again, set aside somewhere safe.
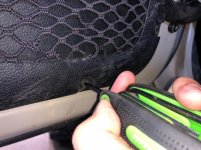
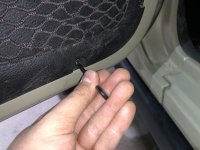
Next, use your flathead or trim tool to pop one or two of the Christmas tree clips free from their retainers, just enough to make room to get your hand back there. They’re super secure in there so it takes some force.
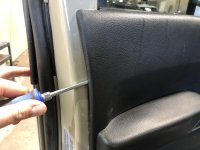
Now this is where I made mistake number one on the passenger side. I tried to pry the door panel free with my bare hands, and while I got it, I can’t say that my hands were too happy with my afterwards. Using some kind of good glove, pull the remaining clips free. Again, these things are in there, so it’ll take some gusto.
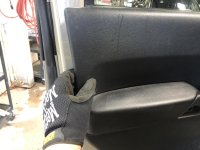
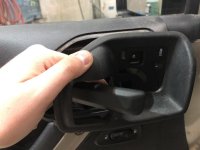
With the panel free, disconnect the single connector for the power lock switch.
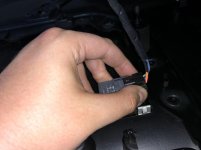
When you remove the panel completely and set it aside, this is what will greet you.
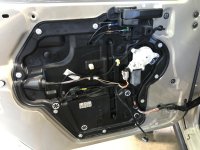
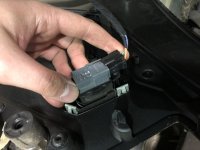
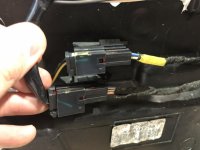
Locate the two connectors that control the power mirror and power heated mirror operations. It’s these two, and they are fairly obvious.
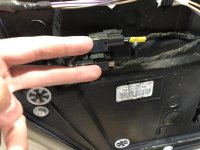
Disconnect them and plug the new mirror up to make sure it functions correctly. If it does, then unplug the connectors and proceed to remove the original ones from the retainers holding the wire in place
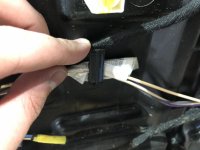
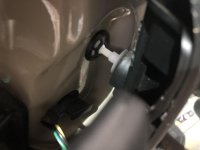
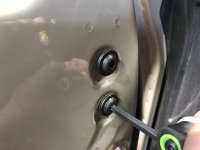
Follow the wire until you see a rubber grommet in the door. Pull hard towards you to pop that grommet loose.
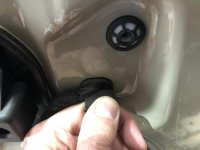
Now, using your T40, loosen and remove the two torx bolts holding the mirror in.
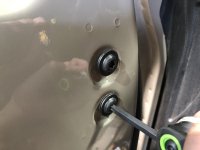
Wiggle the mirror out of its base and cut the wire using wire cutters. I’ll explain why here in a second.
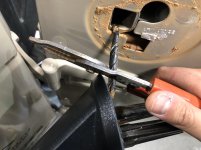
Take the zip tie and zip tie the connectors for the new mirror to the mirror side of the old wiring harness. The hole the wiring goes through goes straight into the vast expanse that is the door. There isn’t a channel that it follows to come out of the hole the rubber grommet covers. If you zip tie the ends together, you can pull the old wiring harness out through the inside of the door, and the new harness will come with it making it a matter of just plugging it in. If you try to fish it through the hole yourself, the ONLY way to do it is to remove the entire door innards. I had to remove the window, window regulator, door handle, door latch, and entire inner panel so I could get into the door enough to fish it through the hole. Trust me, save yourself the trouble and time and just ziptie the ends together and pull it through.
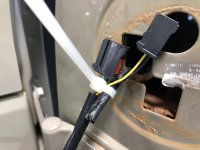
Once you’ve pulled it all the way through, put the new rubber grommet in place.
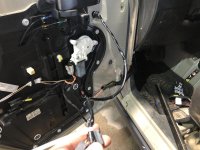
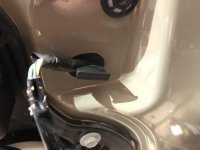
Plug the connectors back in.
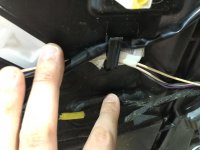
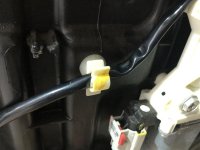
Return the wires to the retainer clips.
Back in February I ripped my passenger side mirror off on a very tight trail at Choccolocco ORV in Alabama. Since then I’ve been meaning to have the fancy new gloss black set from a Smokey mountain edition that I’ve had sitting in my garage installed, but I finally said screw it and decided to attempt it myself. I learned the hard way on a couple of things, so I decided to write and photograph this so you don’t have to make the same mistakes I did. This is for a 2011+ JK/JKU only, applies to power mirrors only, and the pictures were taken on the driver side (although the procedure is the same) because I used the passenger side as my test subject.
Things you’ll need:
-Flathead screwdriver
-Phillips head screwdriver
-T20
-T40
-Wire cutters
-Ziptie (you’ll see why)
-Mechanic gloves
-Trim panel tool (optional)
First, open the door and locate the cover behind the door handle. Using your trim tool or flathead, pop out that cover to expose the single T20 bolt behind it.

Next, using your trim tool or flathead, pop out the decorative trim piece in the door to expose two Phillips head screws.

Remove both Phillips head screws and set aside in a safe location.

Remove the single T20 torx from behind the door handle and set aside in a safe location.

Beneath the cargo net at the bottom of the door you will see two T20 torx. Remove both of those and again, set aside somewhere safe.

Next, use your flathead or trim tool to pop one or two of the Christmas tree clips free from their retainers, just enough to make room to get your hand back there. They’re super secure in there so it takes some force.

Now this is where I made mistake number one on the passenger side. I tried to pry the door panel free with my bare hands, and while I got it, I can’t say that my hands were too happy with my afterwards. Using some kind of good glove, pull the remaining clips free. Again, these things are in there, so it’ll take some gusto.

With the panel free, disconnect the single connector for the power lock switch.

When you remove the panel completely and set it aside, this is what will greet you.

Locate the two connectors that control the power mirror and power heated mirror operations. It’s these two, and they are fairly obvious.

Disconnect them and plug the new mirror up to make sure it functions correctly. If it does, then unplug the connectors and proceed to remove the original ones from the retainers holding the wire in place

Follow the wire until you see a rubber grommet in the door. Pull hard towards you to pop that grommet loose.

Now, using your T40, loosen and remove the two torx bolts holding the mirror in.

Wiggle the mirror out of its base and cut the wire using wire cutters. I’ll explain why here in a second.

Take the zip tie and zip tie the connectors for the new mirror to the mirror side of the old wiring harness. The hole the wiring goes through goes straight into the vast expanse that is the door. There isn’t a channel that it follows to come out of the hole the rubber grommet covers. If you zip tie the ends together, you can pull the old wiring harness out through the inside of the door, and the new harness will come with it making it a matter of just plugging it in. If you try to fish it through the hole yourself, the ONLY way to do it is to remove the entire door innards. I had to remove the window, window regulator, door handle, door latch, and entire inner panel so I could get into the door enough to fish it through the hole. Trust me, save yourself the trouble and time and just ziptie the ends together and pull it through.

Once you’ve pulled it all the way through, put the new rubber grommet in place.


Plug the connectors back in.

Return the wires to the retainer clips.


Last edited:

