HooksNRounds 2016 Billet Silver JKUR Build Thread

Bumper and tire carrier have been holding up fine. I did have one squeak/chirp that was occurring whenever I would hit rough roads or off-road. It was being caused by the ubolt of the latch rubbing on part of the piece that the latch latches to. I pulled the ubolt off and bent it at a bit steeper angle to fix the issue.

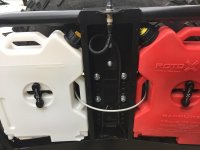
As far as advice goes, I would recommend that you install the whole bumper and carrier before you paint or powder coat and make sure everything fits as it should including drilling all holes and installing Rotopax, then pull back apart and paint. My install went pretty smooth except for setting up the rotopax. I had to elongate the holes in the big JCR bracket that the rotopax mounts install on to get the 2 gallon rotopax cans to fit properly within the tire carrier tubing.

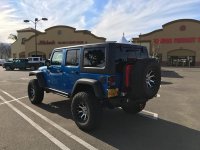
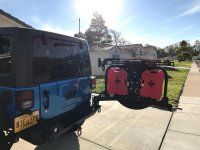
Hey I just wanted to follow up and say thanks for the advice. I installed the JCR Adventure Carrier today. It went on without much problem. Just wanted to say thanks. IMG_0468.jpgIMG_0474.jpg

Sent from my iPhone using WAYALIFE mobile app
 
Hey I just wanted to follow up and say thanks for the advice. I installed the JCR Adventure Carrier today. It went on without much problem. Just wanted to say thanks. View attachment 238966View attachment 238967

Sent from my iPhone using WAYALIFE mobile app

Looks good. There is a CB antenna mount on the top of the carrier also that will get your antenna up a bit higher. If you need any pics on how I routed the coax and wiring for my third brake light, let me know and I'll get you a couple pics.
 
Looks good. There is a CB antenna mount on the top of the carrier also that will get your antenna up a bit higher. If you need any pics on how I routed the coax and wiring for my third brake light, let me know and I'll get you a couple pics.

That would be great. That's the next thing on the agenda. Ran outta time today.


Sent from my iPhone using WAYALIFE mobile app
 
That would be great. That's the next thing on the agenda. Ran outta time today.


Sent from my iPhone using WAYALIFE mobile app
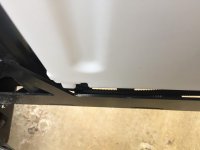
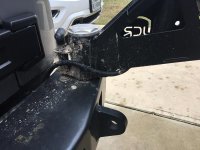
Left a little slack at the coax connector, just in case i have to cut and solder a new connector on in the future. Ziptied the coax in wire loom to the unused bolt holes down the channel. third brake light/license plate light wiring meets up and enters the same loom at the bottom of the channel.
Pic 1.jpg

Layed the wiring in loom inside the bottom channel and ziptied it every 12" or so.
Pic 3.jpg

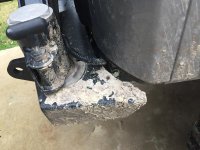
Brought the wire loom out of the bottom channel @ the spindle and put a very slight curl in it so that it's hassle free when opening or closing the tire carrier. The slight curl keeps the loom/wiring from kinking or bending when opening and closing the gate.
Pic 2.jpgPic 4.jpg

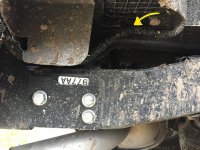
Drilled a small hole in pinch seam at yellow arrow, sealed hole with paint, and ran a ziptie through it to secure wire loom.
Pic 5_Ink_LI.jpg

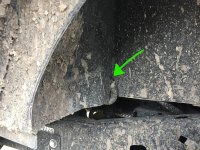
Ran loom into the cab tail light section @ green arrow (existing slot/hole). you will need to peel away some of the factory expandable foam inside the cab tail light area to expose the hole. I resealed with expandable foam after wiring was complete. Once inside the cab, I kept the CB coax in loom and followed the factory harness up to the front of the vehicle under carpet and trim.
Pic 6_Ink_LI.jpg
 
Top Bottom