SoupierPuppy
New member
Hello fellow Wayalifers!
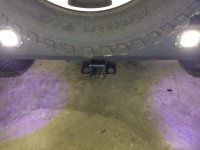
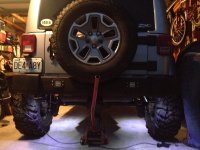
Most people think that lightbars are silly and this mod is certainly under that category. I do most of my wheeling at night on shorter easy trails but sometimes I find the need to reverse. When its dark outside the stock reverse lights just don't cut it so i decide to order up 4 flush mount 3x2 led pods. I chose to go with nilight from Amazon as they were cheap but this write up should work for just about anything out there.
The first part will be the bumper modification. Part two on this thread will be the wiring part when I have time to go over it and make some diagrams to help explain whats going on.
Without further ado, PART I
Time required: 2-3 hours or 2 beers(per person)
This could take longer depending on the quality of tools, availability of spare parts if something breaks, etc
Tools required:
16mm socket wrench and small extension
small piece of cardboard
3mm Allen wrench (or whatever Allen wrench your brand of led pods uses)
white paint marker
Sharpie
Sanding drum for dremel
cutoff wheel for dremel
Whatever screws you have on hand that can bite into plastic nicely
Step 1: Bumper removal
Using the 16mm socket and short extension, remove the 6 bolts holding the bumper on.
Step 2: Make a template
Using your Allen wrench/key take off the top plate of your flush mount pod, leaving you with the square portion of the pod and the mounting plate.
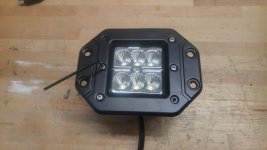
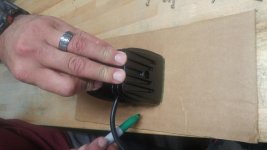
Carefully flip the pod over onto the cardboard, making sure not lose the seal or the lens cover as some pods use the mounting plate to hold it all together.
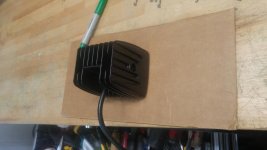
When you are comfortable with how its seated on the cardboard (level and centered) use a sharpie to trace the outline of the pod.
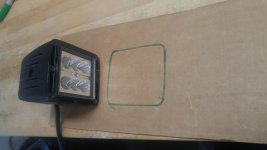
Next cut out the middle and test the fit to make sure its nice and snug
Step 3: Cut the bumper (aka the Point of No Return)
This is where the fun part begins. Take your template and place it on the bumper where you want the lights to sit. We chose to inset them slightly from the raised portion of the stock rear bumper.
With the template placed used your white paint marker to trace inside the template. Flip the template and do the same for the opposite side. Take some measurements of placement if you want to be super sure they are even.
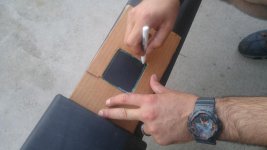
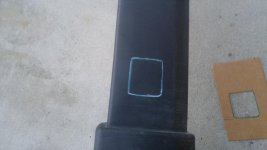
Now drill some pilot holes in the corners of the square. Learn from my mistake and drill through both sides of the bumper so you have corners on the back side as well.
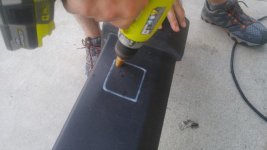
Using a cutoff wheel cut out the inner portion of the lines (easier to take more off later than try to add some back on) and on the back use the corner holes as a guide.
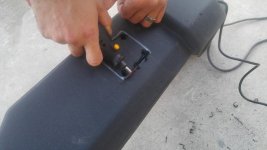
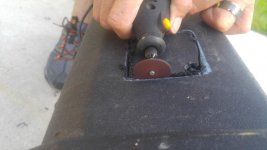
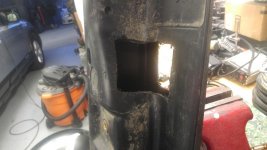
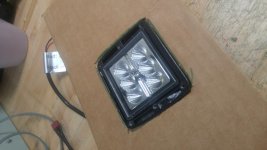
Clean up the dirty edges using the drum sander and widen to fit the pods snugly. Check fitment often. When done it should look a little something like this
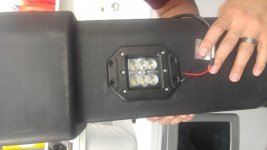
We used some rtv black to help secure it to the bumper but that is completely optional. Some aggressive screws will hold them in place just fine.
Step 4: Reattach the bumper
Now that the cuts are done, ziptie the wires up out of the way for later wiring and reattach the bumper using the six 16mm bolts you pulled off earlier.
WARNING: You may find that the lights rub on the frame rail in the back. If this happens go to your local hardwar store and get some spacers and longer bolts to move the bumper back a little bit to clear the heat sink fins.
Step 5: Blind Honda Civics
If you want to take on wiring on your own go ahead and wire it up and get out there and blind those Civics that tailgate you! If not, wait a week or so and follow my next guide on the switch panel and wiring for the reverse lights
Happy Jeeping!
PART II will be coming soon with parts lists, steps, diagrams, and more!
Most people think that lightbars are silly and this mod is certainly under that category. I do most of my wheeling at night on shorter easy trails but sometimes I find the need to reverse. When its dark outside the stock reverse lights just don't cut it so i decide to order up 4 flush mount 3x2 led pods. I chose to go with nilight from Amazon as they were cheap but this write up should work for just about anything out there.
The first part will be the bumper modification. Part two on this thread will be the wiring part when I have time to go over it and make some diagrams to help explain whats going on.
Without further ado, PART I
Time required: 2-3 hours or 2 beers(per person)
This could take longer depending on the quality of tools, availability of spare parts if something breaks, etc
Tools required:
16mm socket wrench and small extension
small piece of cardboard
3mm Allen wrench (or whatever Allen wrench your brand of led pods uses)
white paint marker
Sharpie
Sanding drum for dremel
cutoff wheel for dremel
Whatever screws you have on hand that can bite into plastic nicely
Step 1: Bumper removal
Using the 16mm socket and short extension, remove the 6 bolts holding the bumper on.
Step 2: Make a template
Using your Allen wrench/key take off the top plate of your flush mount pod, leaving you with the square portion of the pod and the mounting plate.

Carefully flip the pod over onto the cardboard, making sure not lose the seal or the lens cover as some pods use the mounting plate to hold it all together.

When you are comfortable with how its seated on the cardboard (level and centered) use a sharpie to trace the outline of the pod.


Next cut out the middle and test the fit to make sure its nice and snug

Step 3: Cut the bumper (aka the Point of No Return)
This is where the fun part begins. Take your template and place it on the bumper where you want the lights to sit. We chose to inset them slightly from the raised portion of the stock rear bumper.
With the template placed used your white paint marker to trace inside the template. Flip the template and do the same for the opposite side. Take some measurements of placement if you want to be super sure they are even.


Now drill some pilot holes in the corners of the square. Learn from my mistake and drill through both sides of the bumper so you have corners on the back side as well.

Using a cutoff wheel cut out the inner portion of the lines (easier to take more off later than try to add some back on) and on the back use the corner holes as a guide.


Clean up the dirty edges using the drum sander and widen to fit the pods snugly. Check fitment often. When done it should look a little something like this

We used some rtv black to help secure it to the bumper but that is completely optional. Some aggressive screws will hold them in place just fine.
Step 4: Reattach the bumper
Now that the cuts are done, ziptie the wires up out of the way for later wiring and reattach the bumper using the six 16mm bolts you pulled off earlier.
WARNING: You may find that the lights rub on the frame rail in the back. If this happens go to your local hardwar store and get some spacers and longer bolts to move the bumper back a little bit to clear the heat sink fins.
Step 5: Blind Honda Civics
If you want to take on wiring on your own go ahead and wire it up and get out there and blind those Civics that tailgate you! If not, wait a week or so and follow my next guide on the switch panel and wiring for the reverse lights
Happy Jeeping!
PART II will be coming soon with parts lists, steps, diagrams, and more!

