You are using an out of date browser. It may not display this or other websites correctly.
You should upgrade or use an alternative browser.
You should upgrade or use an alternative browser.
AZVAJKU Build
- Thread starter AZVAJKU
- Start date
AZVAJKU
Hooked
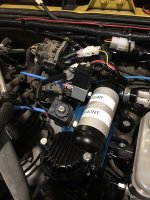
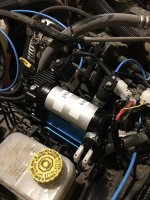
Today I mounted my ARB compressor.
As mentioned by others on the forum- it helps if you bolt the compressor to the mounting plate before you mount it into the engine compartment. Unless you have tiny hands this will reduce a great amount of frustration.
Running the air lines out to the axles was not difficult but it took some planning.


AZVAJKU
Hooked
Today I removed my old full sized rear Shrockworks bumper and replaced it with an EVO facia.
There is nothing wrong with the Shrockworks, it is actually a great bumper. The reason I switched to the EVO is because the full size Shrockworks will not support my new 40-inch tires. The Shrockworks tire carrier sits too low and with a 40-inch tire hanging off the back will negatively effect the departure angle of my Jeep. Also I think the full size bumper would have rubbed on 40-inch tires at full stuff.
I'll sell the Shrockworks at some point as it is a well built piece of hardware and works great with a 37-inch or smaller tire.
Removing the old- I forgot how heavy it was.
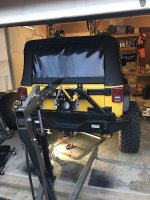
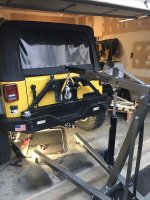
New bumper on. I needed to cut the rear cross member in order to get the captured nut on the rear most bolt.
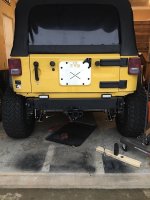
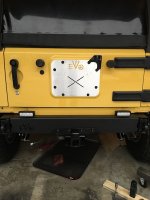
The tow hook set up is nice.
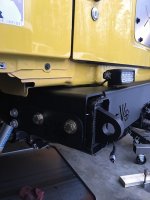
I added Rigid diffused lights that will be wired into my backup lights.
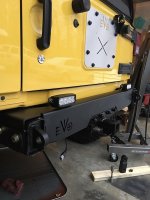
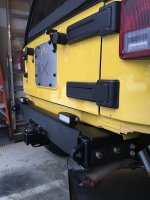
I was not completely sold on the facia, but after installing it I really like it.
There is nothing wrong with the Shrockworks, it is actually a great bumper. The reason I switched to the EVO is because the full size Shrockworks will not support my new 40-inch tires. The Shrockworks tire carrier sits too low and with a 40-inch tire hanging off the back will negatively effect the departure angle of my Jeep. Also I think the full size bumper would have rubbed on 40-inch tires at full stuff.
I'll sell the Shrockworks at some point as it is a well built piece of hardware and works great with a 37-inch or smaller tire.
Removing the old- I forgot how heavy it was.


New bumper on. I needed to cut the rear cross member in order to get the captured nut on the rear most bolt.


The tow hook set up is nice.

I added Rigid diffused lights that will be wired into my backup lights.


I was not completely sold on the facia, but after installing it I really like it.
wjtstudios
Hooked
AZVAJKU
Hooked
Switch Pros
I installed a Switch Pros 8100 system to run my ARB compressor, front and rear lockers, lights, and CB. I still have two remaining switches that I can add other devices to.
It is easy to install and I really like the compactness of the switch panel. It also has a ton of programing modes that can be set up. I bought this about 6 months ago and they have since come out with a new and improved 9100 model. Of course this one is even better than what I have....... FML! :doh:
Power module shown mounted on the firewall above the battery. This is the recommended method but other locations would be possible.
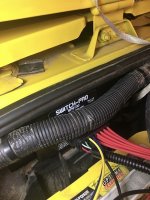
Switch panel mounted
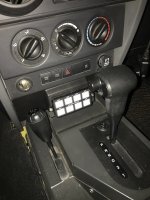
Came with these labels. Vertical orientation is also available for variations in mounting.
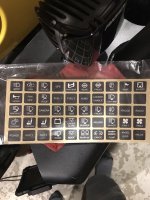
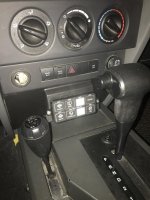
I plan on adding the blank labels to the switches not is use.
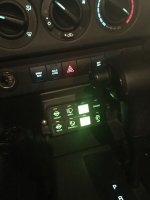
I installed a Switch Pros 8100 system to run my ARB compressor, front and rear lockers, lights, and CB. I still have two remaining switches that I can add other devices to.
It is easy to install and I really like the compactness of the switch panel. It also has a ton of programing modes that can be set up. I bought this about 6 months ago and they have since come out with a new and improved 9100 model. Of course this one is even better than what I have....... FML! :doh:
Power module shown mounted on the firewall above the battery. This is the recommended method but other locations would be possible.

Switch panel mounted

Came with these labels. Vertical orientation is also available for variations in mounting.


I plan on adding the blank labels to the switches not is use.

boardsurfer
Active Member
The switchpro is awesome. The one bit of programming I did was to set CB to remember last state. That way when Im on the trail and stall it on a rock, the cb comes right back when I restart. :thumb:
AZVAJKU
Hooked
The switchpro is awesome. The one bit of programming I did was to set CB to remember last state. That way when Im on the trail and stall it on a rock, the cb comes right back when I restart. :thumb:
Good idea,, thanks! :thumb:
AZVAJKU
Hooked
I finally got around to putting my 40's on. Originaly I had planned to wear the 37's out and then go to the 40's, however after installing my DynaTrac Elite axle package it was obvious the Jeep needed 40's.
The first thing I had to do was dismount the wheels and remove my nearly new 37-inch Nitto Trail Grapplers. Busting the beads on these was WAY harder than removing my previous BFG KM2's. For this task I used my Hi-Lift Jack and the Jeep's rock rails. My Hi-Lift does not get used for much else now that I have a winch, but it works great for this.
Unfortunately I did not take any pictures during the conversion. It was a great work out and I got plenty of torque wrench time.
I continue to be impressed with the beef of the KMC Machete wheels. My old AEV Pintler BL's seem fragile in comparison.
Here are the after pics.
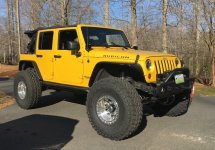
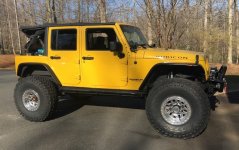
I did not have this combo balanced, however at 65 mph there is no vibration or shaking at all. I am very happy with the Nittos so far. I just need to work out what pressure I am going to run them at.
Trimming needed to be done to clear the Shrockworks front bumper. Eddie's thread on trimming Rubicat was really helpful for cleaning up the wheel wells. I hope to get the Jeep out next weekend and see how much more I need to trim.
The first thing I had to do was dismount the wheels and remove my nearly new 37-inch Nitto Trail Grapplers. Busting the beads on these was WAY harder than removing my previous BFG KM2's. For this task I used my Hi-Lift Jack and the Jeep's rock rails. My Hi-Lift does not get used for much else now that I have a winch, but it works great for this.
Unfortunately I did not take any pictures during the conversion. It was a great work out and I got plenty of torque wrench time.
I continue to be impressed with the beef of the KMC Machete wheels. My old AEV Pintler BL's seem fragile in comparison.
Here are the after pics.


I did not have this combo balanced, however at 65 mph there is no vibration or shaking at all. I am very happy with the Nittos so far. I just need to work out what pressure I am going to run them at.
Trimming needed to be done to clear the Shrockworks front bumper. Eddie's thread on trimming Rubicat was really helpful for cleaning up the wheel wells. I hope to get the Jeep out next weekend and see how much more I need to trim.
Jsouder53
Hooked
wjtstudios
Hooked
TheGrendel
Hooked
Awesome build.
AZVAJKU
Hooked
I finally got around to installing my EVO Tire Carrier. You can tell by the white deer that the parts actually arrived back around Christmas. Once again my wife had to drag Jeep parts into the garage while I was gone.
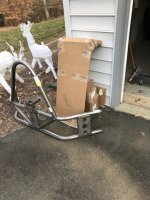
I went with the aluminum skins to lower the weight. It seemed like painting the AL was more difficult although I am an amateur. I used a rattle can of self-etching primer and then black over that. At some point I may have the skins powder coated or anodized, but for now its good enough. It takes some patience to put these on but its not difficult. A well placed beer or bourbon will help reduce stress. The carrier is BEEFY. I painted this in the same manner as the skins. When it gets scratched I can easily touch it up.
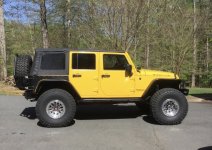
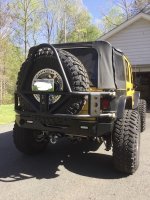
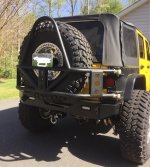
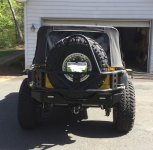
A trained observer will realize that I removed the EVO facia and installed a Shrockworks stubby rear bumper. I had nothing against the EVO set up, but I like having a bumper and I can always change it back. The Rigid back-up lights were easy to remove from the old set up and install in the cut outs built into the Shrockworks bumper.
In addition to adding the tire carrier, I have been tweaking the castor, toe in, control arm length and such to get the road manners sorted out. It drives well enough for now, however I think I will eventually go with long arms and coilovers.
Another issue I dealt with was the ESP/BAS light coming on. I thought I had damaged one of the wheel speed sensors but after checking the codes I had a 'steering angle' issue. It turns out my steering was almost TWO turns off??? :thinking: :doh: I had the steering wheel tied down during the axle swap as well as the hydro-steering install so I am not sure how that happened. Operator headspace and timing no doubt.
My ability to work through all the above modifications was greatly aided by all the solid info I have picked up from the Wayalife Forum.
Many thanks to all who have shared your Jeep knowledge! :rock:

I went with the aluminum skins to lower the weight. It seemed like painting the AL was more difficult although I am an amateur. I used a rattle can of self-etching primer and then black over that. At some point I may have the skins powder coated or anodized, but for now its good enough. It takes some patience to put these on but its not difficult. A well placed beer or bourbon will help reduce stress. The carrier is BEEFY. I painted this in the same manner as the skins. When it gets scratched I can easily touch it up.


A trained observer will realize that I removed the EVO facia and installed a Shrockworks stubby rear bumper. I had nothing against the EVO set up, but I like having a bumper and I can always change it back. The Rigid back-up lights were easy to remove from the old set up and install in the cut outs built into the Shrockworks bumper.
In addition to adding the tire carrier, I have been tweaking the castor, toe in, control arm length and such to get the road manners sorted out. It drives well enough for now, however I think I will eventually go with long arms and coilovers.
Another issue I dealt with was the ESP/BAS light coming on. I thought I had damaged one of the wheel speed sensors but after checking the codes I had a 'steering angle' issue. It turns out my steering was almost TWO turns off??? :thinking: :doh: I had the steering wheel tied down during the axle swap as well as the hydro-steering install so I am not sure how that happened. Operator headspace and timing no doubt.
My ability to work through all the above modifications was greatly aided by all the solid info I have picked up from the Wayalife Forum.
Many thanks to all who have shared your Jeep knowledge! :rock:
Mybadjk
Caught the Bug
Finally caught up to your build again. Everything turned out great! I’ve seen how beefy my xd 60 is. Couldn’t imagine how beefy the 80 is.
Sent from my iPhone using WAYALIFE mobile app
Sent from my iPhone using WAYALIFE mobile app
critter812
New member
Nice Build! Cannot go wrong with that set up!

