You are using an out of date browser. It may not display this or other websites correctly.
You should upgrade or use an alternative browser.
You should upgrade or use an alternative browser.
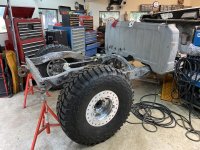
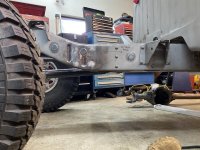
68' M715 AKA "Smokey", 8.1 engine on links, coils and 40's
- Thread starter Rock40
- Start date
DirtHeadDavis
Hooked
That is all insanely excellent and clean work! Well done! :shock:
Rock40
Active Member
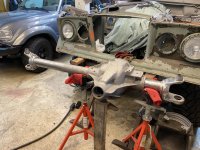
Plugging away. Blasted and primed some setup parts. The knuckles are stock, Reid’s are still in the box but I need studs. Idea is to get this rolling soon
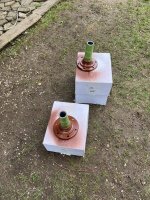
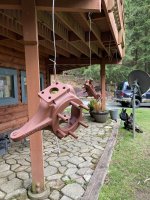
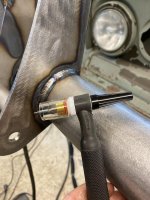
Welding the front 5 link up also. #10 FUPA cup from WeldMonger and a gas lens.
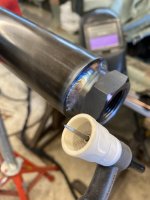
Triple pass on the .375” wall lowers then run a tap through them once they’re totally coo
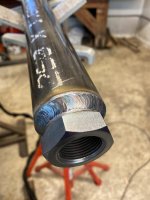
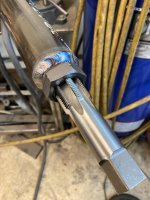


Welding the front 5 link up also. #10 FUPA cup from WeldMonger and a gas lens.

Triple pass on the .375” wall lowers then run a tap through them once they’re totally coo


Last edited:
Rock40
Active Member
That is all insanely excellent and clean work! Well done! :shock:
:thumb: THANK YOU!
Rock40
Active Member
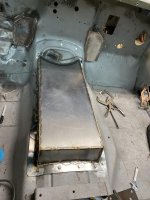
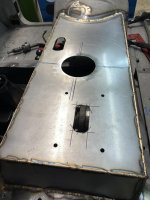
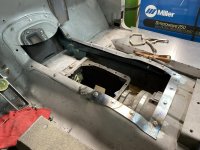
Day project: finish off the tunnel fabrication
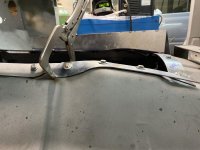
Mating the old with the new and getting the flange to contour with the floor. Heat, clamp, heat, hammer....
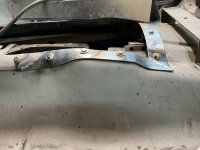
Flange ring is done here
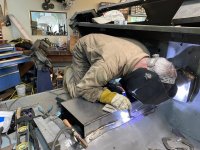
Then came a day of contorting myself to weld it. Managed to scorch my armpit and all the pedal work was done with my knee. Welded it out with
1/16” silicon bronze
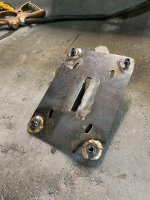
Done. Now it’s time to cut a mess of shifter holes in it
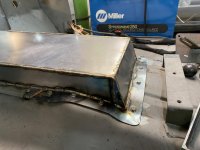

Mating the old with the new and getting the flange to contour with the floor. Heat, clamp, heat, hammer....

Flange ring is done here

Then came a day of contorting myself to weld it. Managed to scorch my armpit and all the pedal work was done with my knee. Welded it out with
1/16” silicon bronze

Done. Now it’s time to cut a mess of shifter holes in it

Rock40
Active Member
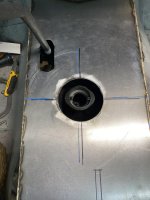
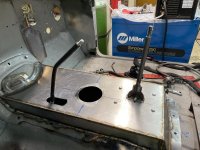
The ORD twin sticks for the 205 were the worst and lots of things (465 and Magnum) are all vying for space
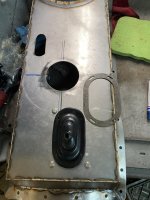
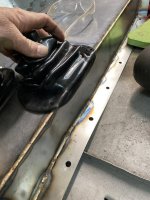
So I thought they were going here. And I was wrong. Cut the hole then realized I didn’t have enough throw to properly engage the 205 shift shafts
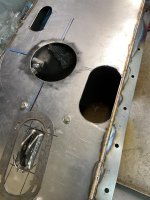
And...... realized I’d screwed the pooch.
So I had to weld it all back up and cut another one
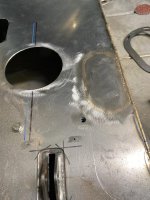
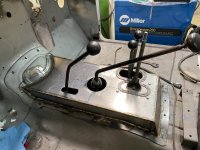
Got it right on the 2nd round. This is where everything will sit. Along with cutting brakes somewhere...
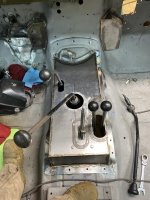


So I thought they were going here. And I was wrong. Cut the hole then realized I didn’t have enough throw to properly engage the 205 shift shafts

And...... realized I’d screwed the pooch.
So I had to weld it all back up and cut another one

Got it right on the 2nd round. This is where everything will sit. Along with cutting brakes somewhere...


Rock40
Active Member
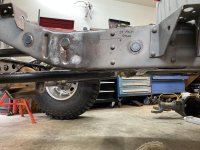
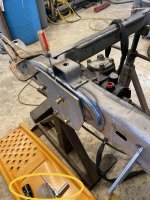
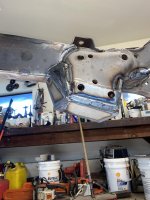
Transitioning over to working on the steering. The factory steering box mount only has 3 bolt holes for a manual box. I need 4 mounting holes and the mount needs to be considerably reinforced/braced across the whole frame rail.
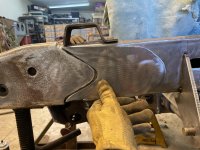
Start with a fresh fish plate to even out the exterior frame rail...
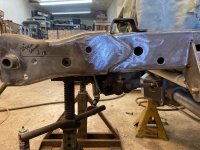
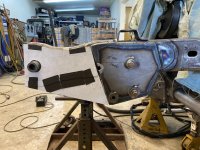
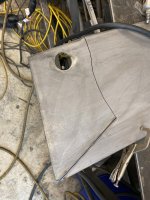
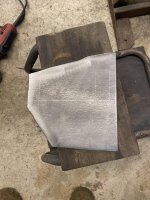
Mocking up the next mount in cardboard first. It hangs pretty low but that’s where the box needs to sit. I’ll make a pretty good slide/skid plate for it
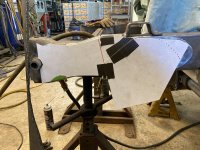
Simple things sometimes take a LONG time. This is merely converting a 3 bolt manual box to a 4 bolt power steering box but good grief I’m still at it. Maybe this is common with the FSJ crowd but the 715 frame is quite a bit different is my guess. Anybody want to chime in that has FSJ experience?
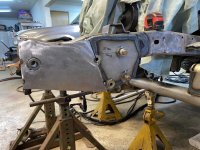
Made a plate below....

Start with a fresh fish plate to even out the exterior frame rail...

Mocking up the next mount in cardboard first. It hangs pretty low but that’s where the box needs to sit. I’ll make a pretty good slide/skid plate for it

Simple things sometimes take a LONG time. This is merely converting a 3 bolt manual box to a 4 bolt power steering box but good grief I’m still at it. Maybe this is common with the FSJ crowd but the 715 frame is quite a bit different is my guess. Anybody want to chime in that has FSJ experience?
Made a plate below....

Rock40
Active Member
This is the factory mount. Yeah, YUCK. This is looking inwards under the frame. Rear bolt has a sleeve which isn’t centered very well, front got nothing, just a big hole to pass a socket through. Nasty splatter welds all over, looks like it was assembled on a Friday afternoon by someone who had been closet drinking all day :banghead:
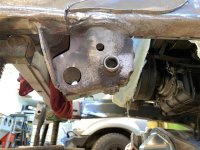
Inner factory plate. The lower holes are the 2 lower ones for the box. Upper right is the 3rd hole on the box. There’s no hole for the upper rear mount. Since this piece is stout and places the box right where it should go I’m leaving it. Everything else needs to be reinforced around it
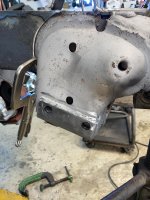
I’m using tube, passed through the mount and frame to make sure nothing crushes. Mounting bolts run through the tube and after mocking this up with low grade cheap tubing, I made the final pieces out of 4130 chromoly. Not going to crush that
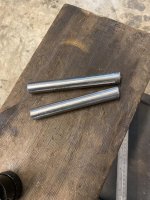
I enlarged the factory holes to 5/8” so my sleeves would pass through.
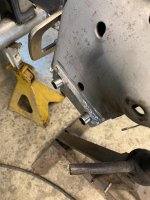

Inner factory plate. The lower holes are the 2 lower ones for the box. Upper right is the 3rd hole on the box. There’s no hole for the upper rear mount. Since this piece is stout and places the box right where it should go I’m leaving it. Everything else needs to be reinforced around it

I’m using tube, passed through the mount and frame to make sure nothing crushes. Mounting bolts run through the tube and after mocking this up with low grade cheap tubing, I made the final pieces out of 4130 chromoly. Not going to crush that

I enlarged the factory holes to 5/8” so my sleeves would pass through.

Rock40
Active Member
Getting the holes centered and lined up correctly was a challenge. And I really wanted to get it right. Used the sleeves to assist in alignment then I marked the back side of the plate
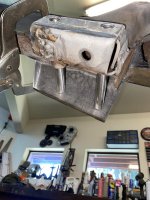
Transferred to the plate. And of course, one hole just has to be half on the plate. The whole outer frame is getting plated so it’d not a big deal, more annoying than anything else
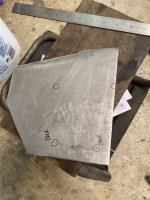
Drilled to 5/8”
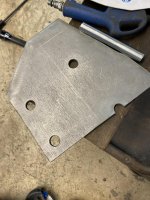
And after checking the alignment about 3 more times, I marked and drilled through the outer frame rail. Used a high speed carbide to smooth them out
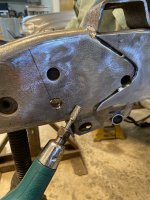

Transferred to the plate. And of course, one hole just has to be half on the plate. The whole outer frame is getting plated so it’d not a big deal, more annoying than anything else

Drilled to 5/8”

And after checking the alignment about 3 more times, I marked and drilled through the outer frame rail. Used a high speed carbide to smooth them out

Rock40
Active Member
This. This is factory janky. Apparently the Kaiser Corporation wants you to fish your tiny hand AND a bolt down in this void where I’m pointing with the awl. It’s for the upper, forward bolt. I think I’ll pass on that plan since this whole area is going to get sealed up
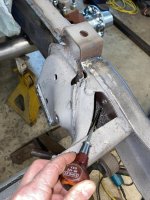
Now the tube sleeve goes through that goofy little void
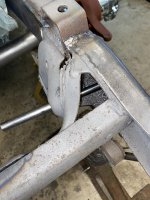
And out the other side on the outer frame rail
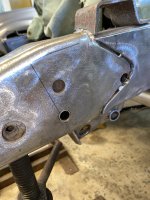
After many more measurements, black arrow shows where the 4th hole needs to go. Please also take the time to admire those factory welds. I don't think that MIG had been around for TOO long in 68' and nearly the whole truck has welds that are inconsistent, way too hot or full of porosity.
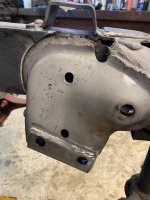
And here’s the outer plate with the sleeves mocked up. Getting much closer. It’s a bit goofy since the bolts and sleeves pass through at an angle. Plus the sleeves have to pass through both the inner and outer frame rails. I’ve got some round bar on order so I can make some wedges for the bolts to evenly snug against
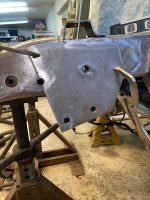

Now the tube sleeve goes through that goofy little void

And out the other side on the outer frame rail

After many more measurements, black arrow shows where the 4th hole needs to go. Please also take the time to admire those factory welds. I don't think that MIG had been around for TOO long in 68' and nearly the whole truck has welds that are inconsistent, way too hot or full of porosity.

And here’s the outer plate with the sleeves mocked up. Getting much closer. It’s a bit goofy since the bolts and sleeves pass through at an angle. Plus the sleeves have to pass through both the inner and outer frame rails. I’ve got some round bar on order so I can make some wedges for the bolts to evenly snug against

Rock40
Active Member
Fish plate is on...
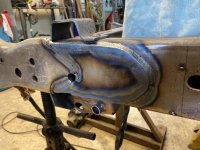
And verified by bolting up a donor box that the sleeves and holes are correct..
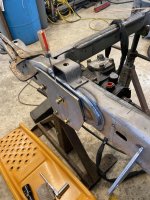
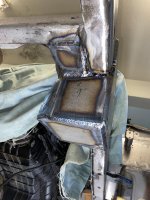
Boxing around the front frame rail.....
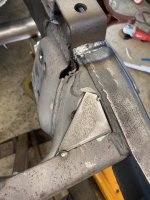
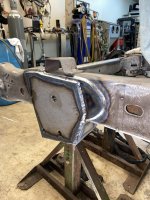
And starting to plate and box the entire factory mount so it ties into the exterior plate
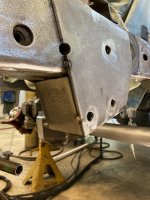
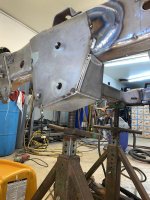
Just using .25” cold roll scraps to do this. I'm guessing that when Jeep did their Concept M715 build they weren't picking through shop scraps trying to save a few pennies :icon_crazy:
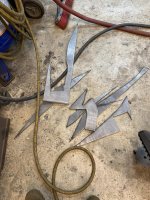

And verified by bolting up a donor box that the sleeves and holes are correct..

Boxing around the front frame rail.....

And starting to plate and box the entire factory mount so it ties into the exterior plate


Just using .25” cold roll scraps to do this. I'm guessing that when Jeep did their Concept M715 build they weren't picking through shop scraps trying to save a few pennies :icon_crazy:

Cousin Clyde
Hooked
Rock40
Active Member
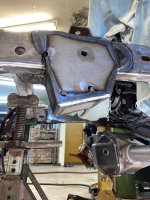
Steering box stuff is just about done.
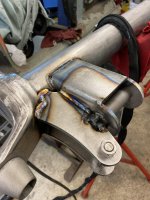
I upgraded the internal sleeves to 4130 chromo then welded in both sides. Also used some 1018 round bar to make the appropriate “wedges” so the bolts are pulling straight against the box. The bolts passing through the frame need to be set at the same mounting angle that the box is at. That ensures the bolts pull totally STRAIGHT and not off the side which would be much weaker. Ignore the bolts with the stacked washers, that’s mock-up
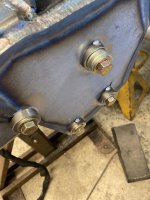
The upper bolt here also needs the correct spacer. 20 degree wedge with the same 1018 round bar drilled to 15/16”
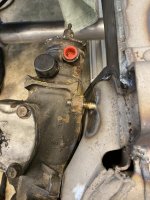
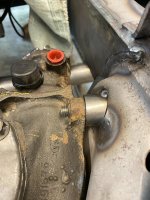
I upgraded the internal sleeves to 4130 chromo then welded in both sides. Also used some 1018 round bar to make the appropriate “wedges” so the bolts are pulling straight against the box. The bolts passing through the frame need to be set at the same mounting angle that the box is at. That ensures the bolts pull totally STRAIGHT and not off the side which would be much weaker. Ignore the bolts with the stacked washers, that’s mock-up

The upper bolt here also needs the correct spacer. 20 degree wedge with the same 1018 round bar drilled to 15/16”


Last edited:
Rock40
Active Member
This thread is amazing.
Gotta love that TIG finger
View attachment 358849
Sent from my iPhone using WAYALIFE
You are ABSOLUTELY RIGHT. I have both sizes and use them constantly

