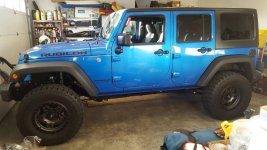
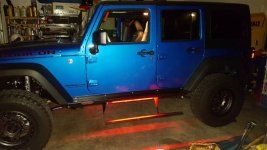
2016 Rubicon Hard Rock

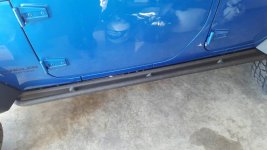
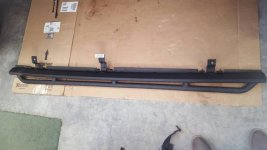
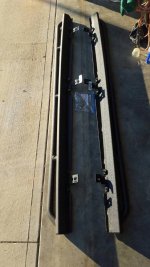
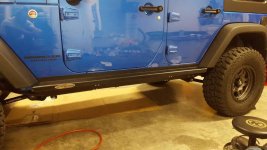
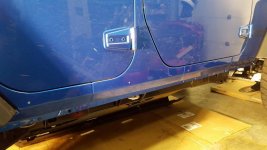
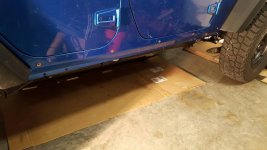
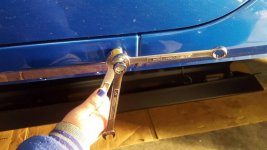
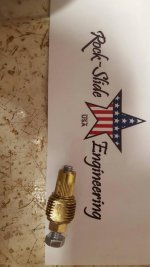
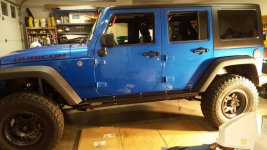
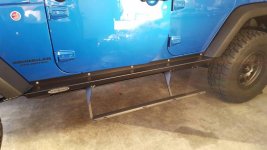
Well this has been an interesting jeepend my rock slide engineering power steps arrived on Friday so I set out on Saturday morning to do what was supposed to be a 6 hour job. Lol. First came the removal of the factory Hard Rock rails, piece of cake about 10 mins each side (3 bolts and 6 nuts each side) then the fun began. I will have to admit she looks pretty good with out anything at all on there but that probly wouldn't last long. Next I had to loosen the cab mount bolts and hang the sliders in place to mark the holes to be drilled in the body. Yeah in the body of a brand new vehicle that has less than 100 miles on it I must be crazy. The front cab mount bolt just behind the front tire on each side had to be removed completely for the installation of a new 130mm bolt and an aluminum spacer. The bolt on the drivers side of the vehicle would start back into the captive nut in the frame but would not tighten back up. This had me a little worried because when I googled it everyone was talking about cutting a hole through the cab to be able to get to this nut omg what have I done? I used my impact gun and held force down on the bolt by hand and gave it hell several times eventually it threaded all the way in, damn was that scary. Next you will see a series of silver circle (5 on each side) these are the locations for the 5/16" nutsert or riv nuts to be installed. You must drill a 17/32" hole for each nutsert this is definitely the scary part. All went well with the drilling of the holes, then came the installation of the nutserts that not so well. After some fabrication of a makeshift tool and two trips to the hardware store all the nutserts were finally in. I wanted to use a 5/16"×2" grade 8 bolt for the insertion tool but it had to be threaded the full length, the only ones that the hardware store had must have been like a grade 2 that is the reason why I had more than one trip the hardware store (each bolt was only good for one installation because it would stretch the threads making it to hard to turn on the next one) I did use a grade 8 nut though. Now to top it off you needed three hands to install them, that is my wife's hand btw blue does not look good on my nails. Finally managed to get them installed late Saturday night 6 hrs my a$$. Next comes the wiring and at this point I didn't feel much like tackling that so I went to bed and would finish up on Sunday. And btw it is late now also so I will finish this post tomorrow.
 

Attachments

  • 1449466640126.jpg
    1449466640126.jpg
    64.6 KB · Views: 296
  • 1449466672525.jpg
    1449466672525.jpg
    51.5 KB · Views: 289
  • 1449466687241.jpg
    1449466687241.jpg
    88.8 KB · Views: 293
  • 1449466704834.jpg
    1449466704834.jpg
    80.7 KB · Views: 291
  • 1449466720969.jpg
    1449466720969.jpg
    65.9 KB · Views: 291
  • 1449466736103.jpg
    1449466736103.jpg
    65.6 KB · Views: 291
  • 1449466749786.jpg
    1449466749786.jpg
    62.4 KB · Views: 288
  • 1449466767528.jpg
    1449466767528.jpg
    65.8 KB · Views: 291
  • 1449466787292.jpg
    1449466787292.jpg
    54.2 KB · Views: 293
  • 1449466809141.jpg
    1449466809141.jpg
    84.3 KB · Views: 293
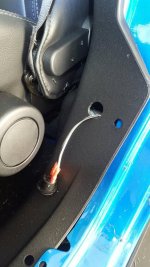
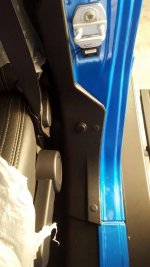
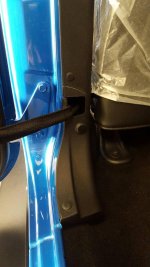
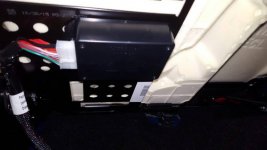
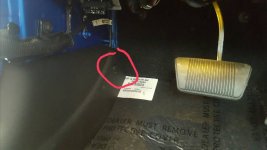
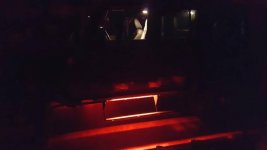
Ok the saga continues, Sunday morning came the daunting task of installing the wiring. This was a little time consuming due to the fact that carpet had to be pulled back, plastic covers removed from both B pillars the drivers side rocker and also the drivers side A pillar. Sorry I didn't take to many pics here because I became so consumed with the end result. They have you install the control module under the rear passengers seat this was achieved using a 1/4" drive impact, which was short enough to fit under the seat and a couple of 1/4" self tapping screws. The supplied wiring harness is then routed underneath the back seat between the carpet and the floorboard. Starting on the passengers side rear first you mount a sensor beneath the door strike and route the wiring to it next comes a door delete button on the back side of the B pillar this requires a 7/8" hole saw and then a little fine tuning. Then you remove a drain plug in the floor and drill a small hole in it (I chose 3/8") to pass the actuator motor and LED lighting wiring through. Next comes the passengers side front door delete button, another hole in the plastic. Now you can proceed to the drivers side and repeat. Once you make it to the A pillar that is where I chose to mount my system power switch (hard to see in the pic so I circled it) I used an existing stud on the a pillar for the ground wire. Yet another hole to be drilled in the plastic. Then it's trough the firewall via a 2" hole located between the vacuum booster and the drivers fender, then it's on too the battery. Finally it's time to make all the terminations and test everything out. Then I decided to add some red LED light strips to illuminate the steps at night. Matches the red accents of the Hard Rock.when that was finished my wife decided it was time to install the jeep provided coat hanger hooks and her new sticker collection on the inside of the rear door. Well I guess that's all for now, we'll until my AFE y pipe arrives.
 

Attachments

  • 1449532929653.jpg
    1449532929653.jpg
    101.9 KB · Views: 284
  • 1449532959732.jpg
    1449532959732.jpg
    61.9 KB · Views: 285
  • 1449532981947.jpg
    1449532981947.jpg
    67.2 KB · Views: 278
  • 1449533014218.jpg
    1449533014218.jpg
    43.9 KB · Views: 275
  • 1449533032539.jpg
    1449533032539.jpg
    40.3 KB · Views: 273
  • 1449533099823.jpg
    1449533099823.jpg
    63.8 KB · Views: 273
  • 1449533140408.jpg
    1449533140408.jpg
    67 KB · Views: 271
  • 1449533153324.jpg
    1449533153324.jpg
    19.9 KB · Views: 274
These pics didn't make it on the last post for some reason, oh well.
 

Attachments

  • 1449533442470.jpg
    1449533442470.jpg
    44.1 KB · Views: 276
  • 1449533453907.jpg
    1449533453907.jpg
    27.4 KB · Views: 275
  • 1449533464550.jpg
    1449533464550.jpg
    42 KB · Views: 275
  • 1449533478534.jpg
    1449533478534.jpg
    54.7 KB · Views: 274
  • 1449533491881.jpg
    1449533491881.jpg
    77 KB · Views: 278
Thnx allwhitejeeps it might be time to slow down a little and drive it some though, I've had it 3 weeks now and it has only seen 125 miles of roadway.
 
Those look really nice. I'm interested to see how they hold up.

I have a small video clip of them operating on my Instagram I could not figure out how to load it on here maybe it's not possible I'm not sure. My Instagram username is sponnythegr8 feel free to check it out if you like.
 
Well I finally broke down and had my rig put on the alignment rack, now I know that the only thing they can adjust is the toe in. When I took some preliminary measurements it appeared to be off and I was correct it was. But what bothers me the most is that the caster angles are down at the low end of the acceptable spec which is causing a flighty feeling in the steering. It was my understanding that the fixed LCA's that came with the Mopar stage 3 lift we're supposed to be just a little bit longer then the factory ones and should have kept me at the optimum angle of 4.2 degrees but as you can see that didn't happen. Not exactly sure what my angle was with the factory LCA'S but oh well one of those things . So now it looks like I will probably end up with some adjustable LCA'S in my future. Also my camber readings are not at their optimum location could be due to the additional weight added to the vehicle not 100% sure.
 

Attachments

  • 1449852685060.jpg
    1449852685060.jpg
    79.8 KB · Views: 239
Here is a pic of the adjusted toe in settings, well at least now I won't chew the inside edges of the tires up. Money well spent I guess. I would like to see my caster angle around 5 degrees positive to see if this would correct if flighty feel in the steering.
 

Attachments

  • 1449853251780.jpg
    1449853251780.jpg
    74.2 KB · Views: 235
Well I finally broke down and had my rig put on the alignment rack, now I know that the only thing they can adjust is the toe in. When I took some preliminary measurements it appeared to be off and I was correct it was. But what bothers me the most is that the caster angles are down at the low end of the acceptable spec which is causing a flighty feeling in the steering. It was my understanding that the fixed LCA's that came with the Mopar stage 3 lift we're supposed to be just a little bit longer then the factory ones and should have kept me at the optimum angle of 4.2 degrees but as you can see that didn't happen. Not exactly sure what my angle was with the factory LCA'S but oh well one of those things . So now it looks like I will probably end up with some adjustable LCA'S in my future. Also my camber readings are not at their optimum location could be due to the additional weight added to the vehicle not 100% sure.

Camber on Jeep can only be affected by bent parts, worn wheel bearings or worn ball joints. Extra weight shouldn't affect it.
 
Camber on Jeep can only be affected by bent parts, worn wheel bearings or worn ball joints. Extra weight shouldn't affect it.

Yeah that's what I always thought so that means that it was probably that way from the factory. In spec but barely.
 
Yeah that's what I always thought so that means that it was probably that way from the factory. In spec but barely.

I did my lift and alignment at 9,000 miles, my camber measurements were about the same as yours if i remember right. No noticable inside edgewear on my tires at 50,000 miles
 
I did my lift and alignment at 9,000 miles, my camber measurements were about the same as yours if i remember right. No noticable inside edgewear on my tires at 50,000 miles

Well that is good to hear, it's just a little depressing you would think that the factory would dial it in a little closer to the middle of the tolerances instead of just hitting one side or the other. Since this is the last year for the JK they are working with machinery and tooling that is ready to be replaced and they are probably just happy to see it between the lines. That was one of my concerns with buying the last year of the JK model. But then it will probably take them a few years to get the bugs worked out of the next model.
 
Are you doing the loop delete too or just the Y-pipe? I'm running the AFE Y-pipe, loop delete and high tuck exhaust.

I was not aware of this what all does it involve? The only thing I purchased was the AFE y pipe. I was wondering what the loop in the exhaust was even there for anyways.
 
Well that is good to hear, it's just a little depressing you would think that the factory would dial it in a little closer to the middle of the tolerances instead of just hitting one side or the other. Since this is the last year for the JK they are working with machinery and tooling that is ready to be replaced and they are probably just happy to see it between the lines. That was one of my concerns with buying the last year of the JK model. But then it will probably take them a few years to get the bugs worked out of the next model.

nothing to do with the jeep factory-that is all dana tolerances
 
Top Bottom