devonn216
Member
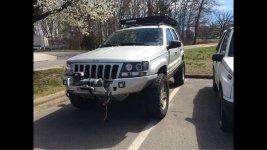
I traded in my 2003 WJ because it needed a good amount of work and I desperately wanted back into a Wrangler! 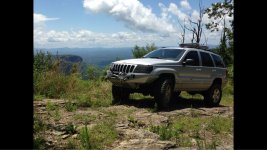
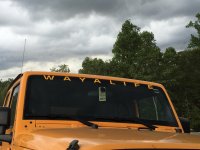
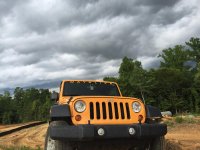
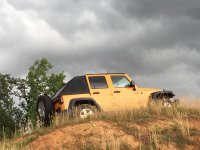
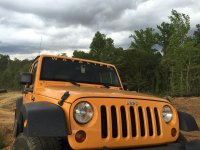
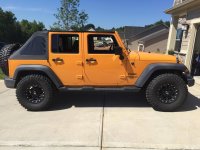
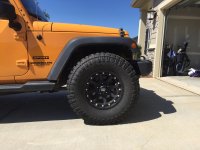
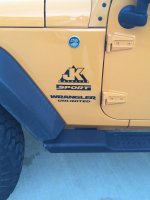
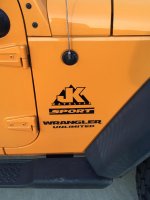
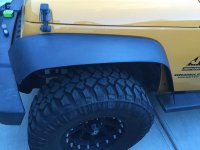
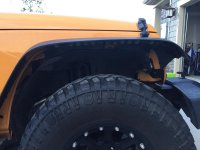
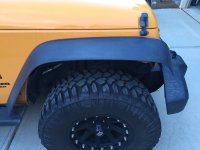
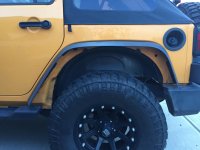
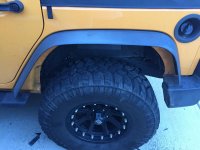
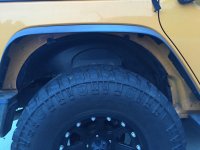
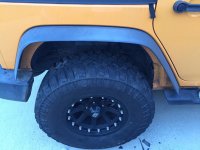
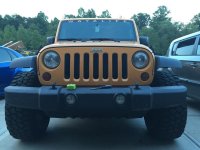
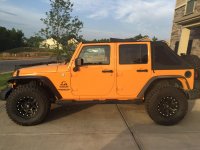
I got a 2012 Dozer JKU Sport with 60k on it. It didn't have all the things I wanted, but I searched and searched for a Dozer and the price was right on this one, plus is was in great shape and had a Trektop.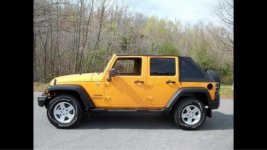
2012 JEEP WRANGLER UNLIMITED X 4X4 SPORT UTILITY 4-DOOR
*A7 Cloth Seats w/Adj. Head Restraints
-X9 Black
AAJ Connectivity Group
AHT Trailer Tow Group
AJPP Power Convenience Group
APAS Monotone Paint
BABS 160 Amp Alternator
BC2S 600 Amp Maintenance Free Battery
BNBS Electronic Stability Control
BNGS Hill Start Assist
BNHP Hill Descent Control
BNMP Traction Control
BNSP Electronic Roll Mitigation
BNTP Trailer Sway Damping
BPTP Hydraulic Assist Brake Booster
BRWS 4-Wheel Disc Brakes
CACS Low Back Bucket Seats
CDBS Reclining Front Seats
CDHP Driver Height Adjuster Seat
CFNS Rear 60/40 Folding Seat
CGXS RR Head Restraints Outboard Seating
CG3S Advanced Multistage Front Air Bags
CKES Front Seat Area Carpet
CKFP Rear Seat/Wheelhouse/Cargo Carpet
CKLS Cargo Compartment Floor Mat
CKTS Cargo Tie Down Loops
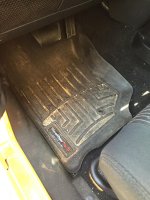
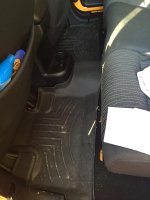
CLES Front & Rear Floor Mats
CLMS Sport Bar w/Full Padding
CSMP Front Seat Back Map Pockets
CUFS Full Length Floor Console
CURS Rear Compartment Covered Storage
CUYS Storage Tray
CVCP Chrome/Leather Wrapped Shift Knob
DBAC All Automatic Transmissions
DGJ 5-Speed Auto W5A580 Transmission
DHES Command-Trac Shift-on-the-Fly 4WD
DJRS Next Gen. Dana 30 Solid Front Axle
DMCS 3.21 Rear Axle Ratio
DRZS Next Gen. Dana 44 HD Rear Axle
DS7S Conventional Differential Frt Axle
DS8S Conventional Differential Rear Axle
ERB 3.6L V6 24V VVT Engine
GBBS Tinted Windshield Glass
GCBS Front Door Tinted Glass
GCDP Deep Tint Sunscreen Windows
GCFS Full Metal Doors w/Roll-up Windows
GNAS Rear View Day/Night Mirror
GNUS Sliding Sun Visors w/Mirrors
GTBP Power Heated Mirrors
GWKP Sunrider Soft Top
GXMP Remote Keyless Entry
GXXS Sentry Key Theft Deterrent System
HAAS Air Conditioning
JA2S Premium Instrument Cluster w/Tach
JCDS 100 MPH Primary Speedometer
JFJS Temperature & Compass Gauge
JHAS Var Intermittent Windshield Wipers
JJFS Single Low Note Horn
JJJS 12V Auxiliary Power Outlet
JKAS Glove Box
JPBP Power Locks
JPYP Pwr Windows, Front 1-Touch Down
LABS Tire Pressure Monitoring Warning LP
LAXS Front Passenger Seat Belt Alert
LAZP Vehicle Information Center
LCLS Front Dome w/On/Off Switch Lamp
LHES Rear Dome w/On/Off Switch Lamp
LMAS Halogen Headlamps
LNJS Fog Lamps
LPSS CHMSL Lamp
LSAP Security Alarm
MBAS Black Front Bumper
MB5S Black Rear Bumper
MFRS Black Front Frame Overlay
MFTS Body Color Grille
MGXS Wrangler Unlimited Badge
MRK Tubular Side Steps
MT2S Trail Rated Badge
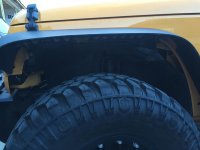
MUGS Accent Color Fender Flares
MVCS Jeep Badge
MVJS Sport Badge
MX4S Black Sunrider Soft Top
NAS 50 State Emissions
NF5S 22.5 Gallon Fuel Tank
NHAP Engine Oil Cooler
NHMS Speed Control
PY5 Dozer Clear Coat
QY5S Dozer Clear Coat
RCGS 8 Speakers
RDDS Fixed Long Mast Antenna
RDZS Steering Wheel Mounted Audio Ctrls
RESS Uconnect 130 AM/FM/CD/MP3
RSC SIRIUS Satellite Radio
RSPP Uconnect Voice Command w/Bluetooth
RSUP Audio Jack Input for Mobile Devices
RSXP Remote USB Port
SBAS Power Steering
SCVP Leather Wrapped Steering Wheel
SDAS Normal Duty Suspension
SHAS Front Stabilizer Bar
SHCS Rear Stabilizer Bar
SUAS Tilt Steering Column
TBBS Full Size Spare Tire
TBRS Outside Tire Carrier
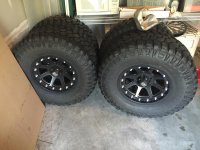
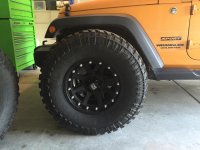
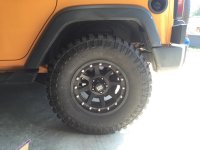
TUFP P255/75R17 OWL On/Off Road Tires
TZAP Goodyear Brand Tires
WFFP 17X7.5 Aluminum Wheels
WKBP Matching Spare Wheel
WLZC All Aluminum Wheels
XBNP Tip Start
XEES Fuel Tank Skid Plate Shield
XEFS Transfer Case Skid Plate Shield
XEWS 2 Front & 1 Rear Tow Hooks
XFNP Class II Receiver Hitch
XFUP Trailer Tow w/4-Pin Connector Wiring
XJFS Tethered Fuel Filler Cap
XJGS Non Locking Fuel Filler Cap
XLNS English/USA Language
XPFS Protective Coating and Remover
XSBS Midnight Star Interior Accents
X8ZS Seat Parts Module
X81S Instrument Panel Parts Module
X83S Front End Parts Module
X86S Complete Chassis Parts Module
X88S Tire & Wheel Parts Module
X9AP For More Info, Call 888-539-7474
X9BP 1-Yr. SiriusXM Radio Service
X92S Complete Body in White Parts Module
X94S Complete Painted Body Module
YAAS Build To U.S. Mkt. Specifications
Rubicat and olram30's Dozer build are my inspiration. I have a rough plan in my head about what I want to do, but I'm sure as things fall into place it will change numerous times. Eventually I'll have Prorocks, EVO double throw downs, 37s, and all that high dollar stuff that comes with it! Hopefully. We will see :/


I got a 2012 Dozer JKU Sport with 60k on it. It didn't have all the things I wanted, but I searched and searched for a Dozer and the price was right on this one, plus is was in great shape and had a Trektop.

2012 JEEP WRANGLER UNLIMITED X 4X4 SPORT UTILITY 4-DOOR
*A7 Cloth Seats w/Adj. Head Restraints
-X9 Black
AAJ Connectivity Group
AHT Trailer Tow Group
AJPP Power Convenience Group
APAS Monotone Paint
BABS 160 Amp Alternator
BC2S 600 Amp Maintenance Free Battery
BNBS Electronic Stability Control
BNGS Hill Start Assist
BNHP Hill Descent Control
BNMP Traction Control
BNSP Electronic Roll Mitigation
BNTP Trailer Sway Damping
BPTP Hydraulic Assist Brake Booster
BRWS 4-Wheel Disc Brakes
CACS Low Back Bucket Seats
CDBS Reclining Front Seats
CDHP Driver Height Adjuster Seat
CFNS Rear 60/40 Folding Seat
CGXS RR Head Restraints Outboard Seating
CG3S Advanced Multistage Front Air Bags
CKES Front Seat Area Carpet
CKFP Rear Seat/Wheelhouse/Cargo Carpet
CKLS Cargo Compartment Floor Mat
CKTS Cargo Tie Down Loops
CLES Front & Rear Floor Mats
CLMS Sport Bar w/Full Padding
CSMP Front Seat Back Map Pockets
CUFS Full Length Floor Console
CURS Rear Compartment Covered Storage
CUYS Storage Tray
CVCP Chrome/Leather Wrapped Shift Knob
DBAC All Automatic Transmissions
DGJ 5-Speed Auto W5A580 Transmission
DHES Command-Trac Shift-on-the-Fly 4WD
DJRS Next Gen. Dana 30 Solid Front Axle
DMCS 3.21 Rear Axle Ratio
DRZS Next Gen. Dana 44 HD Rear Axle
DS7S Conventional Differential Frt Axle
DS8S Conventional Differential Rear Axle
ERB 3.6L V6 24V VVT Engine
GBBS Tinted Windshield Glass
GCBS Front Door Tinted Glass
GCDP Deep Tint Sunscreen Windows
GCFS Full Metal Doors w/Roll-up Windows
GNAS Rear View Day/Night Mirror
GNUS Sliding Sun Visors w/Mirrors
GTBP Power Heated Mirrors
GWKP Sunrider Soft Top
GXMP Remote Keyless Entry
GXXS Sentry Key Theft Deterrent System
HAAS Air Conditioning
JA2S Premium Instrument Cluster w/Tach
JCDS 100 MPH Primary Speedometer
JFJS Temperature & Compass Gauge
JHAS Var Intermittent Windshield Wipers
JJFS Single Low Note Horn
JJJS 12V Auxiliary Power Outlet
JKAS Glove Box
JPBP Power Locks
JPYP Pwr Windows, Front 1-Touch Down
LABS Tire Pressure Monitoring Warning LP
LAXS Front Passenger Seat Belt Alert
LAZP Vehicle Information Center
LCLS Front Dome w/On/Off Switch Lamp
LHES Rear Dome w/On/Off Switch Lamp
LMAS Halogen Headlamps
LNJS Fog Lamps
LPSS CHMSL Lamp
LSAP Security Alarm
MBAS Black Front Bumper
MB5S Black Rear Bumper
MFRS Black Front Frame Overlay
MFTS Body Color Grille
MGXS Wrangler Unlimited Badge
MRK Tubular Side Steps
MT2S Trail Rated Badge
MUGS Accent Color Fender Flares
MVCS Jeep Badge
MVJS Sport Badge
MX4S Black Sunrider Soft Top
NAS 50 State Emissions
NF5S 22.5 Gallon Fuel Tank
NHAP Engine Oil Cooler
NHMS Speed Control
PY5 Dozer Clear Coat
QY5S Dozer Clear Coat
RCGS 8 Speakers
RDDS Fixed Long Mast Antenna
RDZS Steering Wheel Mounted Audio Ctrls
RESS Uconnect 130 AM/FM/CD/MP3
RSC SIRIUS Satellite Radio
RSPP Uconnect Voice Command w/Bluetooth
RSUP Audio Jack Input for Mobile Devices
RSXP Remote USB Port
SBAS Power Steering
SCVP Leather Wrapped Steering Wheel
SDAS Normal Duty Suspension
SHAS Front Stabilizer Bar
SHCS Rear Stabilizer Bar
SUAS Tilt Steering Column
TBBS Full Size Spare Tire
TBRS Outside Tire Carrier
TUFP P255/75R17 OWL On/Off Road Tires
TZAP Goodyear Brand Tires
WFFP 17X7.5 Aluminum Wheels
WKBP Matching Spare Wheel
WLZC All Aluminum Wheels
XBNP Tip Start
XEES Fuel Tank Skid Plate Shield
XEFS Transfer Case Skid Plate Shield
XEWS 2 Front & 1 Rear Tow Hooks
XFNP Class II Receiver Hitch
XFUP Trailer Tow w/4-Pin Connector Wiring
XJFS Tethered Fuel Filler Cap
XJGS Non Locking Fuel Filler Cap
XLNS English/USA Language
XPFS Protective Coating and Remover
XSBS Midnight Star Interior Accents
X8ZS Seat Parts Module
X81S Instrument Panel Parts Module
X83S Front End Parts Module
X86S Complete Chassis Parts Module
X88S Tire & Wheel Parts Module
X9AP For More Info, Call 888-539-7474
X9BP 1-Yr. SiriusXM Radio Service
X92S Complete Body in White Parts Module
X94S Complete Painted Body Module
YAAS Build To U.S. Mkt. Specifications
Rubicat and olram30's Dozer build are my inspiration. I have a rough plan in my head about what I want to do, but I'm sure as things fall into place it will change numerous times. Eventually I'll have Prorocks, EVO double throw downs, 37s, and all that high dollar stuff that comes with it! Hopefully. We will see :/

