You are using an out of date browser. It may not display this or other websites correctly.
You should upgrade or use an alternative browser.
You should upgrade or use an alternative browser.
1980 CJ7 Crawler Build
- Thread starter BobJob42
- Start date
BobJob42
Caught the Bug
I did!If you cleaned up and scuffed the paint, then the adhesion promoter should give you a good bond with the bed liner.
BobJob42
Caught the Bug
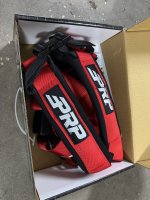
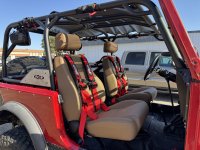
Well, after having to take some time off to recover from a minor surgery I’ve finally been able to get back on the CJ. Having a decent amount of off time had me thinking about stuff and ultimately decided that if we may end up down the road doing shoulder harnesses then we better just do it now. So we got back onto Genright’s website and ordered the harness bar kit to tie into the cage and ordered 4 PRP 4.2 easy harnesses.
Funny thing about the seatbelts is that the PRP harnesses were no more expensive than a standard 3 point buckle. Figured it would be easier to do it now then down the road since Im here doing the cage now.
Then I got to working on getting the A-Pillars welded and installed, getting these to all line up and play together was a bit of a chore but that was to be expected and they did end up settling in nicely all said and done.
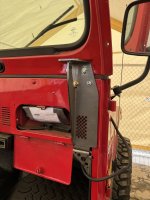
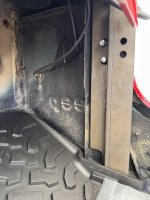
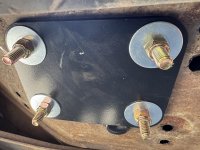
The floor plates and gussets come not attached so they need to be welded and this is where I ran into the biggest problem, where the stanchion bolts into the door hinge it left almost an inch gap to the floor (to be fair, Genright specifically states in the instructions that these old CJs will have floor sag and modifications will need to be made)
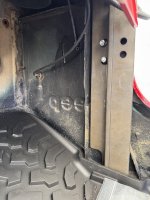
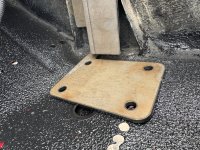
The passenger side was the worst, driver side still had some sag but it was close enough after some bending of the floor plates that we could fill it with weld. Passenger side, even after bending the floor plate, was just too much of a gap so I made a spacer it fill it in.
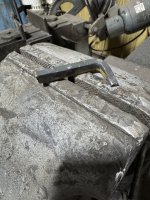
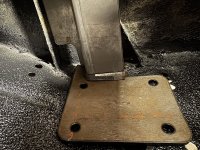
Once that was complete we proceeded to weld in the gussets and prepare it for paint because once these go back in there is no reason to pull them back out.
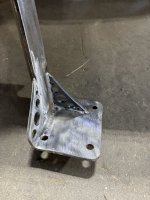
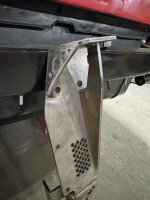
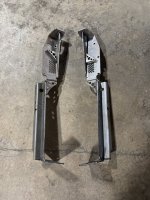
Got them all painted up and installed, had to slightly modify my floor mats but after that everything turned out nicely!
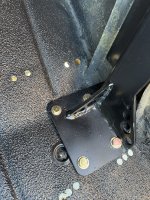
Funny thing about the seatbelts is that the PRP harnesses were no more expensive than a standard 3 point buckle. Figured it would be easier to do it now then down the road since Im here doing the cage now.

Then I got to working on getting the A-Pillars welded and installed, getting these to all line up and play together was a bit of a chore but that was to be expected and they did end up settling in nicely all said and done.
The floor plates and gussets come not attached so they need to be welded and this is where I ran into the biggest problem, where the stanchion bolts into the door hinge it left almost an inch gap to the floor (to be fair, Genright specifically states in the instructions that these old CJs will have floor sag and modifications will need to be made)


The passenger side was the worst, driver side still had some sag but it was close enough after some bending of the floor plates that we could fill it with weld. Passenger side, even after bending the floor plate, was just too much of a gap so I made a spacer it fill it in.


Once that was complete we proceeded to weld in the gussets and prepare it for paint because once these go back in there is no reason to pull them back out.


Got them all painted up and installed, had to slightly modify my floor mats but after that everything turned out nicely!


Last edited:
circlepete
Active Member
NiceGot the Raptor on today. It went on really well and is a very forgiving product, really happy with how it went. Using the roll on was also a plus, allowed me to control the product and get the texture I wanted.
Will it last? I don’t know, maybe, maybe not. I did as best as I could with what I had. I used UPOL’s acid etch and adhesion promoter underneath so only time will tell!
View attachment 419556
View attachment 419557
View attachment 419558
View attachment 419559
BobJob42
Caught the Bug
Thanks! Me tooI checked out that cage on GenRight's website and it looks nice! I'm looking forward to seeing yours.
BobJob42
Caught the Bug
I’ll be sure to post! Appreciate itMan this looks like an awesome project. Can't wait to see the final pics when completed.
Jaybird 11
Caught the Bug
That looks great!
BobJob42
Caught the Bug
Thanks!That looks great!
BobJob42
Caught the Bug
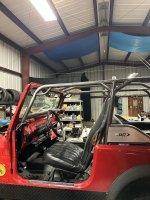
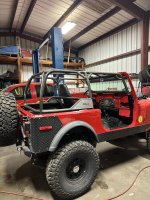
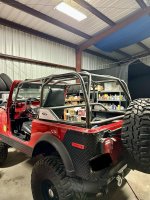
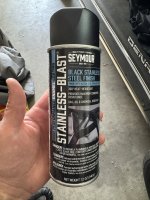
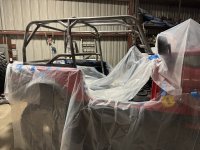
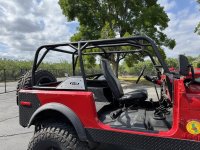
Got the cage painted this weekend, turned out about as good as one could expect for a rattle can job. I went this route because of price and ease of touch up in the future.
I used the Seymour stainless blast black and was very happy with the product. This was my first time using it and I wanted to see what all the hype was about, it’s now my favorite rattle can and it’s not even close. I bought 5 cans, used 4 and saved a can for touch ups.
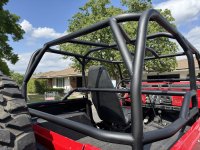
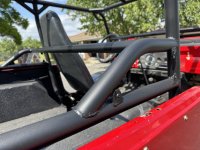
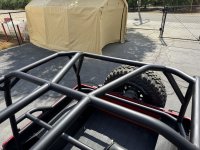
I used the Seymour stainless blast black and was very happy with the product. This was my first time using it and I wanted to see what all the hype was about, it’s now my favorite rattle can and it’s not even close. I bought 5 cans, used 4 and saved a can for touch ups.


Launch
Active Member
That turned out really well. Nicely done and cost effective = winner!Got the cage painted this weekend, turned out about as good as one could expect for a rattle can job. I went this route because of price and ease of touch up in the future.
I used the Seymour stainless blast black and was very happy with the product. This was my first time using it and I wanted to see what all the hype was about, it’s now my favorite rattle can and it’s not even close. I bought 5 cans, used 4 and saved a can for touch ups.
View attachment 425129
View attachment 425134
View attachment 425130
View attachment 425131
View attachment 425132
View attachment 425133
BobJob42
Caught the Bug
Thanks!That turned out really well. Nicely done and cost effective = winner!
BobJob42
Caught the Bug
Another big day on the jeep.
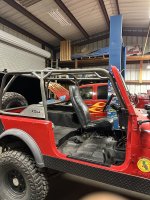
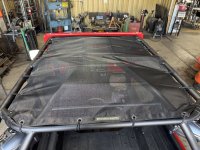
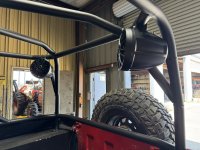
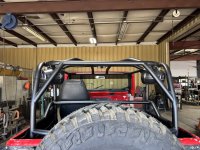
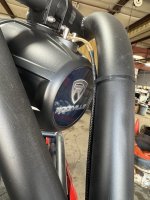
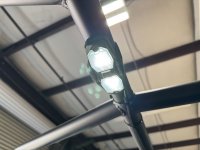
New Rockville 6” marine speakers, ran the wires in a braided loom along the cage. Cheap amazon UTV dome light with a simple on/off button wired straight to battery and I picked up the Genright specific cut spider shade.
Still waiting on 2 of the seats from Bestop as they were on a back order, once they come in I will install the center console and harnesses.


BobJob42
Caught the Bug
Thanks!Badass!
BobJob42
Caught the Bug
Seats finally came in after being on back order since January. Got them in and the PRP harnesses and wow, what a difference it makes.
I also have had a switch panel for months and finally decided to throw it in, its fuse box is hard mounted to the fender, not in love with its location but there really wasn’t anywhere else that was reasonably accessible and I have new fenders on the list in the future so at that point I will revisit all of the wiring, for now it works and is accessible.
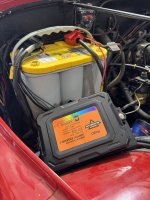
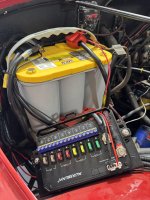
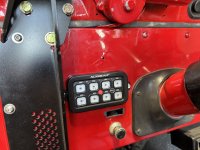

I also have had a switch panel for months and finally decided to throw it in, its fuse box is hard mounted to the fender, not in love with its location but there really wasn’t anywhere else that was reasonably accessible and I have new fenders on the list in the future so at that point I will revisit all of the wiring, for now it works and is accessible.


