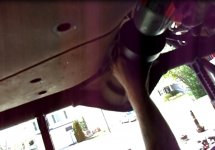
What's Involved in Re-gearing a JK, Doing your own re-gear DIY

WJCO

Meme King
The question comes up from time to time about doing your own gears at home. Well, it can be done, but it is a big deal and very time-consuming. This is the first set of gears that I've ever done on the ground and it really is a pain in the ass. But if you have the proper tools, it can be done. This will be a semi-writeup that will cover the process but won't include everything. I did my best to take pictures along the way but likely didn't capture everything. If other members have tips and tricks, I certainly encourage posting those. This write-up will assume that new bearings are used. This write-up is not gospel, it is merely an attempt to show others what is truly involved in re-gearing. This is a very meticulous and time-consuming venture that requires patience, specialty tools, and constant questioning of why you started this to begin with at your house instead of paying a professional.

This writeup will not cover tool sizes, etc, it will only cover the process. Sorry. It will also not cover the removal of driveshafts, diff covers, nor axles. It is assumed if you are attempting to re-gear yourself, you already have that knowledge. If not, there are other threads for that. This will only cover gear setup.

Starting, make sure you have the proper OEM specifications and that your parts are correct. By counting the ring gear teeth and the pinion teeth, divide the two to make sure you were actually supplied with the correct gear ratio. As far as tools, you will need a press, some kind of bearing puller, an inch pound DIAL torque wrench, a dial indicator, a dial caliper, along with a full set of sockets and wrenches.

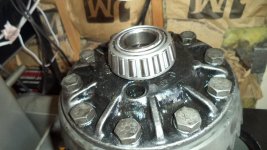
The first thing to do is to ensure your carrier cap bolts are marked. If not , mark them yourself. The caps are machined with the axle and on ours, the left side had a sideways 'A' and the right side had a proper linear 'A.' They have to go back in the EXACT same location.
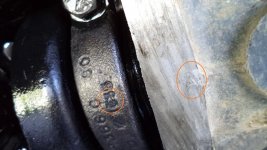
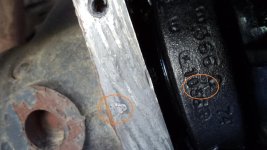
DSC08211.jpg

DSC08212.jpg

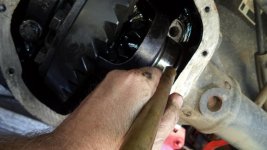
Loosen the caps but leave the bolts threaded into the housing a little. It may help to remove the carrier with a prybar and block of wood. It will be tight. Leaving the bolts and caps in place will prevent the heavy slippery carrier from accidentally falling on the floor. After the caps are removed, make sure the carrier preload shims are kept on the correct sides. If you are planning on re-using the carrier, the same shims will get you pretty close to a good starting point when you re-assemble.
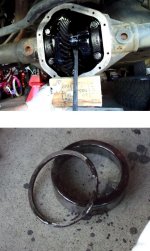
removing carrier.jpg

Sometimes the shims stick in the housing, keep an eye out for that.
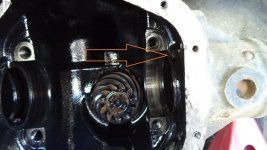
DSC08220.jpg

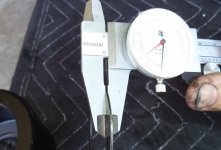
You should measure the shims and record the reading of both the left and right sides along with the total thickness of shims. If you are re-using the carrier, the total shim thickness of both sides will need to be accounted for. Once you do the gear setup, if you remove shims at all from one side, you need to add them to the other. This ensures the carrier bearings have the proper pre-load. If you are installing a locker (different carrier), the locker should come with instructions on what measurements need to be taken to set this up.
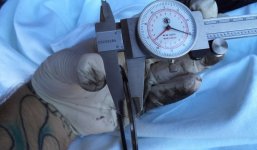
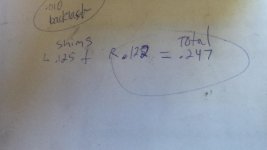
DSC08222.jpg

DSC08225.jpg

Once the carrier is removed, ensure that the bearings and races are indeed the correct parts.
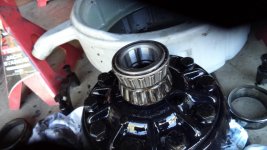
DSC08226.jpg

DSC08228.jpg

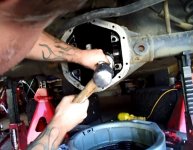
Put the carrier in the vice of your choice. Surround the carrier with thick rags or wood blocks and make sure it's tight. After removing the bolts, a light tap with a good sized hammer will remove the ring gear from the carrier.
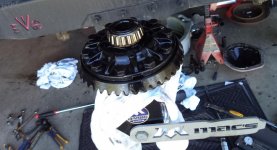
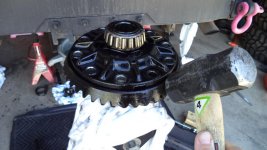
DSC08229.jpg

DSC08230.jpg

DSC08231.jpg

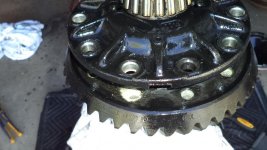
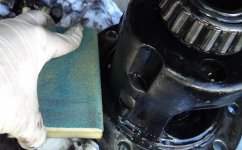
After the ring gear is removed, it's time to clean up the carrier, the new ring gear, and install the new ring gear to the carrier. Using a file, stone/sand the ring gear and carrier to ensure of no burrs or high spots. While this may sound ridiculous, it is important. I had two burrs on my carrier and ring gear while doing this today. Also use a sanding block to ensure all surfaces are clean and free of debris.
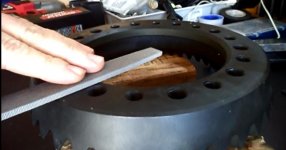
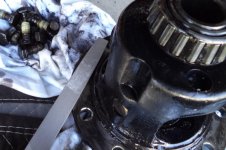
ads.jpg

DSC08232.jpg

DSC08233.jpg

Note that some aftermarket gears have TWO different size bolt holes. Make sure that you check the bolts that came with the master install kit to ensure you are setting them in the right bore. The bolts that came with the master install kit will likely be the larger ones. If for some reason your carrier will not allow the bolts to pass through, you will need to re-drill your carrier to the correct size. This is not uncommon, but pay attention to it.
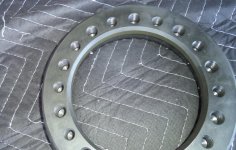
DSC08234.jpg

After cleaning the new ring gear and carrier, it should fit on normally by hand, however if it doesn't, DO NOT FORCE IT. You can put the ring gear in the oven at 170F for 20 minutes and expand it so it will fit on just fine.
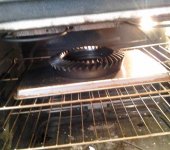
0504181046 (1).jpg

Make sure and locktite the ring gear bolts.
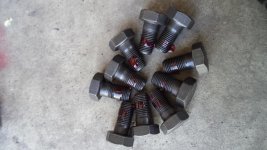
DSC08239.jpg

After the new ring gear is installed, make sure it is torqued to specs.
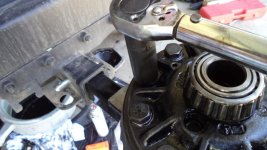
DSC08240.jpg

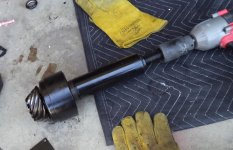
Now it's time to remove the carrier bearings and press the new ones on. If you can get ahold of a clamshell puller, it is fricking awesome and will save you a ton of time. You will need a high-powered impact to use it.
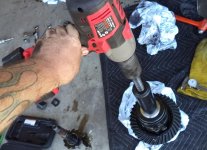
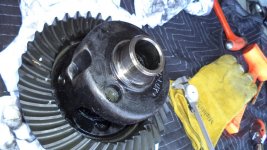
DSC08250.jpg

DSC08252.jpg
 
Last edited:
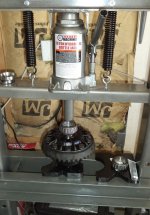
Press your new bearings on while using a press. During the process, make sure the bearing can still spin the entire time. Press on the inner race, not the outer. Make sure and put a little bit of gear oil on the bearings before spinning them to ensure they are lubricated.

DSC08254.jpg

DSC08255.jpg

It's time to remove the pinion, pinion seal, and pinion races from the axle housing. Removing the pinion yoke may require a yoke puller after the nut is loose.

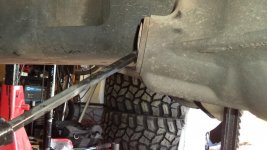
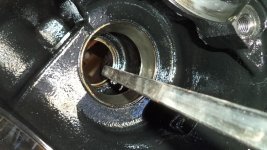
The pinion seal removal may require a hammer and punch or a large pry bar.

DSC08236.jpg

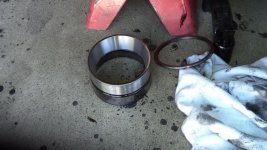
Removing the races is best done with a large steel pipe and a big hammer. It will take some effort, but will come out.

DSC08238.jpg

On a Dana 30, there will likely be an oil baffle that sits behind the inner bearing race. Pay attention to which way it is oriented. It will get damaged when removing, but your install kit should include a new one. Don't forget to install it when the new races are installed.

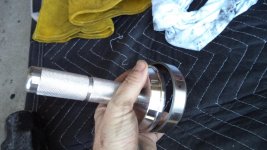
Installing the new races will take some good manual effort. You will need a bearing race installer tool and if you're working on the ground, it will take some effort.

DSC08241.jpg

pounding race.jpg

After they are installed, wipe some gear oil on them or some assembly lube.

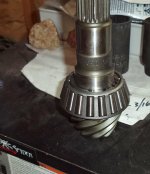
Now, it's time to move on to the pinion. Although the pinion gear will be changed out, it's important to pull the inner pinion bearing and measure the depth shim just to see where the OEM gears were set up at. Once again, the clamshell puller kicks ass to do this job.

DSC08245.jpg

DSC08247.jpg

Measure this shim and write it down. Just to see where you started.

DSC08249.jpg

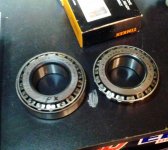
The next step is to make DUMMY or SETUP bearings for the pinion. The sole purpose of this is to setup your gears in the correct location and there is much trial and error involved in this step. If you were to use the bearings that came with the kit, you would have to pull them off and press them off for each step and it would be very time-consuming with the risk of damaging the new bearings. The setup bearings do not require pressing and pulling and save a lot of time. They do, however, require purchasing an extra set of bearings (You can modify the old bearings from your axle if they are the same part number, however it's best to just buy a set ahead of time to know for sure). MAKE SURE THAT THEY ARE THE EXACT SAME MAKE AND MODEL THAT COME WITH YOUR MASTER INSTALL KIT. Various manufacturers can fit the Jeep, but are different from one another. So make sure your setup bearings are the same as the ones that will be installed on the Jeep.

0122182039.jpg

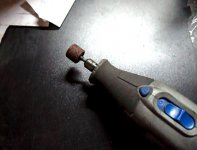
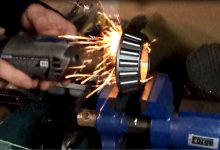
To make a setup bearing, the inside needs to be grinded out with a dremel. This bearing will no longer be a press fit, but rather will slide right onto the pinion gear by hand.

Untitled2.jpg

Untitled.jpg

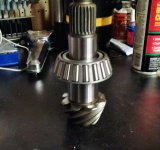
This picture is an example of a bearing that needs to be pressed on and it will not slide down all the way. A dummy bearing will slide on by hand and will not stick at this point.

0122182042.jpg

A dummy/setup bearing will fall right into place by hand.

DSC07511.JPG

Make sure and put a little bit of gear oil on the bearings before spinning them to ensure they are lubricated.

After your dummy bearing is setup, it's time to install the pinion into the axle housing with the new races. At this point, do not use a seal, do not use a crush sleeve. At this point, the pinion position is only to setup to get the readings and measurements, this is not the final install. It will be tricky to get it setup by yourself and a helper would be ideal to avoid having the pinion gear fall out of place. After the pinion is put into the housing, install your outboard pinion dummy bearing and then the yoke. Use the old nut to tighten the pinion down. The pinion should be tightened so that all play is removed and there is drag when spinning it. It is ideal to use an inch pound torque wrench to spin the pinion to make sure it has the proper spinning resistance.

checking preload.jpg

Once the pinion is installed, re-install the carrier. The same shims should be used on the same sides. This ensures the carrier bearing preload is correct. The carrier assembly with shims should require effort to remove and install. If not, the bearings do not have proper preload. It should require a good amount of effort to remove or install it. Once installed, the shims will need to be tapped in with a brass drift or specialty tool. Also, a brass drift should be used to hit the bearings/races to ensure they are seated all the way.

DSC08261.jpg

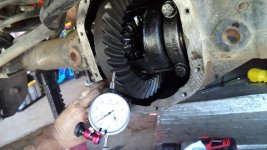
After the carrier is installed, torque the caps to spec. Then it's time to run measurements. Start with the backlash to ensure it's in spec. If it's too low or too tight, you will have to remove shims from the ring gear side and add the EXACT same amount to the other side. If it's too high or too loose, you will have to add shims to the ring gear side and remove them from the other side. Remember that the total shim amount has to remain the same in order to keep the carrier bearing preload in spec.

DSC08262.jpg

Once the backlash is in spec, it's time to paint the gears and check the pattern. The master install kit should come with the gear marking compound and brush to paint the gears and check the pattern.

painting compound.jpg

At this time, if the pattern is showing that your pinion is too deep or shallow, you will have to take the entire thing apart again and change your pinion shim. Then you have to reassemble the entire thing again. Changing your pinion depth will also change your backlash, so that will need to be checked again.

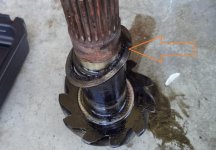
Once you've determined your backlash is good and your pattern is good, it's time to remove the entire carrier, the entire pinion assembly, and press the pinion bearings on for real this time. MAKE SURE THE PINION DEPTH SHIM is installed on the pinion gear and press the inner pinion bearing on using the press.

DSC08266.jpg

Then install the crush sleeve on the pinion gear.

DSC08267.jpg
 
Last edited:
Then install your pinion seal in the axle housing. Before you install the seal, make sure the real inner pinion bearing (not the dummy) and the OIL SLINGER is installed first. Installing the seal can be a little tricky. Either a hammer or punch will work or a good block of wood. Note that although the pinion seal already has RTV, it is a good idea to add extra so it doesn't leak.

seating pinion seal.jpg

Once the seal is installed, it's time to install the pinion gear. This part is a little challenging by yourself, but once the pinion is installed, ensure the yoke is put on and tightened. The pinion splines should have RTV added to them and the yoke sealing surface should have some bearing grease added to it to ensure the seal seals well and doesn't get damaged. If you're using an impact gun, tighten the pinion until there is no play at all, but do not over-tighten it. Then, THE MOST IMPORTANT STEP OF THE ENTIRE PROCESS: Slowly tighten the pinion nut until the CRUSH SLEEVE is crushed ACCURATELY. You will likely have to tighten the nut, then recheck with your inch-pound torque wrench. THEN tighten again, and recheck. Repeat this process until the turning resistance is within spec. Be very careful that the crush sleeve is not over-tightened or a new crush sleeve and a new pinion nut will have to be used.

seating yoke.jpg

checking preload.jpg

Once the pinion is installed properly, it's time to install the carrier. Ensure that the SAME shims are used on the correct side and then double check the backlash and gear pattern. When tightening the carrier cap bolts, torque to spec and use locktight. It's not a bad idea to use a deadblow hammer to ensure bearings are seated before checking final measurements.

final carrier install.jpg

If your backlash is still within spec and your gear pattern is good, then you are all done! It's now time to install your drivehaft, your axles, and your diff cover, then fill with fluid.
 
Last edited:
SUMMARY: If you're willing to learn the right way and buy the right tools, it's definitely worth it to save the money and know it's done right yourself. But it is VERY time-consuming, the tools are costly, and it is a tedious job. This is why shops charge so much to do it. I've done a lot of gears prior to this, however, this is the first that I've done in a garage on the ground. It is indeed a major pain in the ass.

Don't forget when you're done to use your tuner and re-calibrate the gear ratio.
 
Last edited:
Nice write up. I like the time spent discussing the set up bearing. I didnt have one the first time and the project sucked because of it.
 
Nice write up. I like the time spent discussing the set up bearing. I didnt have one the first time and the project sucked because of it.

I think the total cost for the extra bearings for both axles was 60 bucks, but indeed it was well worth it. Not sure why, but when I used to do gears years ago, setup bearings were non-existent. Not sure why. Simple concept that saves hours of time.
 
Nice write up! It’s very helpful to me in deciding that I will not do this alone. [emoji23]


................................................................
Overall "build thread"
http://wayalife.com/showthread.php?26097-I-guess-it-s-the-quot-Super-Stocker-quot-build

DIY trail/tube door build http://wayalife.com/showthread.php?24449-My-DIY-Doors

It is a major project but definitely something you can do on your own if you have patience and are willing to spend money on some tools.
 
Nice wright up.

I will keep this handy.

Thanks for taking the time to share this. It is a time consuming job, and even more with all the pictures and posting.
 
It is a major project but definitely something you can do on your own if you have patience and are willing to spend money on some tools.

As I get older, my patience has dwindled! [emoji15] A co-worker worked in a transmission shop swapping out gears for eight years. We are going to tackle mine together in the future.
 
I think the total cost for the extra bearings for both axles was 60 bucks, but indeed it was well worth it. Not sure why, but when I used to do gears years ago, setup bearings were non-existent. Not sure why. Simple concept that saves hours of time.

WJCO, great job documenting this procedure! While I have never had the need to do this, I do have a couple of possible suggestions:

Prior to installing the bearings on the carrier and pinion, heating them up using a bearing heater or in the oven will make them grow and subsequently make installation easier.

Prior to installing the outer races (like the night before) freeze to shrink them and/or use a heat gun to warm the differential housing to subsequently make installation easier.

If any of this is done it’s important to note that all parts must be normalized back to ambient temperature before any fitting is performed.

We do this a lot at work while assembling machinery with precision bearings and press fit bushings. Just something to consider.
 
Last edited:
WOW [emoji50] What an awesome write up man. Not that I will be attempting such project myself and any time soon the question is, what specialty tools are needed and plus minus the cost of them.


Sent from my iPad using WAYALIFE mobile app
 
WOW [emoji50] What an awesome write up man. Not that I will be attempting such project myself and any time soon the question is, what specialty tools are needed and plus minus the cost of them.


Sent from my iPad using WAYALIFE mobile app

A press-170
An inch pound dial torque wrench-200
A dial indicator-80
A dial caliper-40
A bearing spreader or clamshell puller- 100-300
A good impact-300
A breaker bar or two will help
A torque wrench.
A race driver set-100
Brass punches-40
A yoke puller-100
A yoke holder-30 (my yoke holder has a puller built in)
Large sockets for pinion nuts
Slide hammer is helpful-100

I think that's all, but I probably forgot something.

How much time? For a moderately mechanical individual?
 
A press-170
An inch pound dial torque wrench-200
A dial indicator-80
A dial caliper-40
A bearing spreader or clamshell puller- 100-300
A good impact-300
A breaker bar or two will help
A torque wrench.
A race driver set-100
Brass punches-40
A yoke puller-100
A yoke holder-30 (my yoke holder has a puller built in)
Large sockets for pinion nuts
Slide hammer is helpful-100

I think that's all, but I probably forgot something.

You sure did six pack of IPA[emoji23][emoji23][emoji23]


Sent from my iPad using WAYALIFE mobile app
 
How much time? For a moderately mechanical individual?

A weekend if you’re working alone, you have all the tools at hand, and everything goes smoothly. Two weekends otherwise. YMMV.

^ Yeah, that's pretty accurate. The rear took me 8 hours yesterday, but I went slow because it's been years since I did a set and I probably was more meticulous than I should have been. Along with taking some photos, that added some time. I setup the rear 4 times before I got the pattern acceptable. I really would have liked a better pattern but it just didn't happen. That happens sometimes. It was centered enough so I went with it.

Today I did the front and it took about 5 hours. My first shim setting resulted in perfection so I really lucked out.

We just got back from about 100 mile road test and no noises nor vibrations nor leaks so I'm really happy it went this smoothly.
 
Congratulations

That sounds like a successful install.

Thanks again for taking the time to share the details.
 
^ Yeah, that's pretty accurate. The rear took me 8 hours yesterday, but I went slow because it's been years since I did a set and I probably was more meticulous than I should have been. Along with taking some photos, that added some time. I setup the rear 4 times before I got the pattern acceptable. I really would have liked a better pattern but it just didn't happen. That happens sometimes. It was centered enough so I went with it.

Today I did the front and it took about 5 hours. My first shim setting resulted in perfection so I really lucked out.

We just got back from about 100 mile road test and no noises nor vibrations nor leaks so I'm really happy it went this smoothly.

Excellent. It’s a project that’s better to have done, than to do. If you know what I mean.
 
Top Bottom