While the Jeep JK Wrangler is without a doubt, the best off road vehicle ever made, the headlights it comes with from the factory are anything but. In fact, I’d have to say that they are the one thing that everyone I know who owns a JK, hates about it. The light they provide are a sickly yellow at best, are really only focused at one point and do very little to fill in the road immediately in front of you. In fact, it is for that reason this that most people who own a JK tend to always use their fog lights in conjunction to their headlights and, are always in search of a good replacement.
Originally developed for the U.S. Military, the Truck-Lite LED’s are a completely solid-state unit, rugged and put out an impressive spread of clean white light while using very little power. The low beams do a great job of filling in the road immediately in front of you and wide out to the sides as well. Of course, the high beams do an even better job by projecting light far out into the distance while still retaining all the lighting up front as well. These may not be the cheapest set of headlights you can buy but, in my opinion, you really do get what you pay for. When it comes to a great all around set of replacement headlights, I’d have to say that the Truck-Lite LED’s are about the best I have found.
Installation of the Truck-Light LED headlights is super easy as the write-up below will show and typically takes about 15 minutes to do. Please note that 2 different JK’s were used in this write-up as I already had aftermarket headlights and wanted to keep this from a stock perspective as possible.
What you will need
• Torx T-15 Driver
• 10mm Wrench
• Phillips Screwdriver
• Flathead Screwdriver
Installation Instructions
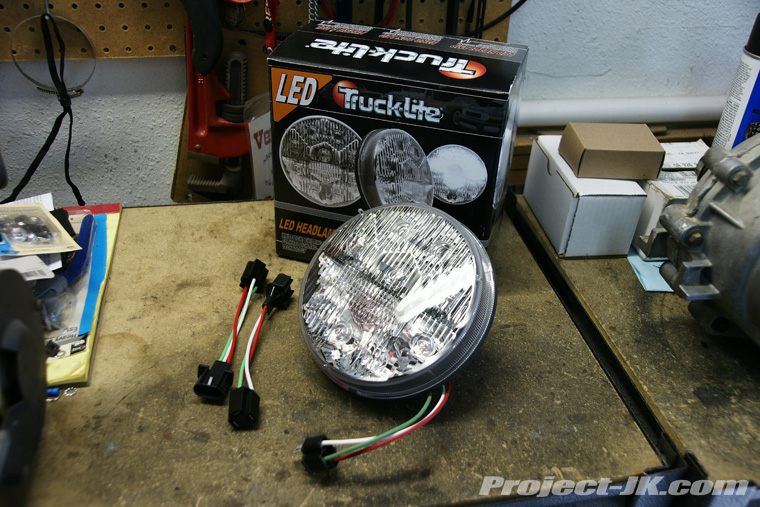
This is a shot of everything you will get with your new Truck-Lite LED Headlights. As you can see, they come complete with a plug-n-play wiring harness adapter.
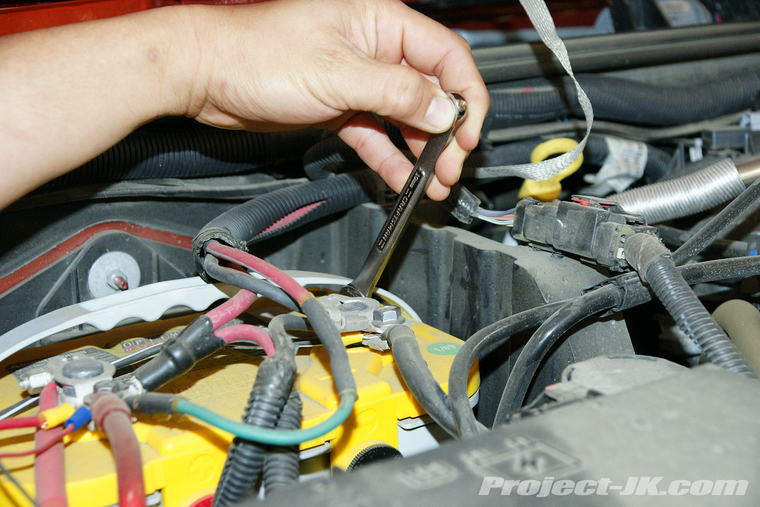
1. Pop open your hood and then, using a 10mm wrench, disconnect the negative battery lead.
2. Look behind the front grille, locate the wiring harness attached to the indicator lights and unlock the plug by sliding out the red tab as shown in this pic.
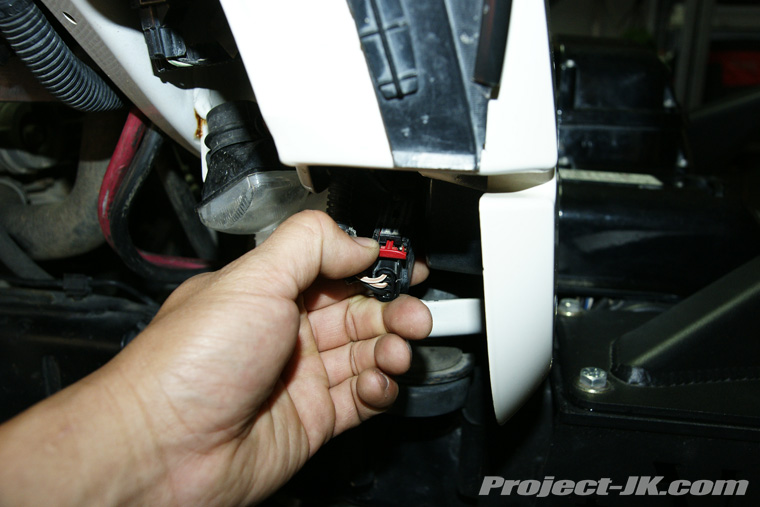
3. Press the release tab on the end of the wiring harness plug and then pull it out.
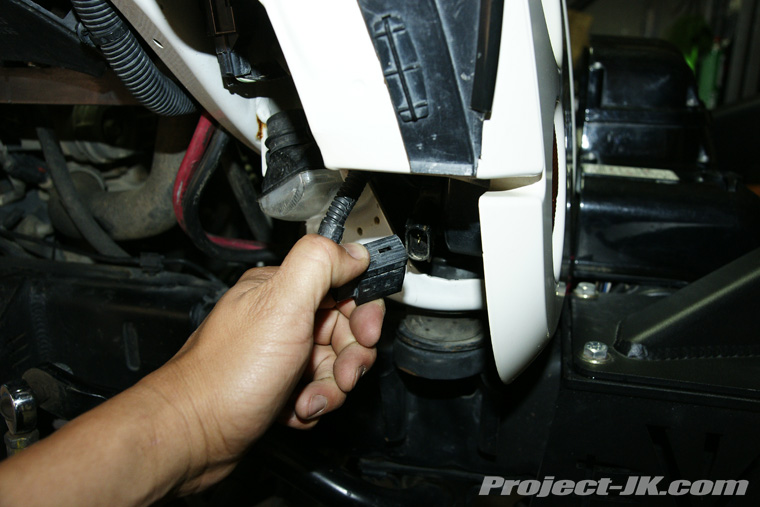
4. If you have an older JK, you will need to loosen the plastic retaining screws using a phillips screwdriver.
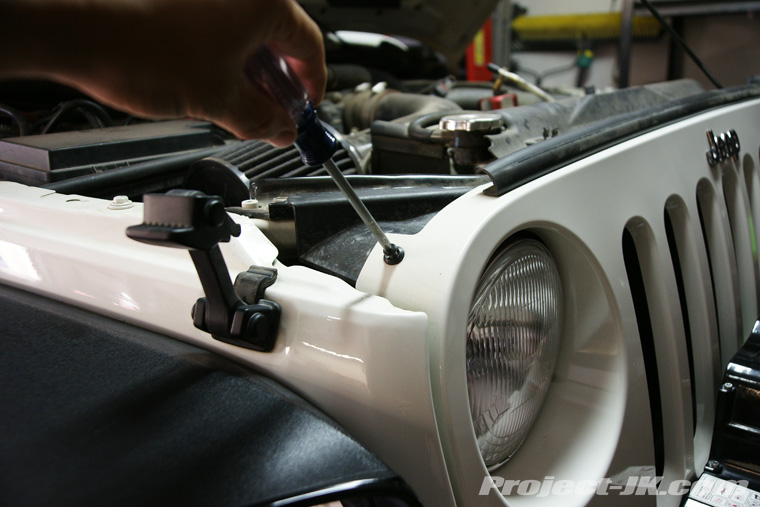
5. If you have a newer JK, use a small flathead screwdriver to unlock the retaining tabs on top of grill by lifting up the pin in the center as shown in this pic.
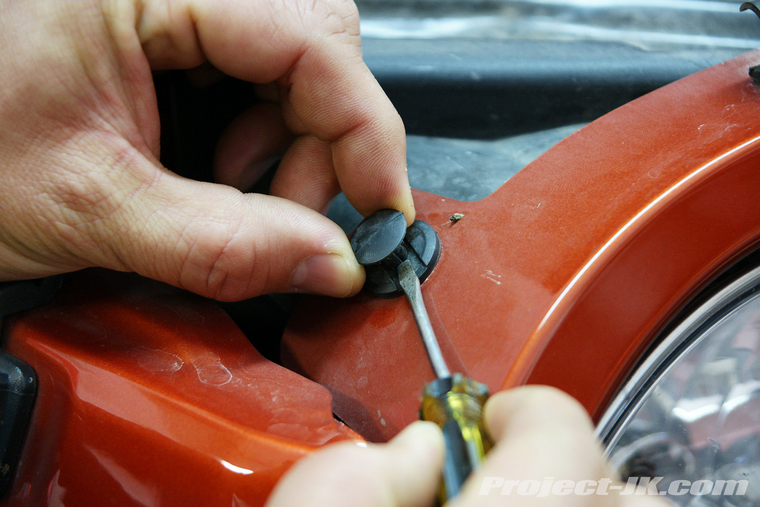
6. Once the retaining tabs have been unlocked or unscrewed, use a flathead screwdriver to pry up the back side of the grill just enough to pop them out.
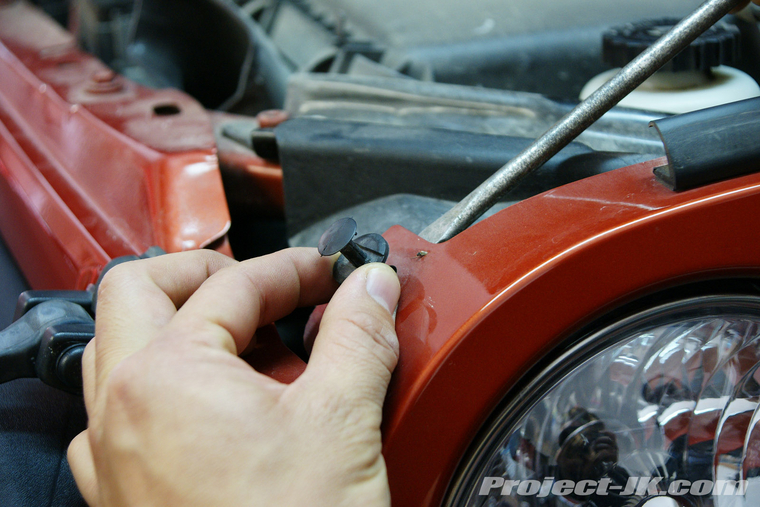
7. Carefully pull on your Jeep JK Wrangler’s grille until it breaks free of the retaining clips.
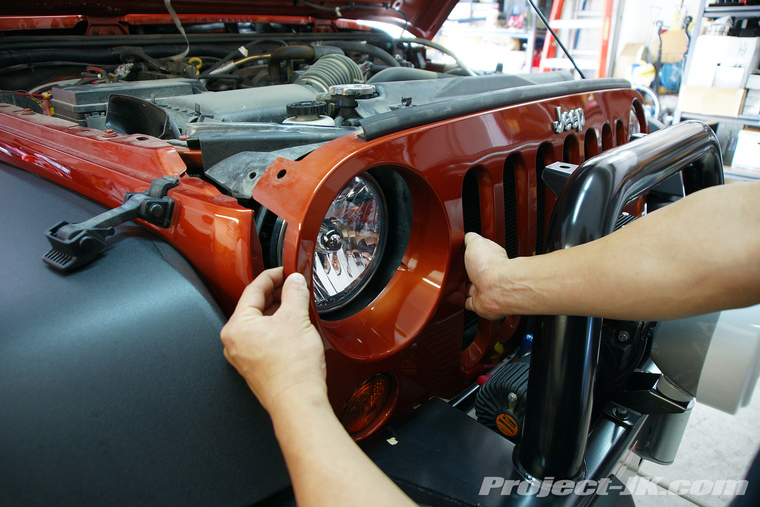
8. Using a Torx T-15 driver, remove the 4 retaining ring screws securing your factory headlights in place.
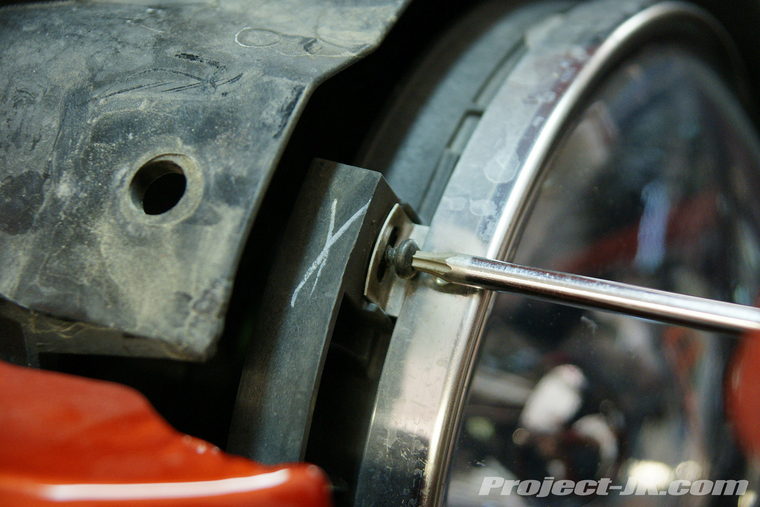
9. Pull the headlight out a bit, locate the wiring harness attached to the back of it and then unlock the plug by sliding out the red tab as shown in this pic.
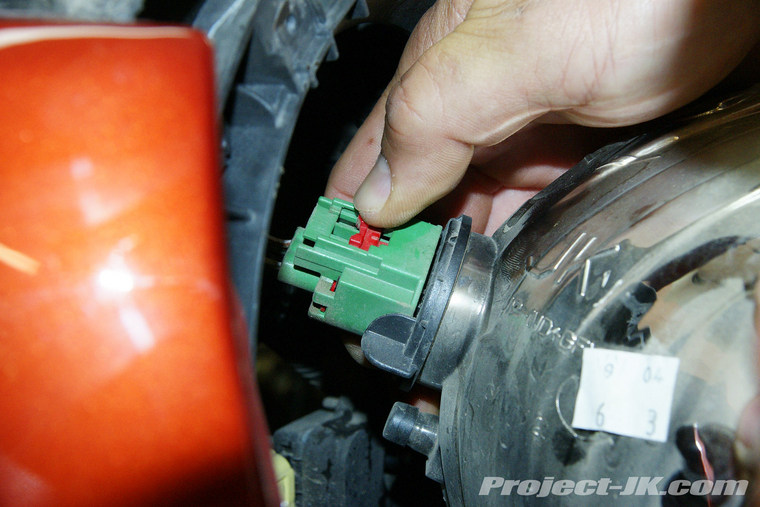
10. Press the release tab on the end of the wiring harness plug and then pull it out.
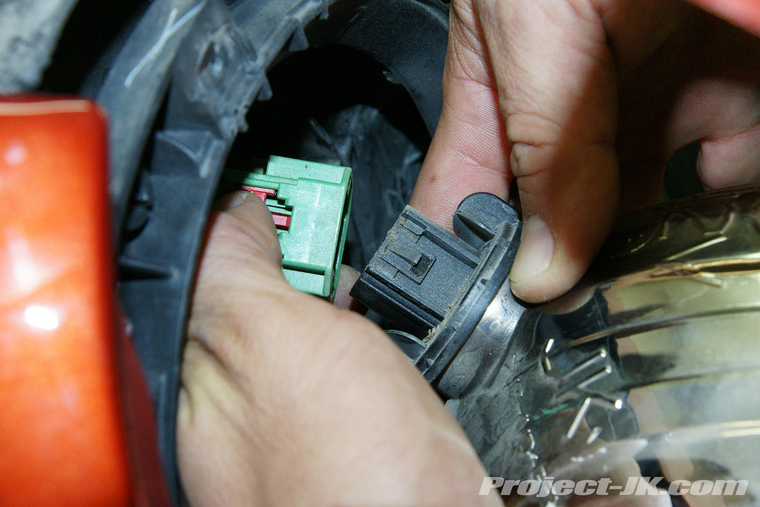
11. Separate the retaining ring from the factory headlight housing as shown.
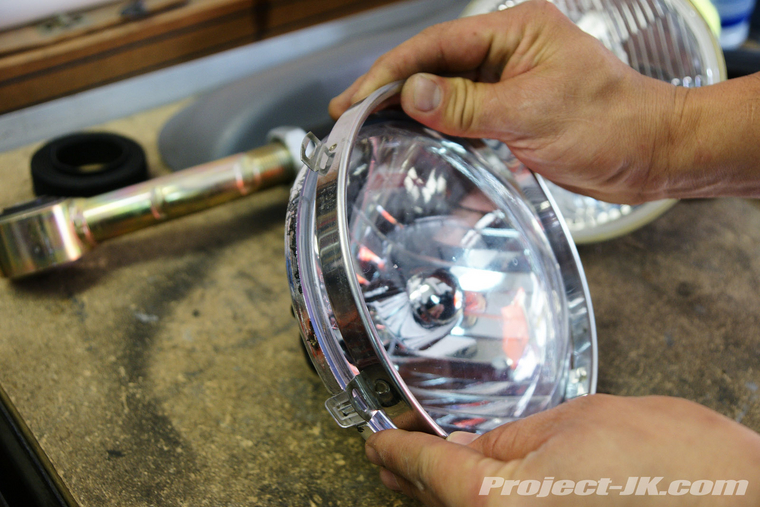
12. Take the new wiring harness adapter and plug it into the Truck-Lite LED headlights.
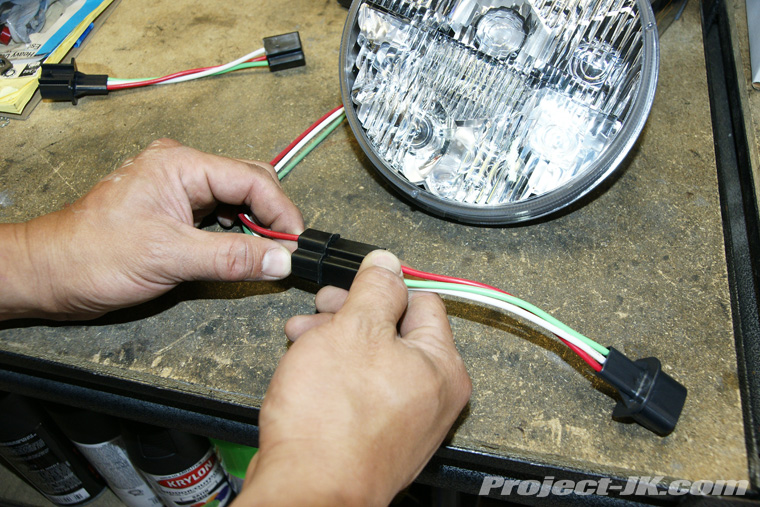
13. Plug the Truck-Lite LED into the wiring harness on your JK, place the factory retaining ring over the headlight and then position it so that all the indexing tabs line up with the appropriate mounting holes.
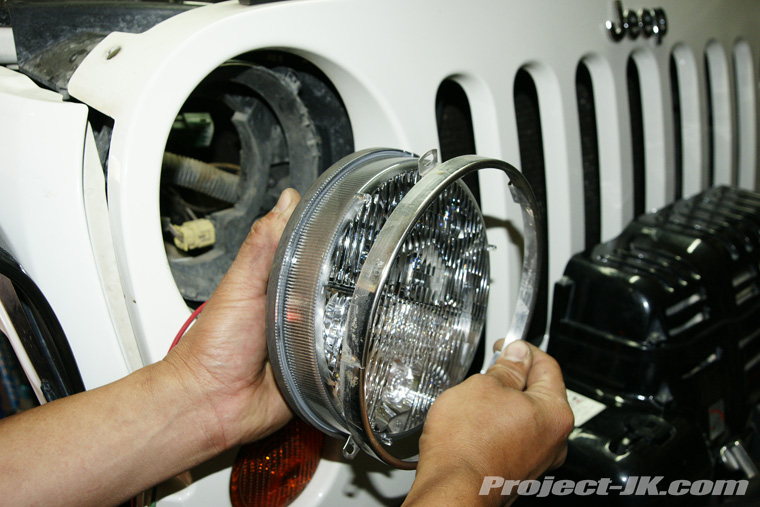
14. Secure the retaining ring and Truck-Lite LED headlights in place using the factory screws. A Torx T-15 driver will be needed for this job.
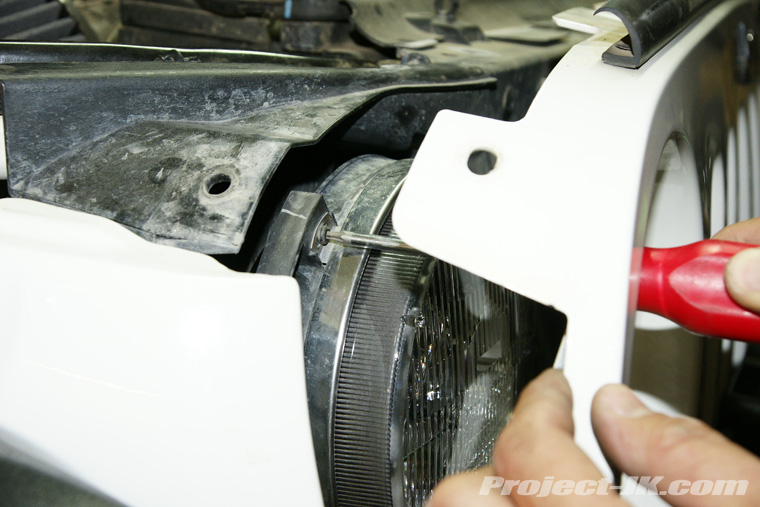
15. Reinstall your front grille, secure it in place using the factory retaining tabs or screws, reconnect your battery lead and test out your new Truck-Lite LED headlights.
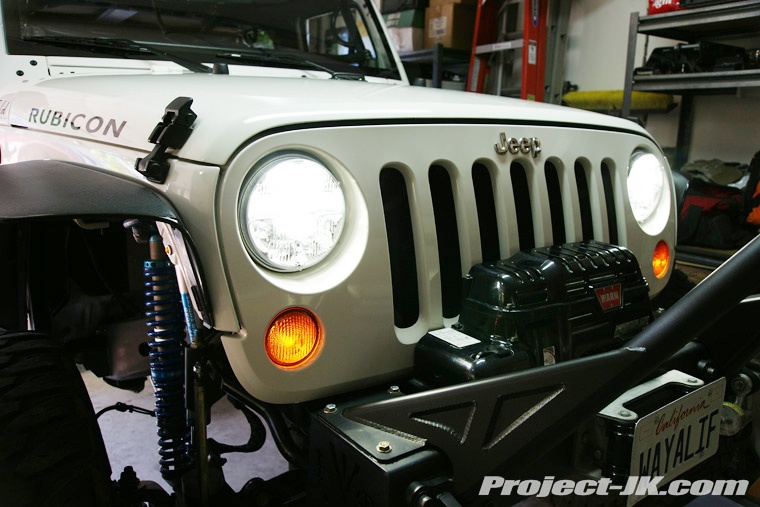
Light Test Shots
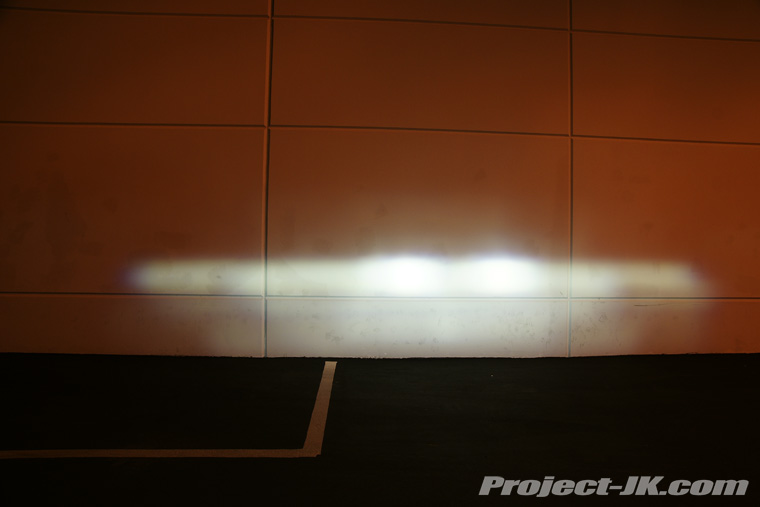
This is a shot on a wall to show what the projected low beam pattern looks like. As you can see, the spread extends wide to the outside and does well to fill in the space below as well.
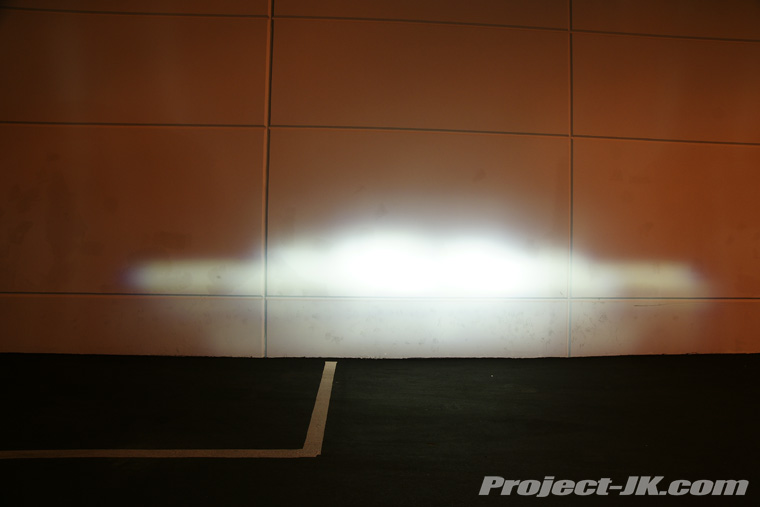
This is a shot on a wall to show what the projected high beam pattern looks like. As you can see, the low beam pattern is still retained in addition to the higher projection of light.
The following 3 comparison shots were taken in a dark alley with the exact same settings so that you could get a better sense of what the overall spread is like. Please note that to the naked eye, the actual lighting that these headlights provided did appear to be brighter (way better than stock) but, in the interest of showing how the lights performed more accurately, we purposefully set the aperture and speed on our camera so that you could see where the actual beams of light were hitting.
No lights on.

Low beam comparison.

High beam comparison.

As I said, this is a super easy install! Make sure to check the positioning of your new headlights and make necessary adjustments as needed.
Headlight Adjustment Write-Up
From the Manufacturer
Our headlamp was designed originally for US Military functions, as they needed an LED solution that did not “ever” break in the field, and wanted a completely solid-state lamp. They’ve been using them for night time combat situations, where previous lamps (such as halogen, and to a much greater extent, HID) couldn’t withstand the impact of common military functions, and literally left vehicles stranded until daylight.
The other focus of the lamp was the pure white light, that makes an incredible different on vehicles that trail for mines in the Middle East. The LED lights help show disruptions in sand better, and can make improvised explosives (IED’s) more noticeable. The lamps were developed for that purpose, and they wanted the solution put to market quickly, without needing to meet any DOT compliance.Since then, we’ve made incredible improvement in the optics of the lamp, adding to the common LED features, with a now DOT-compliant pattern. We just released an update to the line as well, with a significantly spread light output. It still shows some of the characteristic aiming within the pattern, but that’s what allows us to isolate and place extra light at valuable locations within the pattern.
We feel it’s the best solution for LED forward lighting, and when mated with the other military-tough features, it’s more than worth the investment.
Originally developed for the U.S. Military, the Truck-Lite LED’s are a completely solid-state unit, rugged and put out an impressive spread of clean white light while using very little power. The low beams do a great job of filling in the road immediately in front of you and wide out to the sides as well. Of course, the high beams do an even better job by projecting light far out into the distance while still retaining all the lighting up front as well. These may not be the cheapest set of headlights you can buy but, in my opinion, you really do get what you pay for. When it comes to a great all around set of replacement headlights, I’d have to say that the Truck-Lite LED’s are about the best I have found.
Installation of the Truck-Light LED headlights is super easy as the write-up below will show and typically takes about 15 minutes to do. Please note that 2 different JK’s were used in this write-up as I already had aftermarket headlights and wanted to keep this from a stock perspective as possible.
What you will need
• Torx T-15 Driver
• 10mm Wrench
• Phillips Screwdriver
• Flathead Screwdriver
Installation Instructions
This is a shot of everything you will get with your new Truck-Lite LED Headlights. As you can see, they come complete with a plug-n-play wiring harness adapter.
1. Pop open your hood and then, using a 10mm wrench, disconnect the negative battery lead.
2. Look behind the front grille, locate the wiring harness attached to the indicator lights and unlock the plug by sliding out the red tab as shown in this pic.
3. Press the release tab on the end of the wiring harness plug and then pull it out.
4. If you have an older JK, you will need to loosen the plastic retaining screws using a phillips screwdriver.
5. If you have a newer JK, use a small flathead screwdriver to unlock the retaining tabs on top of grill by lifting up the pin in the center as shown in this pic.
6. Once the retaining tabs have been unlocked or unscrewed, use a flathead screwdriver to pry up the back side of the grill just enough to pop them out.
7. Carefully pull on your Jeep JK Wrangler’s grille until it breaks free of the retaining clips.
8. Using a Torx T-15 driver, remove the 4 retaining ring screws securing your factory headlights in place.
9. Pull the headlight out a bit, locate the wiring harness attached to the back of it and then unlock the plug by sliding out the red tab as shown in this pic.
10. Press the release tab on the end of the wiring harness plug and then pull it out.
11. Separate the retaining ring from the factory headlight housing as shown.
12. Take the new wiring harness adapter and plug it into the Truck-Lite LED headlights.
13. Plug the Truck-Lite LED into the wiring harness on your JK, place the factory retaining ring over the headlight and then position it so that all the indexing tabs line up with the appropriate mounting holes.
14. Secure the retaining ring and Truck-Lite LED headlights in place using the factory screws. A Torx T-15 driver will be needed for this job.
15. Reinstall your front grille, secure it in place using the factory retaining tabs or screws, reconnect your battery lead and test out your new Truck-Lite LED headlights.
Light Test Shots
This is a shot on a wall to show what the projected low beam pattern looks like. As you can see, the spread extends wide to the outside and does well to fill in the space below as well.
This is a shot on a wall to show what the projected high beam pattern looks like. As you can see, the low beam pattern is still retained in addition to the higher projection of light.
The following 3 comparison shots were taken in a dark alley with the exact same settings so that you could get a better sense of what the overall spread is like. Please note that to the naked eye, the actual lighting that these headlights provided did appear to be brighter (way better than stock) but, in the interest of showing how the lights performed more accurately, we purposefully set the aperture and speed on our camera so that you could see where the actual beams of light were hitting.
No lights on.
Low beam comparison.
High beam comparison.
As I said, this is a super easy install! Make sure to check the positioning of your new headlights and make necessary adjustments as needed.
Headlight Adjustment Write-Up
From the Manufacturer
Our headlamp was designed originally for US Military functions, as they needed an LED solution that did not “ever” break in the field, and wanted a completely solid-state lamp. They’ve been using them for night time combat situations, where previous lamps (such as halogen, and to a much greater extent, HID) couldn’t withstand the impact of common military functions, and literally left vehicles stranded until daylight.
The other focus of the lamp was the pure white light, that makes an incredible different on vehicles that trail for mines in the Middle East. The LED lights help show disruptions in sand better, and can make improvised explosives (IED’s) more noticeable. The lamps were developed for that purpose, and they wanted the solution put to market quickly, without needing to meet any DOT compliance.Since then, we’ve made incredible improvement in the optics of the lamp, adding to the common LED features, with a now DOT-compliant pattern. We just released an update to the line as well, with a significantly spread light output. It still shows some of the characteristic aiming within the pattern, but that’s what allows us to isolate and place extra light at valuable locations within the pattern.
We feel it’s the best solution for LED forward lighting, and when mated with the other military-tough features, it’s more than worth the investment.

