When you're restoring a Jeep that's over 40 years old, there are times that it can feel a lot like you're an archaeologist working at a dig site. Carefully removing parts as not to break any of its rusty bolts or strip any of their heads, you often unearth the tell tale signs of problems and mistakes left behind from previous owners. Likewise, sanding down its paint can reveal layer after layer of previous colors it once had as well as any body damage it may have suffered and the repairs that were made to it. Unfortunately, Jane is no exception to the rule and in spite of the fact that she was predominantly stock when we brought her home, we've quickly discovered that looks can be deceiving and that she's clearly lived a rougher life than we had ever imagined.
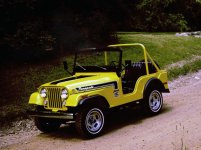
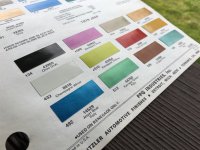
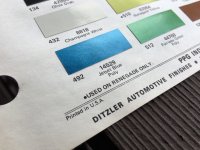
Over the last couple of weeks, Cindy and I have started the restoration of Jane and have done so by stripping her down and sanding the paint off of her body. After doing some welding and body work and replacing un-salvageable part with new ones made by Omix-Ada, we're hoping to get her painted back to the stunning Jetset Blue Metallic that she once was. Of course, along the way, we've been documenting our progress with video and photos and in this post, you'll get to see some of the calamity of Jane.
First off, let's take a moment to point out some of the more obvious calamities of Jane that we could see right off the bat.
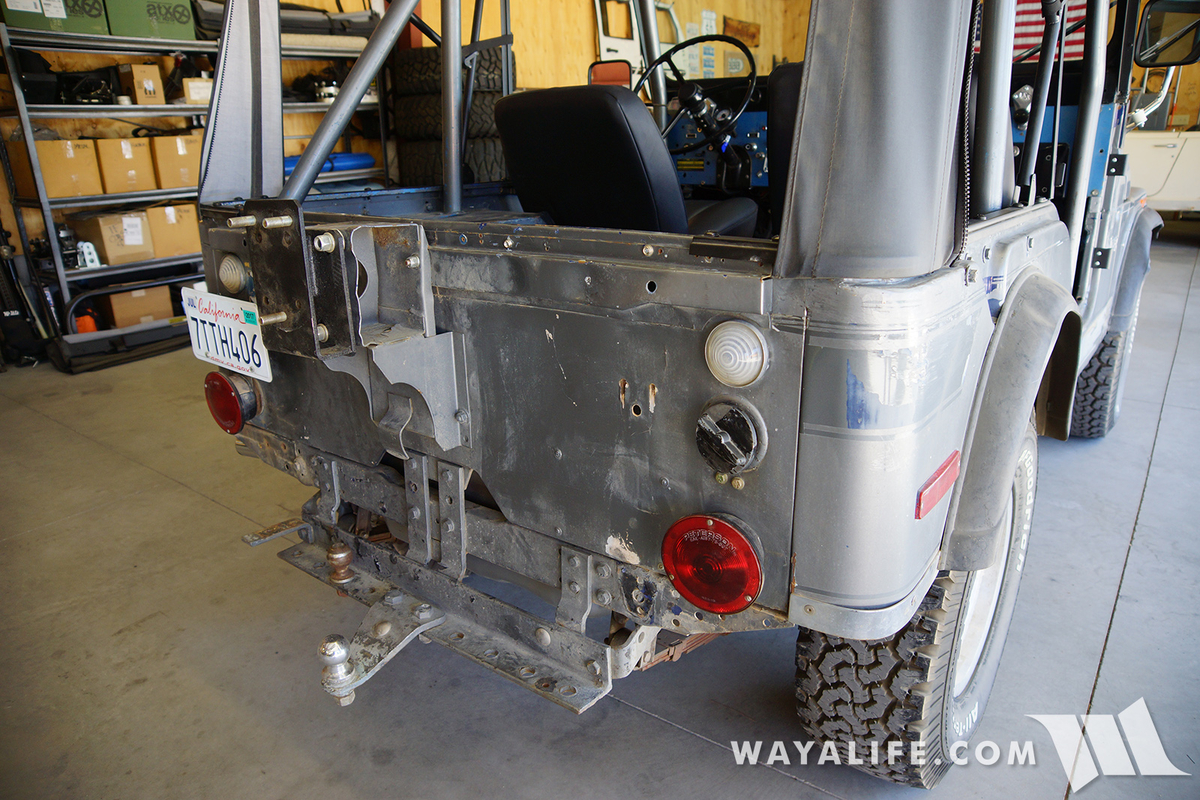
It's a little hard to tell in photographs but the rear end of this CJ5 had either been hit or was backed into something hard enough to cause a fair amount of body damage. The dimples you see in the support bar was clearly caused by the spare tire getting smashed into it.
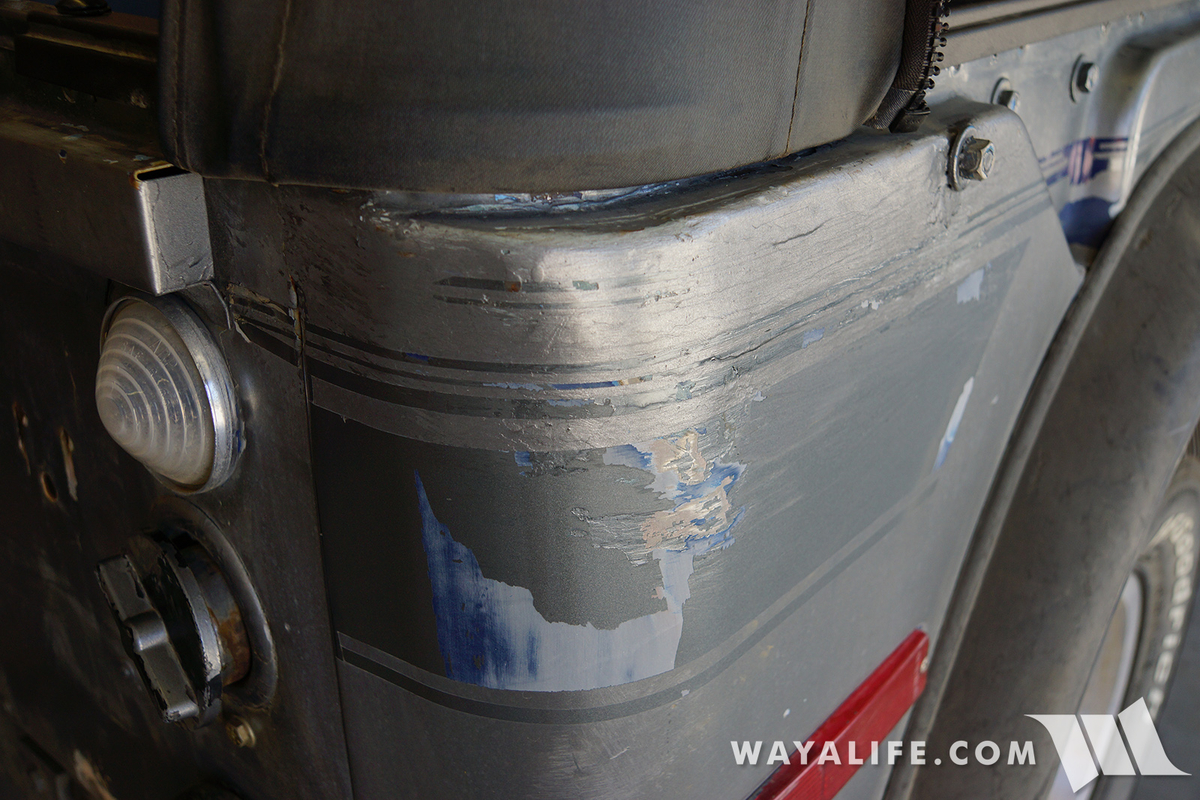
You can clearly see there was quite a bit of bondo applied to the passenger side rear quarter panel in an effort to help reshape it.
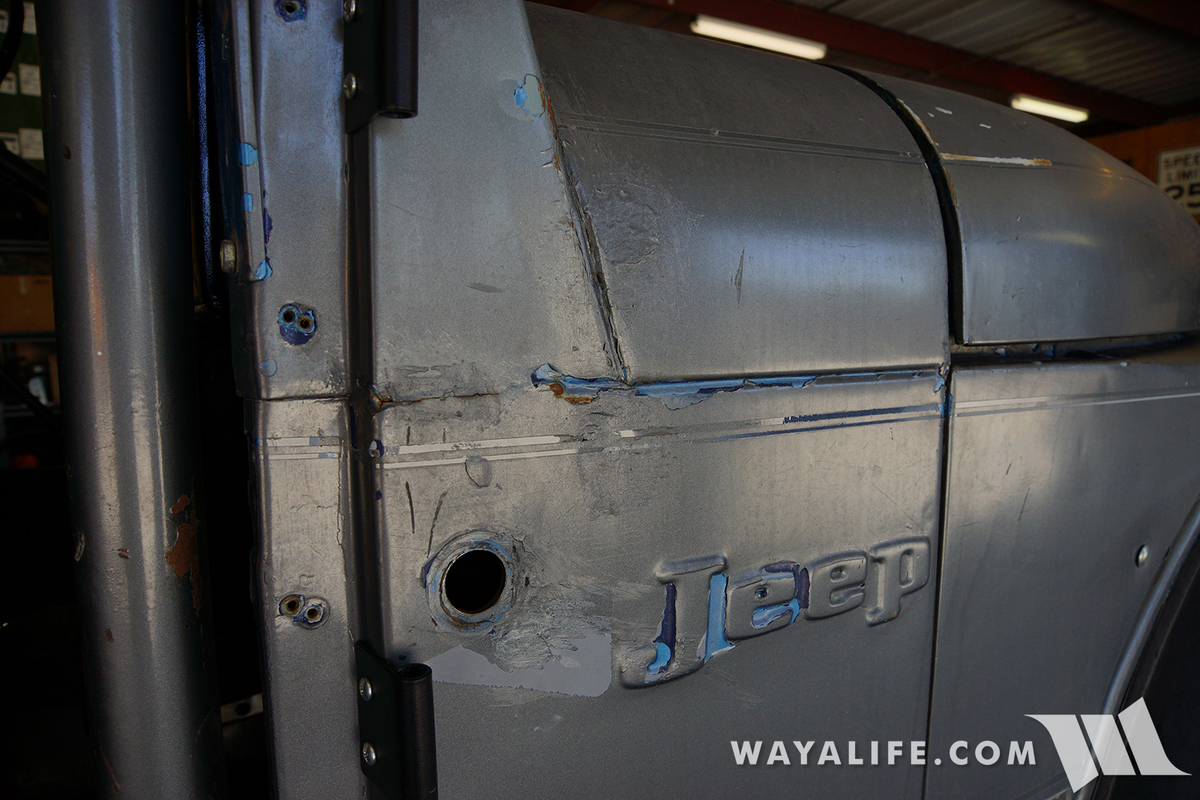
On the passenger side of this CJ5 close to where the embossed Jeep logo is, there was a large 1" hole that had been drilled into the tub. My best guess is that this was for a radio antenna but it's hard to say for sure. From the looks of the body, this point had been hit by something or the Jeep had leaned into a tree or rock as there is some buckling here.
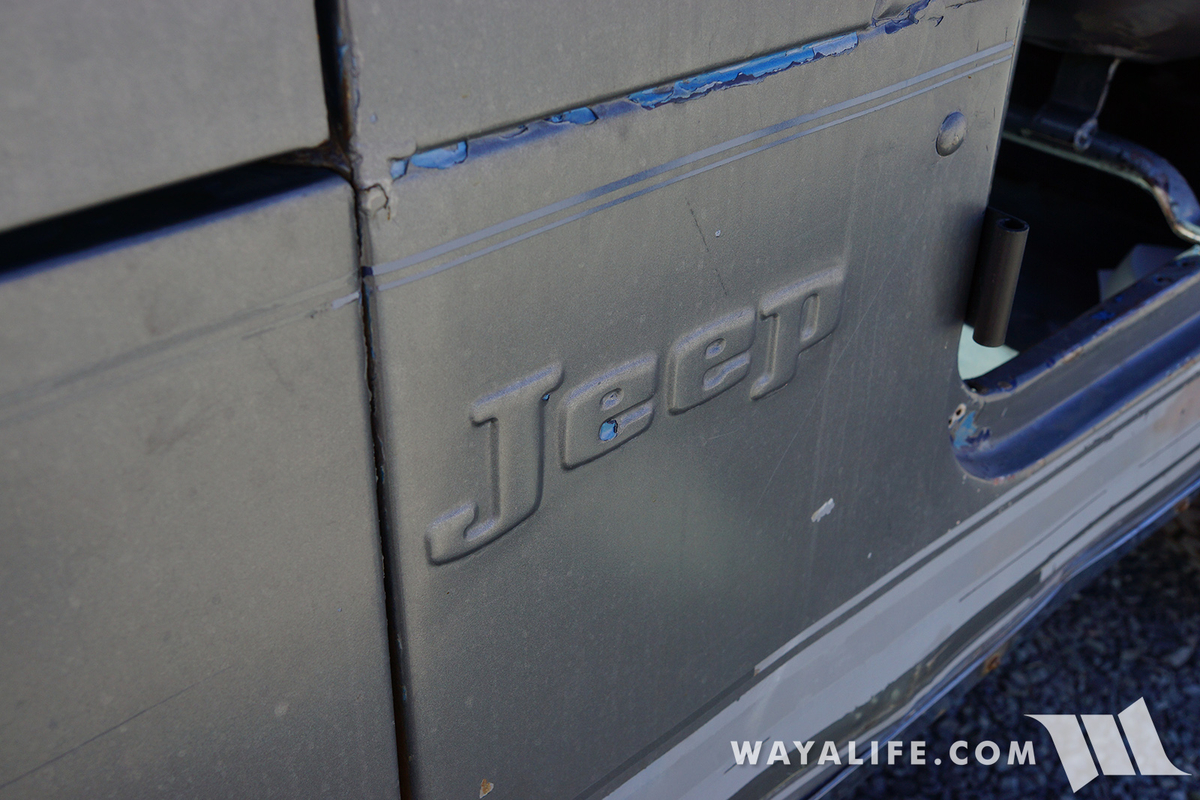
There are other smaller holes that were drilled into the body so that carriage bolts could be installed through them and in what I think was an effort to hold the body together. You can see this bolt to the right of the embossed Jeep logo on the driver side.
Both the passenger and driver side fenders were a total mess. At one point and time, the previous owner had crudely cut large holes in the fenders in order to install headers and make them fit.
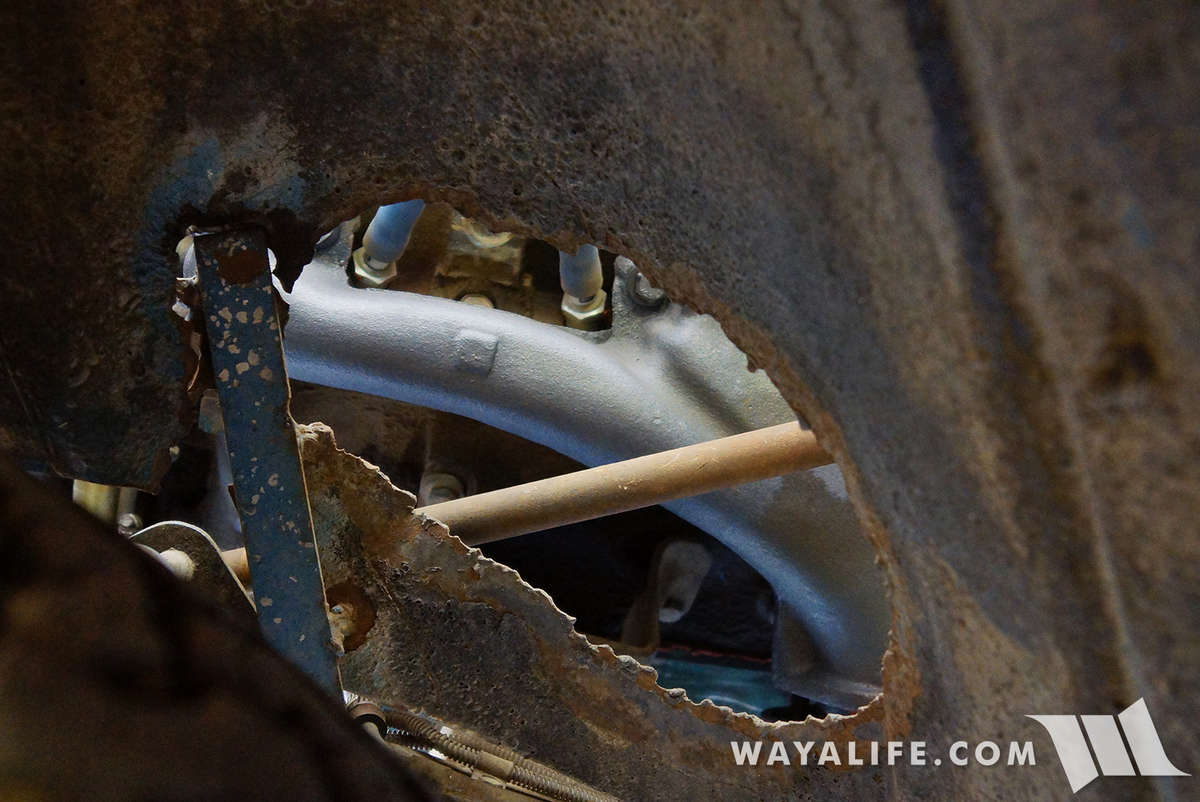
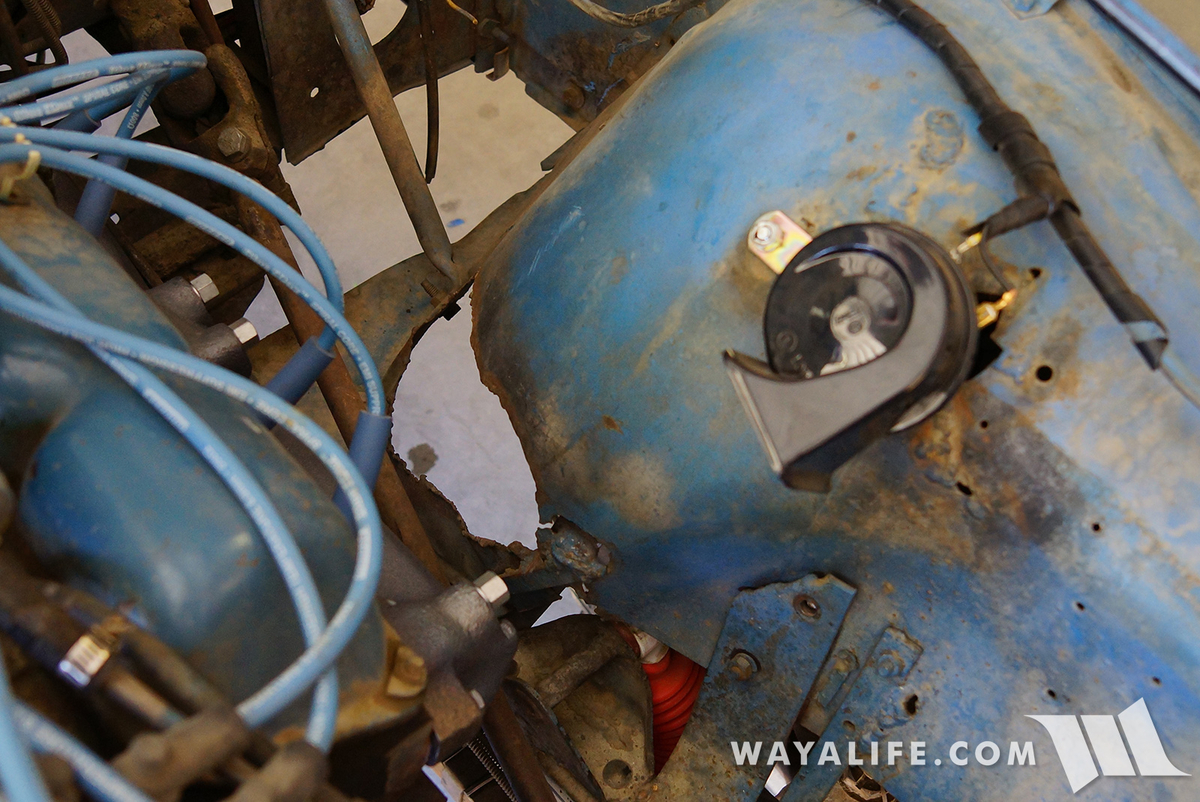
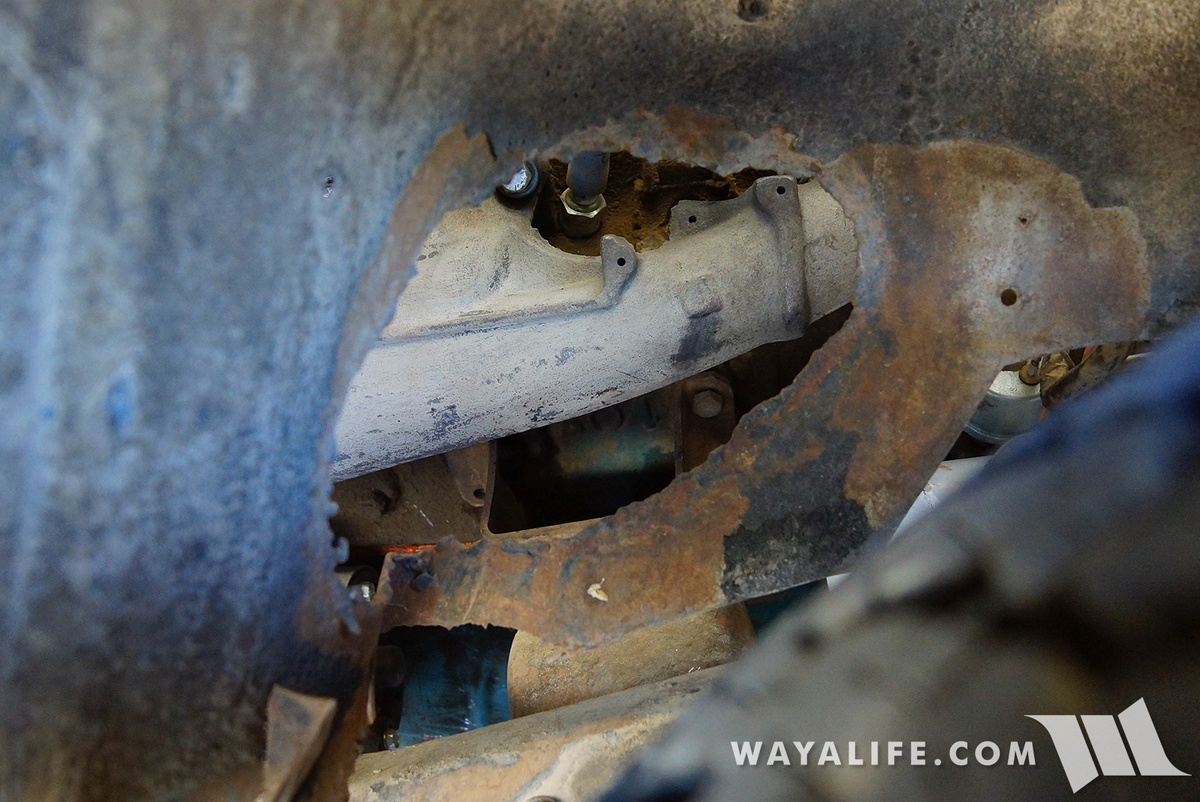
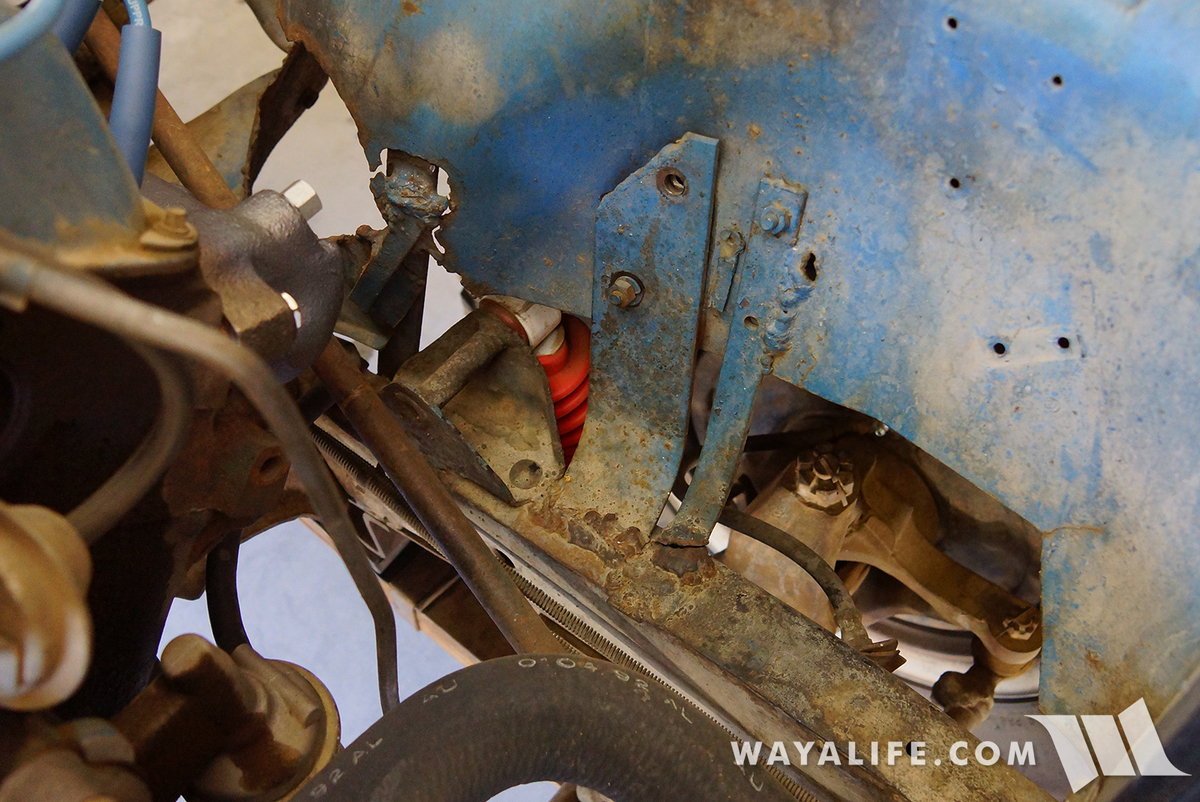
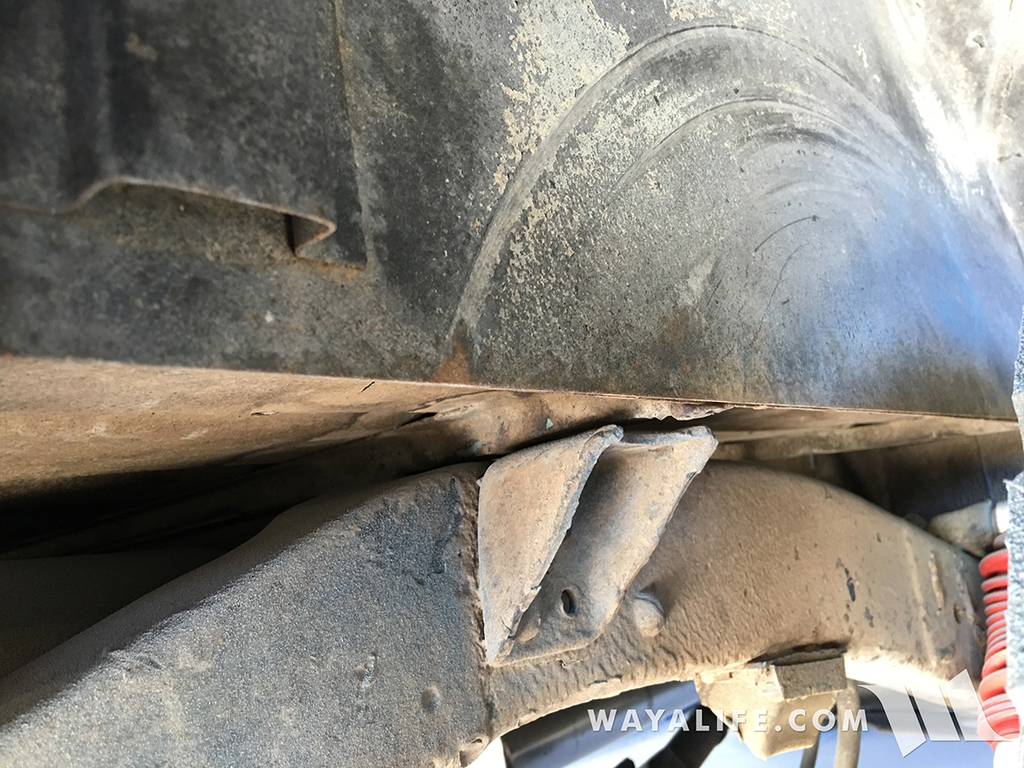
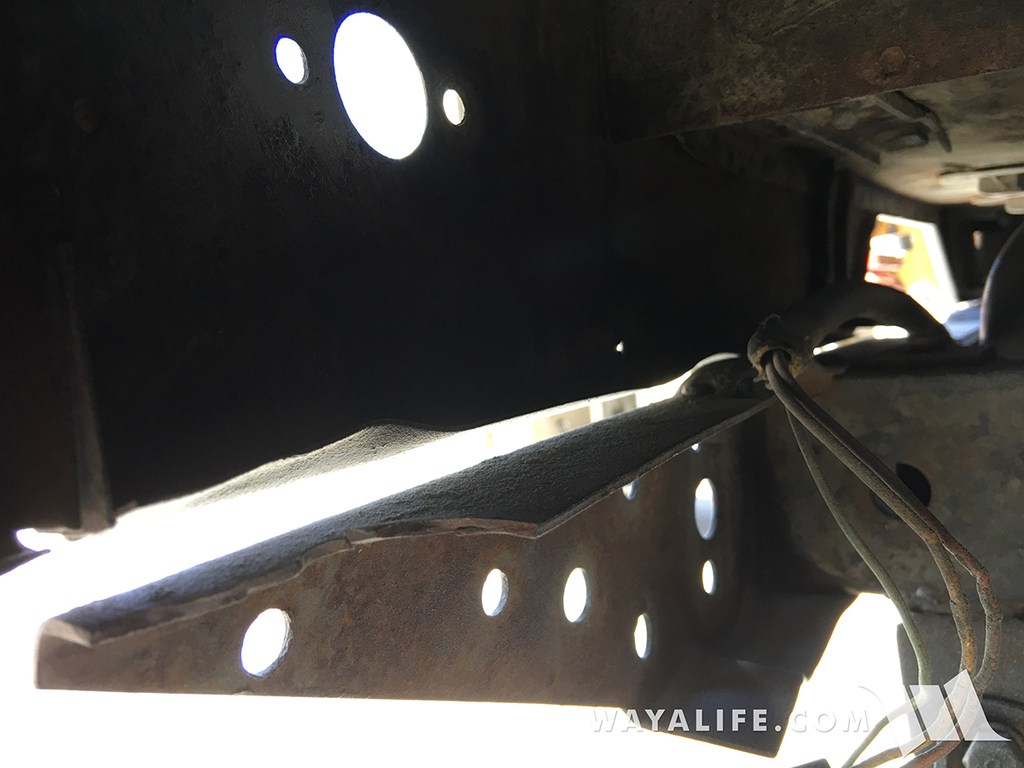
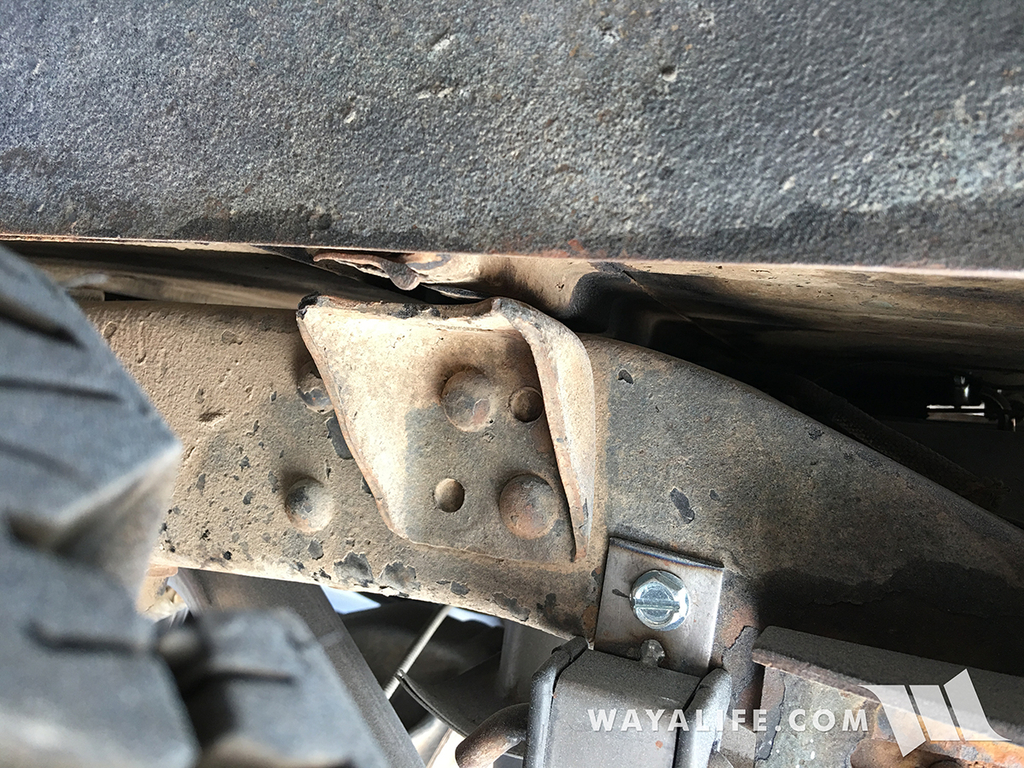
In order to help give the fenders additional support after having large sections removed from them, the previous owner decided to weld them to the frame using thick pieces of steel. Unfortunately, what the guy didn't realize is that the body of the CJ5 is separated from the frame with body mounts that allow for movement between the two. Needless to say, it didn't take long before these brackets broke and more brackets were added to help hold things together.
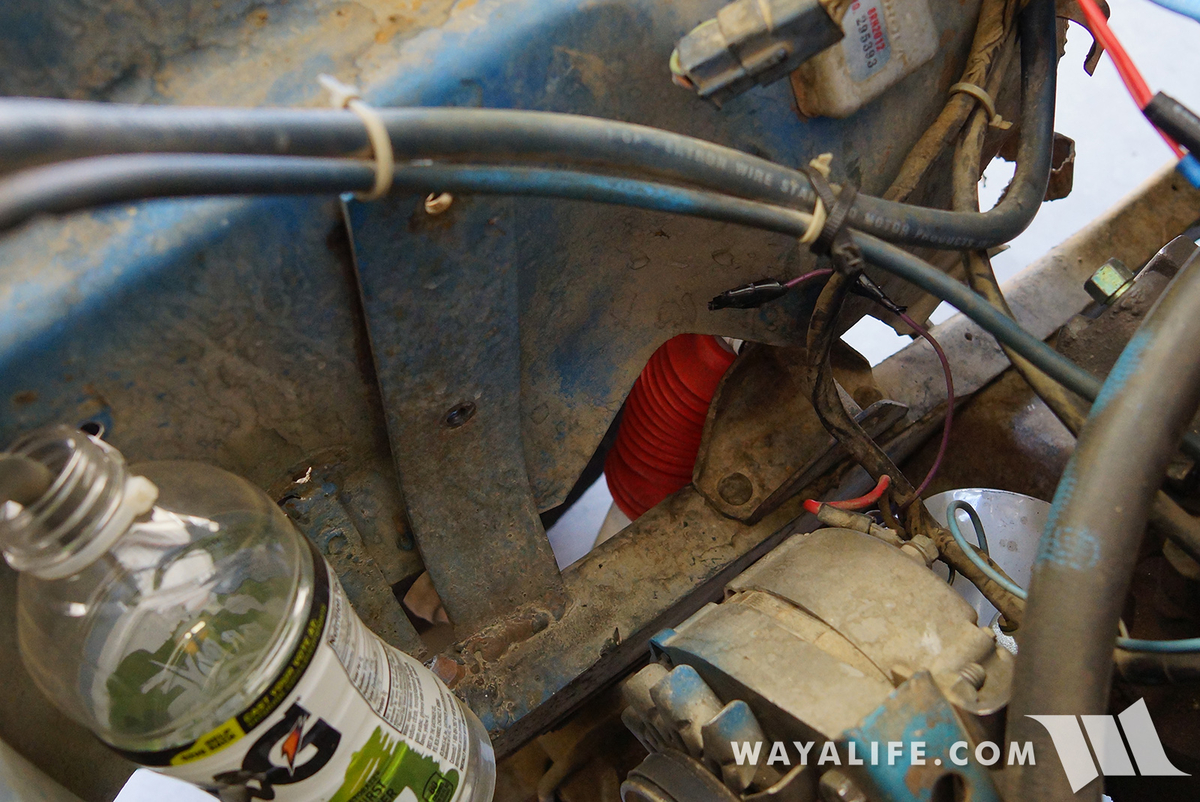
Surprisingly, at a glance, Jane's floor pans looks like they were in really good condition and the only real problem I initially saw was a tear in on the passenger side.
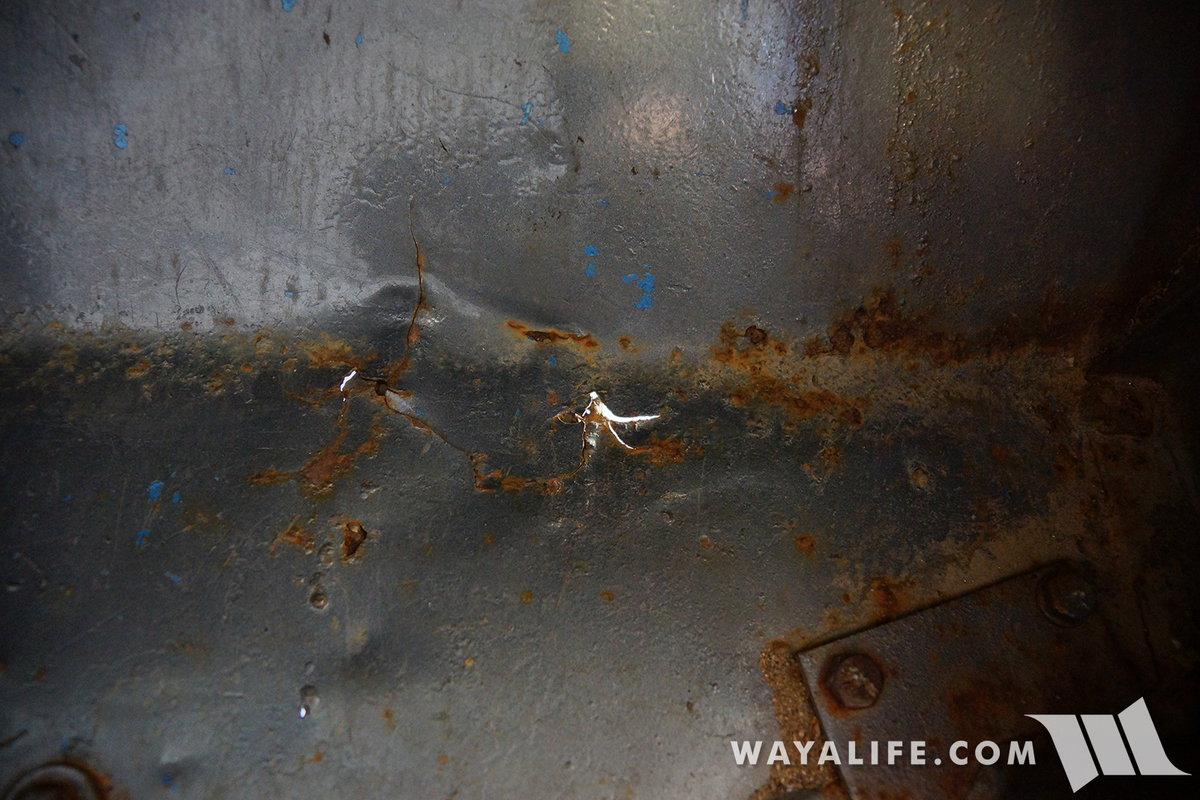
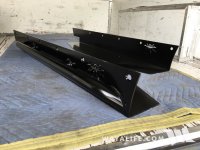
Underneath, there were clear signs that some kind of homemade rocker guards were once installed and welded directly to the tub.
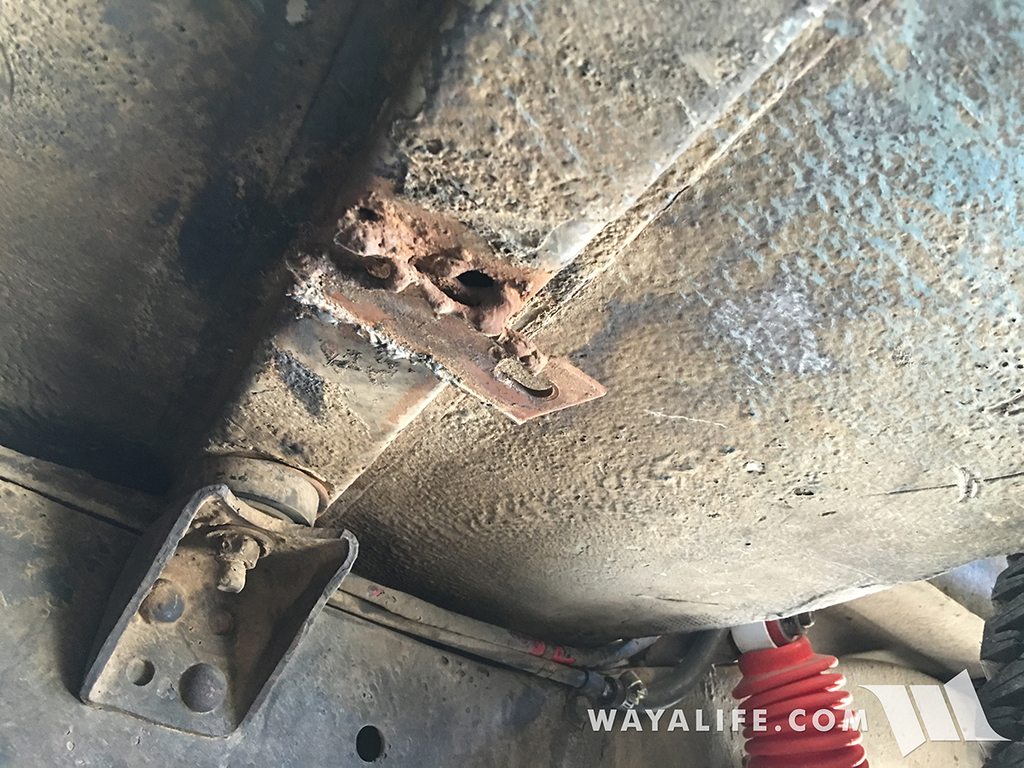
A bigger problem I noticed right away was how many of the body mounts were loose, torn out, rotted out or missing altogether.
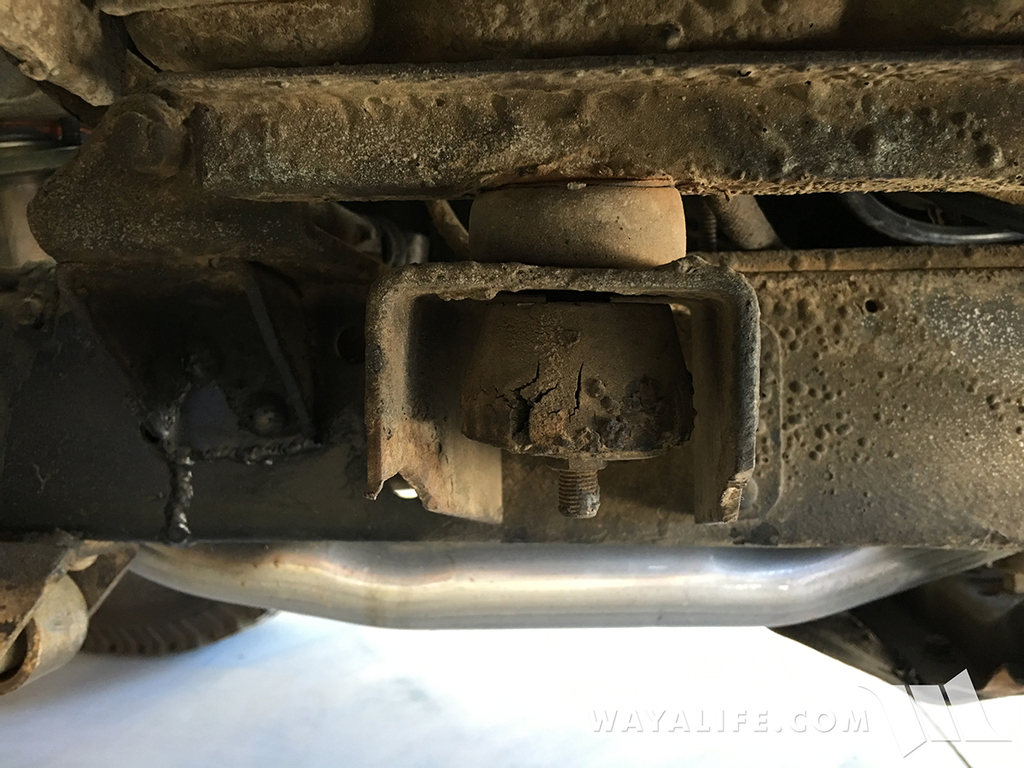
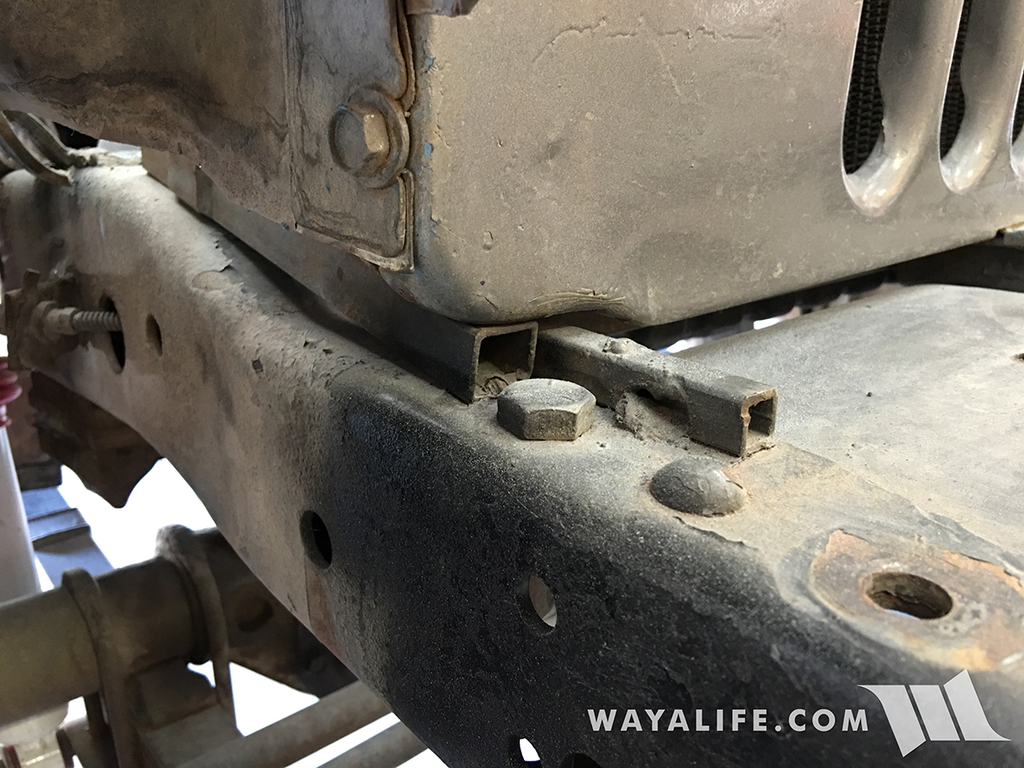
Here's an improvised grill support that was welded in place.
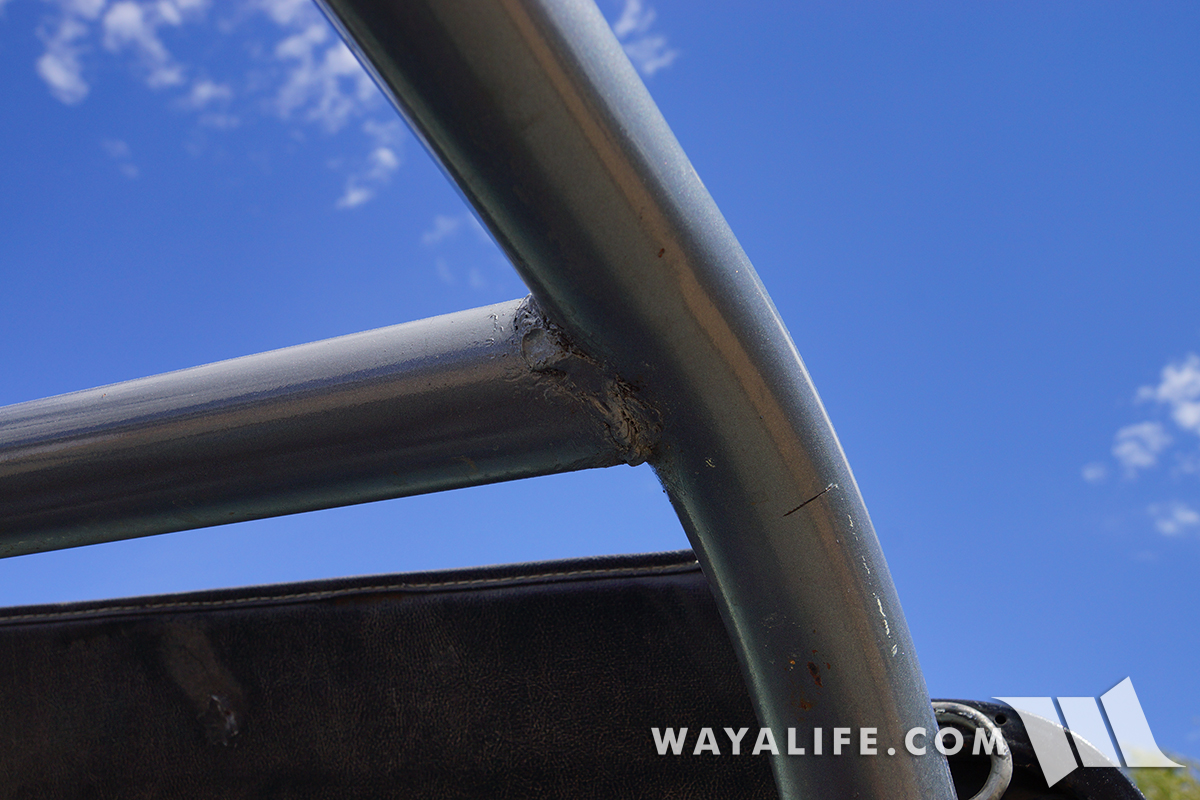
Now, I'm far from being a good welder but looking at the full cage that was added onto the factory roll bar, I was less than impressed with what I saw. Also, the mounting points on the floor pan was far from being desirable.
Stripping Jane Down to the Metal
To help identify problems we couldn't see at a glance and to being the restoration of Jane, one of the first things we did was remove the roll bar that was installed on her.
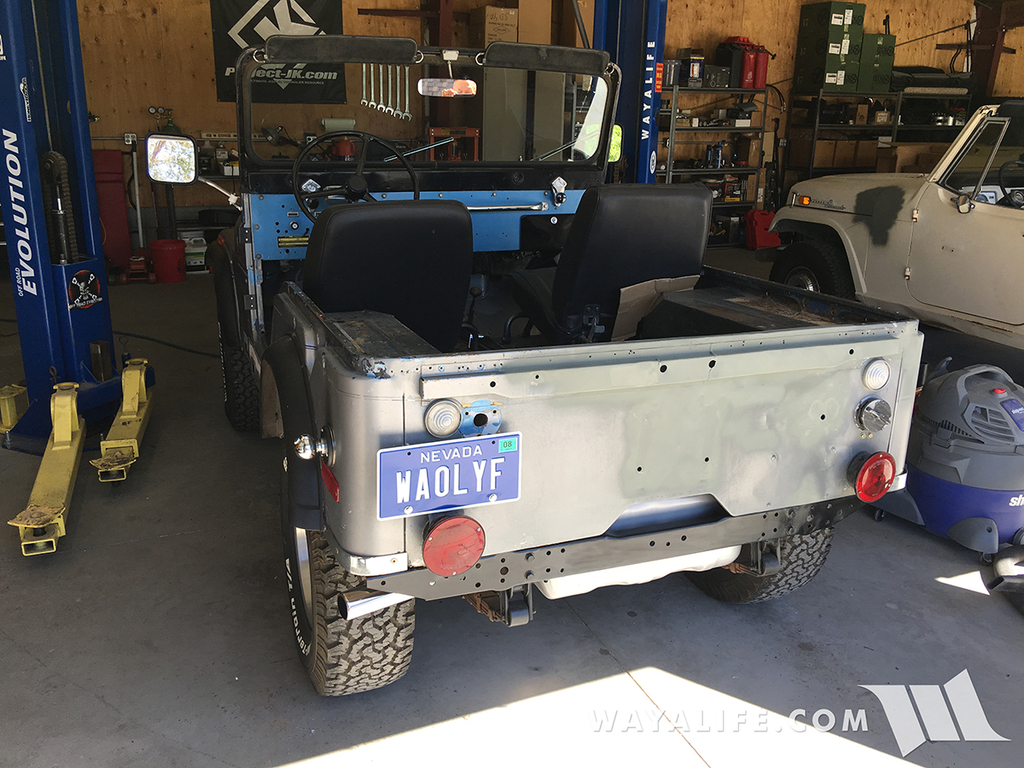
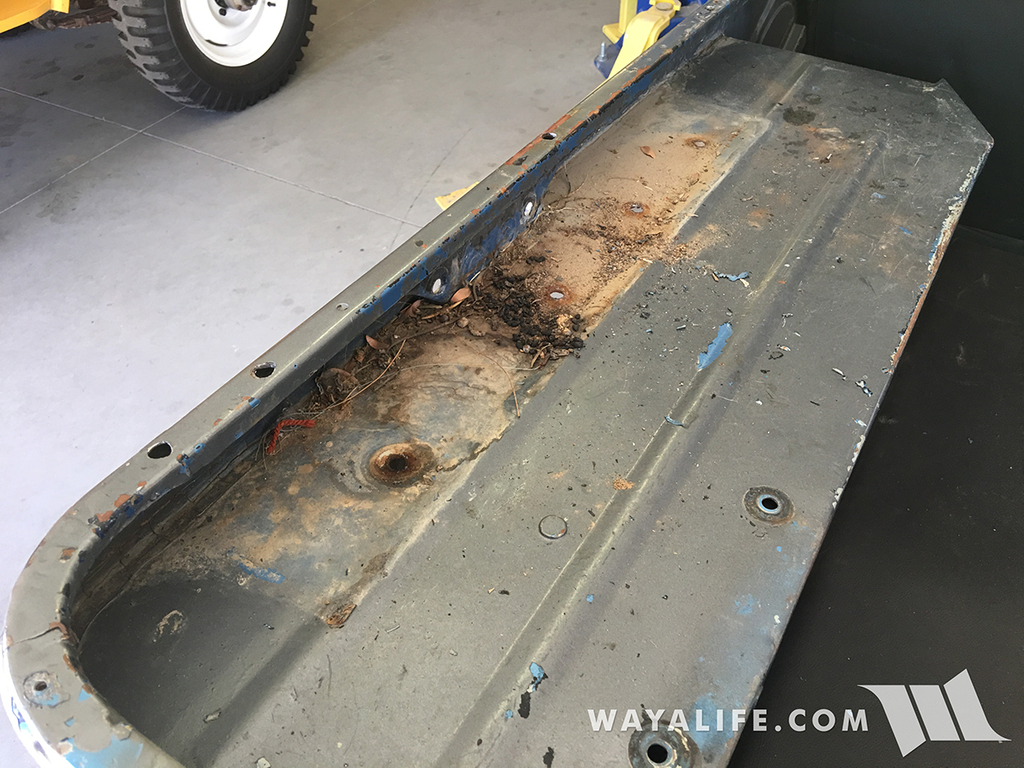
Right away, we could see this was a smart move as it looked as if a mouse had made his home in between the mounting plate and fender.
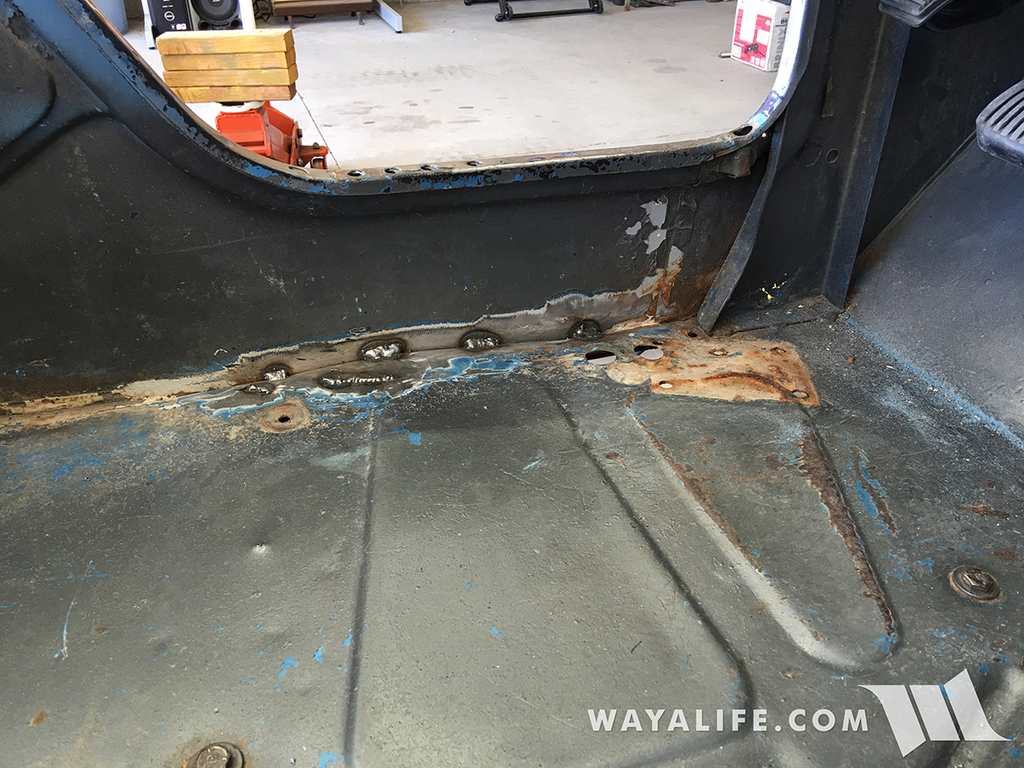
What we also discovered after moving the cage is that the spot welds securing the driver side floor pan to the rocker panel had separated and most likely from the forward half of the roll cage pushing down on it. There were also additional cracks in the floor pan that were being hidden by the driver seat. It ain't the prettiest thing but I was able to repair the cracks and stitch the floor pan and rocker panel back together again.
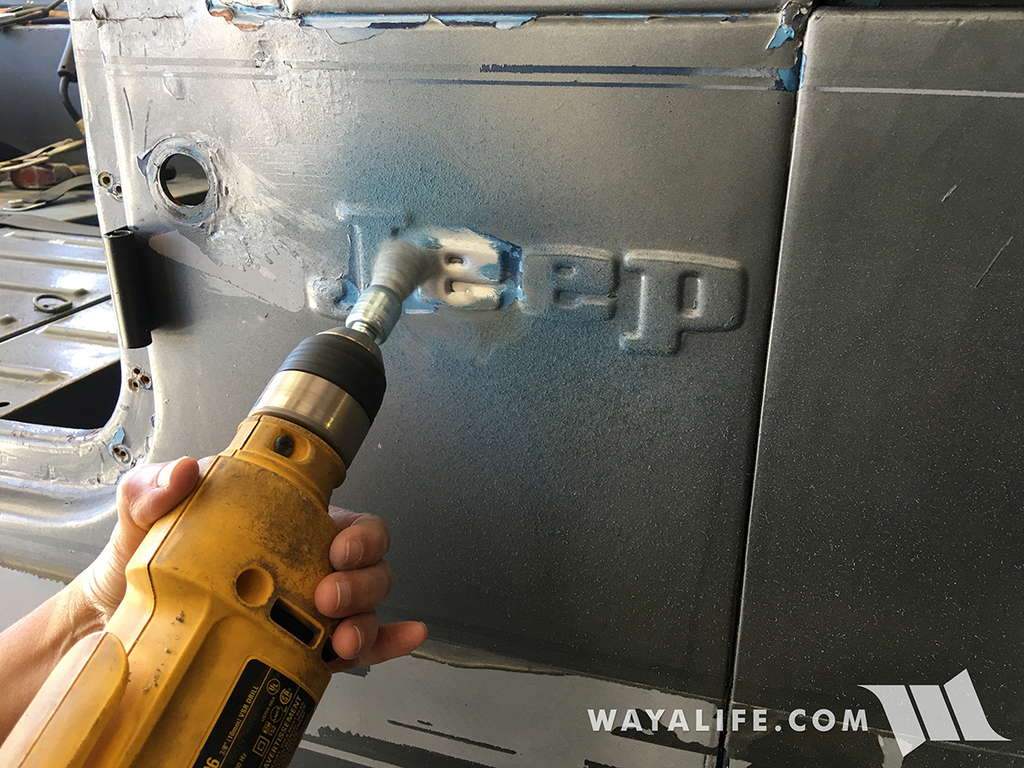
Here's a shot of Cindy starting the process of stripping the layers and layers of paint covering Jane and starting with the embossed Jeep logos.
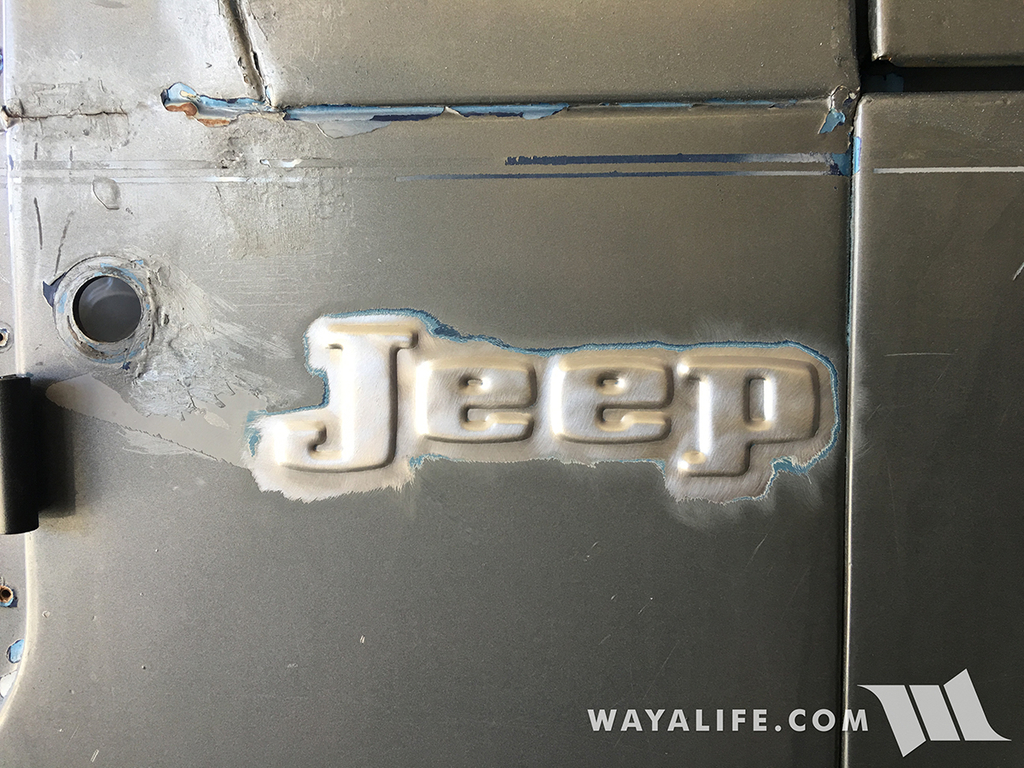
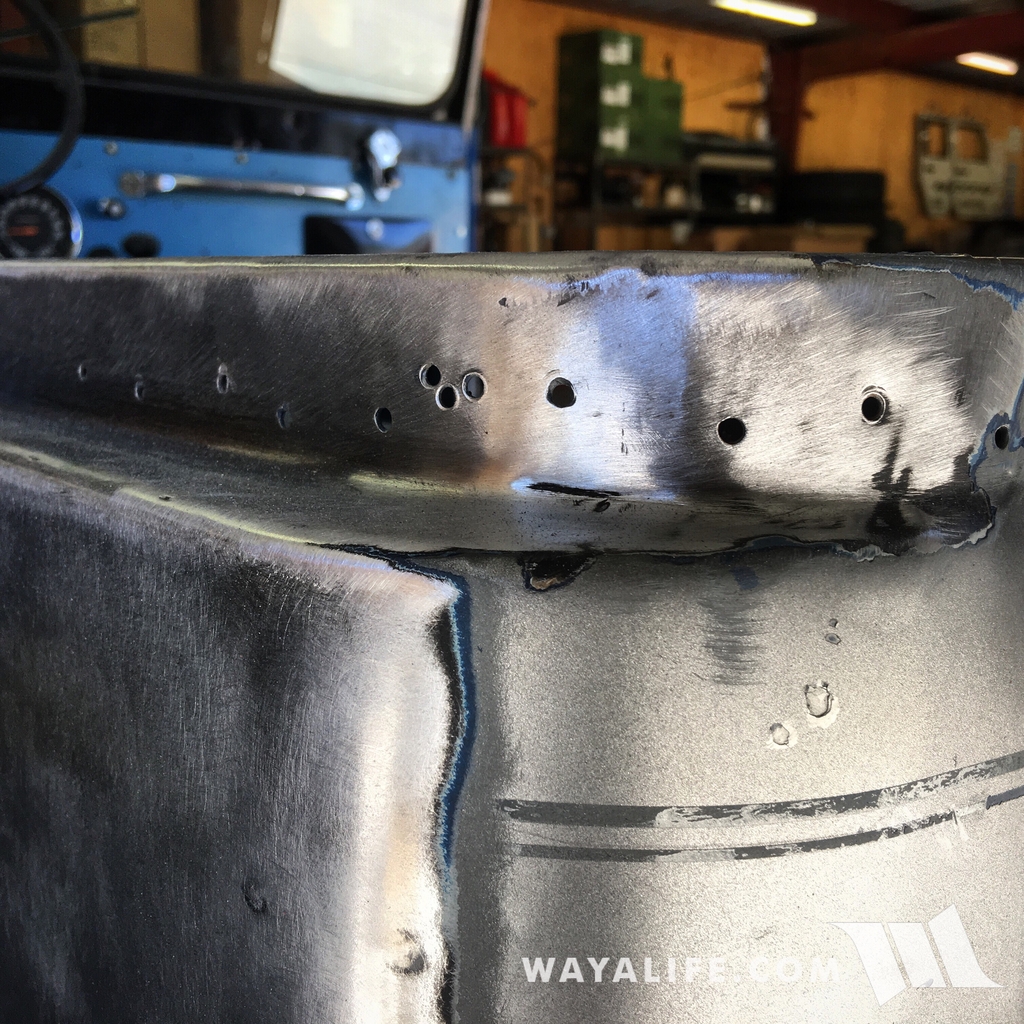
As mentioned before, the previous owners got drill happy with Jane and made swiss cheese out of this CJ5's body. Some of the holes were quite large but we were determined to fill them in with metal.
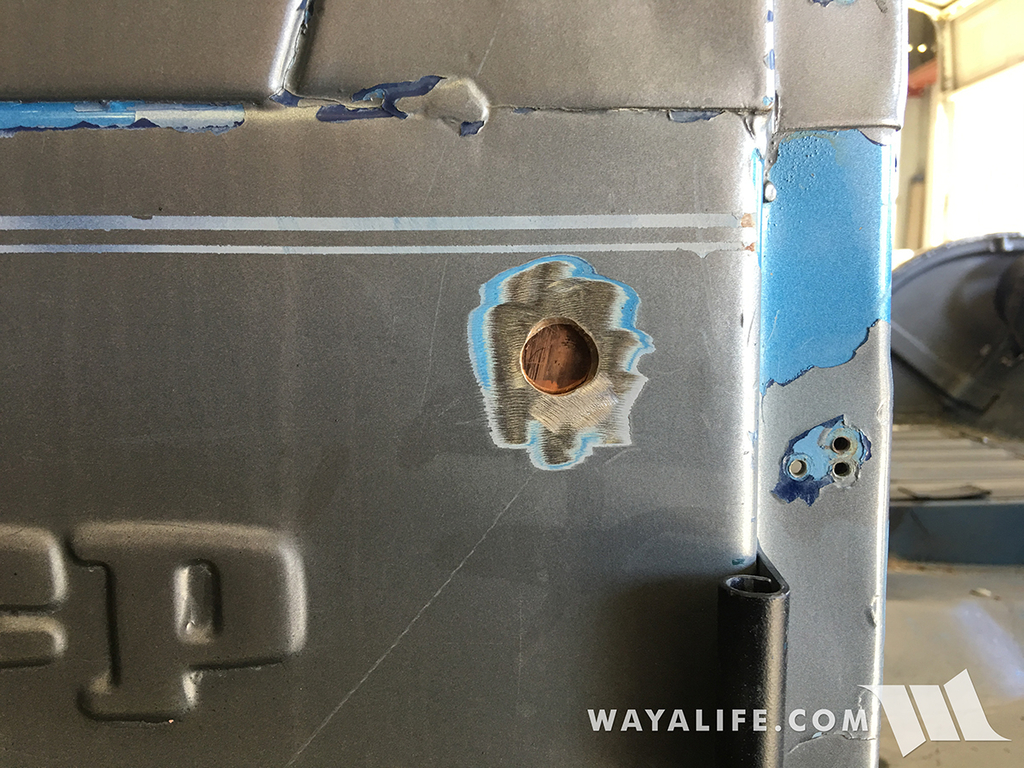
Here's a shot of the passenger side hole after filling it in and sanding it down. A skim coat will be applied to the area to help fill in the gaps and smooth things out before going to paint.
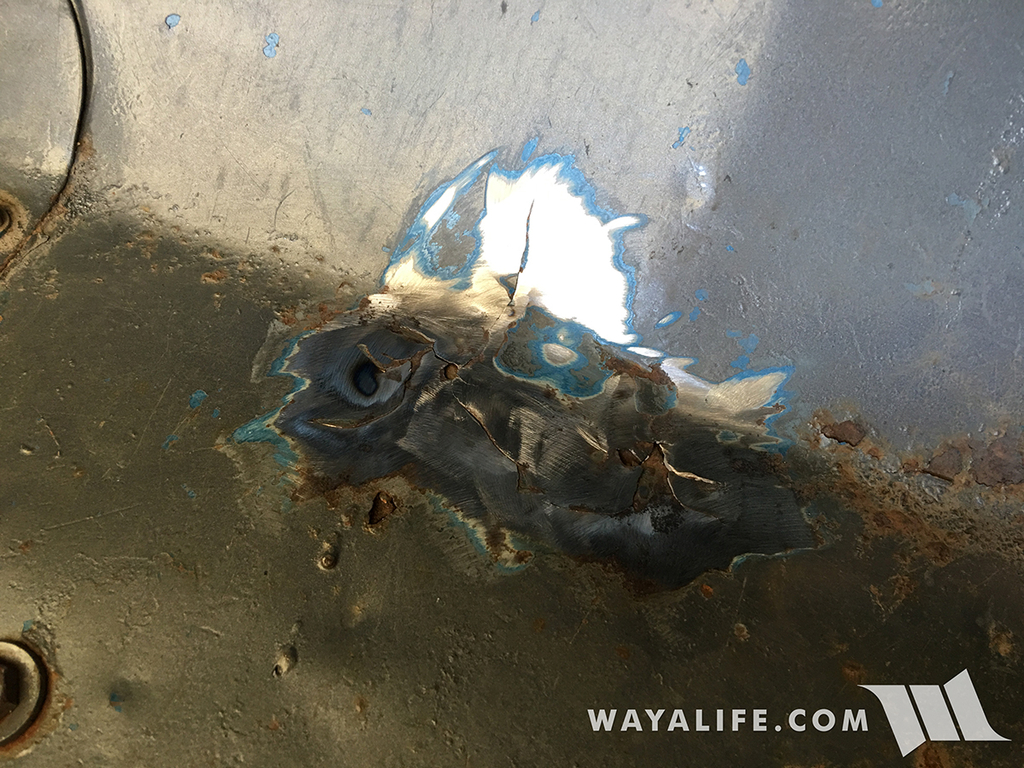
Prepping the cracks on the passenger side floor pan.
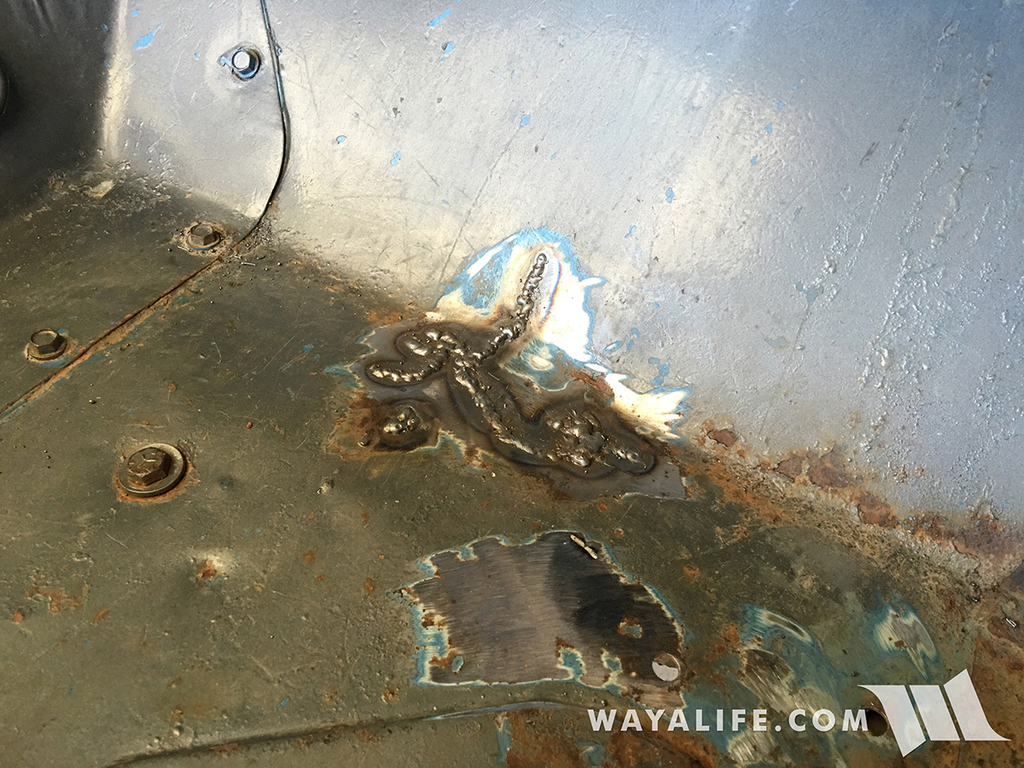
And here it is after being stitched back up.
Continuing to dig through the layers of paint and strip Jane back down to metal.
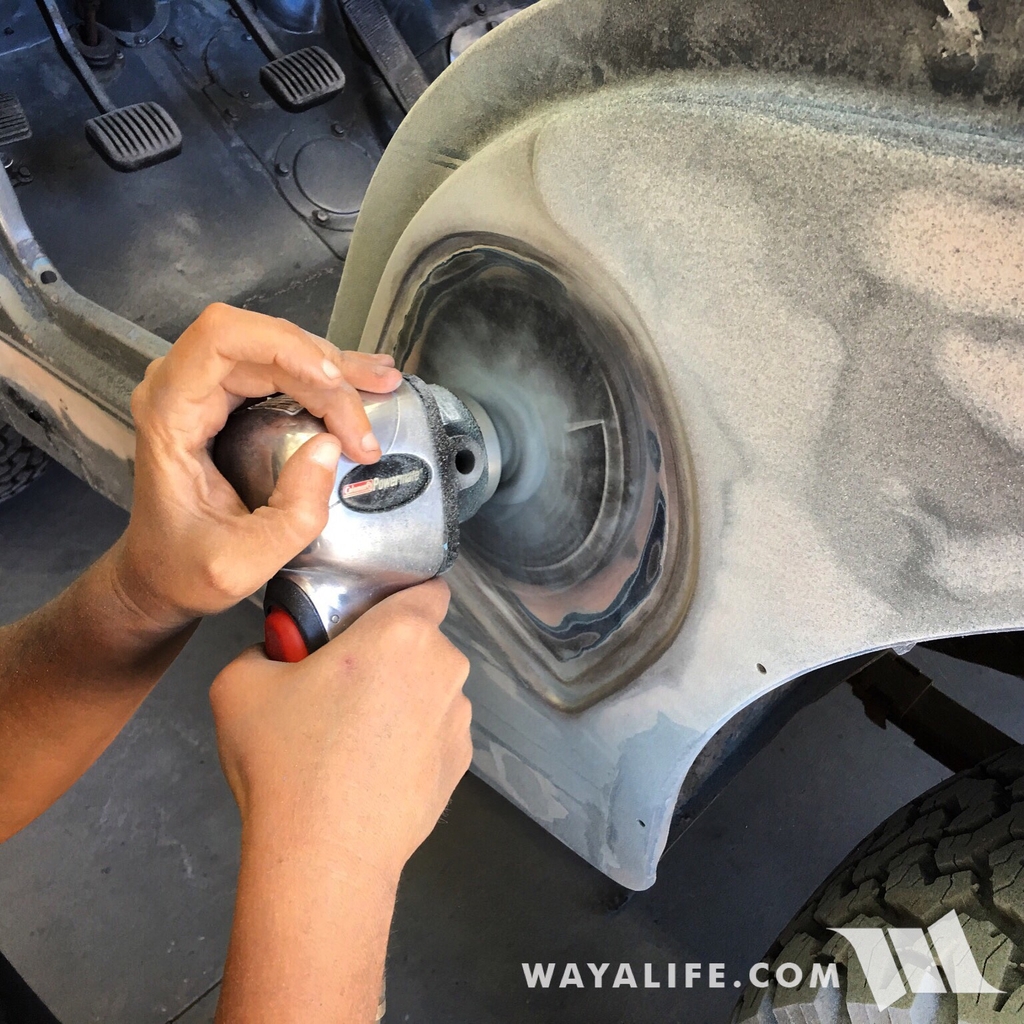
It's slow going but we're making progress.
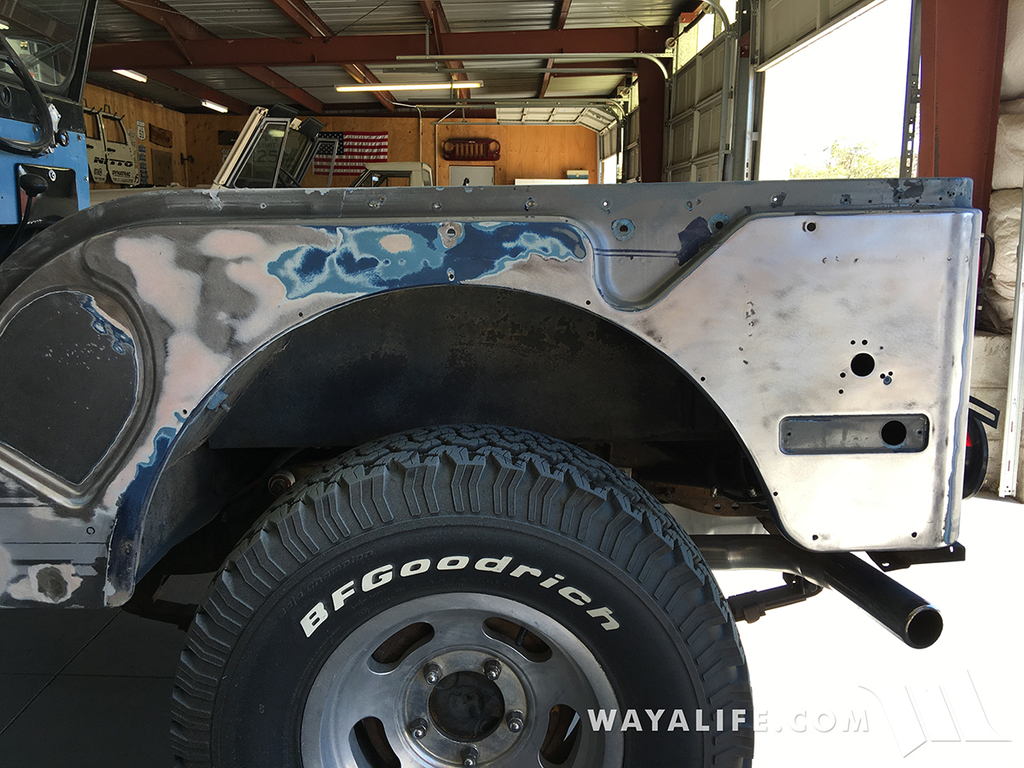
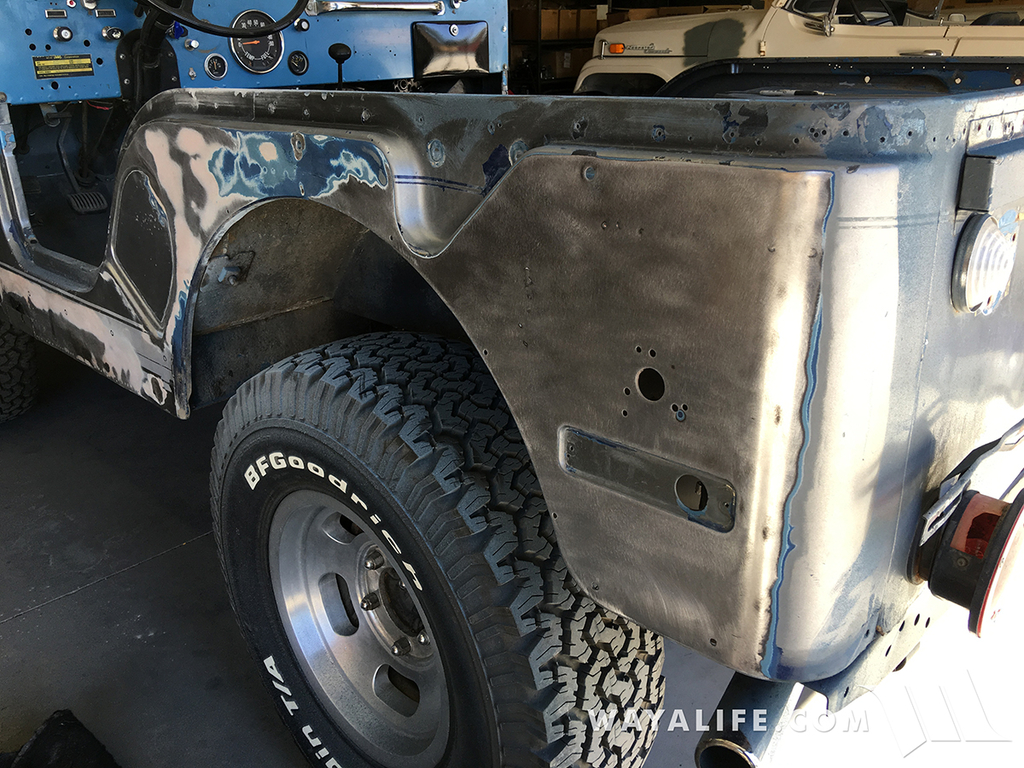
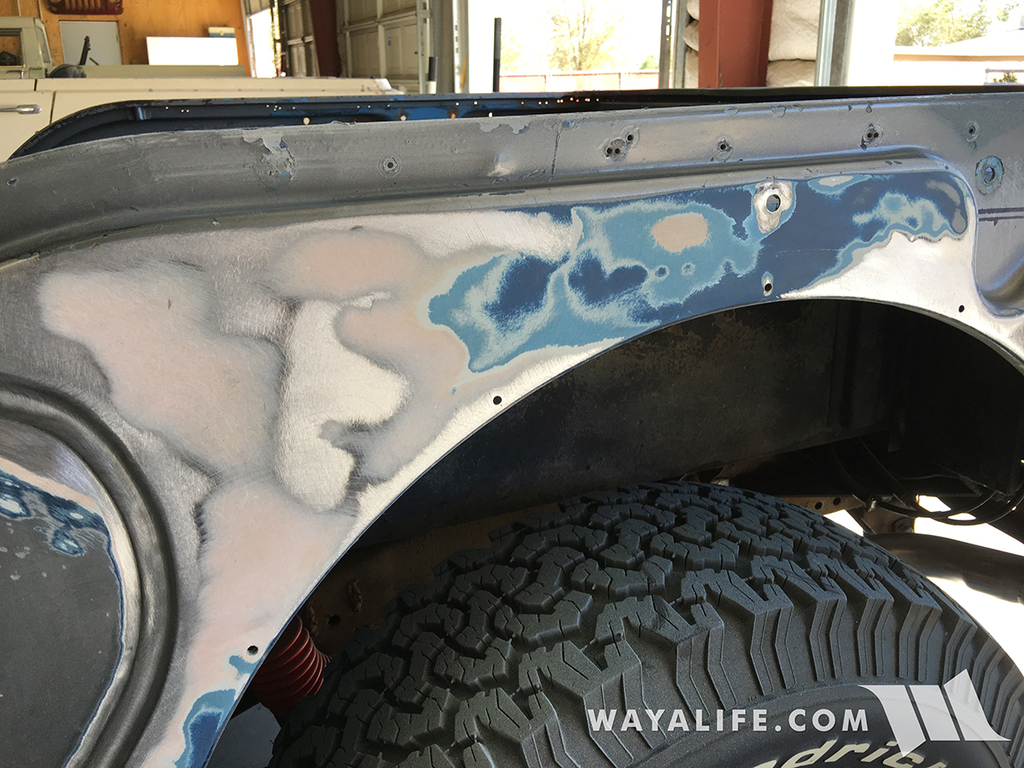
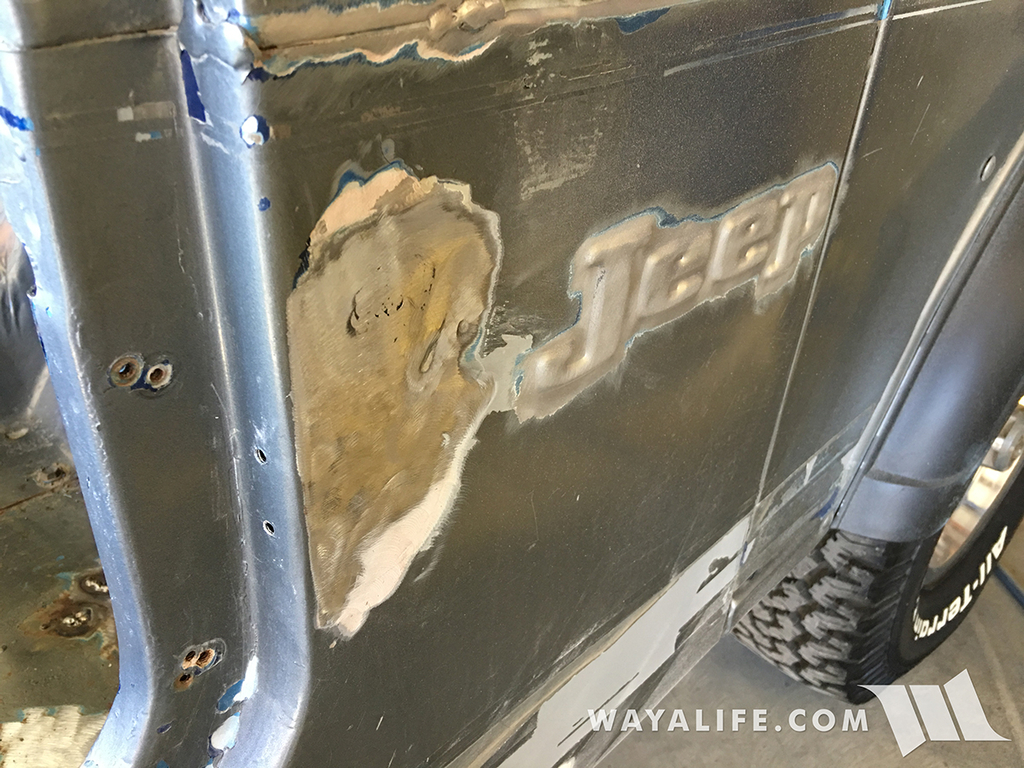
On the passenger side, we were starting to find a lot of bondo... A LOT of it!
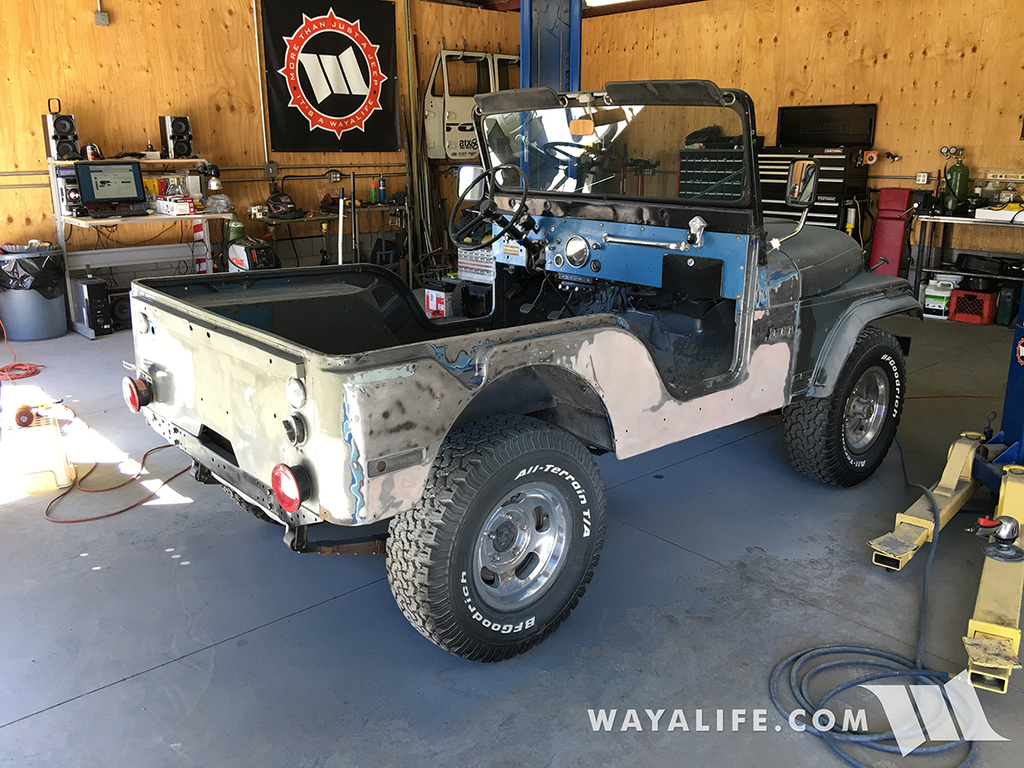
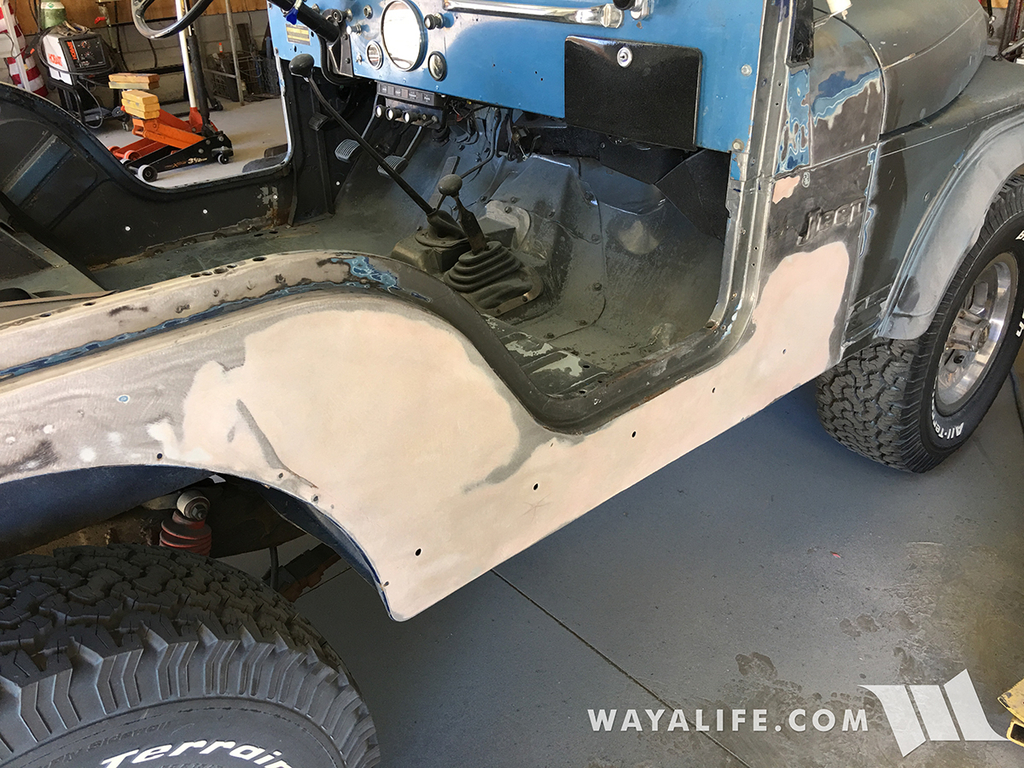
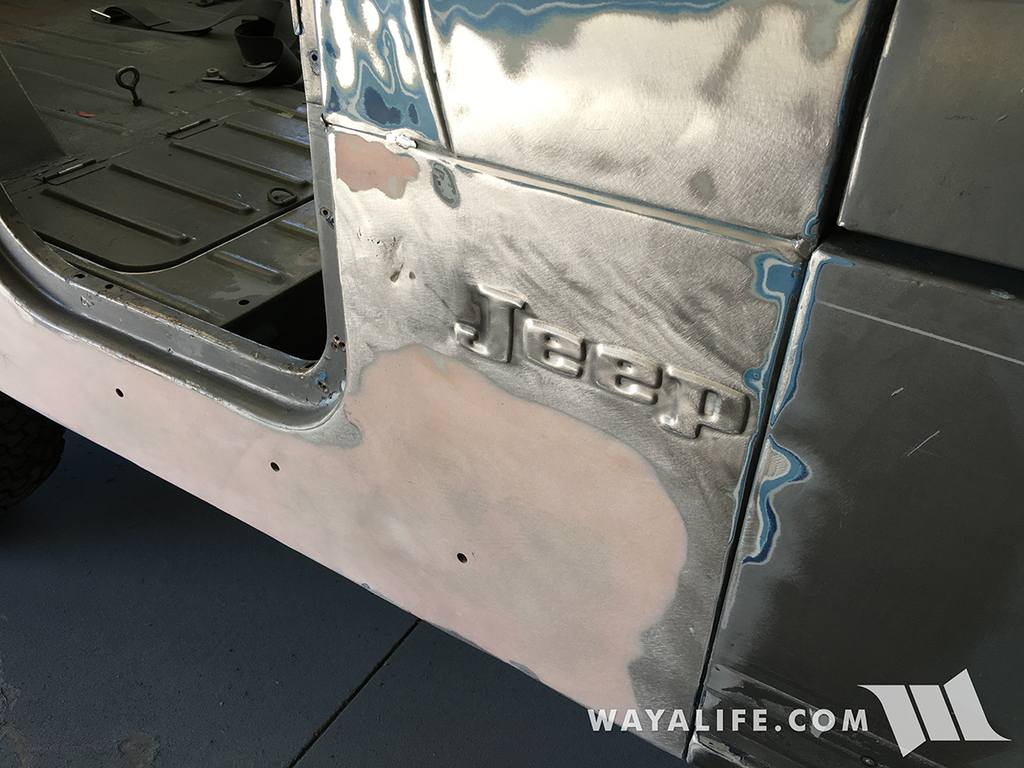
As concerning as it was to see so much bondo, a quick check on the inside of the tub revealed there wasn't any damage, holes, rust or otherwise being covered up. In fact, the metal seemed to be smooth and in good condition.
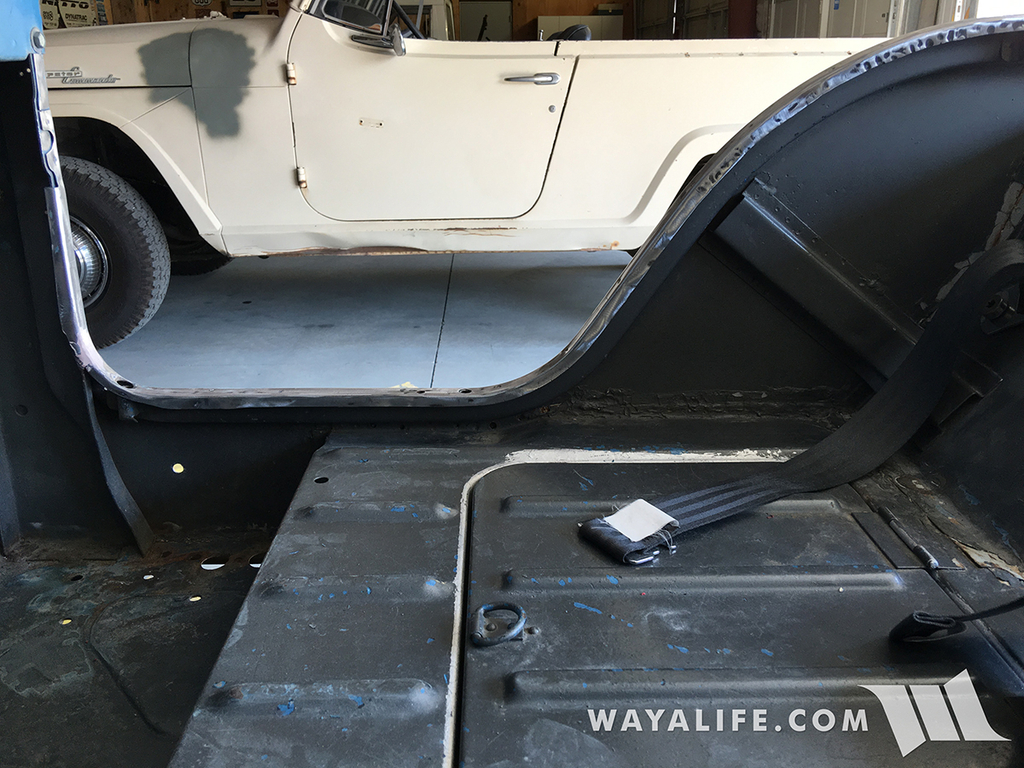
Sanding further down in a small area to see what was going on, we found that the bondo was just being used as a skim coat to smooth over spot welds and so we left the rest alone.
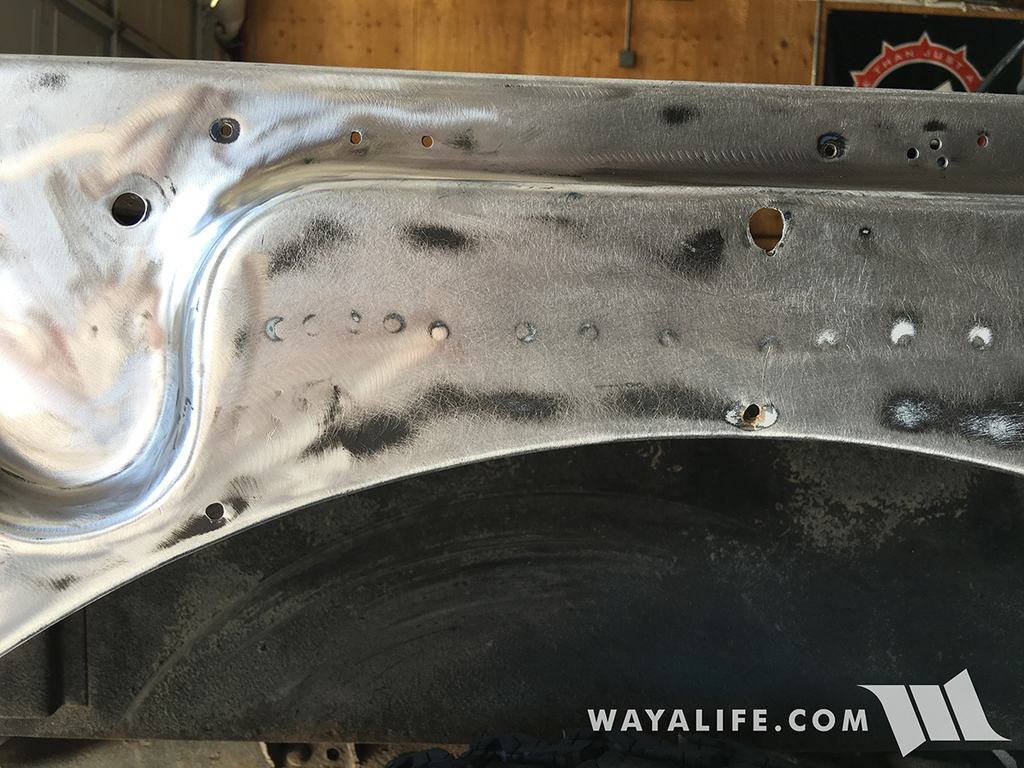
Driver side embossed Jeep logo all cleaned up and the hole next to it filled in.
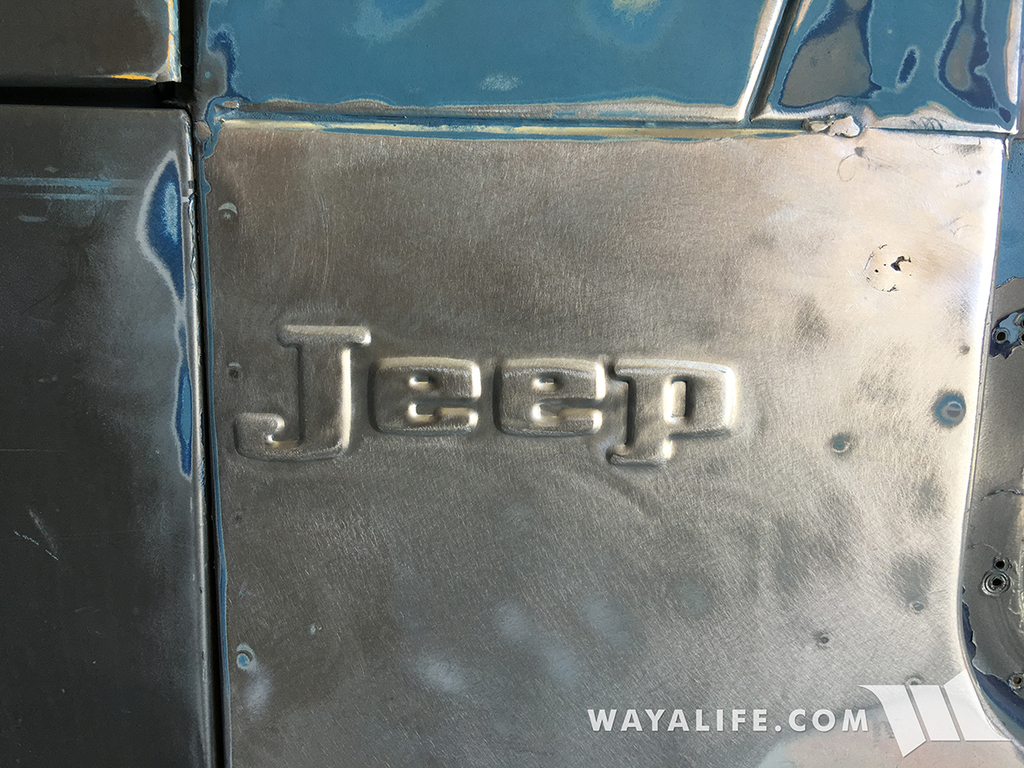
Did I mention how many holes were drilled into Jane and all over the place?
Okay, time to get the windshield front fenders and hood removed.
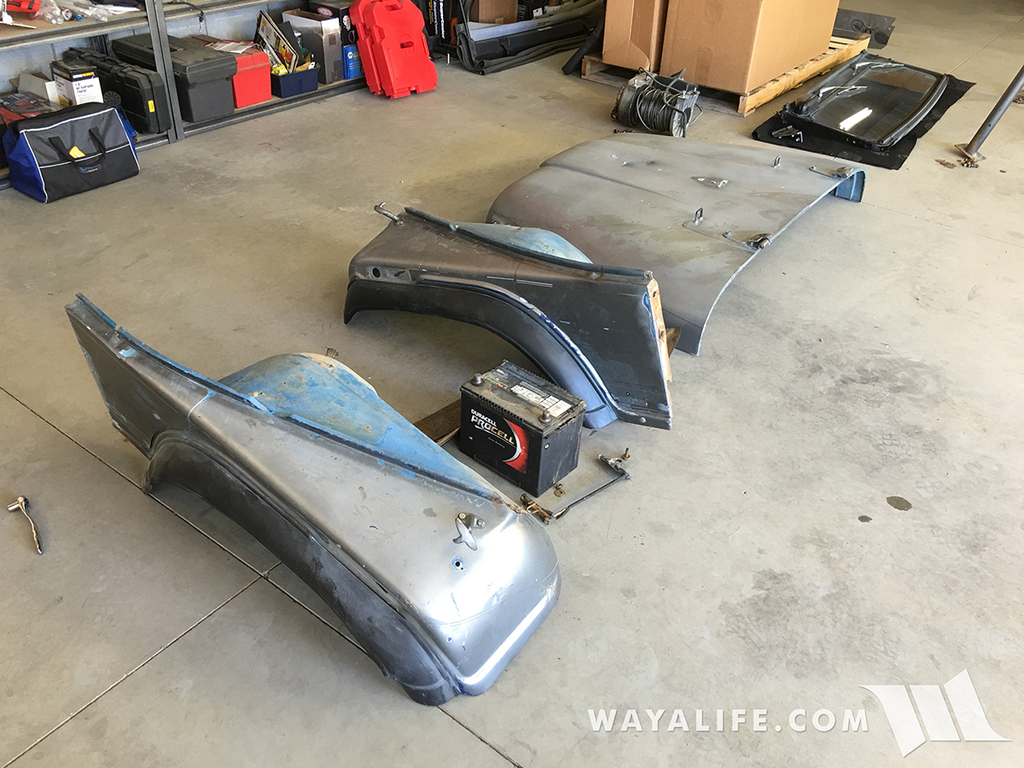
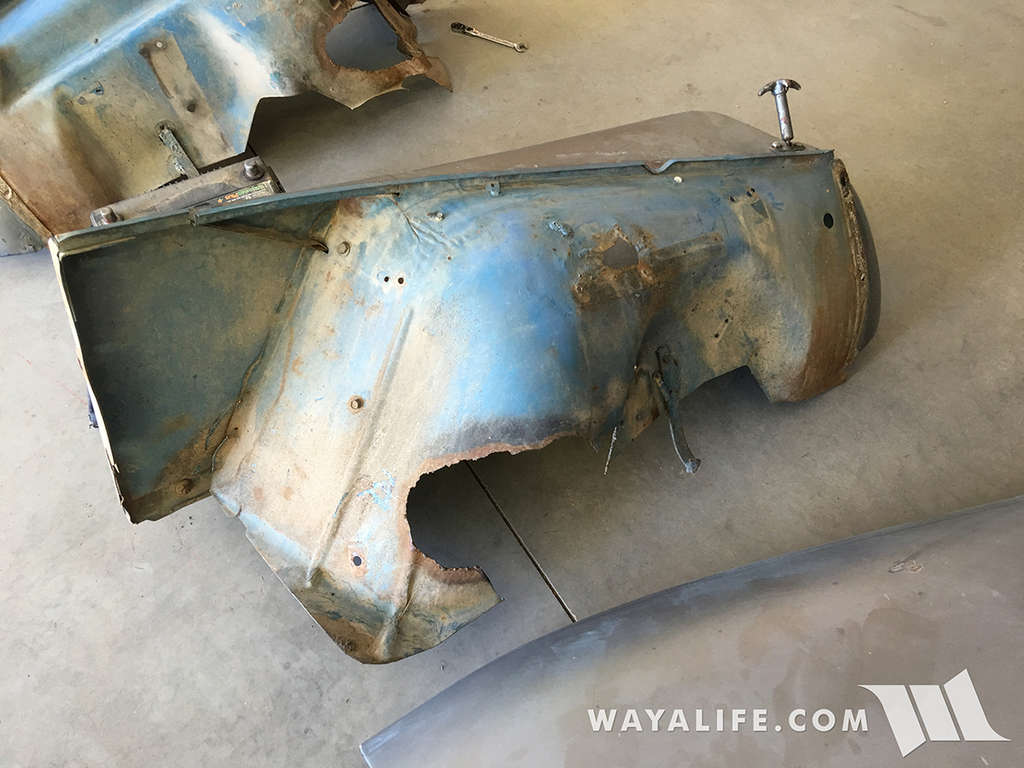
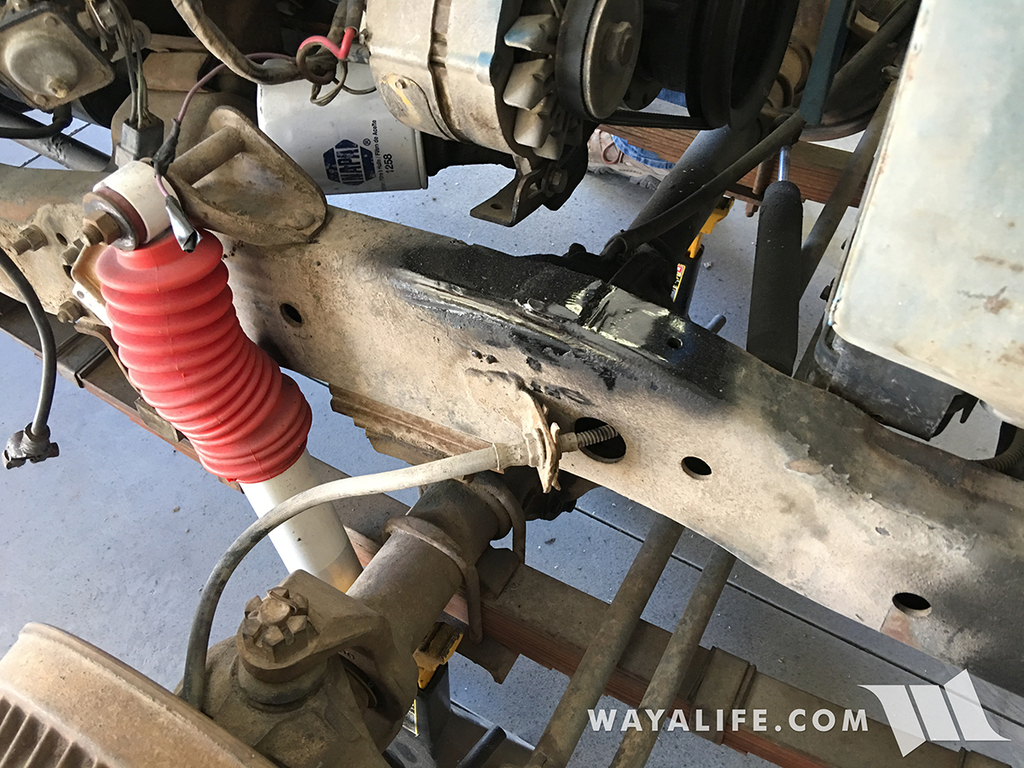
Now we have better access to get rid of the stupid homemade fender brackets.
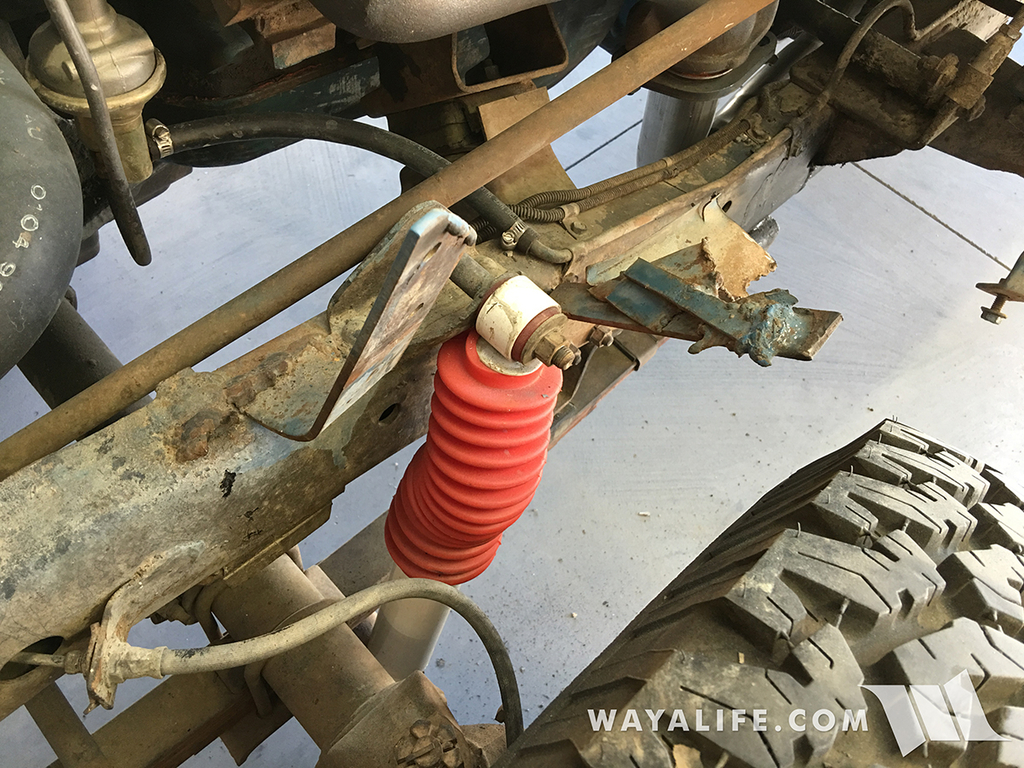
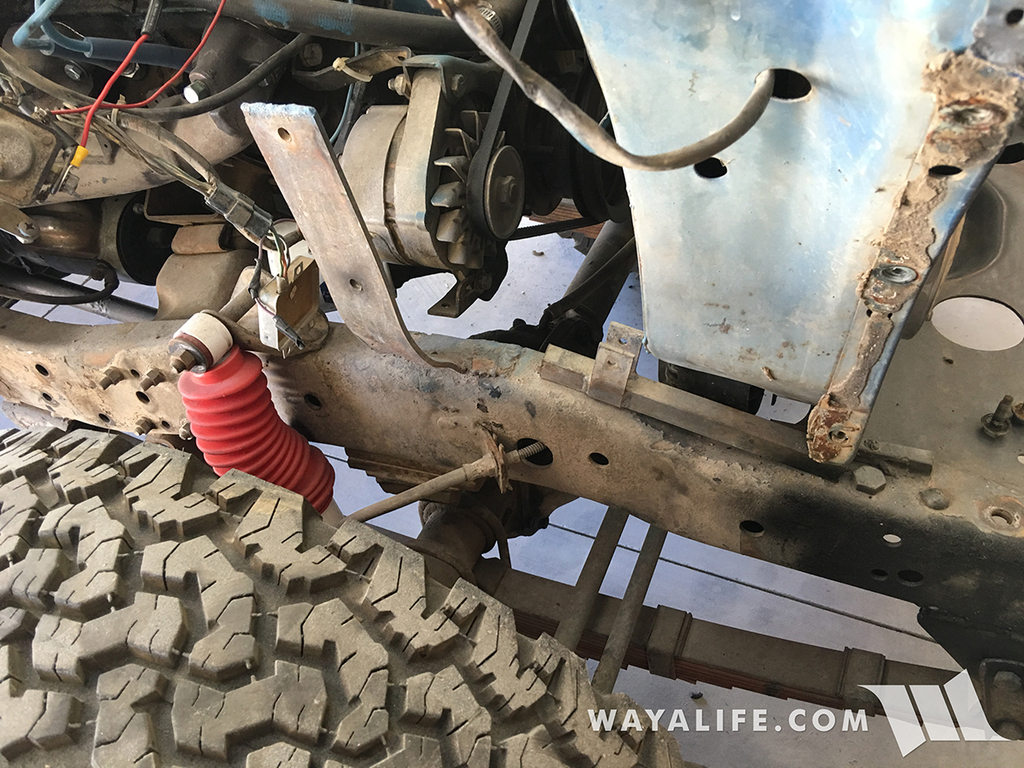
Lame brackets cut off and frame cleaned up.
A couple of shots of Jane all stripped down.
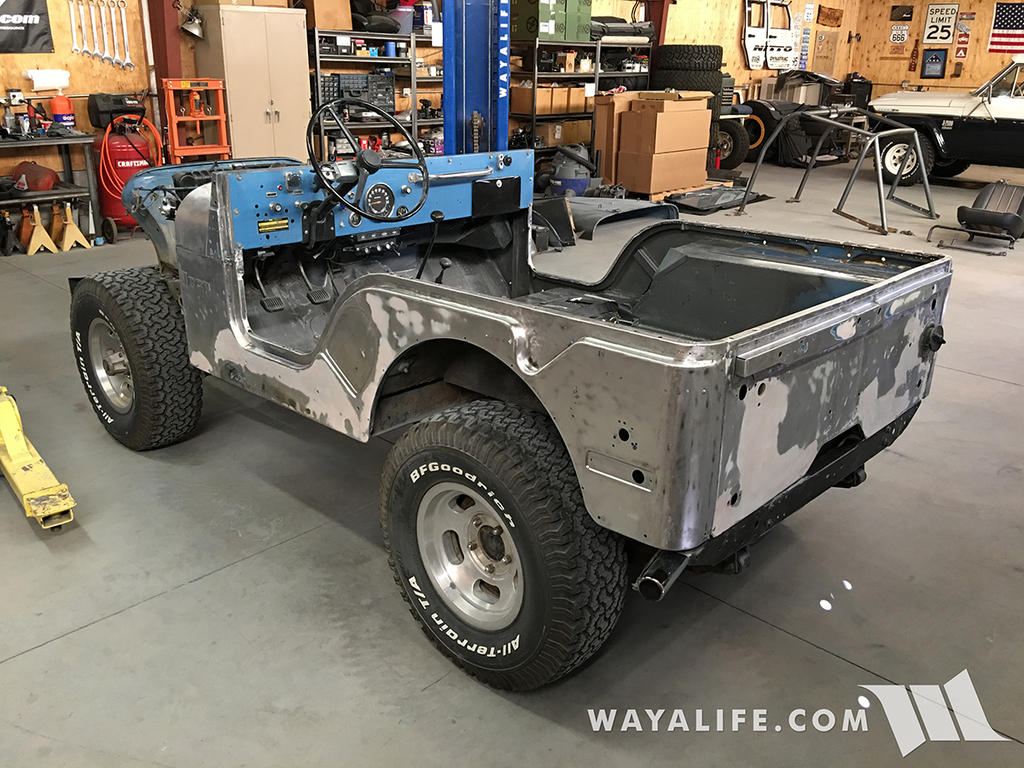
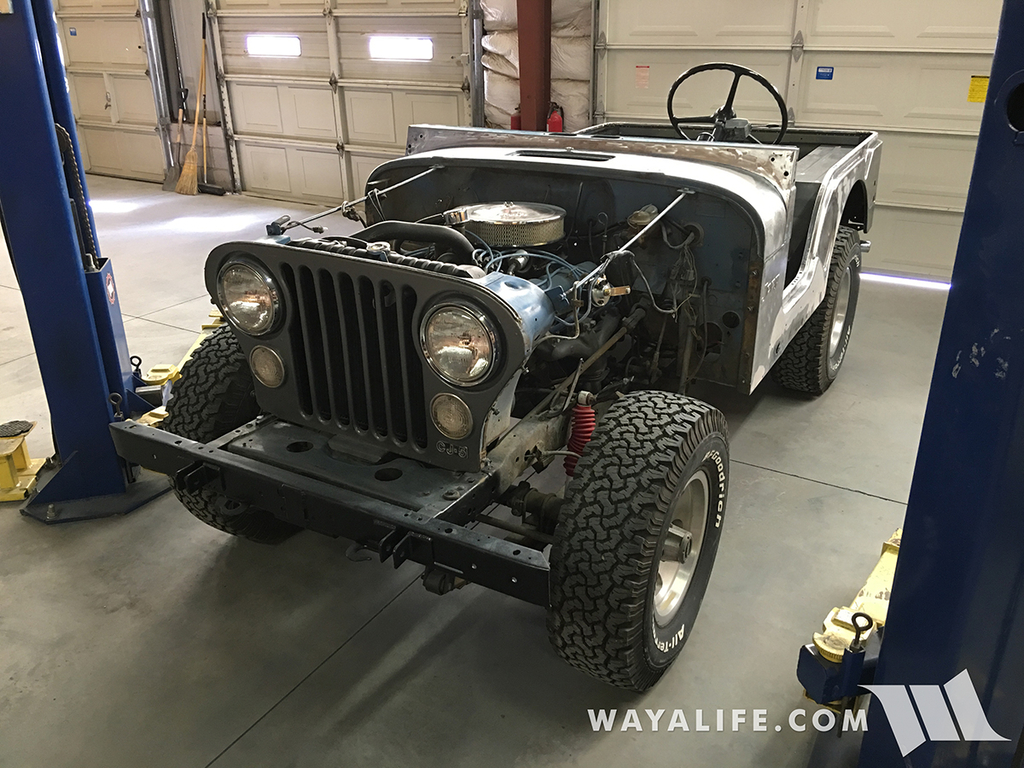
With all the paint removed, you can really see all the patches of bondo well now. Or, should I say, places on the body that needed some help.
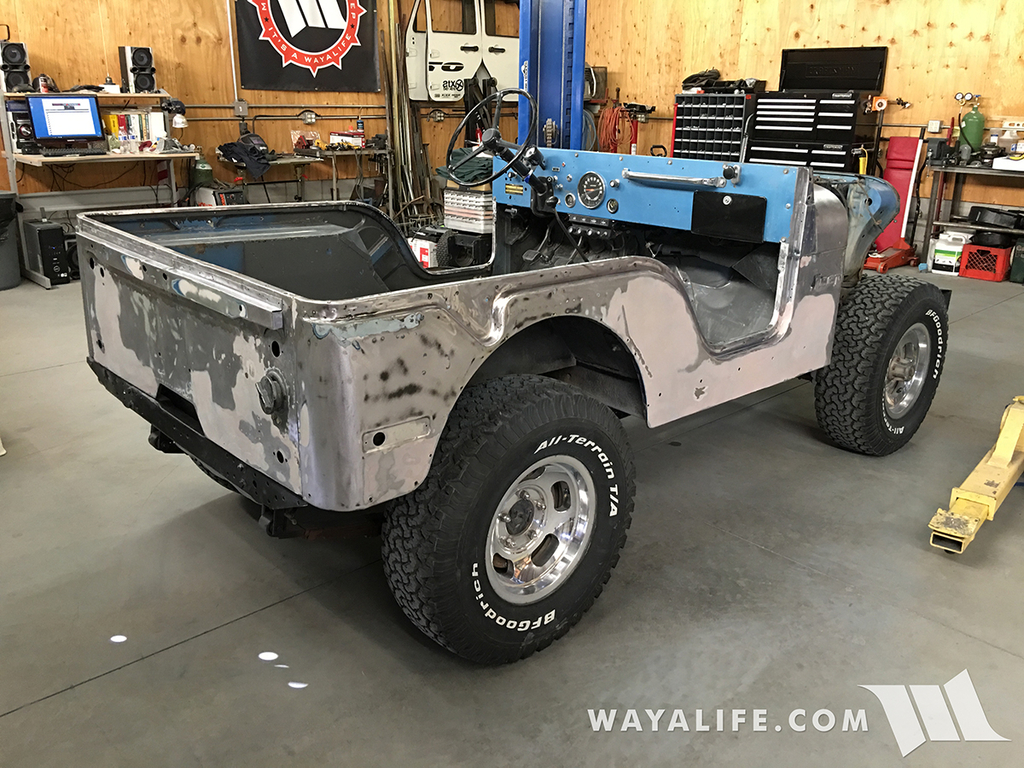
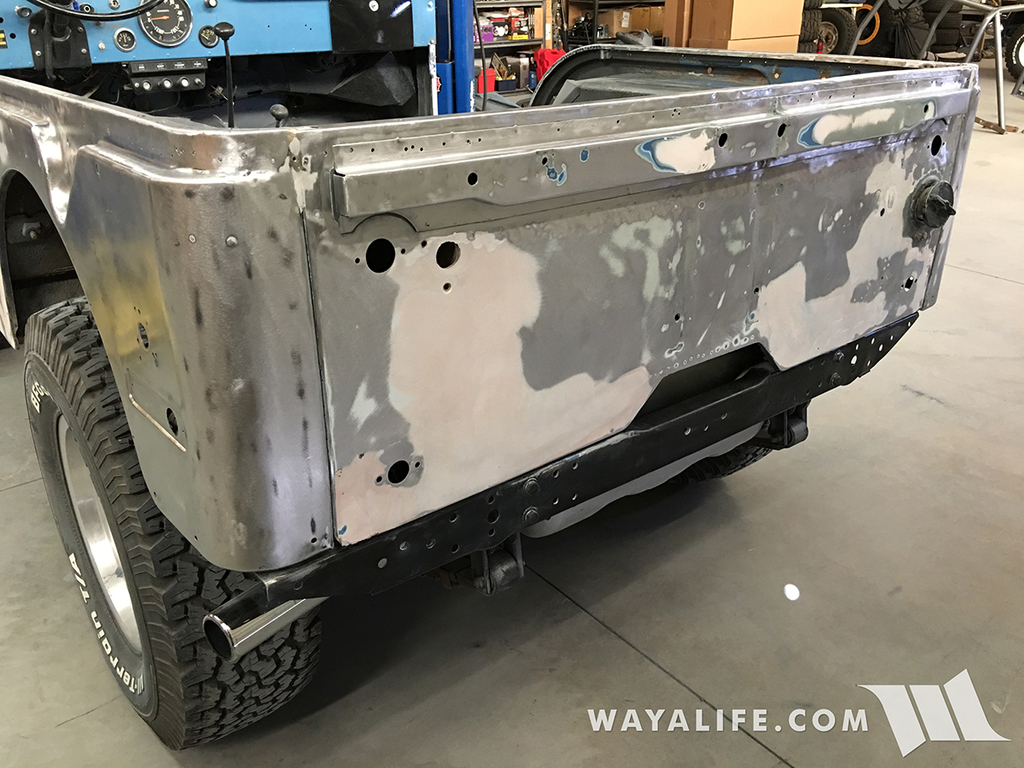
Oddly enough, it looks as if there was some kind of damage to the top of the cowl too.
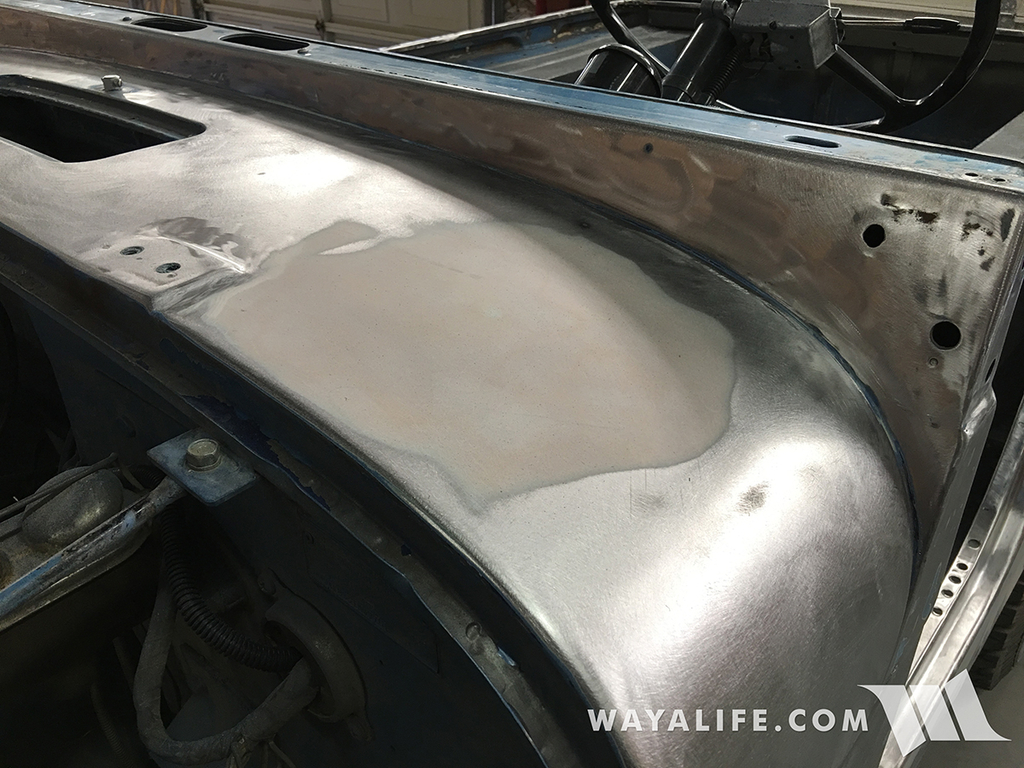
Okay, it's time to get these stupid holes filled.
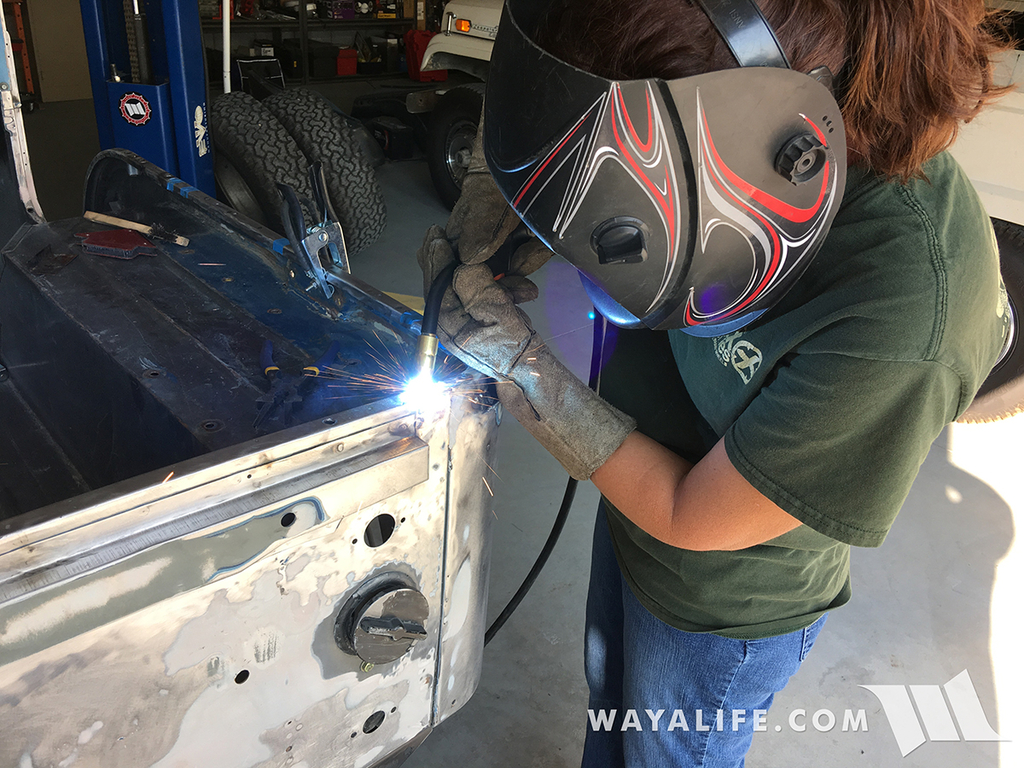
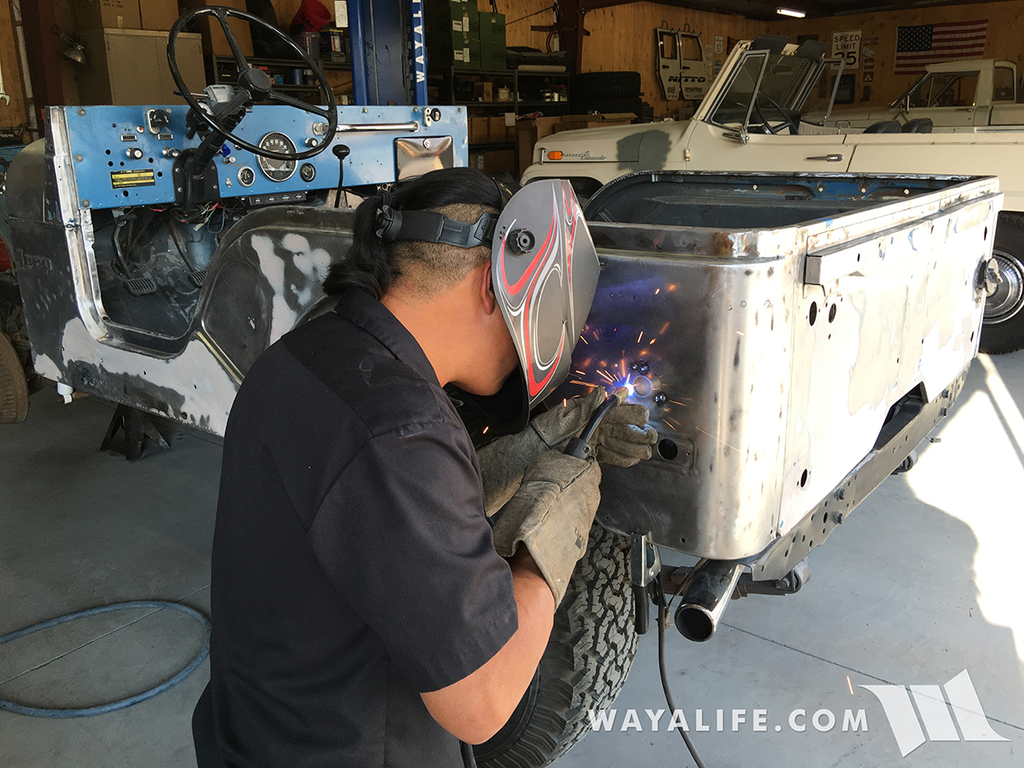
Some of the holes we still needed for the soft top rails and so we temporarily marked them off with some blue tape.
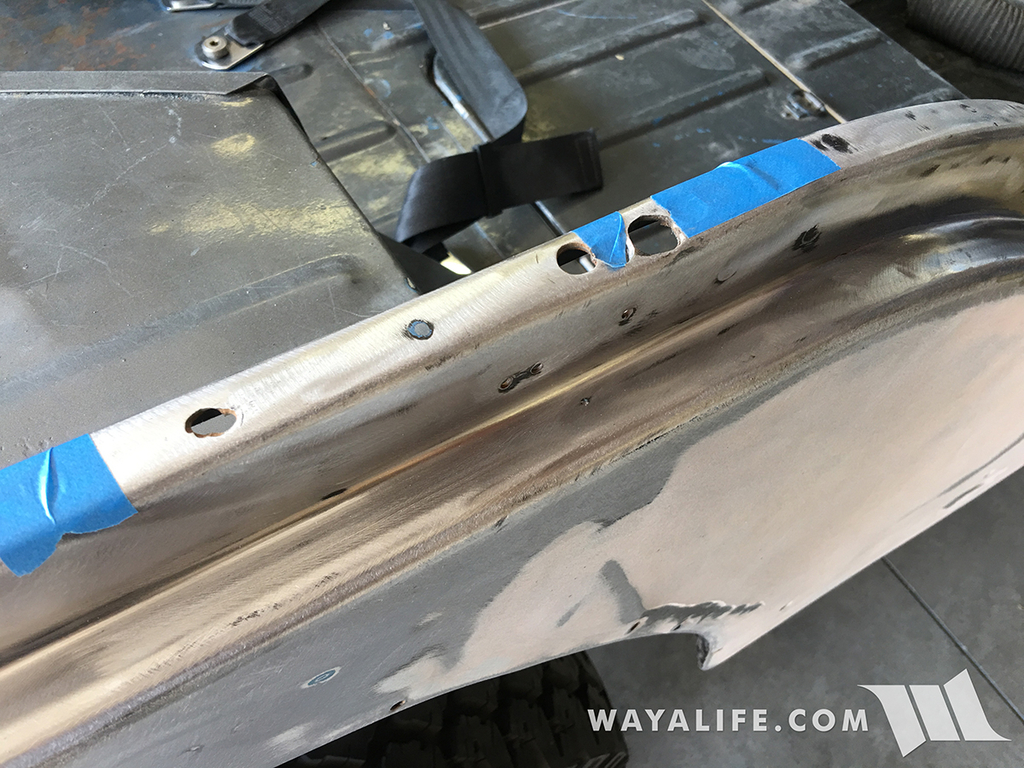
And, here's a shot of what they look like filled in.
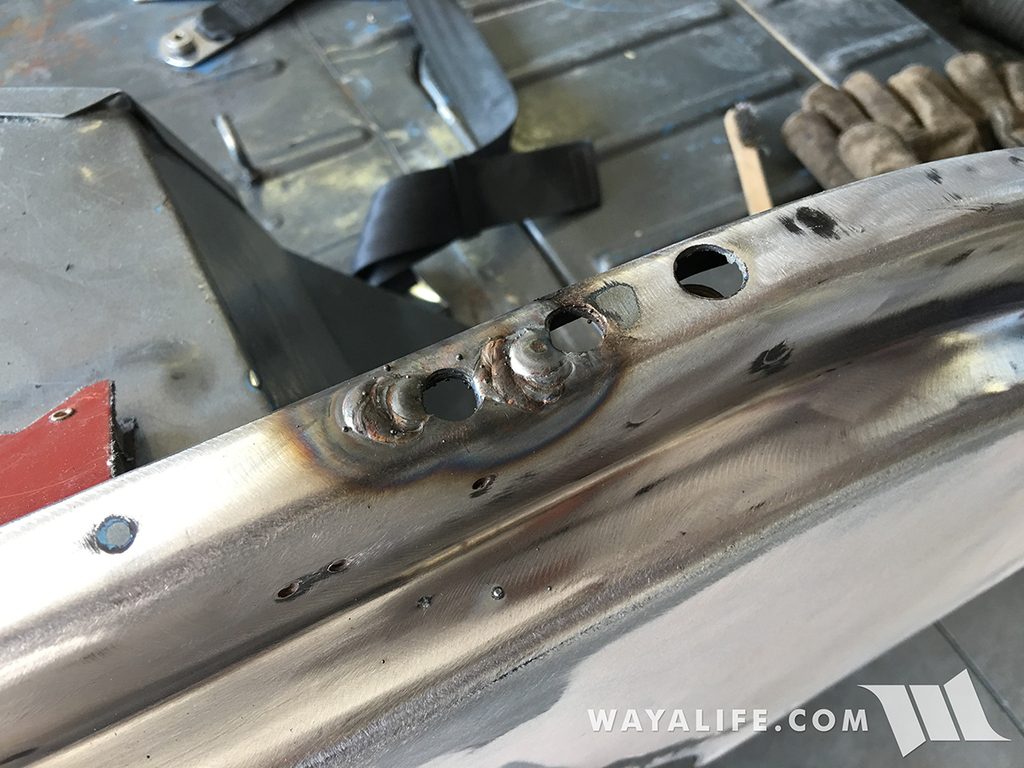
Just need to clean them up a bit.
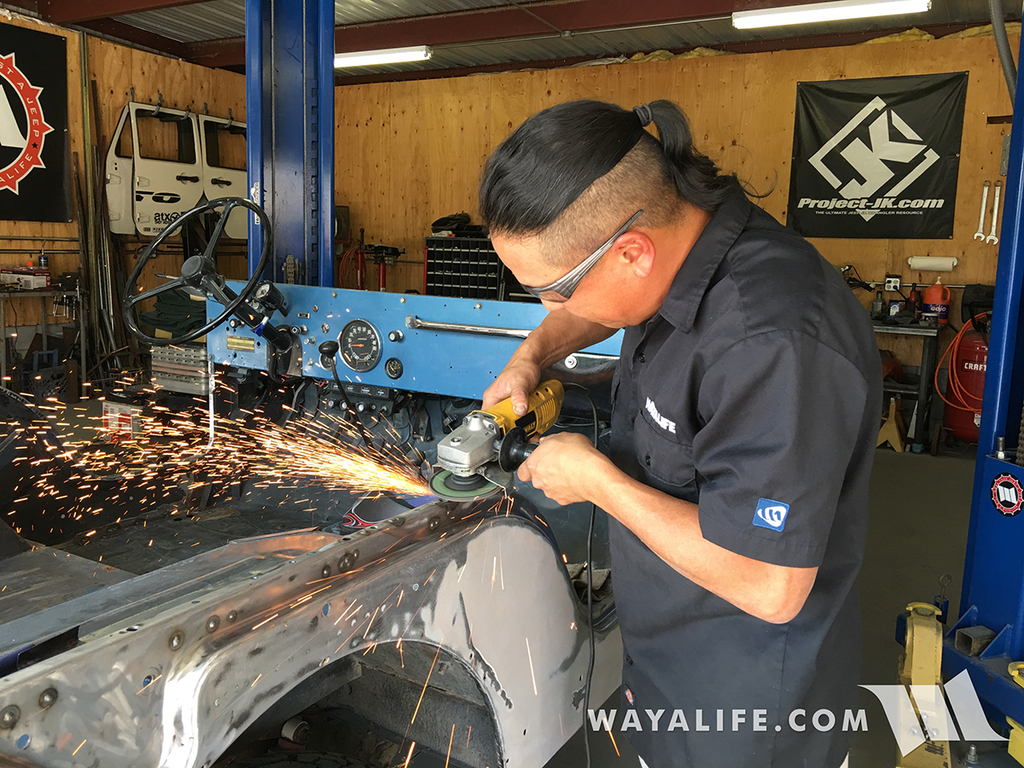
What it looks like now.
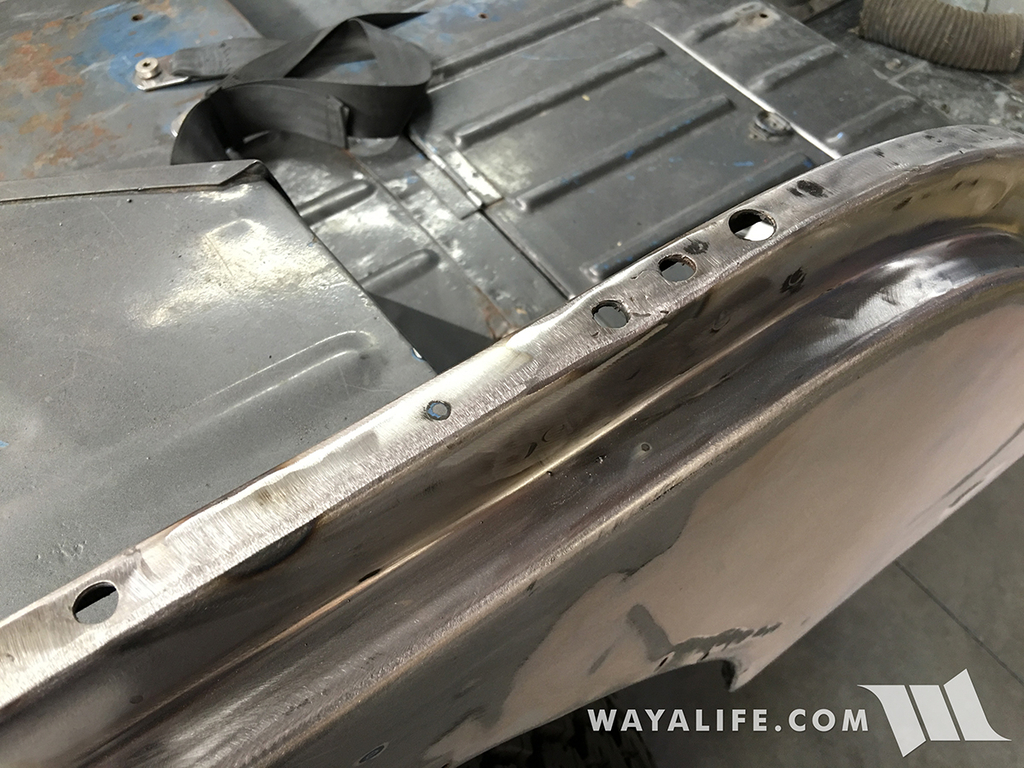
Some of the little holes along the side filled in.
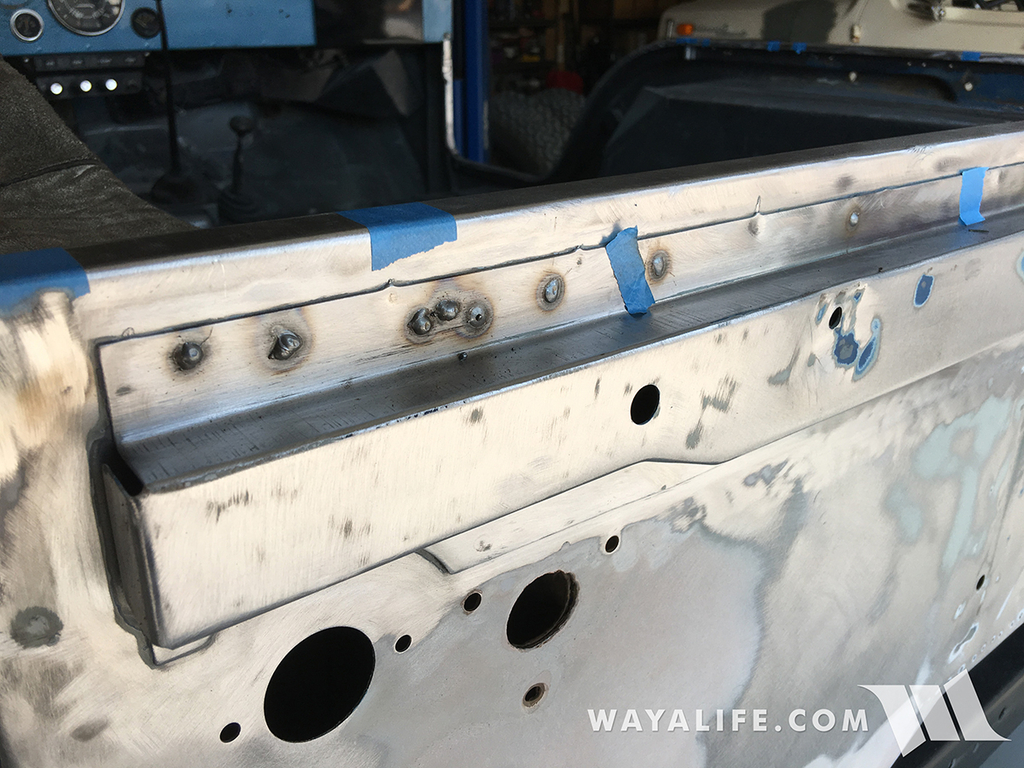
And what they look like after being sanded down.
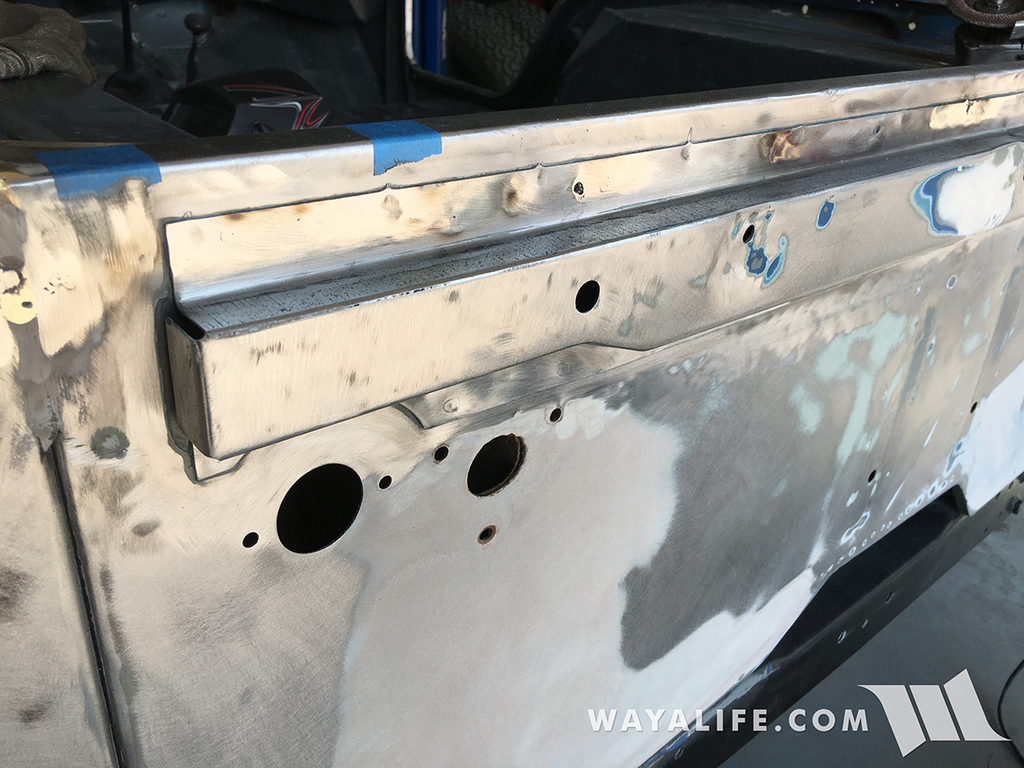
Another before shot.
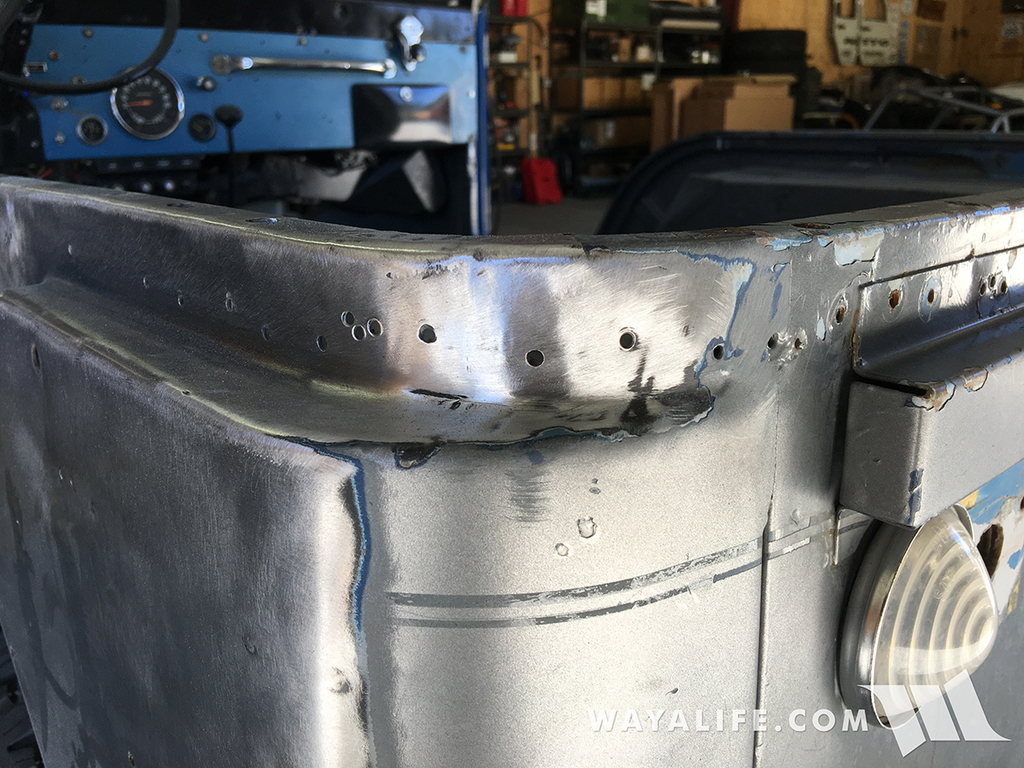
And after.
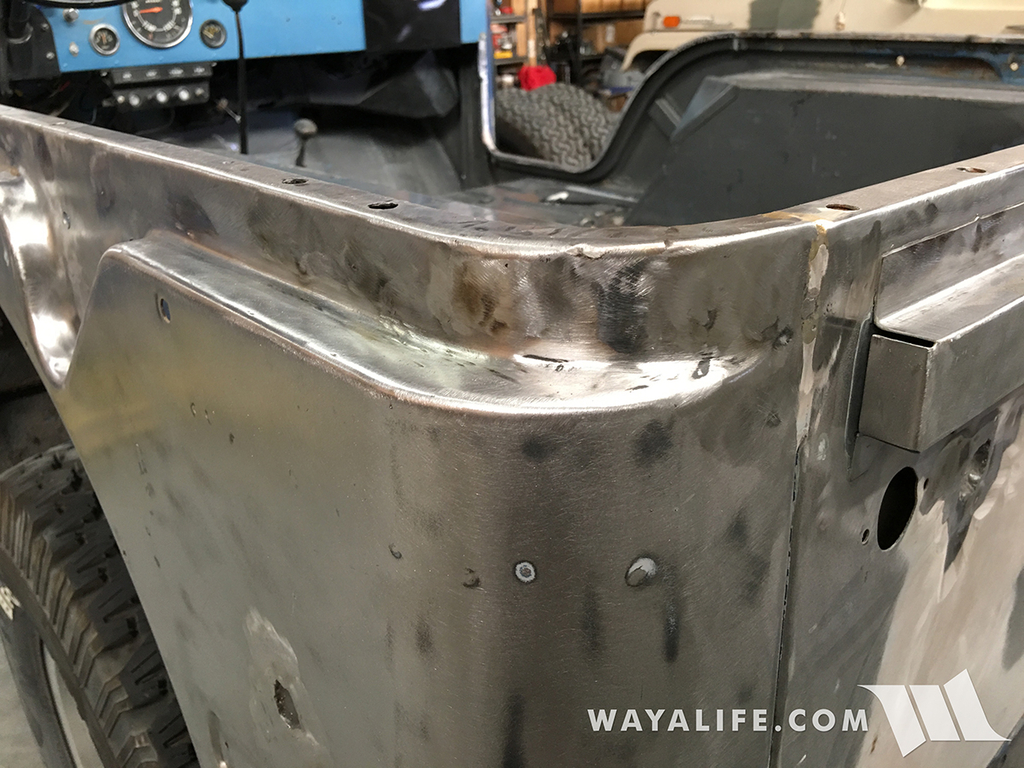
Still got a ton of work to do but, that's about where we've been able to things so far.
Over the last couple of weeks, Cindy and I have started the restoration of Jane and have done so by stripping her down and sanding the paint off of her body. After doing some welding and body work and replacing un-salvageable part with new ones made by Omix-Ada, we're hoping to get her painted back to the stunning Jetset Blue Metallic that she once was. Of course, along the way, we've been documenting our progress with video and photos and in this post, you'll get to see some of the calamity of Jane.
First off, let's take a moment to point out some of the more obvious calamities of Jane that we could see right off the bat.
It's a little hard to tell in photographs but the rear end of this CJ5 had either been hit or was backed into something hard enough to cause a fair amount of body damage. The dimples you see in the support bar was clearly caused by the spare tire getting smashed into it.
You can clearly see there was quite a bit of bondo applied to the passenger side rear quarter panel in an effort to help reshape it.
On the passenger side of this CJ5 close to where the embossed Jeep logo is, there was a large 1" hole that had been drilled into the tub. My best guess is that this was for a radio antenna but it's hard to say for sure. From the looks of the body, this point had been hit by something or the Jeep had leaned into a tree or rock as there is some buckling here.
There are other smaller holes that were drilled into the body so that carriage bolts could be installed through them and in what I think was an effort to hold the body together. You can see this bolt to the right of the embossed Jeep logo on the driver side.
Both the passenger and driver side fenders were a total mess. At one point and time, the previous owner had crudely cut large holes in the fenders in order to install headers and make them fit.
In order to help give the fenders additional support after having large sections removed from them, the previous owner decided to weld them to the frame using thick pieces of steel. Unfortunately, what the guy didn't realize is that the body of the CJ5 is separated from the frame with body mounts that allow for movement between the two. Needless to say, it didn't take long before these brackets broke and more brackets were added to help hold things together.
Surprisingly, at a glance, Jane's floor pans looks like they were in really good condition and the only real problem I initially saw was a tear in on the passenger side.
Underneath, there were clear signs that some kind of homemade rocker guards were once installed and welded directly to the tub.
A bigger problem I noticed right away was how many of the body mounts were loose, torn out, rotted out or missing altogether.
Here's an improvised grill support that was welded in place.
Now, I'm far from being a good welder but looking at the full cage that was added onto the factory roll bar, I was less than impressed with what I saw. Also, the mounting points on the floor pan was far from being desirable.
Stripping Jane Down to the Metal
To help identify problems we couldn't see at a glance and to being the restoration of Jane, one of the first things we did was remove the roll bar that was installed on her.
Right away, we could see this was a smart move as it looked as if a mouse had made his home in between the mounting plate and fender.
What we also discovered after moving the cage is that the spot welds securing the driver side floor pan to the rocker panel had separated and most likely from the forward half of the roll cage pushing down on it. There were also additional cracks in the floor pan that were being hidden by the driver seat. It ain't the prettiest thing but I was able to repair the cracks and stitch the floor pan and rocker panel back together again.
Here's a shot of Cindy starting the process of stripping the layers and layers of paint covering Jane and starting with the embossed Jeep logos.
As mentioned before, the previous owners got drill happy with Jane and made swiss cheese out of this CJ5's body. Some of the holes were quite large but we were determined to fill them in with metal.
Here's a shot of the passenger side hole after filling it in and sanding it down. A skim coat will be applied to the area to help fill in the gaps and smooth things out before going to paint.
Prepping the cracks on the passenger side floor pan.
And here it is after being stitched back up.
Continuing to dig through the layers of paint and strip Jane back down to metal.
It's slow going but we're making progress.
On the passenger side, we were starting to find a lot of bondo... A LOT of it!
As concerning as it was to see so much bondo, a quick check on the inside of the tub revealed there wasn't any damage, holes, rust or otherwise being covered up. In fact, the metal seemed to be smooth and in good condition.
Sanding further down in a small area to see what was going on, we found that the bondo was just being used as a skim coat to smooth over spot welds and so we left the rest alone.
Driver side embossed Jeep logo all cleaned up and the hole next to it filled in.
Did I mention how many holes were drilled into Jane and all over the place?
Okay, time to get the windshield front fenders and hood removed.
Now we have better access to get rid of the stupid homemade fender brackets.
Lame brackets cut off and frame cleaned up.
A couple of shots of Jane all stripped down.
With all the paint removed, you can really see all the patches of bondo well now. Or, should I say, places on the body that needed some help.
Oddly enough, it looks as if there was some kind of damage to the top of the cowl too.
Okay, it's time to get these stupid holes filled.
Some of the holes we still needed for the soft top rails and so we temporarily marked them off with some blue tape.
And, here's a shot of what they look like filled in.
Just need to clean them up a bit.
What it looks like now.
Some of the little holes along the side filled in.
And what they look like after being sanded down.
Another before shot.
And after.
Still got a ton of work to do but, that's about where we've been able to things so far.

