If you've just installed a new set of headlights or, maybe even a taller suspension lift, there's a good chance that you'll need to make an adjustment to your headlight beams. Certainly, you don't want to be blinding on-coming traffic and having them positioned properly will help to ensure that the road ahead is illuminated properly. Fortunately, adjusting your headlights is a very simple task, takes just a few minutes and, this TECH TIP will show you how to do it.
What you will need
• Torx T-15 Bit
• 25′ Tape Measure
• Blue Masking Tape
What you will need to do
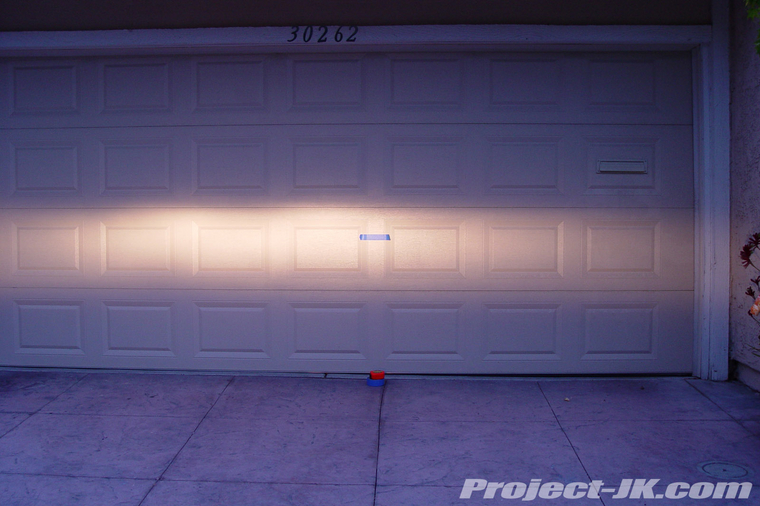
1. Park your Jeep 25′ back from a garage door or wall. Affix a strip of blue masking tape 3′ up from the ground. If you’ve just lifted your Jeep, you will see that your headlights are pointing above the tape as shown in this pic.
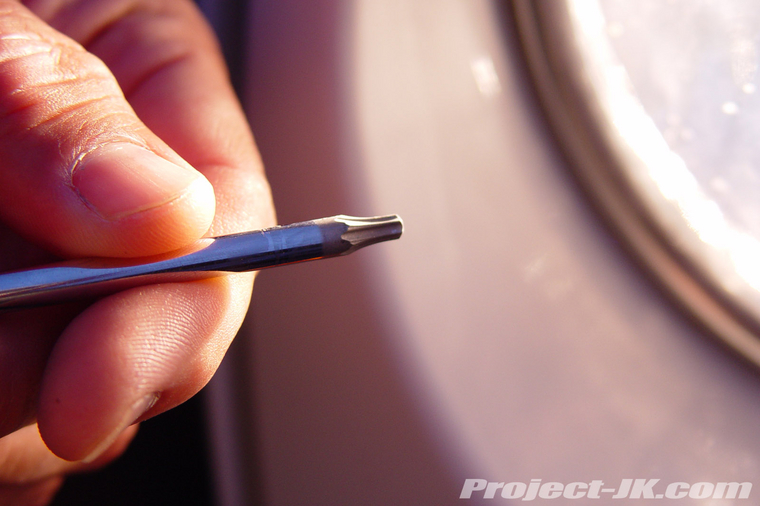
2. To adjust your headlights, you will need a Torx T-15 driver as shown in this pic. It is important that your driver is a stand alone tool and not an interchangeable universal driver that allows you attach different bits to it. Drivers of this nature will be to thick in diameter and will prevent you from accessing the adjustment screws.
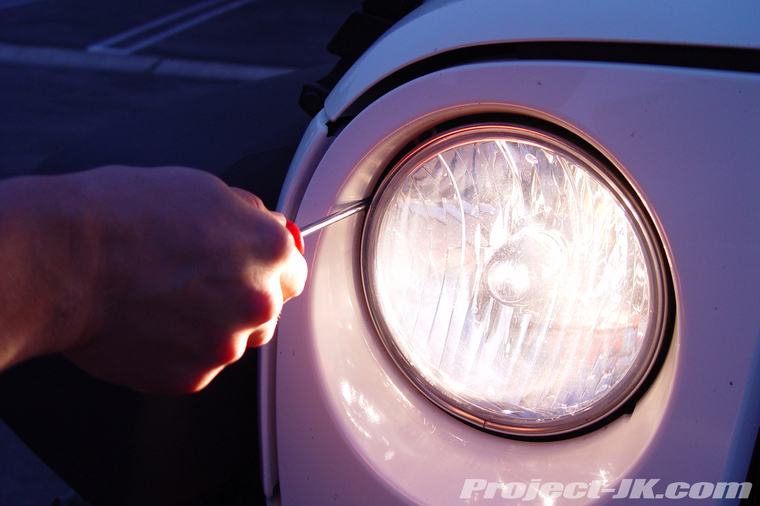
3. Insert your Torx T-15 bit into the adjusting screw slot which is located on the outside of your Jeep JK Wrangler’s headlight. On the passenger side, this will be located at about the 10 o’clock position and on the driver side, at the 2 o’clock position as shown in this pic.
4. Using your Torx T-15 driver, turn the adjustment screw counter-clockwise until your headlight is pointing just below the blue tape on the garage or wall you attached it to.
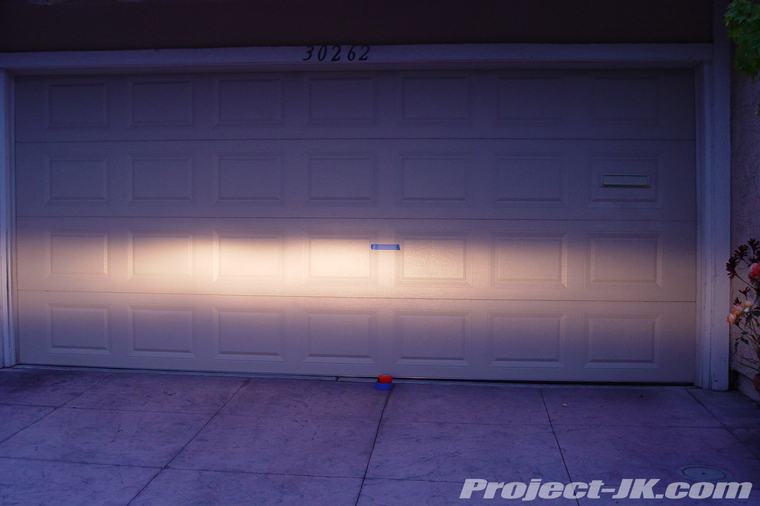
And that’s all there is to it, you’re done. You should now have headlights with beams that point where they should be and not into the eyes of on-coming traffic.
PLEASE NOTE: This write-up is based solely on what has worked for me. If you disagree with the method I have described here, please don't use it.
What you will need
• Torx T-15 Bit
• 25′ Tape Measure
• Blue Masking Tape
What you will need to do
1. Park your Jeep 25′ back from a garage door or wall. Affix a strip of blue masking tape 3′ up from the ground. If you’ve just lifted your Jeep, you will see that your headlights are pointing above the tape as shown in this pic.
2. To adjust your headlights, you will need a Torx T-15 driver as shown in this pic. It is important that your driver is a stand alone tool and not an interchangeable universal driver that allows you attach different bits to it. Drivers of this nature will be to thick in diameter and will prevent you from accessing the adjustment screws.
3. Insert your Torx T-15 bit into the adjusting screw slot which is located on the outside of your Jeep JK Wrangler’s headlight. On the passenger side, this will be located at about the 10 o’clock position and on the driver side, at the 2 o’clock position as shown in this pic.
4. Using your Torx T-15 driver, turn the adjustment screw counter-clockwise until your headlight is pointing just below the blue tape on the garage or wall you attached it to.
And that’s all there is to it, you’re done. You should now have headlights with beams that point where they should be and not into the eyes of on-coming traffic.
PLEASE NOTE: This write-up is based solely on what has worked for me. If you disagree with the method I have described here, please don't use it.

