JohnnyD
New member
What's up Wayalifers!! Been here for a while and really enjoy the forum. The experience here has been very valuable to me and I appreciate it.
I thought I would share my newby experience building up my JKR with others, I have found the build threads very helpful and hope I can contribute.
So the name...don't laugh, being from the NorthEast, winter was the first season I had with my Jeep. My daughter and I were out trouncing in the snow and it just came to us.
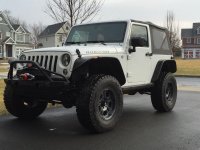
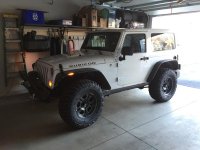
2014 JKR Bright White
At the dealer!!!
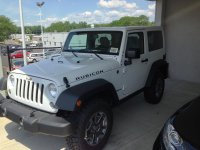
First things first: Need to be able to save my ass in a jam, I am usually by myself or with kids when wheeling so...
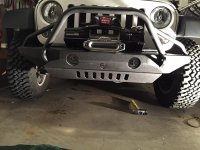
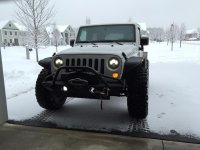
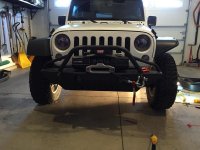
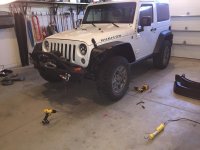
Front Bumper/Skid and winch: JCR Defender and Warn Zeon 10s
Notes: Bumper/Skid - Do not get the powercoat, IMO a waste of money. Do the work and coat yourself. Easier touch up later on.
Winch - flawless, phenominal, more expensive than most but worth every penny
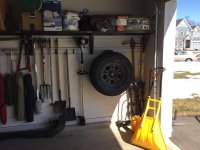
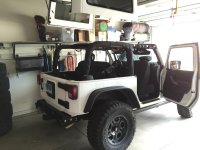
Hard top storage: Pic says it all...couple of pulleys, rope and duct taped pool noodles to keep the edges clean....total 20$ Don't really a great photo but you get the point here...
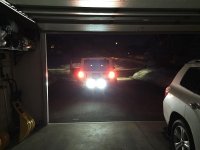
Then came the LED Headlights and fogs:
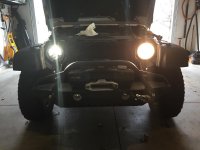
Notes - JW Speaker Evo 2 heads and 6145 fogs - provide great light compared to stock, much better visability. I really don't like that the adapters for flicker where not included, for the price should've been included. These have done very well for me, including no issues with freezing up, even out in a blizzard. The fogs controlled by the stock switch.
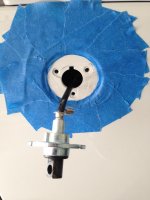
Antenna buried in rollbar
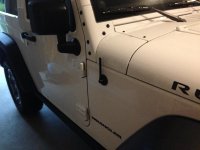
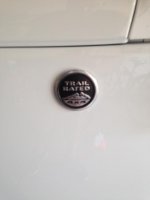
Notes: Just placed a trail rated badge over the hole. My first time out wheeling caught the antenna on a tree and it snapped back hard against windshield, not no more. I bought the mopar parts for the connectors and just extended the length of antenna wire with coax and buried up in the roller padding using a ground i made on the rollbar. It works just as well as in the stock position(in my area). You will need to cover the antenna with an insulator like electrical tape to prevent noise bleed from the metal rollbar.
Stock tweeter tweak!
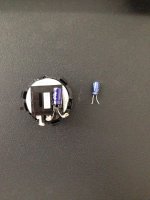
Notes: I have the Alpine system and could not stand how the front set sounded. I figured out that the stock tweets are crossed at some ungodly high frequency like 12K providing very little midgrange fill sounding very empty. I figured out the model of tweeter and saw the specs are quite capable of handling frequecies down to about 2K, since the crossover is a simple inline capacitor, changed the value of the cap and WHOA damn what a difference. the cap went from something like 3.3uf to 33uf...but you coals also potentially just remove the cap altogether and have the tweet roll off naturally but this has potential for blowing them if you play at high volumes. I have not felt the need to change anything else with the system. To note, I just have the bare bones radio no nav unit but it is a factory amped system. Just for reference...
I also put a little acousta stuff in the sound bar and the sub modules for a little more oomf as the acousta stuff will make the speaker think its in a bigger box. There was a noticeable change in the sound to me.
Then came the decisions on tires and wheels:
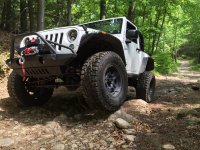
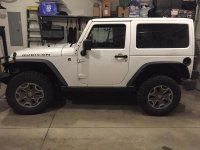
Notes: I wanted 35's but had concerns surrounding rubbing and gearing. The 35's fit just fine off the bat, BUT with substantial rubbing even on small road bumps. I initially went with GY MTR/k's, great looking tire. In my case this was a major mistake, could not get them to balance well enough for a DD. Had three separate shops try, twice road forced, still no good. One of them had 41oz of balance weight!!! So off they came and on went the Toyo Open Country RT, the Toyos are awesome on and off trail, I could not be happier.
Rims: went with ATX Artillery - nice looking and not black, more of a dark gunmetal color, these have held up very well the finish is great at shedding mud/dirt/brake dust.
Gears: Haven't gone here yet...the 4.10's hold their own, I did lose a little gumshin but nothing remotely close to necessitating a change, but it's still in the back of my head. (so is going 37's beause the flats opened the wells sooo much)
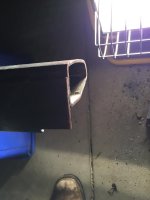
I also had to cut my stock rock rails...shorted about 1.5 inches or ....
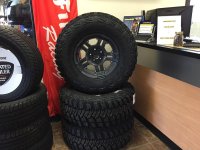
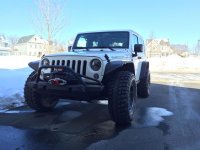
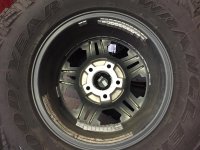
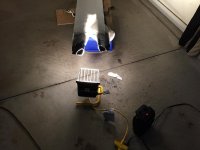
Difficult balancing.....
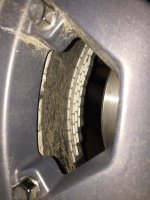
Rail cut...
Then flat fenders:
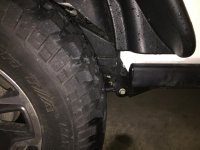
Notes: Just cut the stocks, you will save a ton and (subjectively) look better. I went with bushwacker flats. Good product, install was a little rough, lots of test fitting and some cutting of the wheel well plastic, all in all a well made product. They have taken several good hits on the trail and popped right back.
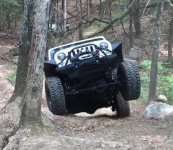
Adding these eliminated a good amount of rubbing BUT did not eliminate it fully! Be aware I did not add any bumpstop after going 35's as I knew I would be lifting.
I thought I would share my newby experience building up my JKR with others, I have found the build threads very helpful and hope I can contribute.
So the name...don't laugh, being from the NorthEast, winter was the first season I had with my Jeep. My daughter and I were out trouncing in the snow and it just came to us.
2014 JKR Bright White
At the dealer!!!

First things first: Need to be able to save my ass in a jam, I am usually by myself or with kids when wheeling so...
Front Bumper/Skid and winch: JCR Defender and Warn Zeon 10s
Notes: Bumper/Skid - Do not get the powercoat, IMO a waste of money. Do the work and coat yourself. Easier touch up later on.
Winch - flawless, phenominal, more expensive than most but worth every penny

Hard top storage: Pic says it all...couple of pulleys, rope and duct taped pool noodles to keep the edges clean....total 20$ Don't really a great photo but you get the point here...

Then came the LED Headlights and fogs:
Notes - JW Speaker Evo 2 heads and 6145 fogs - provide great light compared to stock, much better visability. I really don't like that the adapters for flicker where not included, for the price should've been included. These have done very well for me, including no issues with freezing up, even out in a blizzard. The fogs controlled by the stock switch.


Antenna buried in rollbar
Notes: Just placed a trail rated badge over the hole. My first time out wheeling caught the antenna on a tree and it snapped back hard against windshield, not no more. I bought the mopar parts for the connectors and just extended the length of antenna wire with coax and buried up in the roller padding using a ground i made on the rollbar. It works just as well as in the stock position(in my area). You will need to cover the antenna with an insulator like electrical tape to prevent noise bleed from the metal rollbar.


Stock tweeter tweak!
Notes: I have the Alpine system and could not stand how the front set sounded. I figured out that the stock tweets are crossed at some ungodly high frequency like 12K providing very little midgrange fill sounding very empty. I figured out the model of tweeter and saw the specs are quite capable of handling frequecies down to about 2K, since the crossover is a simple inline capacitor, changed the value of the cap and WHOA damn what a difference. the cap went from something like 3.3uf to 33uf...but you coals also potentially just remove the cap altogether and have the tweet roll off naturally but this has potential for blowing them if you play at high volumes. I have not felt the need to change anything else with the system. To note, I just have the bare bones radio no nav unit but it is a factory amped system. Just for reference...
I also put a little acousta stuff in the sound bar and the sub modules for a little more oomf as the acousta stuff will make the speaker think its in a bigger box. There was a noticeable change in the sound to me.

Then came the decisions on tires and wheels:
Notes: I wanted 35's but had concerns surrounding rubbing and gearing. The 35's fit just fine off the bat, BUT with substantial rubbing even on small road bumps. I initially went with GY MTR/k's, great looking tire. In my case this was a major mistake, could not get them to balance well enough for a DD. Had three separate shops try, twice road forced, still no good. One of them had 41oz of balance weight!!! So off they came and on went the Toyo Open Country RT, the Toyos are awesome on and off trail, I could not be happier.
Rims: went with ATX Artillery - nice looking and not black, more of a dark gunmetal color, these have held up very well the finish is great at shedding mud/dirt/brake dust.
Gears: Haven't gone here yet...the 4.10's hold their own, I did lose a little gumshin but nothing remotely close to necessitating a change, but it's still in the back of my head. (so is going 37's beause the flats opened the wells sooo much)
I also had to cut my stock rock rails...shorted about 1.5 inches or ....


Difficult balancing.....


Rail cut...


Then flat fenders:
Notes: Just cut the stocks, you will save a ton and (subjectively) look better. I went with bushwacker flats. Good product, install was a little rough, lots of test fitting and some cutting of the wheel well plastic, all in all a well made product. They have taken several good hits on the trail and popped right back.
Adding these eliminated a good amount of rubbing BUT did not eliminate it fully! Be aware I did not add any bumpstop after going 35's as I knew I would be lifting.


