JK's JK
Banned
Had my gears changed out a good 3 months ago now and when I broke in my 5.13 gears, I decided to use my rear locker for the first time. When I engaged my rear locker the dash board light would not go off. The locker would work but the light on the dash board would not go out. I took it over to the Dodge dealership that I live by and they narrowed it down the the locker switch in my rear differential. Bought the rear locker switch for $120. This will be a write up on how to remove the rear axle shafts, rear carrier, rear locker switch and replace the fluid.
(I just want everyone to know I am not a mechanic and if there are major issues with your Jeep please seek a professional mechanics help. I am only writing up what I have experienced)
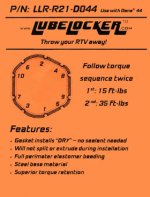
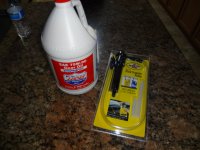
What you will need
__________________________________________________ ___________________
The fun begins!!!
__________________________________________________ ___________________
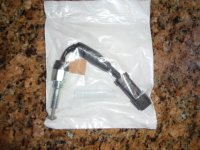
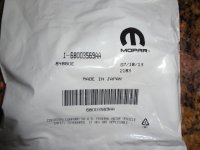
The sensor you will need to buy is
The first step that you will need to do is place the rear end of the Jeep on jack stands and chock blocks on the front tires.
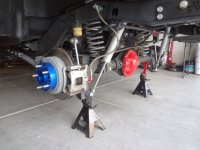
Next would be to remove the axle shafts out of the housing before you do that make sure to drain all the fluid out of the diff into a oil tray. I'm not going to explain the whole process of removing the axle shafts as Eddie has already done this for me. He has all the torque setting for the calipers and brake assemble. Here is that link.
http://wayalife.com/showthread.php?5162-Jeep-JK-Wrangler-Rear-Axle-Shaft-Removal-amp-Installation-Write-Up
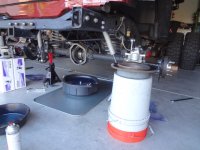
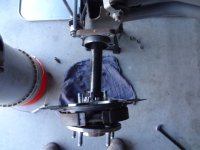
Once you have the axle shafts out of the carrier and drained the differential then you will be removing the differential cover.
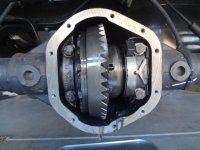
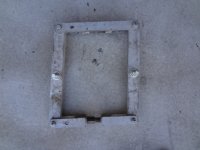
I tried to use a spreader but at this time I was alone and trying to man handle a spreader and trying to take out the carrier was impossible. Here is a picture of the spreader that I tempted to use but ended up not using it.
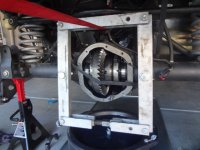
This is where the fun starts to take place. You have to remove the four bolts that are holding the carrier. The passenger side has a bracket that's made out of aluminum and I experienced it bending very easy. I would suggest purchasing this bracket as the dealership said to purchase one (I did not because I was unsure of what bracket they where talking about and this was the first time I've done this). Once you have the caps off and the bracket off then you have to remove the carrier. The best way that I found doing this is the top of the ring gear on the back side is bolts. Take a closed end wrench to the most top bolt and pull towards you. Make sure you have another set up hands to help you handle the carrier as its very heavy. DO NOT LOOSE THOSE SHIMS AND CAPS OFF BOTH SIDES AS THEY HAVE TO GO INTO THE CARRIER AS THEY CAME OUT BACK IN
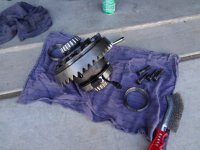
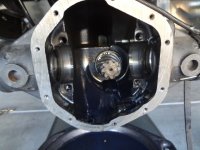
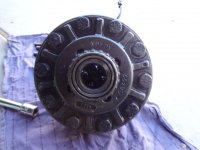
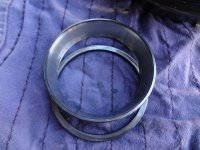
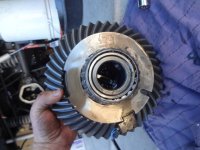
Once the carrier is completely out of the housing then you can remove the locker switch out of the differential.
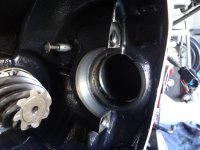
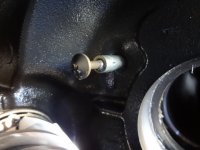
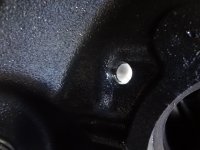
As you can see the locker switch that I had in my rear differential was completely bent and could not even move freely as it should have.
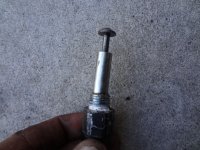
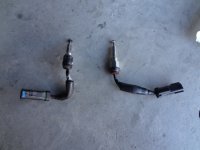
Place the new switch back into the carrier. From a video that I saw from another posting, you have to extend the switch out when placing the locker back into the carrier.
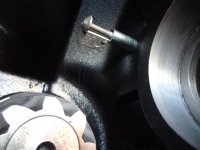
This step will for sure take two people to man handle the carrier back into the housing. What I did was have my buddy put the carrier into the housing with the barring caps and I slide the shims in when he was holding the carrier. This took a few minutes because its a very tight fit.
When you are installing the carrier, make sure that your watching the sliver sleeve and were it is. This is how my original switch got bent in the first place. There is a opening about 2" and the switch has to go in between that opening. Both people man handling the carrier and placing the shims in also have to watch where that sliver ring is. When the carrier is completely in you can rock that sliver ring back and forth, which it will stop between 2" saying the switch is in between that area.
Once we got it most to all the way in the shims still needed to go in more. I lightly tapped on the shims with a mallet (you can bend the shims, so take caution with those shims).
When I got the carrier completely in the torque settings on the four bolts are 80 foot pounds. Make sure you go between all the bolts multiple times back and forth until you build up to 80 ft.pds as you want those brackets perfectly even across the carrier.
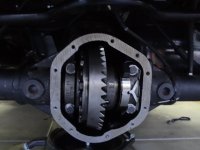
When placing the axle shafts back into the carrier, refer back to the link at the top for axle shaft removal.
(I just want everyone to know I am not a mechanic and if there are major issues with your Jeep please seek a professional mechanics help. I am only writing up what I have experienced)
What you will need
__________________________________________________ ___________________
- Socks and wrenches
- Pry Bar
- Torque Wrench ft.pds
- Floor Jack
- jack stands
- Brake Cleaner
- rags
The fun begins!!!
__________________________________________________ ___________________
The sensor you will need to buy is


The first step that you will need to do is place the rear end of the Jeep on jack stands and chock blocks on the front tires.

Next would be to remove the axle shafts out of the housing before you do that make sure to drain all the fluid out of the diff into a oil tray. I'm not going to explain the whole process of removing the axle shafts as Eddie has already done this for me. He has all the torque setting for the calipers and brake assemble. Here is that link.
http://wayalife.com/showthread.php?5162-Jeep-JK-Wrangler-Rear-Axle-Shaft-Removal-amp-Installation-Write-Up


Once you have the axle shafts out of the carrier and drained the differential then you will be removing the differential cover.

I tried to use a spreader but at this time I was alone and trying to man handle a spreader and trying to take out the carrier was impossible. Here is a picture of the spreader that I tempted to use but ended up not using it.


This is where the fun starts to take place. You have to remove the four bolts that are holding the carrier. The passenger side has a bracket that's made out of aluminum and I experienced it bending very easy. I would suggest purchasing this bracket as the dealership said to purchase one (I did not because I was unsure of what bracket they where talking about and this was the first time I've done this). Once you have the caps off and the bracket off then you have to remove the carrier. The best way that I found doing this is the top of the ring gear on the back side is bolts. Take a closed end wrench to the most top bolt and pull towards you. Make sure you have another set up hands to help you handle the carrier as its very heavy. DO NOT LOOSE THOSE SHIMS AND CAPS OFF BOTH SIDES AS THEY HAVE TO GO INTO THE CARRIER AS THEY CAME OUT BACK IN


Once the carrier is completely out of the housing then you can remove the locker switch out of the differential.


As you can see the locker switch that I had in my rear differential was completely bent and could not even move freely as it should have.


Place the new switch back into the carrier. From a video that I saw from another posting, you have to extend the switch out when placing the locker back into the carrier.

This step will for sure take two people to man handle the carrier back into the housing. What I did was have my buddy put the carrier into the housing with the barring caps and I slide the shims in when he was holding the carrier. This took a few minutes because its a very tight fit.
When you are installing the carrier, make sure that your watching the sliver sleeve and were it is. This is how my original switch got bent in the first place. There is a opening about 2" and the switch has to go in between that opening. Both people man handling the carrier and placing the shims in also have to watch where that sliver ring is. When the carrier is completely in you can rock that sliver ring back and forth, which it will stop between 2" saying the switch is in between that area.
Once we got it most to all the way in the shims still needed to go in more. I lightly tapped on the shims with a mallet (you can bend the shims, so take caution with those shims).
When I got the carrier completely in the torque settings on the four bolts are 80 foot pounds. Make sure you go between all the bolts multiple times back and forth until you build up to 80 ft.pds as you want those brackets perfectly even across the carrier.

When placing the axle shafts back into the carrier, refer back to the link at the top for axle shaft removal.
Last edited:

