Rachet's Wretched Rig

Ratchet

New member
Rachet's Rig

Let me preface this by stating that I have a pretty limited budget. Nearly all the work will be done by myself, as I find the time, money, and learn how to do so. This will be an exercise in "how to make it work, with the little you have."

My intent is to build a support vehicle for my other Jeeping buddies. Repair equipment, supplies, tools, things of that nature. To solve the potential problem of "Why didn't we bring a .... with us?"

After owning my Jeep for all of about...5 minutes, it became apparent that things were needed. So...I thought I'd create a build/reconstruction log.

Here's how she started:
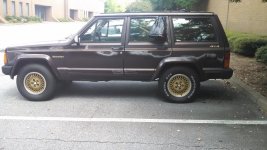
07.jpg

Busted window, dry rotted tires, dying alternator, dented in driver fender....etc, etc, etc.

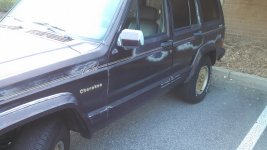
So, I hopped over to the local Pull-A-Part, and grabbed a new window. And banged on the fender until it straightened out somewhat. Which got me here:
door fixed.jpg


But, then I found that the door hinge welds were cracking. Not surprised. Everytime the door opens, it swings too wide, and mashes the fender back in.

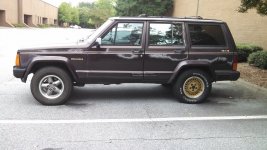
Also picked up a set of Grizzly wheels with tires, to replace the current 80's throwbacks. Even included a full size spare. Which introduced me to the newest problem.

Spent an hour, trying to break the lug nuts loose. Managed to get three of them off. Out of the whole set. So, I borrowed an impact wrench, and took another crack at it.

Two hours, a can of PB blaster, and a lot of cursing later....I was able to remove one wheel. The driver rear, the lugs will come off, but the wheel is fused to the axle. No amount of kicking, rocking the vehicle back and forth, etc was able to dislodge it. The passenger side, I was unable to remove any of the lugs. So, this is going to require a lot more force. And more cursing. And there is 5 lugs on the front wheel, don't worry. One just isn't chrome.
new wheel.jpg

Next step, is to get the vehicle somewhere that I can work on it with more liberty.
 
Last edited:
I may be competing for "slowest build ever"....

Purchased a breaker bar, and had success with three additional lugs.

In the process, three others became stripped beyond function. Too bad the door welds weren't as strong as the binding of these lugs...

So, I'm looking at either taking it to a tire shop and hoping they have have the ability to do what I cannot.

Or buy some stripped lug removing sockets....

Or option 3, which...currently hasn't manifested in my ideas yet.

Primary problem being: the alternator gave out, battery is dead. So I either need to swap that out in the parking lot where she sits. Or have her towed somewhere else.

But I'd much rather get it to a shop where I can rebuild from the ground up, rather than fix bits and pieces.

This would go so much better, if I still owned a house with a garage. Apartments are great for a lot of things, unless they don't like you working on vehicles. :(
 
holy hell those lugs are on there good! i would have thought an impact would have helped a little but i guess not. :thinking:
 
holy hell those lugs are on there good! i would have thought an impact would have helped a little but i guess not. :thinking:

Yeah, we haven't quite figured out exactly how to get these things off yet, but I might have just come up with an idea. If it works, we'll let you know. Need to get this thing on the trail so that it can carry my spare parts in case I end up breaking my D30!
 
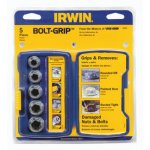
I remember reading on the formum where a member had an issue with a locking lugnut and the used the Irwin Bolt Extractor set. Here is a pic of the set and it can be picked up at your local Lowe's home improvement store.

Bolt.jpg

R/
Will
 
So, the weather is just too nice, to not work on the Jeep.

Not a huge update, as will be par the course for this build, but did get a few things addressed.

Firstly, swung by Lowes and picked up a sledge hammer. And the bolt grip set. But, I think I need the expansion set, as the one I found only went up to 1/2 inch. Couldn't get it onto my rounded off 18mm lug. Still, the set will come in handy later. I do appreciate the advice, and welcome any suggestions as this goes along!

After another round of breaker bar attempts, I still wasn't able to get any lugs loose - so the passenger side remains cursed. :gaah: But the sledge did get the stuck wheel off, after a few dozen thumps.

And voila, I now have the driver side switched over to the "new" wheels.

twins_zpsef28e461.jpg


Not too bad, in my humble opinion.

And as to the reason why I needed to address the wheels/tires before being able to do much else. Here's the tire of the wheel I just removed:

03_zps5e70808f.jpg


Dry rot is not your friend, my friends. I'm marveling at how the previous owner was driving around on these.... :grayno:

On the note of thumping things, I got tired of having to use a broom handle to hold my lift gate up. A trip to Pull-A-Part, and $12 later, I have a pair from a Ford Windstar. Old vs new:

22_zpsc9229791.jpg


This does require either cutting the trim, or removing it altogether. Since my trim was fairly rubbish, I just removed it. Works like a charm now, and oh, the clearance. I know other people have done this, so it's not revolutionary. I'm just really pleased with the improvement.

25_zps30b9ae06.jpg


Slowly, but surely....

Hope everyone else is having an awesome weekend, too. :beer:
 
Last edited:
Relocated the Jeep to a much more conducive working environment. :thumb:

Now to finally tear into this thing.

There are a number of things that I want to address, in the attempt of making this a much more reliable support vehicle. I've already got a few things in the works to help address the potential overheating problem. Slightly more pressing, is the fact that I have a battery draw somewhere. Unless it's normal for a battery to drain by 20% (measured via charger) from starting it twice and driving about 50 feet. :hmm:

There's a few wires that have melted insulation....notably both the pos and neg leads from the battery, as well as a few others. So, the electrical will be tended to as I'm putting it all back together.

On that note, a number of needless items will be removed. Such as the A/C. For two reasons. Firstly, I have windows. Secondly, the A/C doesn't work. Cruise control. This isn't my daily driver, and I can't see me using cruise control on a trail. Etc... Plus, when you really look at the engine...it's a nightmare of hoses and whatnot. If anything goes wrong on the trail, I want the least amount of causes.

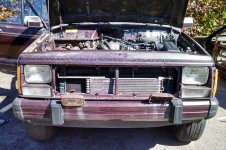
01.jpg

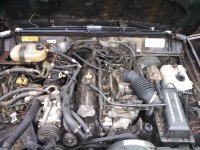
So, this is the beginning. The manual tells me there's an engine under there. We'll see.

No picture of it, but got the A/C condenser out, and a decent amount of the plumbing. Didn't have to worry about capturing the R12, there wasn't any. At all.

Did give it a bit of degrease and pressure washing, though.

24.jpg

Makes her look only 10 years old, again!

While that was drying, I thought I'd get around to switching out my remaining wheels.

And oh, then the fun began.

Did I mention I had trouble breaking some of the lugs loose? Tried a new impact wrench, rated at 450ft-lbs. This got two more loose, but still had one left. Seriously, you'd think 450ft-lbs would be plenty.

We consulted the beer. The beer told us to try a much, much larger breaker bar. Seemed like a good idea.

12.jpg

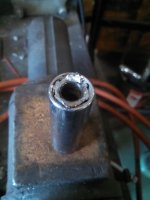
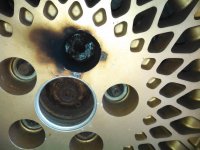
Wait, the good idea seems to have gone wrong. Ripped the lug nut right in half, leaving the cone section still attached. Now, I've sheered lugs before, I've stripped them, etc....first time to have a lug nut tear in half. This also meant that the socket no longer had anything to grab onto.

No problem, we'll just drill out a few cuts into the remaining part, and it should break loose. Hmm. No. Okay, let's take a chisel and a sledge hammer to it, and break it loose. Still no?

You wanna play games? Okay. Say hello to my little oxy-acetylene torch friend.

15.jpg

Goodbye lug, and most of the metal around it. Then take two guys with a sledgehammer, and pummel it. And that's how you do that. :rock:

Except....it didn't. Seriously. It didn't budge. I even drove it back over to where I had it parked, 40-50 feet away. No lugs attached. Not a wobble.

At this point, I decided to call it a day.


However, as I seem to have discovered some sort of secret, indestructible metal weld......maybe I should go into the tire carrier making business? ;)
 
More tinkering.

Cruise control now gone. Decided to get around and install a "new"/replacement evap canister and relocate it at the same time.

newcanister_zps571c3063.jpg


Don't mind the jury rigging to reconnect it to the intake. Didn't have the right hoses on hand, so this is a temporary work-around. Anyway. Changed where the pcv piping went to, to make both routes shorter. Got rid of 4+ feet of piping, and modernized it (slightly) to a 1995 unit. Need to fab up a bracket, but at least it proves concept.

This does free up more area on the passenger side. Still have the rest of the A/C to delete, as well as switch the coolant reservoir to a newer one. And simplify the heater hoses.

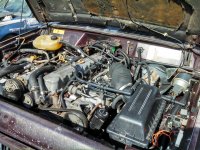
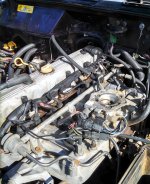
engineside_zpsfbac2253.jpg


Yeah, I know. Not super cool 33"s or a winch, or anything like that. But all that in time, once I get the foundation to where I want it to be.
 
Last edited:
Good news is, once you get that thing running reliably, some mud tires and you'll be good to go on most of the trails we did.

Sent from my SAMSUNG-SGH-I537 using WAYALIFE mobile app
 
Good news is, once you get that thing running reliably, some mud tires and you'll be good to go on most of the trails we did.

Sent from my SAMSUNG-SGH-I537 using WAYALIFE mobile app


:2thumbsup: Looking forward to that!
 
It's not often that things go super well for me, particularly when it comes to working on my vehicles.

But every so often...things come together pretty nicely.

In my previous post with photos, you can see that I'm chipping away at the a/c and heater conglomeration. Really, it's just a pile of nonsense.

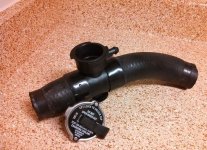
Ran back over to Pull-A-Part, and when I say that I found what I was looking for, just laying there...they really were. Came across the two hoses I wanted to remove the heater control valve, and simplify that mess....and also found the upper radiator hose from a Durango, so I can switch over to an open cooling system. Literally, just laying on their respective engines. Pretty nice to not need any tools whatsoever. :thumb:

Got too dark to install the upper radiator hose filler, but here's a picture of it. Really, I love salvage yards. $9 and 5 minutes gets you 4 feet of heater hoses, a filler, and cap. And honestly, it looks nearly new.

coolant hose.jpg

Already have the bracket and new coolant reservoir. That'll likely be this weekend, amongst a few other things. But I did get the new heater hoses installed, and here they are. Sorry for the crummy pic, flash kinda over saturated the image.

new hoses.jpg

Goodbye mess, hello simplicity. Or at least, several steps closer to it.
 
Last edited:
Things are shaping up.

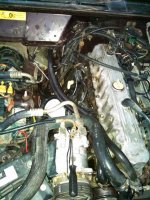
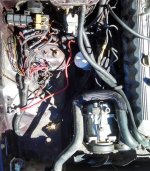
After you remove most of the A/C and pressure bottle...and some of the vacuum system...you end up with a functional mess.

before.jpg


First, I intended to use the bracket and overflow bottle from a newer Cherokee. Which means the bracket for the relays had to go. And the ignition coil/control module were in the way.

Moving the ignition coil/module was really simple, as there were a few long bolts running through the firewall. Two happened to be spaced almost exactly the same distance apart as the original mounting.

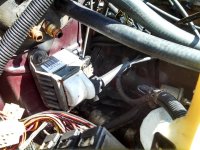
So two minutes later, and some aggravation with the wiring, and I got this:

08.jpg

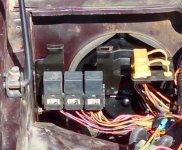
In the midst of that, I thought about moving the relays over to the firewall too. Disconnected the a/c clutch (or is it the 02 sensor heater? damn diagrams..) and starter motor relay, and left them basically where they were. This gave me the slack I needed for the other relays, and diagnostic ports. Had to modify the bracket a little, and wound up with this:

relays.jpg

Pretty happy with that. Still have more cleaning up to do with the rest of the wiring harness. And need to buy replacement pos/neg battery cables, as both are melted through and bare wire in different spots.

Not a whole lot of deleting/relocating left to do. Just a few minor things. Need to replace the rear CCV. Fix the vacuum hose to the EGR, as it was just taped together. Probably replace all the wiring to the starter, as most of that is rigged or damaged.

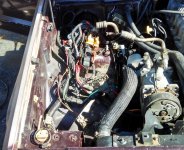
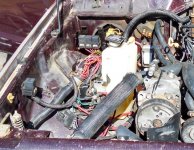
Anywhere, here's where we ended up today.:

passenger.jpg
 
Last edited:
Coming along nicely.

Sent from my SAMSUNG-SGH-I537 using WAYALIFE mobile app

Thank you, sir!

Need to take another look at how I'm routing the wiring. Had a thought this week on how I can improve on what I'm currently doing. Going to start checking for wiring issues this weekend, with a multimeter, too. Obviously need to address the frayed cables I've found, but I think I have a drain caused by something else, as well.

Don't want to start chasing ghosts, until I've fixed the known damage.

May have the trans cooler installed, should have the intake manifold cleaned up more....

Should have a few pictures coming from this weekend. :yup:
 
Last edited:
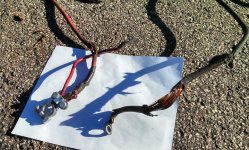
Right. I think I mentioned that I needed new battery cables. It was taking 30~ seconds for the engine to fire up, and in looking for causes, I found both cables to be in poor shape.

This is not what you want under the hood. Or really, anywhere in your vehicle.

06.jpg

At some point, I intend to upgrade the cables to a larger gauge. But funds are limited at the moment, so that'll come later.

As soon as I hooked up the new cables, I ran into another issue. Where I had the starter relay connected to the new bracket, I was shorting out and shooting sparks everywhere. Oops. And the battery I was trying to use to start, was mostly dead. Even so, it seemed to have a much better attempt at starting than previously. Stopped where I was, as I didn't want to make things worse, and started going back through my connections.

Also decided to change how I was routing things a little bit.

So, here's the new battery cables, and the beginning of the new wiring setup. If nothing else; it's a lot easier to check everything, with so much out of the way.

08.jpg

Wasn't able to charge up the battery to see whether I fixed the shorting problem, or to see how well it would start. Decided to call it quits for a bit. But not before trying the fitment on this really small trans cooler I picked up for $15. :brows:

17.jpg

On and on it goes, chaps. :beer:
 
They say that sometimes things must get worse, before they get better.

Day started out well, got a new battery, and I was right, she starts FAR better than previously. Still takes a few rotations, and it seems like you must hit the gas a little, but then she fires up, and maintains a rough, but solid idle.

Proving two things. One, I didn't make it worse. Two, I seem to have improved things. It's good to know, after disconnecting a LOT of wires and vacuum hoses, that you actually know how to put it back together.

Also found that one fuel injector wasn't working, due to the wires being chewed through. Quick splice, and that's back in business. Separated the engine wiring harness while I was at it, to have two harnesses: one for the fuel injectors, one for the idle air sensor, etc.

Then things went worse. I took out the idle air sensor, and cleaned it, and apparently I goofed it up a bit. Still starts the same...slow, but kicks over, but eventually the idle falls away until it dies. Disconnected the sensor, and it starts, and maintains a 2,000 rpm idle. So, clearly I did goof up something with the sensor. Not a big issue.

Also spent some time on that front vacuum hose junction, and ran new vacuum hoses to their various connections, to eliminate that mess.

1.jpg

In taking off the intake, found evidence of a lot of oil blow-by. Looking to fix that by switching the valve cover to a newer one, with internal baffles, and the larger exhaust valve on the rear.

But that's okay. Glad to have her running again, even if it's slightly grumpy at the moment. :thumb:
 
Top Bottom