iRonin
Member
Offroad Evolution Rear Corner Rockskins & Poison Spyder Tramp Stamp II
January, 2015
Hanging a 37" Mud Grappler, and before it a 35" Kelley, off the stock tire carrier for two years of wheeling had finally started taking its toll on the rear end, so it was time to move up some mods on the priority list.
While the stock tire carrier itself actually held up well (no cracks), it was actually my tailgate that began buckling outward and causing the entire assembly to wag a bit over bumps, so it was time to pull it.
My ultimate plan is to have a more secure carrier, and whether I go off the shelf with the ORE enclosed/stinger style or follow through on plans to make a lower profile basket style a-la EVO1, either way it would require reinforcing the corners for mount points, so I went ahead and ordered the corner skins, and the tramp stamp (for now) so I'd have something to slap my plate on.
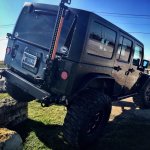
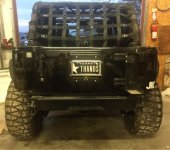
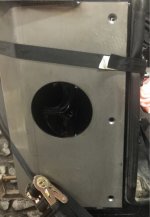
The Trampstamp is preeeetty straight forward so I didn't bother with install pics, but here you can see it in the "before" pic of the rear stripped down for the corners:

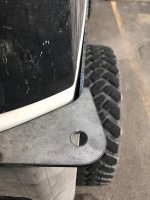
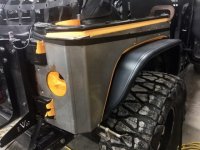
I started with the driver side. Full disclosure I had forgotten to bring painters tape, so lazy me was willing to give it a go raw-dog. It wasn't quite as tough as I imagined to get it squared up evenly, as you can see in this pic I was able to follow the body lines and suck it up close with a couple ratchet straps and 3 clamps:

Steps:
1) I started with the upper strap to "hang" the skin onto the corner, but didn't crank down on it yet.
2) Then I slung on the lower strap to pull the bottom half closer to the body.
3) Then I started cranking down on the straps a bit at a time until the skins were snug, while making fine adjustments to their body-line alignment.
4) As each area got close to perfect, I pinned it down with a clamp and used them to make fine adjustments.
One area to focus on is the gap leading towards the tailgate opening:

A buddy of mine reported trouble getting it to sit vertical and not tapering away as you follow the line down. This is where I used the lower corner clamp to adjust. By applying diagonal inward pressure on the skin that far down, it forces the lower taper in more without changing the upper taper.
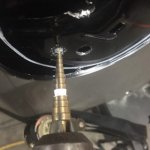
The next thing I did was outline the section of the rear body that needs to be cut away to make room for the round lights. I then also used the to-be-cut area as test material for my drilling and nutsert approach. Here you can see me running a couple test holes with my marked step-bit:

And here you can see the cut area with a test nutsert fully seated:

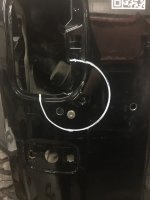
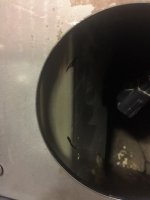
Note: The area you need to cut is a good 1" larger all the way around than the circle traced using the skin as a template, if you plan on using the Tucklites that are sold for this kit. The reason for this is that the lights install using a large double-bead grommet that has to insert and grab flush all the way around, and the channel for the grommet is only wide enough for the Rockskin plate material itself, not the skins + body sheet metal. I could not get my light to seat within the grommet (too tight) until I cut the body back wider.
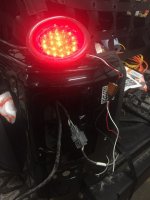
Here I am testing the connections for the light itself:

The instructions were slightly off on the coloring so the steps are:
1) Snip the connector off the old stock light housing. Try to cut the wires as close to the bulbs as possible to maximize the wire slack you are left with. Also, there is a short black jumper wire that is part of the original light that was only connected between the two bulbs- this can be discarded leaving you with just 4 wires.
2) Of the remaining wires, the White/Green will remain unused.
3) Connect the Black wire from the Trucklite harness to the White/Purple wire of the OE harness.
4) Connect the White wire from the Trucklite harness to the Black wire from the OE harness.
5) Finally, connect the Red wire from the Trucklite harness to the White/Yellow wire from the OE harness. (This is the one that is mislabeled in the instructions)
After confirming that all functions worked properly (idle, brake, turn) I secured the wires using 3 individual hear shrinks for each wire and a fatter shrink sleeve over all of them to tie it all together.
Then I drilled and ran my nutserts:

And did a fitment test:

The pic above shows the light not fully seated in the grommet. This was where I discovered that I needed to cut the hole wider, so I had to pull it all off again, cut, and repaint.
After finishing the drivers side I ended up taking a dinner break and while I was out, picked up some tape. Making the fine adjustments on the drivers side under tension left me with a few clear coat scratches so aimed to correct that lazy mistake

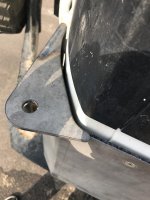
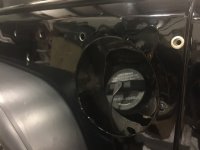
The passenger side was the same basic process. I knew now to cut the body hole bigger, and while I didn't have to mess with a gas opening, I ran into this little issue with the tailgate reinforcement bracket behind the body panel:

This plate was also blocking the tail light from seating all the way in, so I had to notch it between the two marks shown to clear the rear of the light housing.
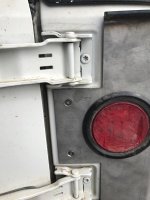
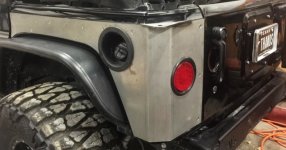
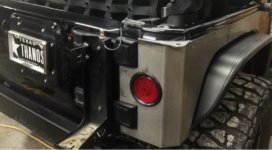
And here is the passenger side mounted with the light properly seated. Much quicker on the second side now that I had some experience!

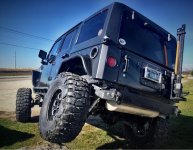
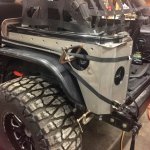
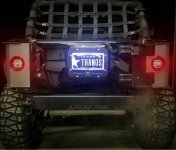
And here's the final shot before leaving the shop- diggin' the setup a lot!

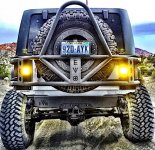
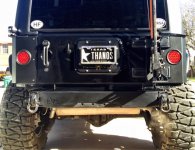
Update: The corners are back from HR shop and as always, Crosslink did a great job. Here's the final setup:

January, 2015
Hanging a 37" Mud Grappler, and before it a 35" Kelley, off the stock tire carrier for two years of wheeling had finally started taking its toll on the rear end, so it was time to move up some mods on the priority list.
While the stock tire carrier itself actually held up well (no cracks), it was actually my tailgate that began buckling outward and causing the entire assembly to wag a bit over bumps, so it was time to pull it.
My ultimate plan is to have a more secure carrier, and whether I go off the shelf with the ORE enclosed/stinger style or follow through on plans to make a lower profile basket style a-la EVO1, either way it would require reinforcing the corners for mount points, so I went ahead and ordered the corner skins, and the tramp stamp (for now) so I'd have something to slap my plate on.
The Trampstamp is preeeetty straight forward so I didn't bother with install pics, but here you can see it in the "before" pic of the rear stripped down for the corners:
I started with the driver side. Full disclosure I had forgotten to bring painters tape, so lazy me was willing to give it a go raw-dog. It wasn't quite as tough as I imagined to get it squared up evenly, as you can see in this pic I was able to follow the body lines and suck it up close with a couple ratchet straps and 3 clamps:
Steps:
1) I started with the upper strap to "hang" the skin onto the corner, but didn't crank down on it yet.
2) Then I slung on the lower strap to pull the bottom half closer to the body.
3) Then I started cranking down on the straps a bit at a time until the skins were snug, while making fine adjustments to their body-line alignment.
4) As each area got close to perfect, I pinned it down with a clamp and used them to make fine adjustments.
One area to focus on is the gap leading towards the tailgate opening:
A buddy of mine reported trouble getting it to sit vertical and not tapering away as you follow the line down. This is where I used the lower corner clamp to adjust. By applying diagonal inward pressure on the skin that far down, it forces the lower taper in more without changing the upper taper.
The next thing I did was outline the section of the rear body that needs to be cut away to make room for the round lights. I then also used the to-be-cut area as test material for my drilling and nutsert approach. Here you can see me running a couple test holes with my marked step-bit:
And here you can see the cut area with a test nutsert fully seated:
Note: The area you need to cut is a good 1" larger all the way around than the circle traced using the skin as a template, if you plan on using the Tucklites that are sold for this kit. The reason for this is that the lights install using a large double-bead grommet that has to insert and grab flush all the way around, and the channel for the grommet is only wide enough for the Rockskin plate material itself, not the skins + body sheet metal. I could not get my light to seat within the grommet (too tight) until I cut the body back wider.
Here I am testing the connections for the light itself:
The instructions were slightly off on the coloring so the steps are:
1) Snip the connector off the old stock light housing. Try to cut the wires as close to the bulbs as possible to maximize the wire slack you are left with. Also, there is a short black jumper wire that is part of the original light that was only connected between the two bulbs- this can be discarded leaving you with just 4 wires.
2) Of the remaining wires, the White/Green will remain unused.
3) Connect the Black wire from the Trucklite harness to the White/Purple wire of the OE harness.
4) Connect the White wire from the Trucklite harness to the Black wire from the OE harness.
5) Finally, connect the Red wire from the Trucklite harness to the White/Yellow wire from the OE harness. (This is the one that is mislabeled in the instructions)
After confirming that all functions worked properly (idle, brake, turn) I secured the wires using 3 individual hear shrinks for each wire and a fatter shrink sleeve over all of them to tie it all together.
Then I drilled and ran my nutserts:
And did a fitment test:
The pic above shows the light not fully seated in the grommet. This was where I discovered that I needed to cut the hole wider, so I had to pull it all off again, cut, and repaint.
After finishing the drivers side I ended up taking a dinner break and while I was out, picked up some tape. Making the fine adjustments on the drivers side under tension left me with a few clear coat scratches so aimed to correct that lazy mistake
The passenger side was the same basic process. I knew now to cut the body hole bigger, and while I didn't have to mess with a gas opening, I ran into this little issue with the tailgate reinforcement bracket behind the body panel:
This plate was also blocking the tail light from seating all the way in, so I had to notch it between the two marks shown to clear the rear of the light housing.
And here is the passenger side mounted with the light properly seated. Much quicker on the second side now that I had some experience!
And here's the final shot before leaving the shop- diggin' the setup a lot!
Update: The corners are back from HR shop and as always, Crosslink did a great job. Here's the final setup:
Attachments
-
 ImageUploadedByWAYALIFE1452611047.041594.jpg49.4 KB · Views: 670
 -
 ImageUploadedByWAYALIFE1452611066.214577.jpg51.9 KB · Views: 664
 -
 ImageUploadedByWAYALIFE1452611712.703842.jpg45 KB · Views: 665
 -
 ImageUploadedByWAYALIFE1452612036.061582.jpg13.2 KB · Views: 663
 -
 ImageUploadedByWAYALIFE1452612243.325615.jpg45.3 KB · Views: 664
 -
 ImageUploadedByWAYALIFE1452612679.769323.jpg51.6 KB · Views: 654
 -
 ImageUploadedByWAYALIFE1452613570.558604.jpg43.9 KB · Views: 660
 -
 ImageUploadedByWAYALIFE1452613622.096842.jpg66.7 KB · Views: 657
 -
 ImageUploadedByWAYALIFE1452613901.986326.jpg50.1 KB · Views: 659
 -
 ImageUploadedByWAYALIFE1452614015.202616.jpg36.1 KB · Views: 658
 -
 ImageUploadedByWAYALIFE1452614107.995652.jpg58.2 KB · Views: 666
 -
 ImageUploadedByWAYALIFE1452614196.376999.jpg88.3 KB · Views: 672
 -
 ImageUploadedByWAYALIFE1452709536.995664.jpg62 KB · Views: 667

