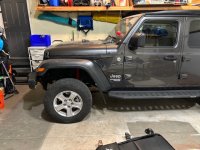
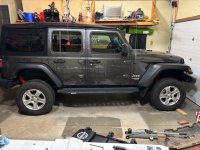
No name build, haven’t thought that far ahead

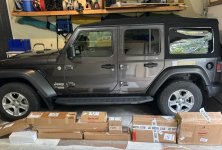
And so it begins. The starting platform is a 2018 JLU Sport S.

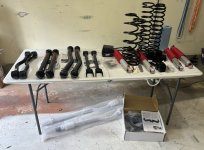
The full Rancho kit has started to arrive. I should have all of the parts (all adj control arms, both adj track bars, 9k shocks etc) by Saturday. I got the non-Rubicon edition, but the same basic kit that Eddie put on the 392 (I believe). I am going to go with some Toyo 35x11.5r17 on the stock wheels with 1.75 inch spacers. Regear will likely be 4.56.

I hope to have the lift on and the tires on by the second weekend of November. Pictures will follow, but I’m genuinely excited now that parts have started to accumulate in the garage.
 
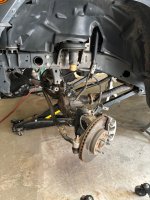
IMG_2059.jpeg
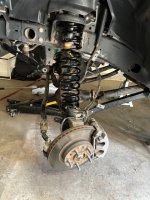
And now with a pretty, new spring
IMG_2063.jpeg

One note to all folks getting ready to do this. Clean the underside of your Jeep first. I made the mistake of not doing that and I have fine silt everywhere. It’s totally awesome to get it in your eyes, mouth, ears…. Just awesome.

I ran into some second guessing trying to put the new shocks in. The lower bolts call for 75ft#s and man does that feel like a lot. I just get the sick feeling I’m striping the bolts. If that’s what it calls for, then that’s what we do. If I strip a bolt by accident, then I can get another one. If I don’t torque it correctly, there’s a lot worse that can happen.
 
Front end is done. I made several mistakes. Mostly on order of operations. And I can say, without a doubt, Eddie makes this look easy. 😉

This process is very simple. But there are some specifics, especially order of operations, that make a huge difference. I had to redo a few steps, mainly because I wanted to validate I did it correctly. Honestly, I watched the lift install video a few times and some very specific parts for help.

I also had to get a larger torque wrench and some crowfoot ratchet ends. And an 18mm, because I couldn’t find mine 🤔

Anywho, the fronts done and I’m ready to do the rear.
IMG_2065.jpeg
Big difference in height.
 
Front end is done. I made several mistakes. Mostly on order of operations. And I can say, without a doubt, Eddie makes this look easy. 😉

This process is very simple. But there are some specifics, especially order of operations, that make a huge difference. I had to redo a few steps, mainly because I wanted to validate I did it correctly. Honestly, I watched the lift install video a few times and some very specific parts for help.

I also had to get a larger torque wrench and some crowfoot ratchet ends. And an 18mm, because I couldn’t find mine 🤔

Anywho, the fronts done and I’m ready to do the rear.
View attachment 397227
Big difference in height.
I noticed you talked about feeling like you’re over-tightening bolts and also mention using a crows foot. Not sure those two are related but wanted to make sure you understand there’s a specific way to use a crows foot on a torque wrench. If done other than 90 degrees you have to account for that difference to be accurate on torque.
 
I noticed you talked about feeling like you’re over-tightening bolts and also mention using a crows foot. Not sure those two are related but wanted to make sure you understand there’s a specific way to use a crows foot on a torque wrench. If done other than 90 degrees you have to account for that difference to be accurate on torque.
This was on a good old socket, but I understand your comment on the crowfoot and try to stay as parallel to the wrench face with the "lever" as I can.
 
Okay. Newbie question.

Putting the control arms on the rear this evening and I had one side upper that was very difficult to get on. I had the springs pulled, shocks out and had the rear axle on stands. Both bottom links went on pretty smoothly, one side needed just a little persuasion with a reamer. Like 1/8 or less off. Both lowers were done and torqued. Put the passenger side upper on pretty easily, from a hole line up perspective (F******G flag nut, 15 D**m minutes for that). Went to do the driver side and it seemed like the arm was 1/4 inch too short.

I set the lower and upper arms to the same length as the stock ones, just to start with. I used a long bolt that just fit in the bushings and placed a stock one on the bolt and then synched the adjustable ones to it. Also measured to validate that they were all the same length as the stock ones. Lower to lower and upper to upper.

Is this normal? I was thinking that with the axle on stands and the lowers on and torqued that the first upper might need some lift on the pinion to make it line up, but once the first one was on, the pinion angle would be set for that length upper and the second upper would just line up. The position of the upper jam nuts were tight and they didn't rotate, so the length hadn't changed since when I set them on the table. Should I disassemble both uppers to verify again, or is this just a normal thing when putting the rear arms on?
 
Not sure what is normal, but recently saw a lift install on a YouTube channel where a similar/identical issue happened. It was solved by using a rachet strap to help close the gap.
 
That was probably for a track bar. I think I’ve seen the same video. This was an upper control arm bolt.
I’ll measure the distances again, from bolt to bolt for all control arms and see if anything has changed. If they are all the correct length, I’ll chalk it up to the axle not sitting on the jacks evenly.

Just trying to make sure I do this correctly and the OCD is kicking in.
 
Both upper control arms are the same length and so are the lowers. Just going to chalk the issue up to the axle settling on crooked jack stands.

I’ll pick up tomorrow after work.
 
And the lift is installed.

IMG_2069.jpeg

It was a fun process that reminded me of when I started wrenching on bikes so many years ago.

I think I need a little more weight in the back or some spacers up front, maybe even a slightly lighter spring in the back? Seems very nose heavy.

And the tires look really puny now.
 
When you install larger tires, the spare will likely weigh twice as much, which should help.

Maybe put a known amount of weight in the back until it looks ok? Then you will know more about the situation.
 
When you install larger tires, the spare will likely weigh twice as much, which should help.

Maybe put a known amount of weight in the back until it looks ok? Then you will know more about the situation.
Interestingly enough, as soon as I pulled out of the garage the rear settled a bit. I think the rear axle was pushed forward and in 4wd, so the axles were pinched together. As soon as I got the wheel chocks out and rolled forward, the rear looked a lot more like the front.

One other thing, the steering adjustment seems really sloppy. As in, I can undo the punch bolt and turn the adjuster a 1/2 turn and the steering wheel doesn’t move.
 
Top Bottom