Frydaddy
New member
From my days in a Cherokee, I enjoyed having lights that shined out, around, and back, instead of umpteen-thousand lights shining only forward. With my new rig, it was clear there are no high mount locations, here is my plan for the rear. The front lights might require a more invasive approach.
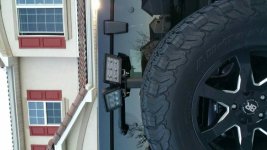
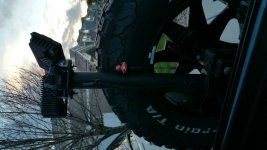
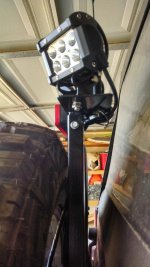
This platform can extend up to the roof line for better antenna propagation, and puts the lights up high to see better. When collapsed, it lowers everything for entering parking garages and still allows for a clear line of sight out of the rear window. My future plans will put the brake light inside the spare wheel, and this post in the very center.
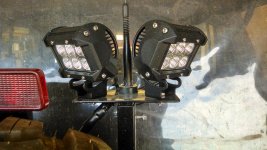
The Platform is 3" by 6", and is offset to the rear to mount the NMO connector for the antenna in the center. The posts are 2 foot even, with holes at 1" and 16" (and 20" just because.) for the quick disconnect pin. Note: I didn't have the proper quick disconnect pin yet, a big screw will have to do.
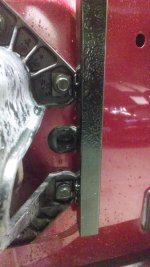
Welded tabs for existing bolts, bent and recessed to clear the aluminum edges.
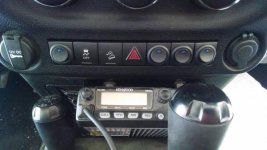
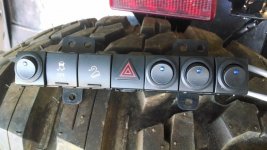
My Sport edition doesn't have all the fancy stuff, so i decided to make use of those delete panels. Cheap Amazon switches beware, the dang things were assembled wrong, down would turn it ON.
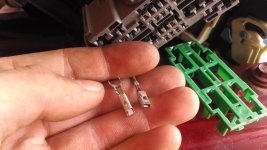
When wiring the switches, the tabs need cut off for clearance, and the wires need to clear the circuit board, that means lower than the locating pins.
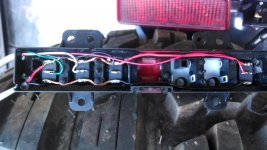
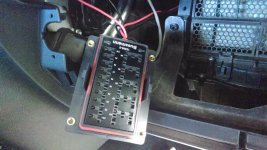
Never run full power through cheap switches. Here, I have a Bussmann fuse/relay panel, giving signal power to the switches, and higher gauge wire to the actual lights. The lights use a diode to also trigger on when backing up, and the ham radio kicks on with the key or when I hit the switch. There are preparations for puddle lights that turn on with the interior lights or a dedicated switch as well.
I will not be doing the typical 4 foot front light bar, but instead these same lights at 45 degrees out on the top window frame. Trail clearance will be a top priority and it will require holes in the shiny new Jeep, so I may wait a little on this.
I'm a first time poster, Let me know what you think, I welcome all comments and suggestions.
This platform can extend up to the roof line for better antenna propagation, and puts the lights up high to see better. When collapsed, it lowers everything for entering parking garages and still allows for a clear line of sight out of the rear window. My future plans will put the brake light inside the spare wheel, and this post in the very center.

The Platform is 3" by 6", and is offset to the rear to mount the NMO connector for the antenna in the center. The posts are 2 foot even, with holes at 1" and 16" (and 20" just because.) for the quick disconnect pin. Note: I didn't have the proper quick disconnect pin yet, a big screw will have to do.

Welded tabs for existing bolts, bent and recessed to clear the aluminum edges.

My Sport edition doesn't have all the fancy stuff, so i decided to make use of those delete panels. Cheap Amazon switches beware, the dang things were assembled wrong, down would turn it ON.

When wiring the switches, the tabs need cut off for clearance, and the wires need to clear the circuit board, that means lower than the locating pins.

Never run full power through cheap switches. Here, I have a Bussmann fuse/relay panel, giving signal power to the switches, and higher gauge wire to the actual lights. The lights use a diode to also trigger on when backing up, and the ham radio kicks on with the key or when I hit the switch. There are preparations for puddle lights that turn on with the interior lights or a dedicated switch as well.

I will not be doing the typical 4 foot front light bar, but instead these same lights at 45 degrees out on the top window frame. Trail clearance will be a top priority and it will require holes in the shiny new Jeep, so I may wait a little on this.
I'm a first time poster, Let me know what you think, I welcome all comments and suggestions.

