georgesadlik
New member
Recently, we got to thinking about protecting some of the components quite literally just hanging around under the chassis of our JK. Besides the obvious oil pan and transmission skids which are needed because these items can’t be moved, we wondered what would be a good solution that would suit our needs for the fuel evap canister that just sits there about mid span down the chassis. After searching for some time and looking at all the skid plates that were available for the evap canister, we discovered that Nemesis Industries were working on a new JK Evap relocation kit. This new kit is really well priced and suited for all model JK’s from 2007 – 2013 and comes with everything required to move the canister from its factory position to above the rear axle.
So after a quick phone call to Nemesis and talking it through with the team, it was decided that it would be worth sending one down under for installation onto a RHD JK.
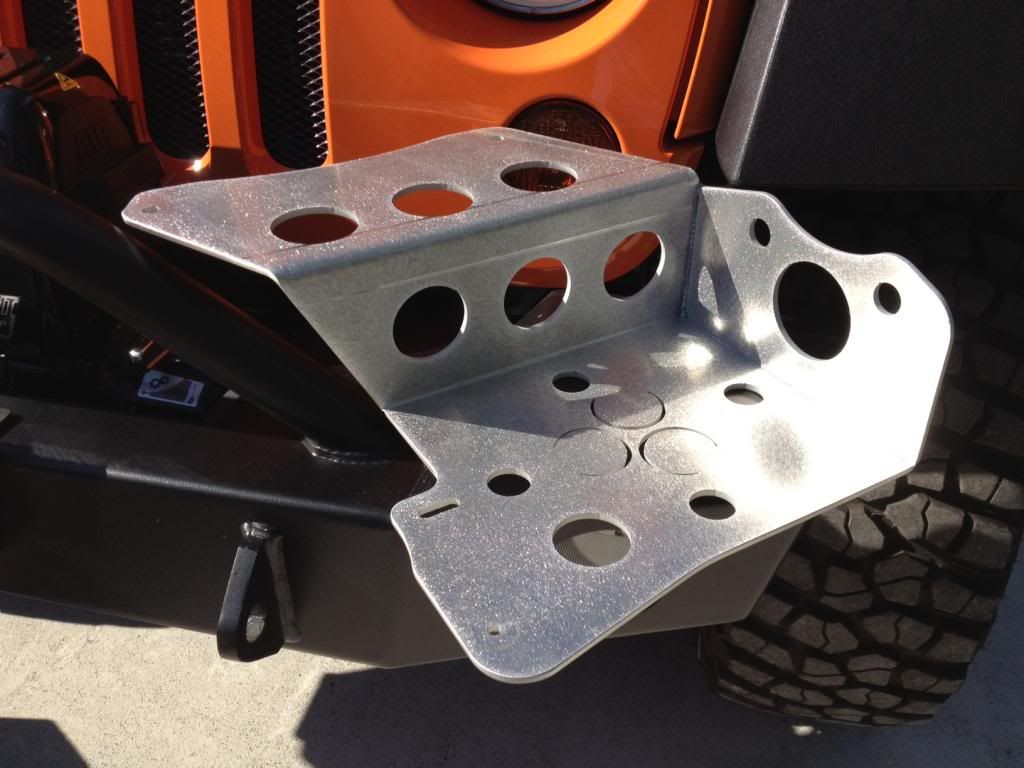
A week later we had this in our possession ready for and install into our JK
On with the install.
First it helps to jack up the rear of your JK and secure it on proper car stands and choke the front wheels. (Do not just climb under your JK with it supported by just a car jack !
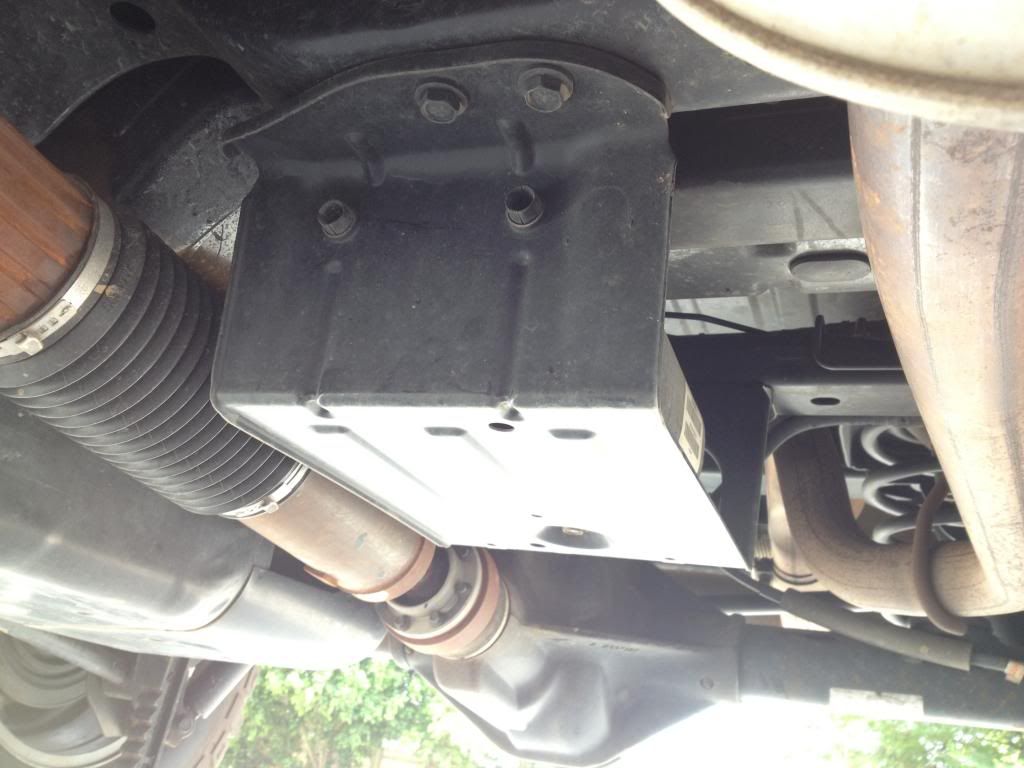
We will be removing the fuel evap canister which sits here under the flimsy skid
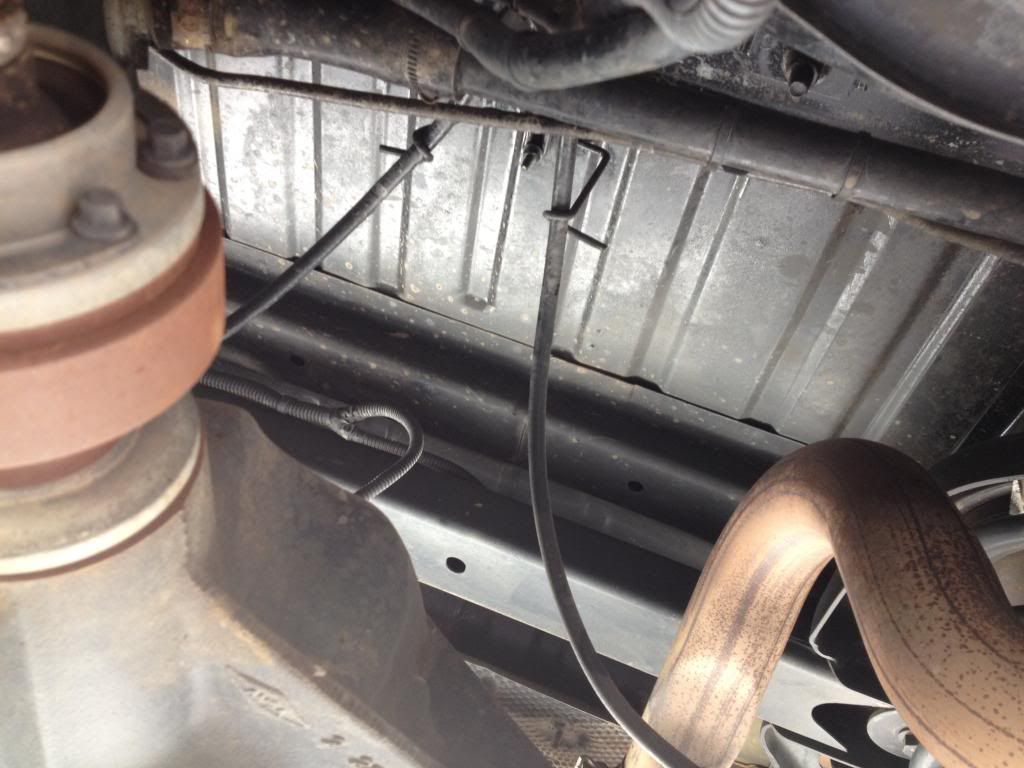
and relocating it to a new safe location here
Start by marking all the pipes so you know where to reconnect them later on
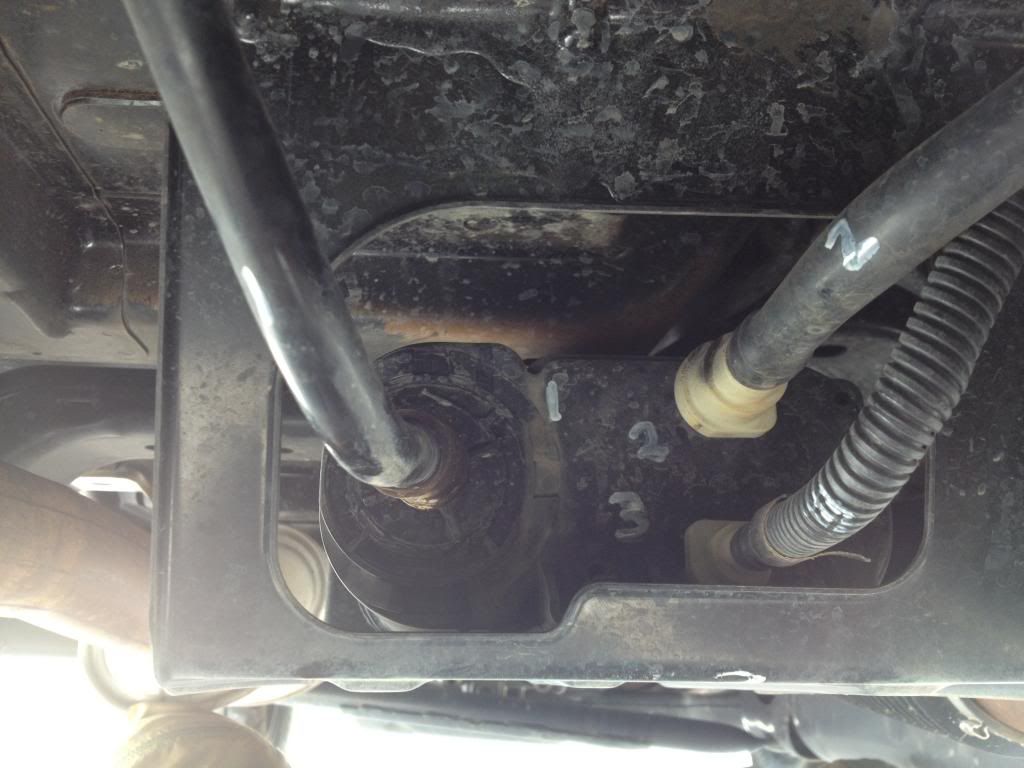
Carefully disconnect the fuel breather lines paying particular attention to the clips that hold the lines in place.
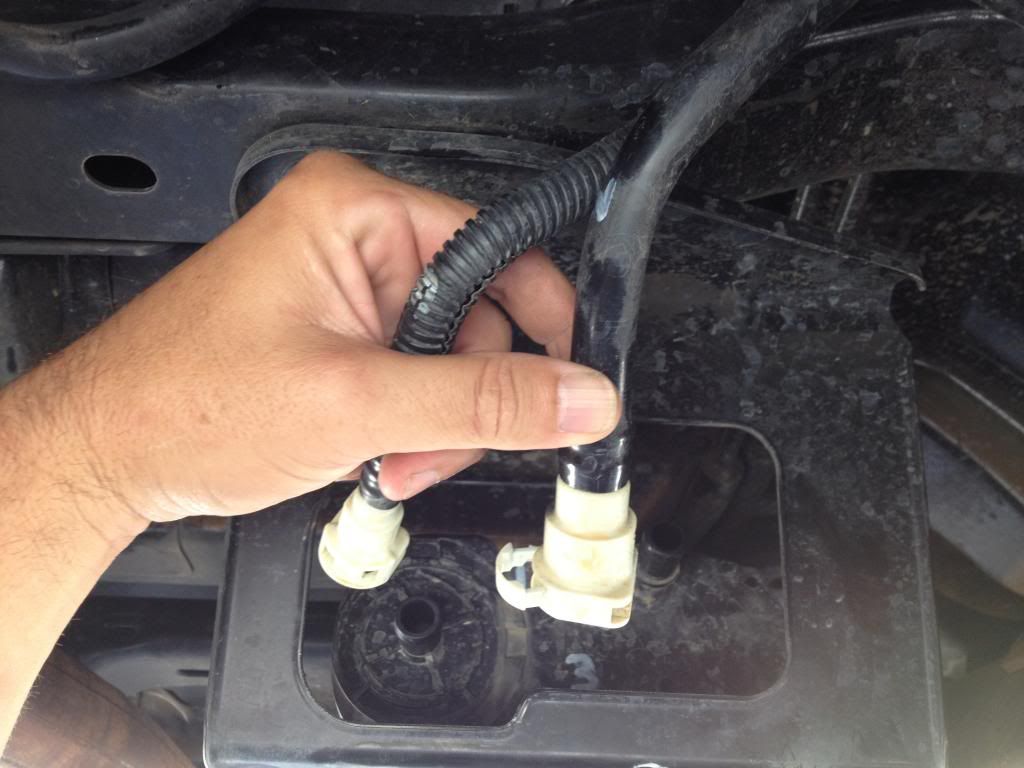
Once all your lines are free and out of the way, undo the three bolts that hold the Evap skid to the chassis and carefully lower the Evap canister and skid out of the way
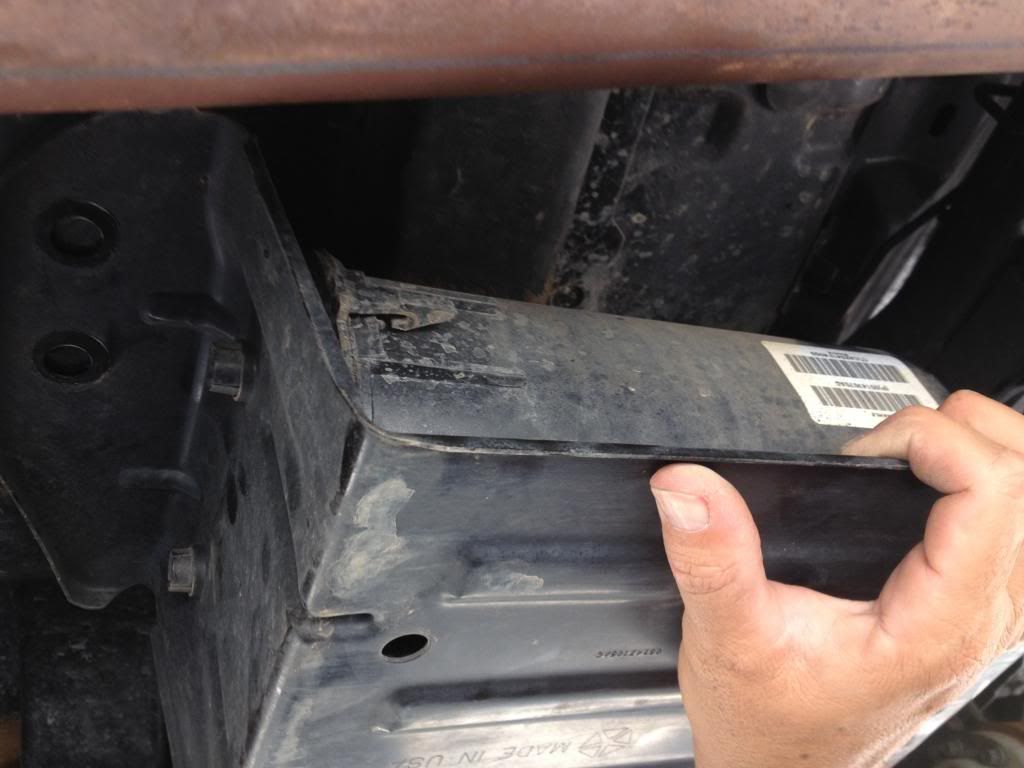
This is the space you will be left with
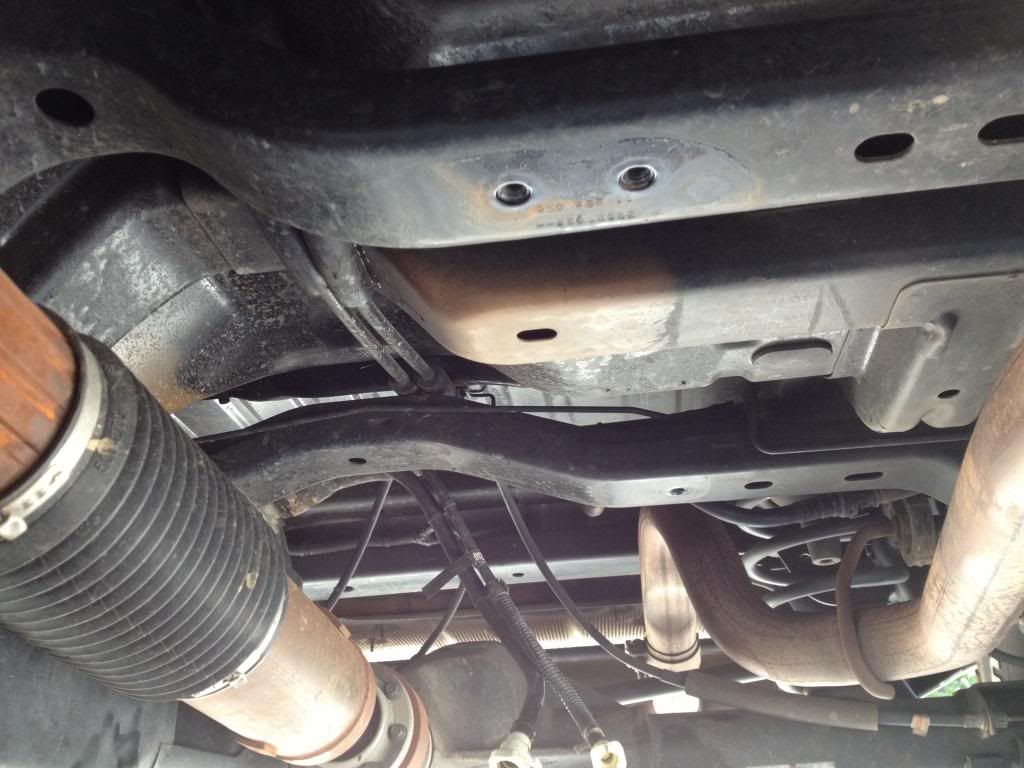
Complete Evap assembly removed from the vehicle

Give it a bit of a clean if you want making sure not to get any water into the vent holes
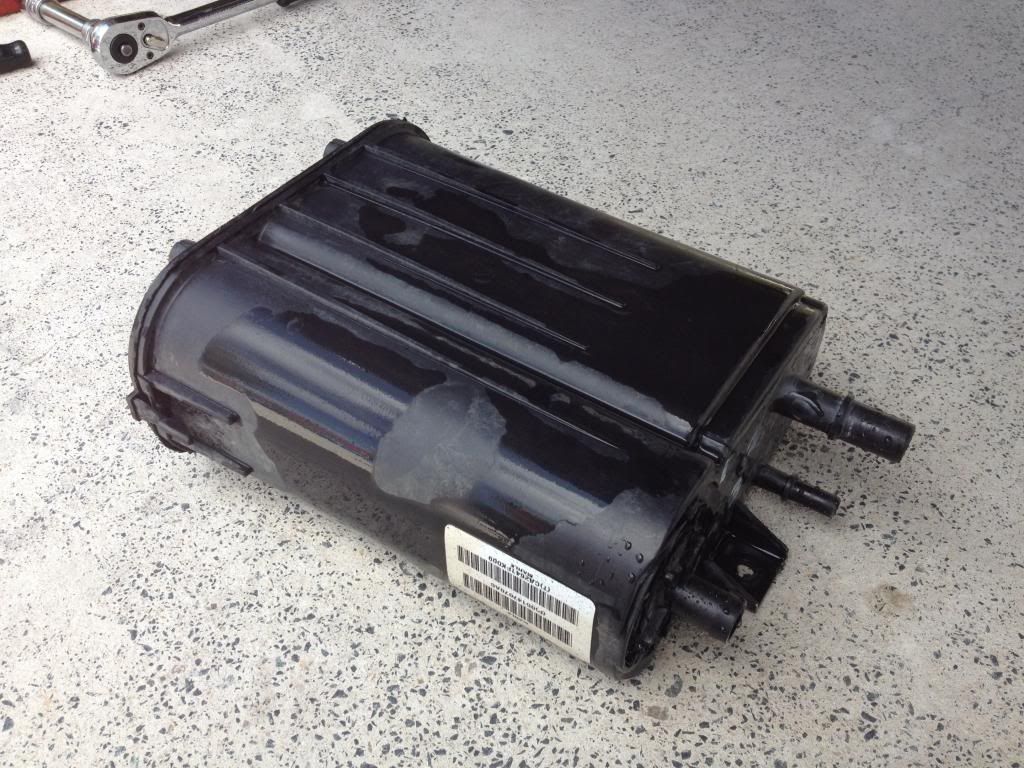
Then following the instructions mount in the new Nemesis Industries Evap relocation mount

You’ll need to drill one 7/16th hole up through the left hand factory hole on the chassis. Please wear your safety glasses for this and make sure the wires are clear before you drill, then hit it with paint to protect any exposed metal

If still connected you will need to release your e-brake cable and remove the hangers
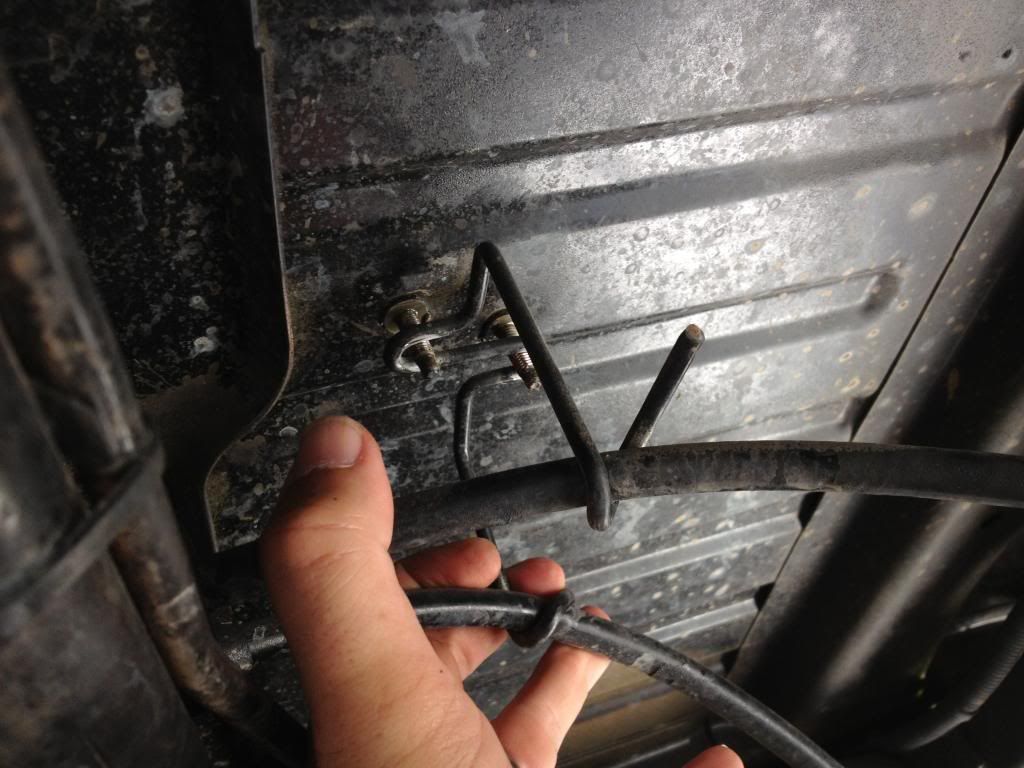
Then carefully move over the rear of the axle and up into position the Evap canister on the Nemesis Industries mount and install the two bolts. Do not tighten fully just yet and if doing this bit by yourself it may help to have a clamp handy to hold the mount while you set the bolts.
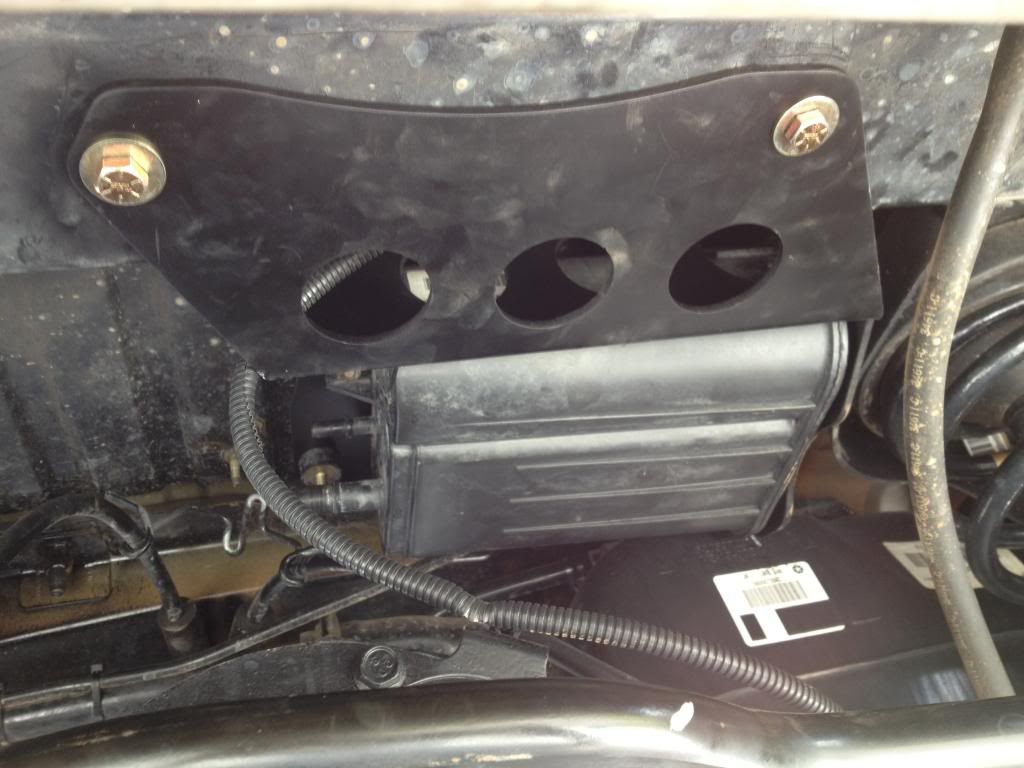
This is what it should look like. Reconnect your e-brake hanger and cables. You will need to bend the hanger a bit to fit it back in. If you already have a lift on your JK this step may not be required. Tighten all the bolts up to the specified torque as listed in the instructions
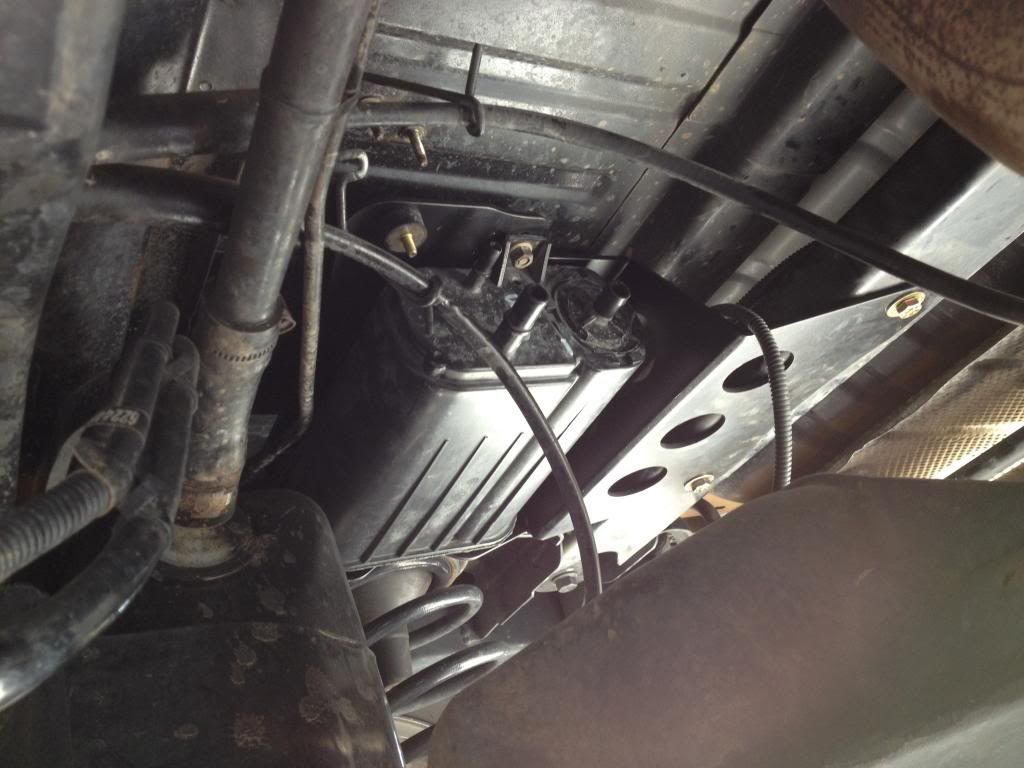
Following the instructions, reconnect all your fuel breather lines and make up new lengths of hose as required. Nemesis Industries provide you with plenty of extra fuel hose in the kit

Another angle of all the hoses reconnected and in position
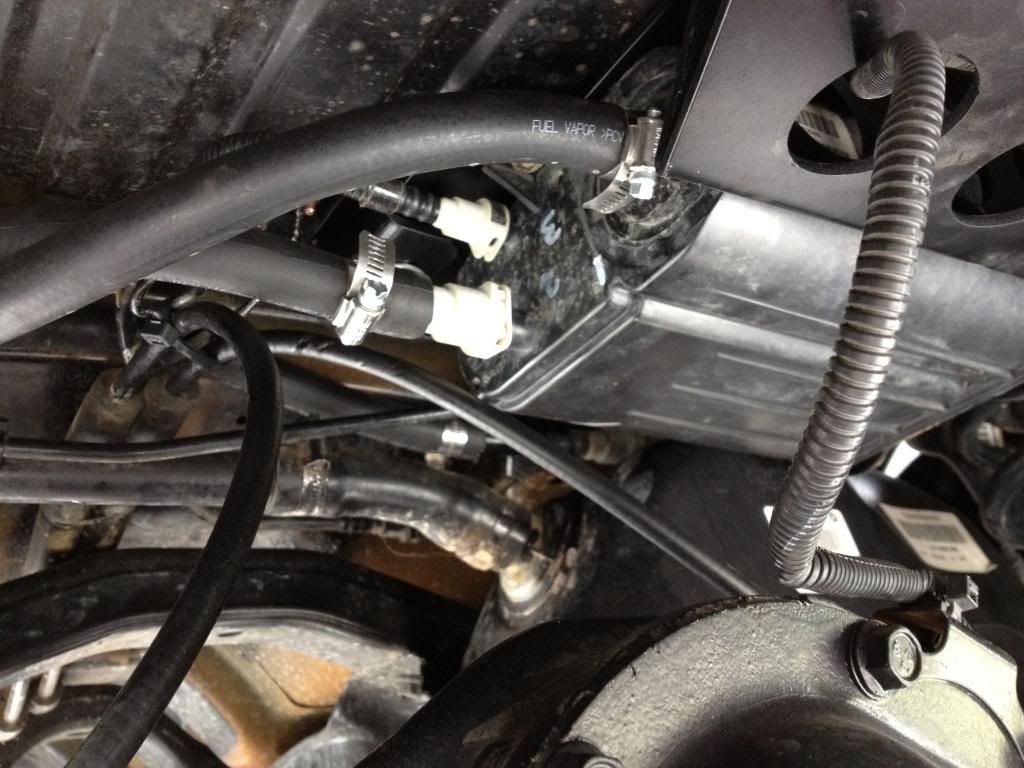
Look at all the extra space you now have and you can see where the Evap now lives which is well up and out of the way from any immoveable objects that nature may throw at your JK
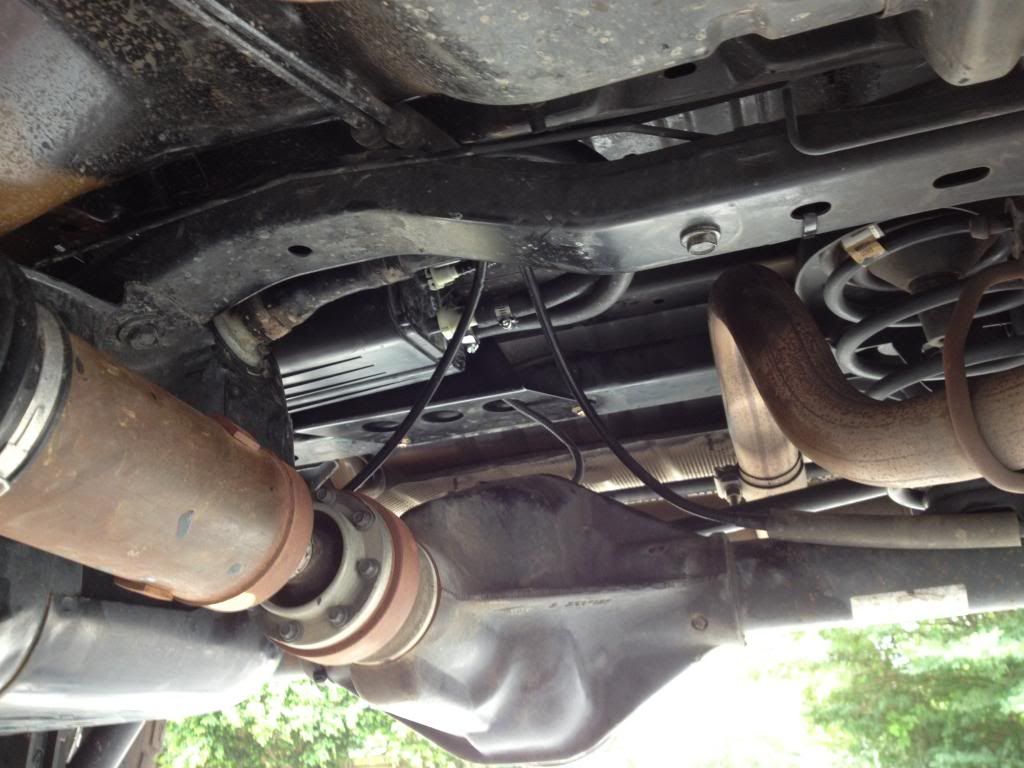
And with that you’re done! Our Australian versions don’t have any electrical connections so that’s one less thing to worry about. Pack up your tools, safely lower your vehicle and go for a test drive. It’s as easy as that. Now you don’t have to worry about that pointy rock that may want to tickle your JK’s belly and whether or not it will want to take some parts with it.
All in all for the value of this kit we believe it is one of those mods you absolutely need to consider if you plan on taking you JK anywhere other than the mall. No one wants to be climbing up under their JK on the trail refixing things with tape or wire etc hoping that it will get them home, no matter how good we believe gaffa tape and tie wire is.
Nemesis Industries have developed an awesome piece of kit, check them out on their page here:
https://www.nem-ind.com/
Cheers
So after a quick phone call to Nemesis and talking it through with the team, it was decided that it would be worth sending one down under for installation onto a RHD JK.
A week later we had this in our possession ready for and install into our JK

On with the install.
First it helps to jack up the rear of your JK and secure it on proper car stands and choke the front wheels. (Do not just climb under your JK with it supported by just a car jack !
We will be removing the fuel evap canister which sits here under the flimsy skid

and relocating it to a new safe location here

Start by marking all the pipes so you know where to reconnect them later on

Carefully disconnect the fuel breather lines paying particular attention to the clips that hold the lines in place.

Once all your lines are free and out of the way, undo the three bolts that hold the Evap skid to the chassis and carefully lower the Evap canister and skid out of the way

This is the space you will be left with

Complete Evap assembly removed from the vehicle

Give it a bit of a clean if you want making sure not to get any water into the vent holes

Then following the instructions mount in the new Nemesis Industries Evap relocation mount

You’ll need to drill one 7/16th hole up through the left hand factory hole on the chassis. Please wear your safety glasses for this and make sure the wires are clear before you drill, then hit it with paint to protect any exposed metal

If still connected you will need to release your e-brake cable and remove the hangers

Then carefully move over the rear of the axle and up into position the Evap canister on the Nemesis Industries mount and install the two bolts. Do not tighten fully just yet and if doing this bit by yourself it may help to have a clamp handy to hold the mount while you set the bolts.

This is what it should look like. Reconnect your e-brake hanger and cables. You will need to bend the hanger a bit to fit it back in. If you already have a lift on your JK this step may not be required. Tighten all the bolts up to the specified torque as listed in the instructions

Following the instructions, reconnect all your fuel breather lines and make up new lengths of hose as required. Nemesis Industries provide you with plenty of extra fuel hose in the kit

Another angle of all the hoses reconnected and in position

Look at all the extra space you now have and you can see where the Evap now lives which is well up and out of the way from any immoveable objects that nature may throw at your JK

And with that you’re done! Our Australian versions don’t have any electrical connections so that’s one less thing to worry about. Pack up your tools, safely lower your vehicle and go for a test drive. It’s as easy as that. Now you don’t have to worry about that pointy rock that may want to tickle your JK’s belly and whether or not it will want to take some parts with it.
All in all for the value of this kit we believe it is one of those mods you absolutely need to consider if you plan on taking you JK anywhere other than the mall. No one wants to be climbing up under their JK on the trail refixing things with tape or wire etc hoping that it will get them home, no matter how good we believe gaffa tape and tie wire is.
Nemesis Industries have developed an awesome piece of kit, check them out on their page here:
https://www.nem-ind.com/
Cheers
Last edited:
