I have been able to get as much as 36,000 miles out of my Jeep JK Wrangler's rear brake pads but it's not uncommon to burn through them in as little as 15,000 miles. While I'm sure some of this can be attributed to driving style, a lot of it is also the result of an over active ESP/BAS system. Whatever the case might be, it’s a good idea to give them a look every other tire rotation and have them serviced as needed. Fortunately, this is a job that can be done with a minimal amount of tools or mechanical know how and this write-up will show you what you need to do.
What You Will Need
• Rear Brake Pads
• 11,18,19mm Wrench
• Torque Wrench
• Floor Jack
• Wheel Chocks
• Large C-Clamp
• Brake Bleeding Kit
• DOT-3 Brake Fluid
Instructions
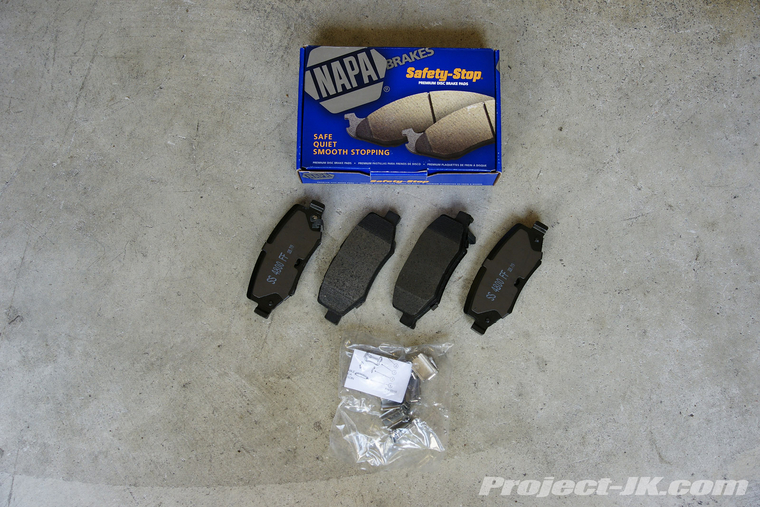
This is a pic of everything you will get with your new brake pads. Basically, a set of 4 new pads (2 of which should have new sounders) and a set of replacement retaining clips.
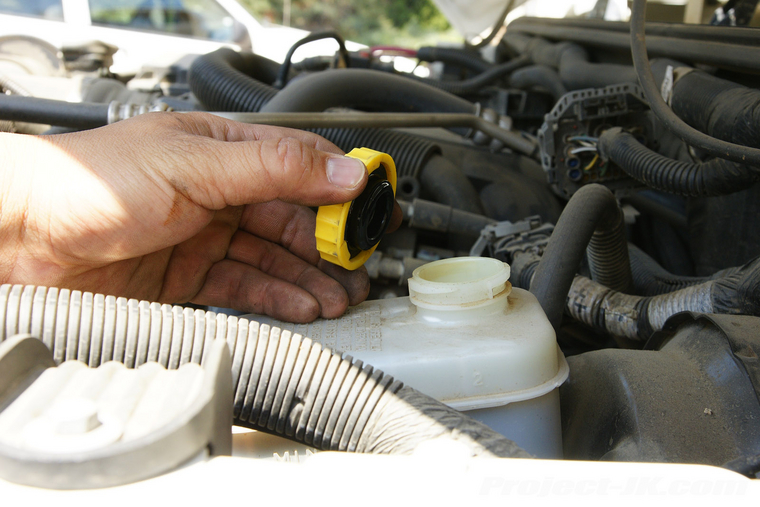
1. Open up your master cylinder and check the fluid level. If you had not been adding more fluid to it, you should see that it is low now. If you have been adding to it, you may find it necessary to bleed your rear brakes a bit before continuing. Failure to do so will result in the overflowing of your master cylinder once you install your new brake pads.
To see a detailed write-up on how to bleed your brakes, click on the link below:
Brake Bleeding Write-Up
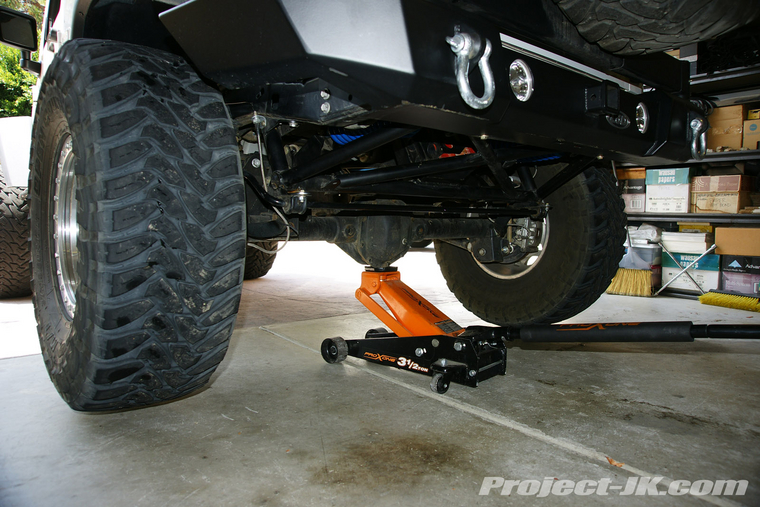
2. Chock your front tires, place a floor jack under the rear differential and raise the back end of until the tires come off the ground.
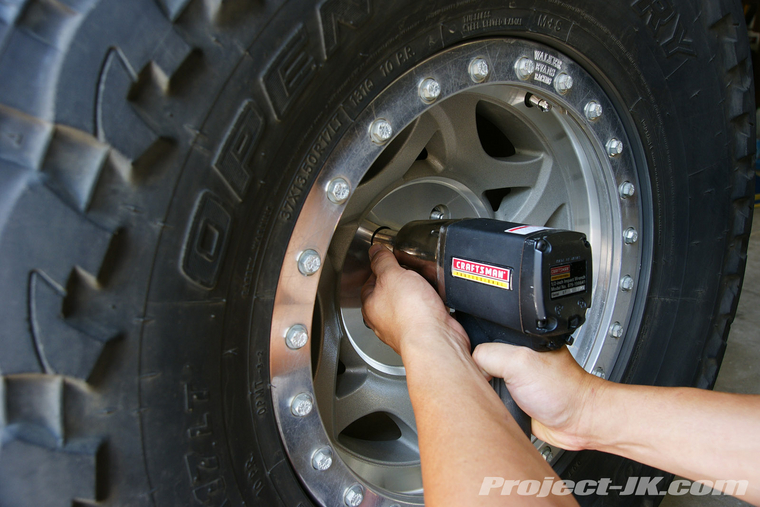
3. Using a 19mm socket or a tire iron, remove the lug nuts securing your rear wheels to your axles and set them aside.
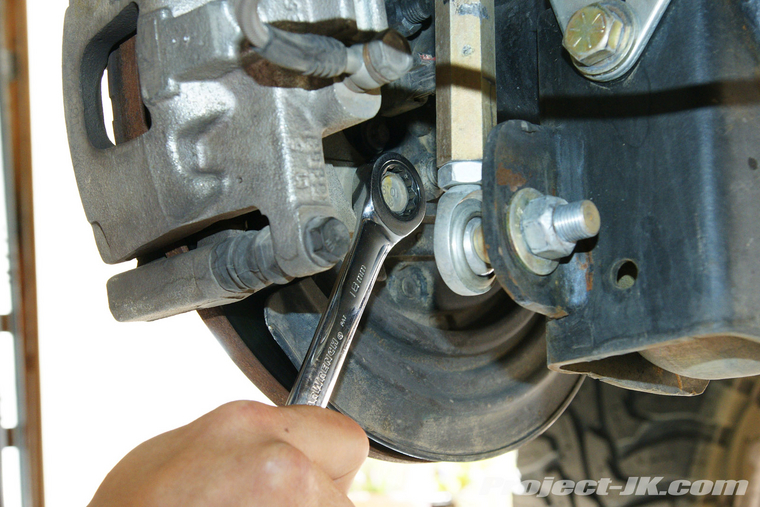
4. Using an 18mm wrench, remove the lower bolt securing the rear brake caliper to the axle as shown in this pic.
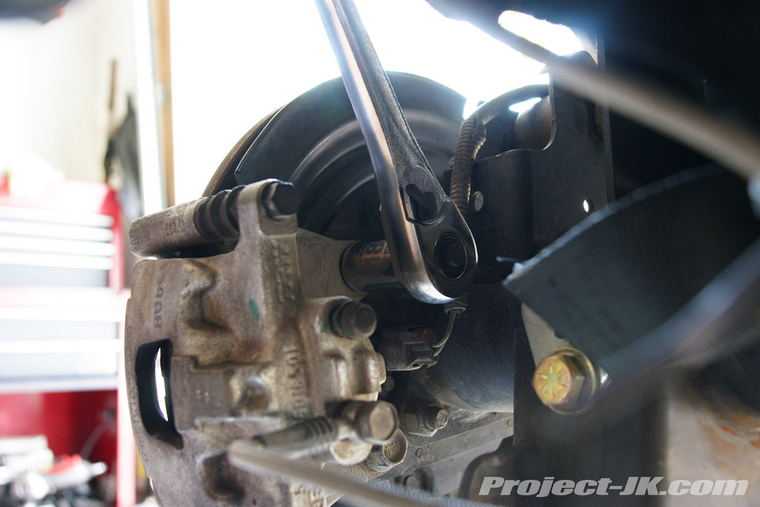
5. Again, using an 18mm wrench, remove the upper bolt securing the rear brake caliper to the axle as shown in this pic.
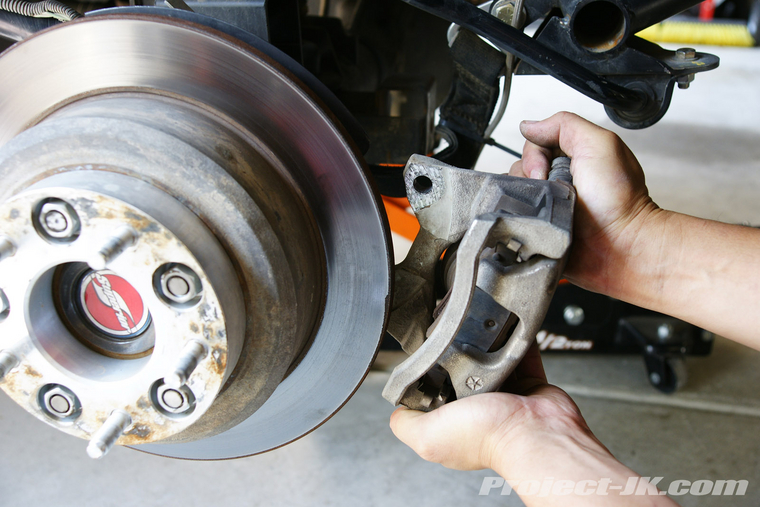
6. With the 2 bolts removed, you should be able to slide the brake calipers off the rear rotors with ease. Carefully inspect your rotors and if they appear to be heavily scored, take them in to your local auto parts store and have them turned or replaced as needed.
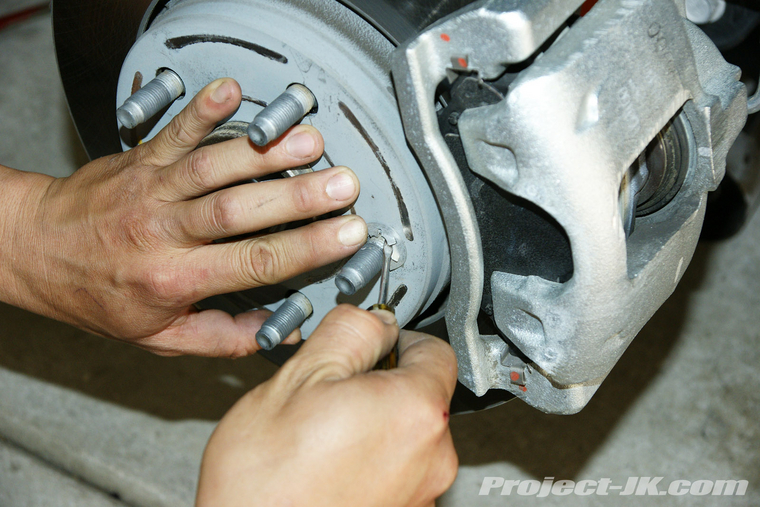
7. If this is the first time removing your rotors for service or replacement, you will need to first remove a couple of assembly washers securing it in place. These washers are attached to the wheel studs and will require a small flathead screwdriver and/or needle nose pliers to remove. Once off, you can throw them away as the will not be reused.
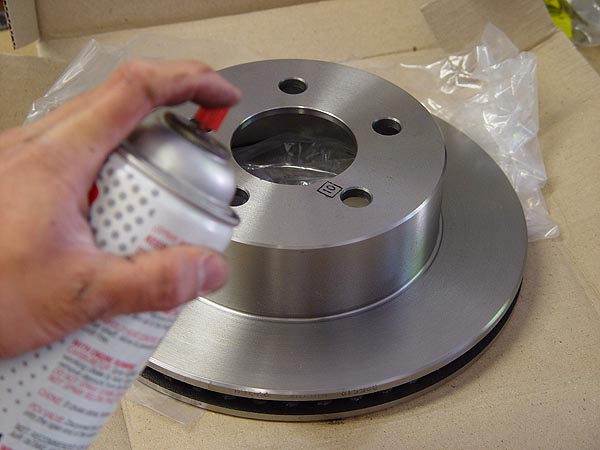
8. IF you purchased new rotors, make sure to spray them with brake cleaner and wipe them down thoroughly with rag to remove the protective film on it prior to installing it. (Note: Photo is a TJ front rotor and is was used for representational purposes only)
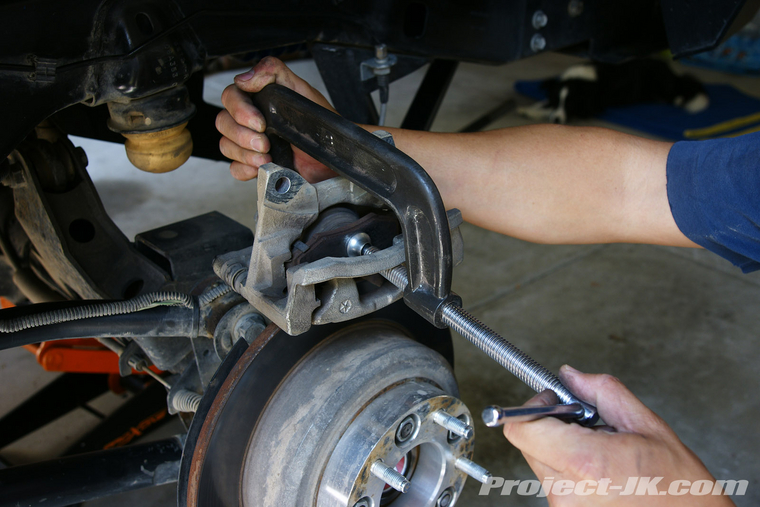
9. Remove the outer brake pad from the rear caliper by pushing it towards the opposite pad as shown in this pic.

10. Place a large C-clamp over the remaining brake pad and the back of the caliper as shown above. Slowly compress the C-clamp so that the caliper piston is forced all the way back inside.
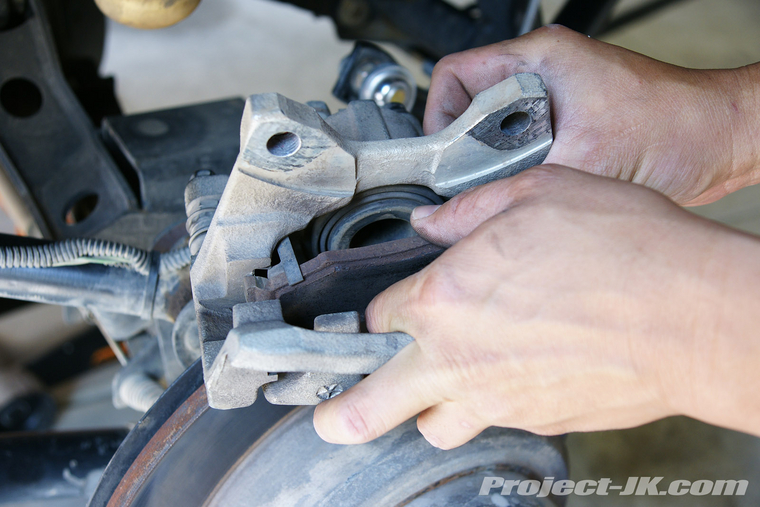
11. Remove the inner brake pad from the rear caliper by pushing it out as shown in this pic.
12. Make a note of how they are installed and then remove the 2 brake pad retaining clips on each side of the rear calipers as shown in this pic.
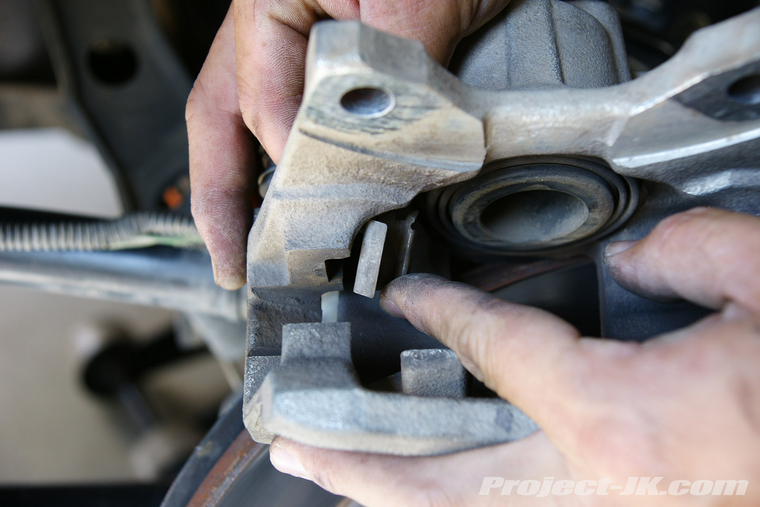
13. Install the 4 new retaining clips that should have come with your brake pads on to the rear calipers as shown.
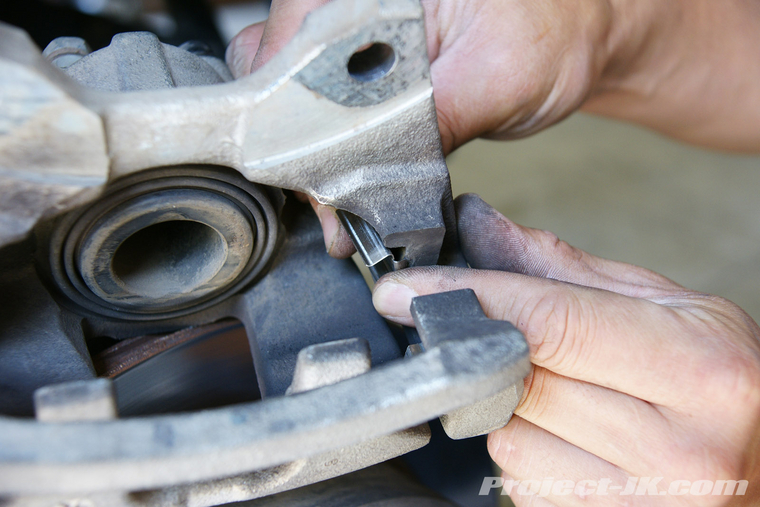
14. 2 of your new brake pads will have sounder clips on them. These need to be installed onto the piston end of the caliper. Simply slide it onto the retaining clips with the pad facing inward as shown in this pic.
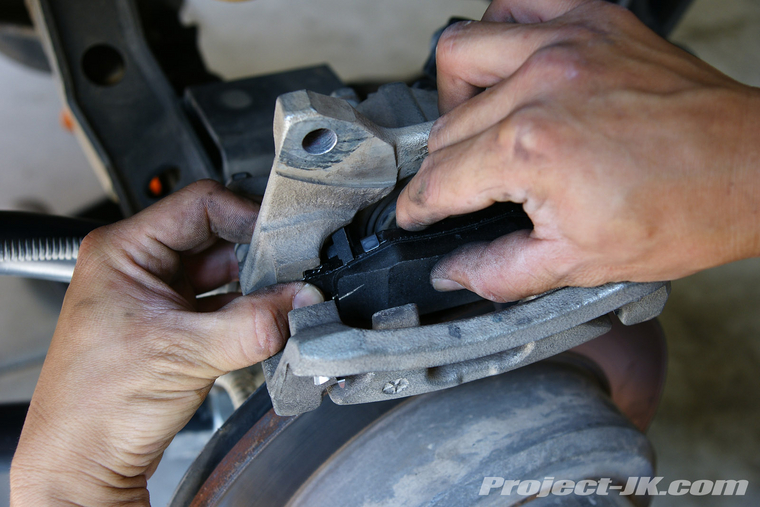
15. Install the brake pads without the sounder clip onto the opposite side of the rear brake caliper. Again, all you need to do is slide it onto the retaining clips.
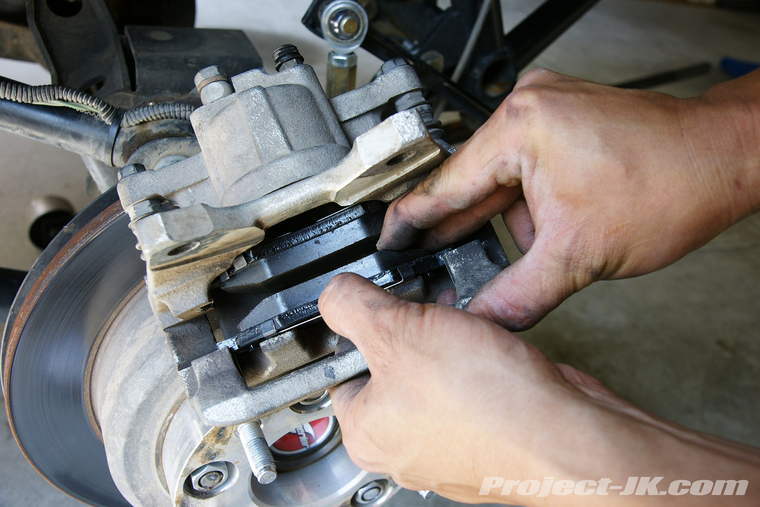
16. Make sure that the brake line isn’t twisted around and then slide the brake caliper back onto the rear rotor.
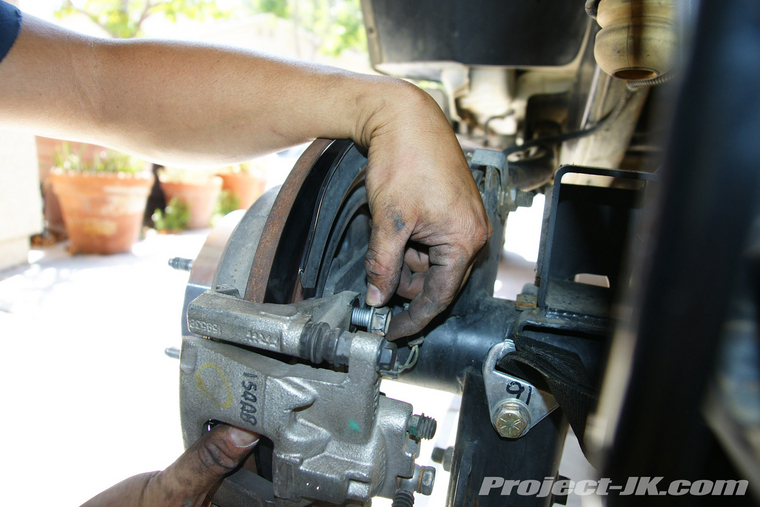
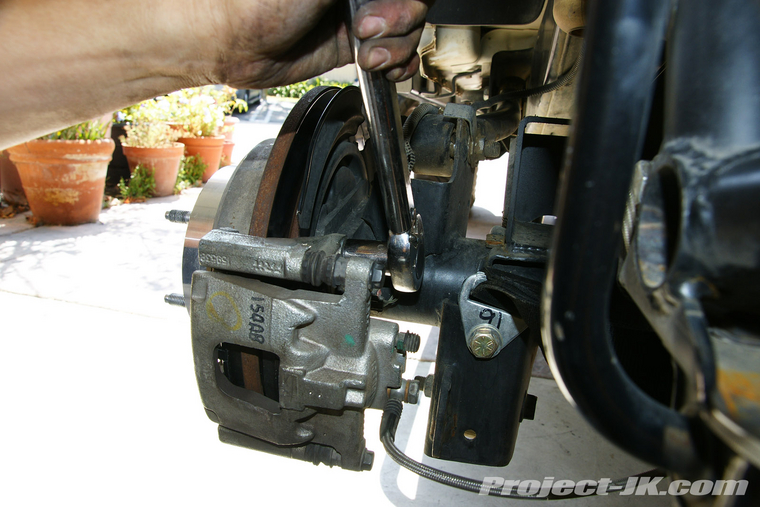
17. Secure the brake caliper in place using the 2 factory bolts and tighten them down to 55 ft. lbs. of torque with an 18mm wrench.
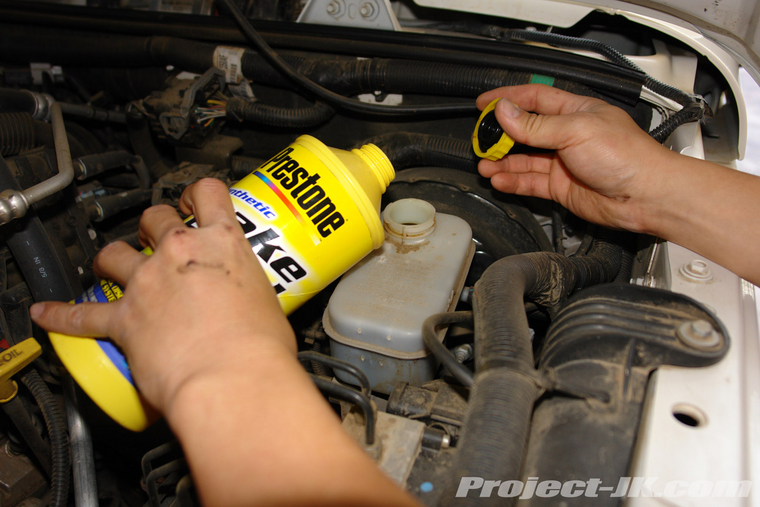
18. Check the level of your master cylinder and add more brake fluid if needed.
19. Reinstall your wheels, tighten the lug nuts to 95 ft. lbs. of torque and lower your Jeep back onto the ground. Your Jeep JK Wrangler’s rear breaks should be in good order once again.
What You Will Need
• Rear Brake Pads
• 11,18,19mm Wrench
• Torque Wrench
• Floor Jack
• Wheel Chocks
• Large C-Clamp
• Brake Bleeding Kit
• DOT-3 Brake Fluid
Instructions
This is a pic of everything you will get with your new brake pads. Basically, a set of 4 new pads (2 of which should have new sounders) and a set of replacement retaining clips.
1. Open up your master cylinder and check the fluid level. If you had not been adding more fluid to it, you should see that it is low now. If you have been adding to it, you may find it necessary to bleed your rear brakes a bit before continuing. Failure to do so will result in the overflowing of your master cylinder once you install your new brake pads.
To see a detailed write-up on how to bleed your brakes, click on the link below:
Brake Bleeding Write-Up
2. Chock your front tires, place a floor jack under the rear differential and raise the back end of until the tires come off the ground.
3. Using a 19mm socket or a tire iron, remove the lug nuts securing your rear wheels to your axles and set them aside.
4. Using an 18mm wrench, remove the lower bolt securing the rear brake caliper to the axle as shown in this pic.
5. Again, using an 18mm wrench, remove the upper bolt securing the rear brake caliper to the axle as shown in this pic.
6. With the 2 bolts removed, you should be able to slide the brake calipers off the rear rotors with ease. Carefully inspect your rotors and if they appear to be heavily scored, take them in to your local auto parts store and have them turned or replaced as needed.
7. If this is the first time removing your rotors for service or replacement, you will need to first remove a couple of assembly washers securing it in place. These washers are attached to the wheel studs and will require a small flathead screwdriver and/or needle nose pliers to remove. Once off, you can throw them away as the will not be reused.
8. IF you purchased new rotors, make sure to spray them with brake cleaner and wipe them down thoroughly with rag to remove the protective film on it prior to installing it. (Note: Photo is a TJ front rotor and is was used for representational purposes only)

9. Remove the outer brake pad from the rear caliper by pushing it towards the opposite pad as shown in this pic.
10. Place a large C-clamp over the remaining brake pad and the back of the caliper as shown above. Slowly compress the C-clamp so that the caliper piston is forced all the way back inside.
11. Remove the inner brake pad from the rear caliper by pushing it out as shown in this pic.
12. Make a note of how they are installed and then remove the 2 brake pad retaining clips on each side of the rear calipers as shown in this pic.
13. Install the 4 new retaining clips that should have come with your brake pads on to the rear calipers as shown.
14. 2 of your new brake pads will have sounder clips on them. These need to be installed onto the piston end of the caliper. Simply slide it onto the retaining clips with the pad facing inward as shown in this pic.
15. Install the brake pads without the sounder clip onto the opposite side of the rear brake caliper. Again, all you need to do is slide it onto the retaining clips.
16. Make sure that the brake line isn’t twisted around and then slide the brake caliper back onto the rear rotor.
17. Secure the brake caliper in place using the 2 factory bolts and tighten them down to 55 ft. lbs. of torque with an 18mm wrench.
18. Check the level of your master cylinder and add more brake fluid if needed.
19. Reinstall your wheels, tighten the lug nuts to 95 ft. lbs. of torque and lower your Jeep back onto the ground. Your Jeep JK Wrangler’s rear breaks should be in good order once again.
